
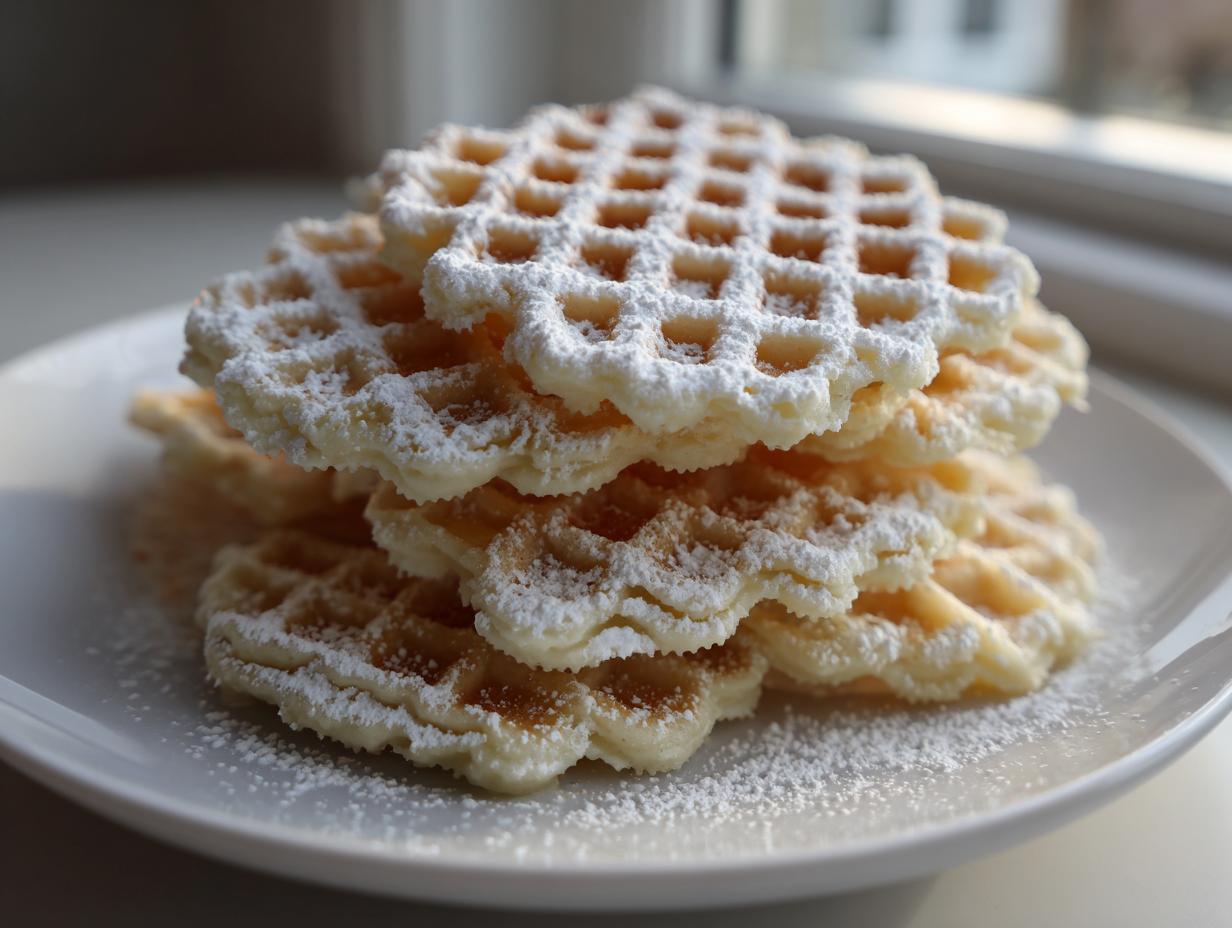
Oh, there’s just nothing like the smell of traditional baking filling your kitchen, is there? For me, that scent instantly takes me back to family gatherings where everyone gathered around waiting for those first, perfect, patterned golden discs to come off the iron. It’s a true labor of love, but I promise you, these pizzelle cookies are utterly worth the effort. This isn’t some complicated, fussy recipe. This is The Ultimate Classic Vanilla & Anise Pizzelle Recipe, designed for real life. I’ve tested and tweaked this formula to ensure you get that delicate, crispy treat that melts in your mouth, honoring the authentic Italian waffle cookies tradition right in your own home.
- Why You Will Love These Classic Pizzelle Cookies
- The Essential Equipment for Perfect Pizzelle Cookies
- Ingredients for the Best Crispy Pizzelle Recipe
- How to Make Pizzelle Cookies: Step-by-Step Instructions
- Pizzelle Baking Tips for Achieving Ultimate Crispness
- Flavor Variations for Your Pizzelle Cookies
- Storage and Reheating Instructions for Pizzelle Cookies
- Frequently Asked Questions About Pizzelle Cookies
- Understanding the Nutrition of These Buttery Patterned Cookies
Why You Will Love These Classic Pizzelle Cookies
When you have a special piece of equipment like a pizzelle maker, you need a recipe that truly shows it off. I want you to feel confident pulling these out for company or keeping them hidden away for your own secret coffee breaks. These aren’t just cookies; they’re little pieces of edible lace!
- Authentic Flavor Profile: We nail that classic Italian balance with creamy vanilla softening the bright, slightly warm hug of anise extract. It tastes exactly like what you hope for when you think of pizzelle cookies.
- Unbeatable Crispness: We use technique more than tricky ingredients to guarantee a snap! They are wonderfully light and delicate; they practically float off the plate.
- Surprisingly Quick: Once your iron is hot, these cook in under a minute each. You can churn out three dozen faster than you can bake a standard sheet cookie.
- Perfect for Gifting: They look gorgeous dusted with a little powdered sugar, and they hold up wonderfully. They are my go-to cookie for holiday trays or hostess gifts. Check out my ideas for simple dessert recipes if you need quick accompaniments!
The Essential Equipment for Perfect Pizzelle Cookies
Okay, let’s be real for a second. You can’t make these Italian waffle cookies without the star player: the pizzelle maker, or iron! It’s the piece of equipment that gives you those beautiful lacy patterns. This isn’t like rolling out sugar cookies; you need that specialized heat and press to get the right texture.
When I first started making pizzelle cookies, I inherited my Nonna’s heavy, stovetop iron. That thing was a beast! It required constant tending over the flame, and I was always worried about burning my knuckles. It gives a real traditional result, but honestly, it’s a lot of work.
Now, I usually rely on a modern electric pizzelle maker. They are fantastic because they plug in and hold a consistent temperature. My tip here for building confidence? Get one that has adjustable coloring settings built in. A consistent, light-to-medium golden brown is what you’re after for maximum crispness. If your iron runs super hot (like my old stovetop one did!), you just need to pull them out faster so they don’t get brittle before you can cool them down.
Ingredients for the Best Crispy Pizzelle Recipe
You don’t need a heap of fussy items for these beauties, which is part of why I love pulling this recipe out when I need something special fast! The magic is in the balance here. Make sure your butter is actually soft, not melted, because we need to cream it properly later.
- 1 cup unsalted butter, softened
- 1 cup granulated sugar
- 4 large eggs
- 1 teaspoon vanilla extract
- 1 teaspoon anise extract
- 2 cups all-purpose flour
- 2 teaspoons baking powder
- 1/4 teaspoon salt
- Powdered sugar, for dusting
That soft butter and the eggs are what give you that nice, light structure when they hit the heat, so don’t skip softening them!
How to Make Pizzelle Cookies: Step-by-Step Instructions
This is where the fun really begins! Since these are made so fast, you need to be organized. Have your cooling rack set up right next to your iron. This speed is part of what makes these such satisfying pizzelle cookies to produce—you see results almost instantly!
Preparing the Batter for Your Pizzelle Cookies
First things first: get that pizzelle maker warmed up! You need it fully preheated according to the machine’s instructions before that batter even touches the plate. Trust me, a cold iron gives you sad, gray discs instead of golden perfection.
Get your butter and sugar into your mixing bowl. Beat these two together until they look pale and fluffy. I mean really light! That air we whip in is critical for keeping these pizzelle cookies light and not dense bricks.
Next, take your eggs and add them in one at a time, making sure each one is blended before you drop in the next. Then mix in your vanilla and that gorgeous anise extract. If you want that incredible licorice hint, using real extract like this really makes a difference in flavor, especially if you want that truly traditional taste you can find more about here.
In a separate bowl, whisk your flour, baking powder, and salt together really well. Now, here is a key dexterity move: add the dry stuff to the wet stuff gradually. Mix it on low speed until it *just* comes together. Seriously, stop mixing as soon as you don’t see any white streaks of flour left. Overmixing develops gluten, and we want these cookies delicate, not chewy!
Cooking and Shaping These Italian Waffle Cookies
Once your iron is screaming hot, drop just one teaspoon of batter right onto the center of the pattern. Don’t be tempted to spread it out, the iron does all the work! Close the lid immediately—and brace yourself for the steam!
Cook time varies wildly based on your specific iron, but it’s usually about 30 to 45 seconds. You’ll know they are ready when the loud rush of steam coming from the sides slows right down. That’s your cue!
This next part is fast! Carefully slide a thin spatula underneath the hot cookie and lift it out. It will feel very soft, almost like a flexible crepe. If you want to serve these flat, just lay them straight onto a wire cooling rack. They firm up in seconds.
But if you want those gorgeous cannoli shells or little cups for filling, you have to work quickly while they are pliable! I use a clean kitchen towel and roll them around a cone form right away. These Italian waffle cookies harden fast, so speed is your friend here.
Lay all the finished cookies on the rack to cool completely. They will transition from soft to wonderfully crisp as they reach room temperature. Once cool, a light dusting of powdered sugar makes them look absolutely professional.
Pizzelle Baking Tips for Achieving Ultimate Crispness
People always ask me, Charlotte, how do you keep them from getting soft by the next day? That’s the eternal struggle with these delicate treats! Getting that perfect snap when you bite into them comes down to a few really simple, but non-negotiable, habits I picked up over the years. You want that textural payoff, right?
The number one secret for keeping your pizzelle cookies wonderfully crisp is all about storage. Never, ever try to store them warm—that traps steam inside, and steam equals soft cookies. They must be completely cooled on the wire rack until they are room temperature and brittle.
Once cool, you need to separate them. I slip a little square of parchment paper—you know, the kind you use for baking—between each cookie, then stack them gently in an airtight container. If you stack them without paper, they stick together and lose that incredible lacy pattern. If you’re stacking a huge amount, keep the container away from any high-humidity areas in your kitchen. They are perfect for gifts this way, too and you can peek at some other great recipe ideas over here!
Now, if you’ve followed the recipe and they still come out a little limp, don’t panic! That usually means they just needed a bit more time on the heat. Next batch, try leaving them in the iron for an extra 5 to 10 seconds. We are looking for that light golden brown, not a deep mahogany color, but a whisper more cook time makes a world of difference to the final crisp result. They should feel dry and almost weightless when you pick them up!
Flavor Variations for Your Pizzelle Cookies
While I absolutely adore the classic vanilla and anise combination—it’s just so evocative of holidays and tradition—it’s fun to shake things up if you’re making a huge batch for a festive dessert tray! The base of our batter is so sturdy and simple that it takes on other flavors like a dream. Mastering the classic first makes experimenting with these pizzelle cookies so much easier.
The one variation everyone asks me about is chocolate. It’s surprisingly easy to turn this recipe into a deep, rich chocolate wafer! To do this, you simply need to swap out some of your dry ingredients. Take out a quarter cup of the all-purpose flour—that’s half a cup for me if I’m making a double batch—and replace those cups with ¼ cup of good quality, unsweetened cocoa powder.
Whisk that cocoa in really well with your other dry bits. Keep the extracts the same, or drop the anise entirely if you want a pure dark chocolate flavor. We still want that light, crisp texture, so don’t overmix the batter after adding the cocoa!
Beyond chocolate, think about what you love! Almond extract gives you a totally different, incredibly buttery aroma that works beautifully with coffee. People often use lemon zest or even a touch of cardamom in their Italian waffle cookies for a brighter flavor. If you’re looking for tons more ideas to customize your batch, check out some fun directions over here. It’s amazing how tweaking just that one element transforms the whole cookie experience, whether I’m serving them alongside my simple dessert recipes or just snacking through the week!
Storage and Reheating Instructions for Pizzelle Cookies
Now that you’ve mastered the art of getting that perfect, delicate snap, the last thing we want is all that hard work turning soggy overnight! Keeping these buttery patterned cookies fresh is really simple, but you have to follow the rules of humidity, my friend.
The absolute most important thing for long-term crispness is airtight storage. As soon as those pizzelle cookies are completely cool—and I mean stone cold—get them into a container. Don’t leave them sitting out on the counter hoping they’ll last; they won’t!
Remember what I mentioned earlier? You need to separate every single cookie with a sheet of wax paper or parchment. If you stack them directly on top of each other, they’ll fuse together overnight, and you’ll lose that beautiful pattern and that crisp separation when you try to grab one. I always use a wide, shallow container if I can, just so they aren’t stacked too high.
Stored correctly at room temperature, these beauties will stay perfectly crisp for at least a week, sometimes longer if your kitchen isn’t too humid. They are honestly just as good on day seven as they were fresh off the iron!
Reheating? Honestly, you shouldn’t need to! If you accidentally let a batch get a little soft because you left the lid off the container for too long (Oops, we’ve all done it!), just pop a few cookies directly onto your preheated pizzelle iron for about 10 seconds per side. That tiny blast of dry heat sucks the residual moisture right out, and they become perfectly crisp again. It’s like magic! You don’t even need to worry about making these pizzelle cookies again for a while if you store them right.
Frequently Asked Questions About Pizzelle Cookies
I know when you approach a *new* type of baking—especially something as special as these traditional Italian desserts—you’re going to have questions. That’s okay! I always tell folks that the kitchen should be a place for learning, not worrying. Here are the few things I get asked most often about making these light and delicate cookies.
Can I make pizzelle cookies without a specific iron?
This is the big one, isn’t it? I’m going to be honest with you: for the *traditional*, lacy look and the signature thin, crispy texture, you really need the actual pizzelle iron. Most standard waffle irons have squares that are too deep, and they don’t get hot enough in the right places to dry the batter out fast enough.
If you’re in a real pinch, you *might* be able to use a very low-profile electric waffle iron, but you have to use the absolute minimum amount of batter, and honestly, the pattern will be messy. It’s worth the investment to get a proper iron if you plan on making these pizzelle cookies regularly, especially around the holidays!
How do I get the traditional anise flavored cookies taste?
Ah, the anise! That’s the flavor that separates the good ones from the truly authentic ones. Anise is a distinct, slightly sweet, licorice-like flavor. Many folks in my family grew up with it being the dominant taste in their anise flavored cookies, but I know it can be a strong flavor for newer bakers.
In our recipe, I asked you to use one teaspoon of anise extract alongside one teaspoon of vanilla. If you love that sharp, traditional taste, you can absolutely bump the anise up to 1 ½ teaspoons and drop the vanilla down to just ½ teaspoon. That extra boost hits you right away. If you hate licorice flavor, just skip the anise completely and use two teaspoons of pure vanilla extract. You’ll end up with a beautiful, buttery wafer cookie that’s still delicious, though less *traditional*!
Why are my pizzelle cookies turning out soft instead of crispy?
This is almost always about moisture management, either during cooking or storage. If they are soft right off the iron, just let them sit on the rack for an extra 10 seconds next time before you pull them off; they need to dry out a bit more on the heat before they even start to crisp.
If they were crisp when you put them away but got soft the next day, that means your container wasn’t airtight, or you stacked them too soon! Always layer them with parchment paper for your best results. If you want to revive a slightly soft batch, just zap them in your preheated iron for 10 seconds max, and they’ll be shatteringly crisp again!
It takes practice to get the hang of timing these amazing holiday Italian desserts just right, but stick with it. Grab these tips and maybe check out some other easy ideas over here at my simple dessert recipes page!
Understanding the Nutrition of These Buttery Patterned Cookies
I know sometimes we get caught up in the details, but remember, these are meant to be enjoyed! Baking is about pleasure first. I pulled together the estimated nutritional breakdown for these delicious, buttery patterned cookies based on the recipe provided so you know what you’re working with. It’s always important to have an idea, even if it’s just a rough guide.
Keep in mind that this information is based on using the exact ingredients listed and yielding about 3 dozen cookies, as stated in our recipe details. Your exact numbers might vary slightly depending on brands or if you make any of those flavor swaps we talked about!
- Serving Size: 1 cookie
- Calories: 105
- Fat: 5g
- Saturated Fat: 3g
- Carbohydrates: 14g
- Sugar: 8g
- Protein: 2g
- Sodium: 25mg
See? They are wonderfully light! That’s why you can often enjoy one (or two!) with your afternoon coffee without feeling weighed down. It’s just part of the joy of these delicate Italian waffle cookies. Enjoy them guilt-free, knowing they were made by your own two hands!
PrintThe Ultimate Classic Vanilla & Anise Pizzelle Recipe: Tips for Perfect Italian Waffle Cookies

Make light, crispy, and patterned pizzelle cookies using this straightforward recipe featuring classic vanilla and anise flavors. These traditional Italian waffle cookies are simple to prepare with a pizzelle iron.
- Prep Time: 15 min
- Cook Time: 20 min
- Total Time: 35 min
- Yield: About 3 dozen 1x
- Category: Dessert
- Method: Waffle Iron
- Cuisine: Italian
- Diet: Vegetarian
Ingredients
- 1 cup unsalted butter, softened
- 1 cup granulated sugar
- 4 large eggs
- 1 teaspoon vanilla extract
- 1 teaspoon anise extract
- 2 cups all-purpose flour
- 2 teaspoons baking powder
- 1/4 teaspoon salt
- Powdered sugar, for dusting
Instructions
- Prepare your pizzelle maker according to the manufacturer’s directions and allow it to preheat fully. Lightly grease the iron if necessary.
- In a large bowl, cream together the softened butter and granulated sugar until the mixture is light and fluffy.
- Beat in the eggs one at a time, mixing well after each addition. Stir in the vanilla extract and anise extract.
- In a separate bowl, whisk together the flour, baking powder, and salt.
- Gradually add the dry ingredients to the wet ingredients, mixing on low speed until just combined. Do not overmix the batter.
- Drop one teaspoon of batter onto the center of the hot pizzelle iron. Close the lid immediately.
- Cook for 30 to 45 seconds, or until the steam stops escaping and the cookie is golden brown. The cooking time depends on your specific iron.
- Carefully remove the hot pizzelle with a thin spatula. It will be soft. Immediately place it on a wire cooling rack to crisp up as it cools. If you want to shape them (into cannoli shells or cones), do this while they are still hot and pliable.
- Repeat with the remaining batter, placing each cookie on the rack to cool completely.
- Once cooled, dust the pizzelle cookies lightly with powdered sugar before serving or storing.
Notes
- For the best crisp texture, store cooled pizzelle cookies in an airtight container at room temperature, separated by parchment paper.
- If you prefer a strong licorice flavor, increase the anise extract to 1 1/2 teaspoons and reduce the vanilla extract to 1/2 teaspoon.
- To make chocolate pizzelle variation, remove 1/4 cup of flour and replace it with 1/4 cup of unsweetened cocoa powder in the dry ingredients.
- If your cookies are not crisping, try cooking them for an additional 5 to 10 seconds per batch.
Nutrition
- Serving Size: 1 cookie
- Calories: 105
- Sugar: 8
- Sodium: 25
- Fat: 5
- Saturated Fat: 3
- Unsaturated Fat: 2
- Trans Fat: 0
- Carbohydrates: 14
- Fiber: 0
- Protein: 2
- Cholesterol: 30