
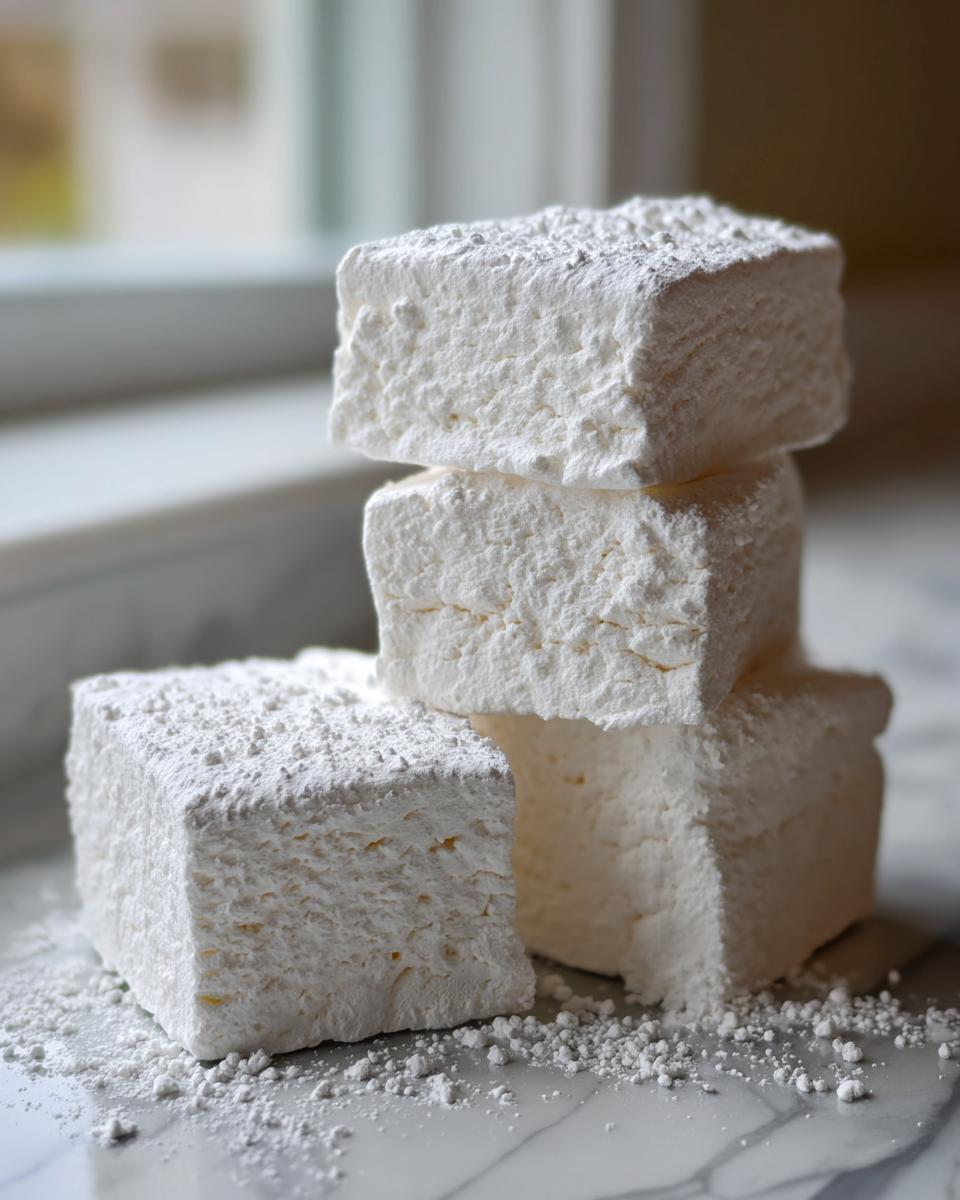
If you think marshmallows are just something you grab in a bag for camping trips, oh honey, you are missing out on one of the most shockingly simple yet fundamentally satisfying sweet treats you can make at home! Seriously, once you try these, you won’t look back. I’m Charlie, and when I was learning to manage my crazy event-planning schedule, I realized I needed quick comforts that still felt meaningful. That’s how I cracked the code on making the ultimate easy and fluffy homemade marshmallows that totally blow those store-bought ones out of the water. This recipe is designed to build your confidence in candy making, proving that gourmet flavor doesn’t need complicated steps. Get ready for soft, cloud-like perfection!
We’re talking about that airy, melt-in-your-mouth texture that makes you close your eyes after the first bite. It’s so much easier than you’d think, and I promise, the shine on these beauties will make you feel like a total kitchen wizard. Think of the cozy nights ahead—we’re almost done before you can even decide what to top with them!
If you’re trying to make a few simple sweets that pack a huge punch, check out my easy chia seed pudding recipe for another foolproof five-minute treat!
- Why You Will Make These Homemade Marshmallows Again and Again
- Gathering Ingredients for Your Homemade Marshmallows
- Essential Equipment for Easy Candy Making
- Step-by-Step Instructions: How to Make Homemade Marshmallows
- Tips for Success with Your Vanilla Marshmallow Recipe
- Storage and Gifting Your Homemade Marshmallows
- Frequently Asked Questions About Homemade Marshmallows
- Next Steps: Developing Your Gourmet Homemade Candy Skills
- Estimated Nutritional Data for Homemade Marshmallows
Why You Will Make These Homemade Marshmallows Again and Again
Look, half the time when you buy marshmallows, they taste like sugary air that’s been sitting on a shelf way too long, right? Not these! These are the real deal. This recipe is your new secret weapon for simple, stunning desserts. Trust me, once you see how easy it is to whip up a batch of homemade marshmallows, you’ll stop buying the bag version for good.
- They store beautifully, meaning you can make a big batch right before a holiday party when you need a lot of sweet things, fast.
- They use simple pantry ingredients—nothing too exotic required!
- They are incredibly versatile, whether you’re layering them or just snacking from the cutting board.
And if you’re looking for other show-stopping yet simple sweets, you should absolutely check out my guide to simple dessert recipes! They all follow the same ‘easy dexterity’ philosophy.
Achieving Superior Cloud-Like Texture
The magic here really happens in that powerful stand mixer. It’s what turns simple syrup and gelatin into that light, incredibly soft texture. Store-bought versions are often dense and chewy because of stabilizers. But ours? Ours become these airy, cloud like texture dessert pillows. The long whipping time is non-negotiable; that’s what incorporates all the air needed for that signature soft homemade marshmallows quality.
Great for Hot Cocoa and S’mores
This is where these cuties really shine. A freshly made marshmallow melts perfectly on top of hot chocolate—it’s intensely flavorful and doesn’t just deflate into a sad puddle. I’m also serious when I say these make the absolute best homemade s’mores ingredients. When you toast one of these babies over a campfire, the outside crisps up perfectly while the inside turns into liquid gold. No comparison!
Gathering Ingredients for Your Homemade Marshmallows
Okay, candy making sounds fancy, but I promise the ingredient list for these homemade marshmallows is incredibly straightforward. Everything here is designed to be accessible—we aren’t running to specialty stores for this! Precision matters when we deal with sugar syrup, so have everything measured out and ready to go before you even turn on the stove. That way, when the candy thermometer hits the magic number, you are ready to move fast!
You’ll need these common items for the absolute best, soft homemade treats. Don’t forget the pan preparation ingredients either; those are key to not losing half your batch to the baking dish!
- 3 tablespoons unflavored gelatin powder
- 1/2 cup cold water (for blooming gelatin)
- 1 1/2 cups granulated sugar
- 1 cup light corn syrup (or substitute with 1 cup granulated sugar + 1/2 cup water for a no corn syrup option)
- 1/2 cup water (for syrup)
- 1 teaspoon pure vanilla extract
- 1/4 cup powdered sugar, for dusting
- 1/4 cup cornstarch, for dusting
If you want to get a head start on your sweet skills before working with the hot sugar, you must check out my intro to easy candy making. It helps build that baseline confidence!
Ingredient Notes and Substitutions for Homemade Marshmallows
Let’s talk swaps, because I know some folks try to avoid corn syrup if they can. If you need no corn syrup marshmallows, the ingredient list has a built-in fix! Instead of using that 1 cup of light corn syrup, you just use an extra cup of granulated sugar and pour in a half cup of water alongside it into the saucepan. You still cook that mixture until it hits that crucial 240 degrees F soft-ball stage, so the cooking process is exactly the same.
For flavor, please, please use pure vanilla extract. You are making a delicate, whipped sugar treat, and artificial vanilla can taste harsh next to that airy texture. Since this is a classic vanilla marshmallow recipe, that pure extract is going to give you the cleanest, sweetest flavor possible. It really makes a difference in how gourmet these turn out!
Essential Equipment for Easy Candy Making
When you’re moving into candy making, even simple candy making, the right tools stop things from becoming a sticky, stressful mess. Don’t let the thought of sugar syrup scare you off; having these three items ready will make this recipe feel like a total breeze. Preparation is absolutely everything when dealing with hot sugar, and setting up your workstation properly is the first step toward getting those perfect, soft homemade treats.
Here are the must-haves I always keep right on the counter when I make these whipped sugar treats:
- A Sturdy Stand Mixer: This is non-negotiable for us. You need a powerful mixer with the whisk attachment, and I mean powerful! That marshmallow fluff has to whip for nearly 15 minutes, and you need something that won’t overheat trying to handle that thick, sticky volume.
- A Reliable Candy Thermometer: This is the cornerstone of any candy recipe. You absolutely must monitor that sugar syrup temperature to hit that soft-ball stage of 240 degrees F. Guessing leads to flat, dense marshmallows, so trust the science here!
- A 9×13 Inch Baking Pan: This size gives us the perfect thickness for cutting into fluffy squares. Make sure you have parchment paper ready to go, too, because clean-up is half the battle won!
Getting these three things lined up really supports the feeling that this is genuinely easy candy making. No fancy gadgets needed, just the right gear. Once you have your station set up, you’ll feel totally prepared to tackle that hot syrup!
Step-by-Step Instructions: How to Make Homemade Marshmallows
Alright, here we go—this is the part where you turn humble sugar into that glorious, cloud like texture dessert! I know hot sugar can sound a little intimidating, which is why we’re paying close attention to two very specific milestones: the temperature reading and the whipping time. Follow these steps precisely, and you’ll have the fluffiest homemade marshmallows you’ve ever tasted. We want that beautiful, high-gloss finish without any stress!
If you’re nervous about working with hot sugar, take a deep breath. We’re going to manage the heat carefully. For more guidance on managing tricky sweets, you might find my post on the easy cool whip candy recipe helpful for building basic kitchen bravery!
Preparing the Pan and Blooming the Gelatin
First things first: we must treat our pan like gold—if anything sticks, it’s a nightmare. You need to grease your 9×13 inch dish, then line it with parchment paper, making sure you leave those little overhangs on the sides. That overhang is our handle for lifting the whole slab out later! Once that’s done, mix your powdered sugar and cornstarch together—this powder mixture is critical for preventing sticking, especially for beginners making DIY marshmallows.
Dust that pan generously with the powder mix, tapping out the excess. Now, go grab your mixing bowl. Sprinkle that gelatin powder right over the half-cup of cold water and just let it sit. This “blooming” time lets the gelatin soak up the water evenly. Don’t rush this part—it needs about five to ten minutes to get soft and jiggly.
Cooking the Sugar Syrup to Soft-Ball Stage
This is where we bring out the candy thermometer! In a saucepan, whisk together your granulated sugar, the right amount of water, and the corn syrup (or your sugar/water mixture if you opted out of corn syrup). We stir gently just to dissolve the sugar, but once it starts bubbling vigorously, stop stirring completely. If you stir while it’s boiling, you risk getting crystals, and nobody wants crunchy-in-a-bad-way marshmallows!
Let that syrup bubble away until that thermometer hits exactly 240 degrees Fahrenheit. Seriously, don’t even look away once it gets close! Hitting 240°F is non-negotiable for the correct structure in your homemade marshmallows. It’s the precise point that tells the gelatin how high and light to bloom. Once you hit it, yank it off the heat immediately.
Whipping for That Cloud Like Texture Dessert
Okay, quick action time! With the mixer running on low speed, slowly stream that blistering hot syrup down the side of the bowl into the bloomed gelatin. Pour it slowly so you don’t accidentally cook the gelatin with a sudden pour of heat! Once it’s all in, stop the mixer, scrape down the sides, and then crank that machine up to high speed. Now, you wait. And wait. You need to beat this mixture for a full 12 to 15 minutes.
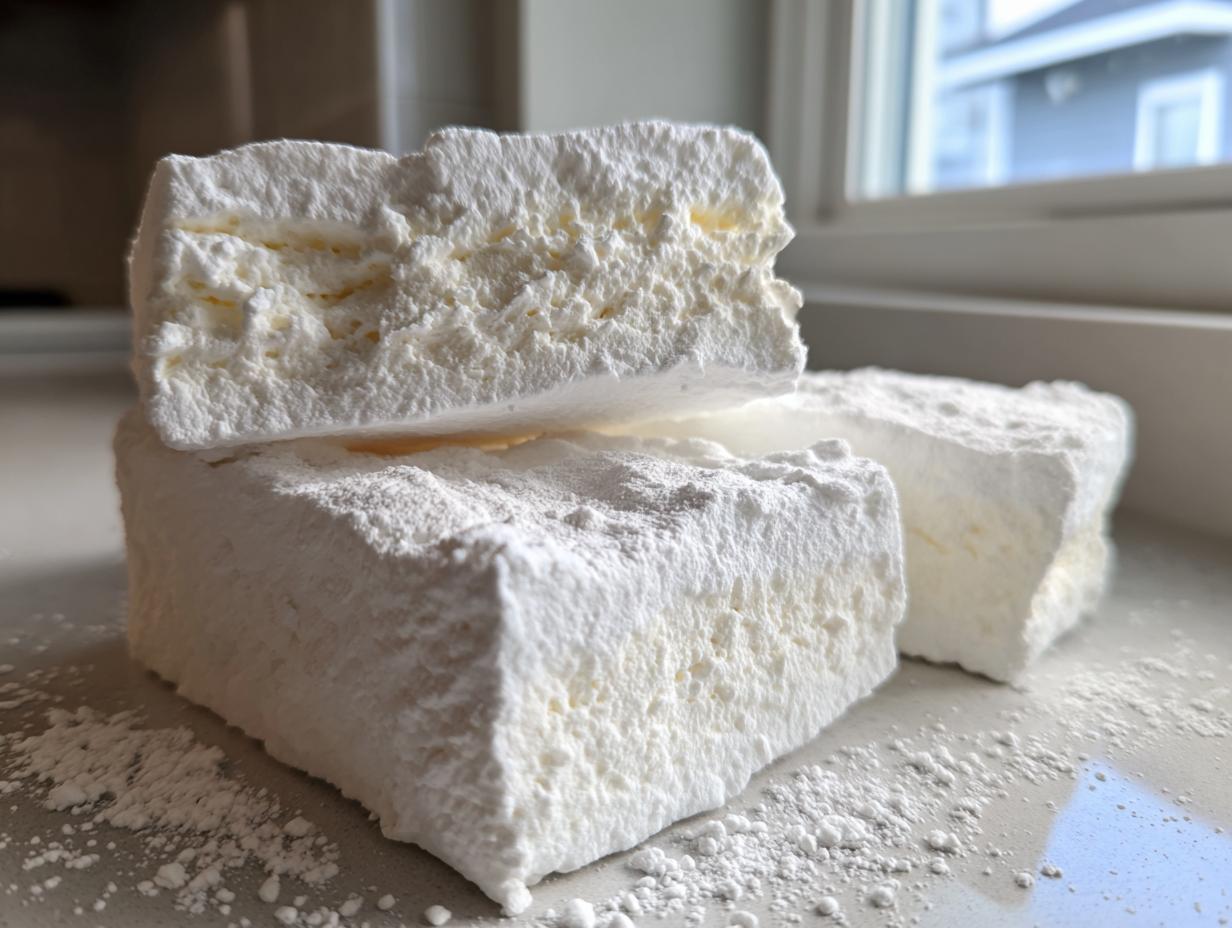
You’re looking for heavy visual cues: the mixture should become opaque white, incredibly glossy, and stiff enough that the whisk leaves unmistakable tracks in the bowl. If you stop it early, they’ll collapse! The outside of the bowl should transition from hot to just warm when it’s perfectly whipped. During the very last minute, pour in your pure vanilla extract and let it incorporate. Quick! Scrape that thick, sticky fluff into your prepared, dusted pan using an oiled spatula.
Setting and Cutting Your Soft Homemade Treats
This is the hardest part: leaving them alone! You must let these set completely at room temperature for a minimum of four hours, but truly, overnight is best. Do not put them in the fridge; that ruins the texture! Once they’re firm enough that they don’t wobble when you gently press the top, it’s time to cut.
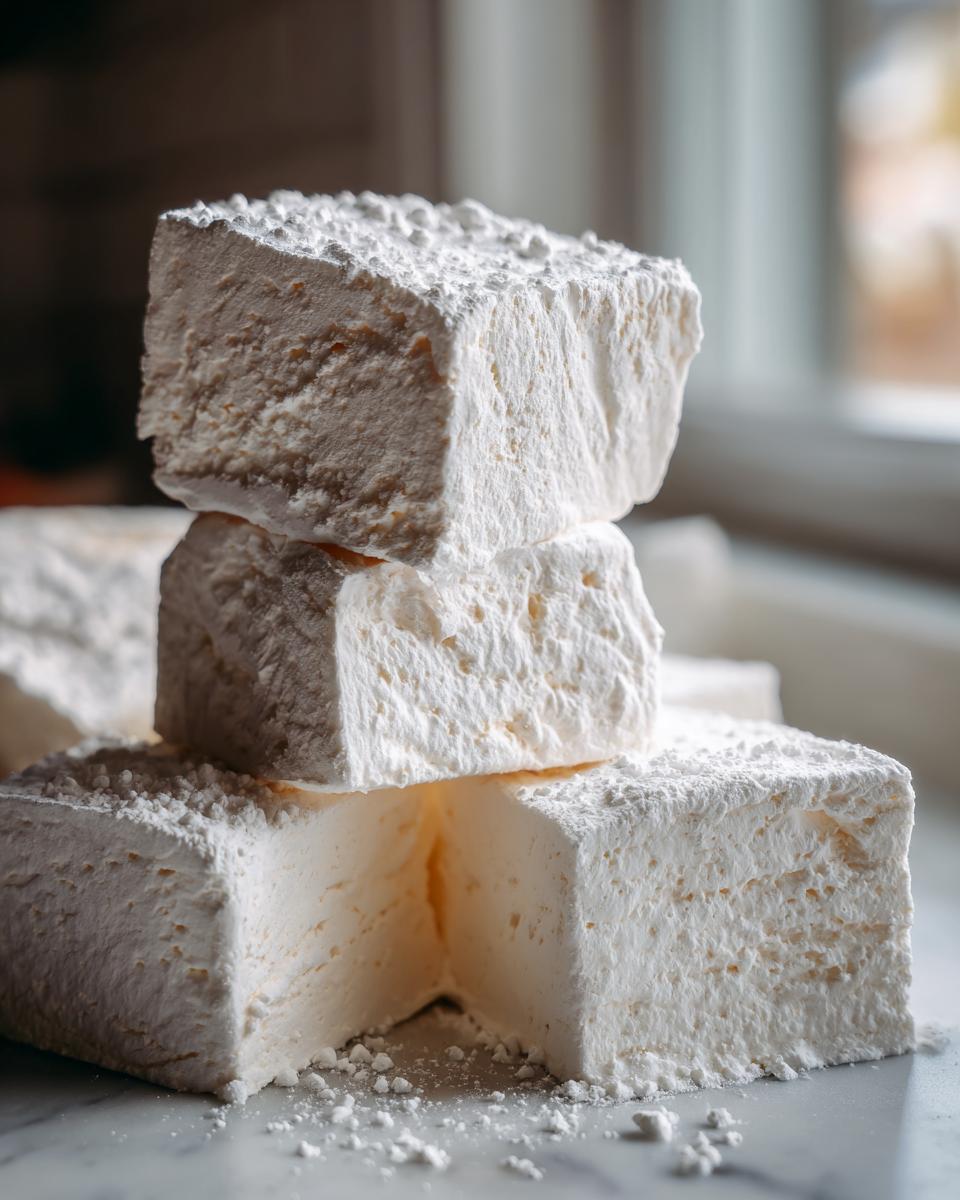
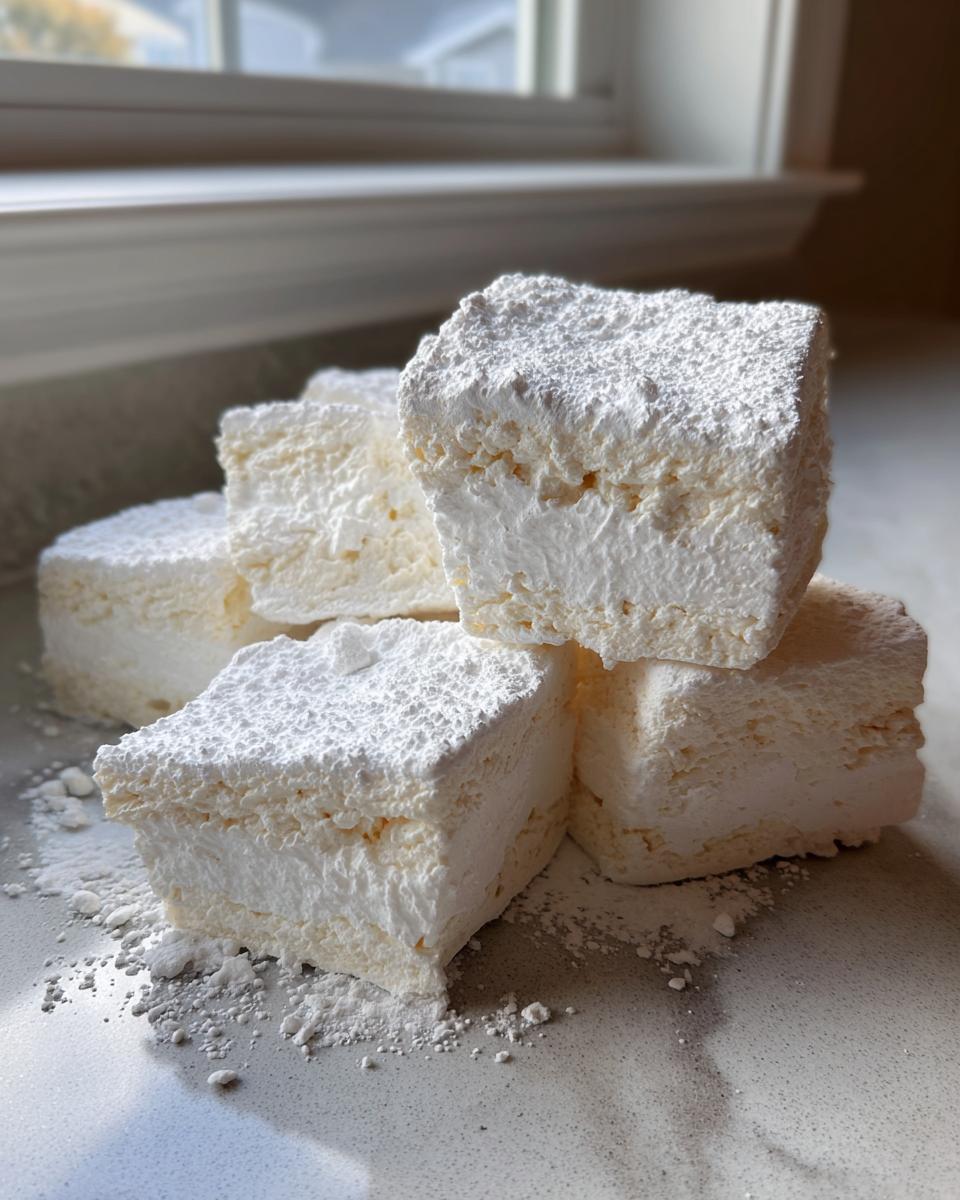
Lightly powder your cutting board with more of that cornstarch/powdered sugar mix. Use the parchment overhang to lift the entire slab out and place it gently on the board. Grab a very sharp knife or a pizza cutter—and I mean *oiled*—so the sticky marshmallow slides right off. Cut them into squares, and then toss those fresh cuts in the remaining powder mixture until they aren’t sticky anymore. Voila! You’ve made soft homemade treats!
Tips for Success with Your Vanilla Marshmallow Recipe
Now that you’ve nailed the basic technique for making your incredible homemade marshmallows, I want to empower you to start experimenting a little bit! Getting that perfect, fluffy structure is the main hurdle, and since you’ve done that successfully, you’ve earned the right to play around with flavors. I always tell people that once you master the vanilla base, the possibilities for flavored marshmallow ideas open up immediately!
If you want to branch out, think about swapping that vanilla for something else fun! Maybe you want peppermint for Christmas, or lemon zest for a bright summer treat. This recipe is so solid, it handles variations like a champ. It’s all about feeling confident enough to trust your instincts in the kitchen, just like I had to when I started adapting recipes for my busy life.
If you’re moving onto other baking projects where you need reliable dough, make sure you check out my tips for easy homemade soft chewy garlic naan bread. Mastering texture is key in all desserts!
Here are a couple of little secrets I picked up while testing batch after batch of these DIY marshmallows that should keep you on the fast track to success:
- Chocolate Swirls: Want a richer flavor? If you’re making chocolate version, you can melt down a few ounces of good dark chocolate separately. Once the marshmallow is whipped and ready to go into the pan (just before scraping it out), drizzle the melted chocolate gently over the top. Then, use a skewer or butter knife to lightly swirl it in. Don’t over-mix, or you’ll lose that beautiful marbling!
- Dealing with Stickiness: If you find your spatula is fighting you when you try to scrape the fluff into the pan, that means it stuck somewhere! Use a very light coat of neutral oil (like canola or vegetable oil) on your spatula—don’t use butter, as it can sometimes make the surface gummy. A little oil on the blade helps that thick gloss slide right out.
- Flavor Boosts: Don’t be shy with extracts! If you’re doing peppermint, start small with 3/4 of a teaspoon, taste (carefully!), and add more if you need it. Extracts are strong, so adding them near the end means you can control the intensity before it sets up for good.
Don’t worry if your first few cubes stick to each other—that just means they are genuinely soft! Just keep tossing them in that powder mixture, and you’ll soon have perfect, gorgeous cubes ready for gifting or dunking.
Storage and Gifting Your Homemade Marshmallows
You’ve made the perfect batch of homemade marshmallows—they’re sitting there, glistening under that fluffy powder coating. Now what? We need to make sure they stay exactly how they are: soft, cloud-like, and amazing for weeks to come. The enemy of homemade candy is air, which sucks the moisture right out of them, turning your tender treats hard and brittle.
The number one rule for storage is airtight. Keep them in a container that seals tightly. You can leave them sitting out on the counter—no need to refrigerate them at all! Refrigeration can actually make them sweat or get a little sticky later on once they warm up, which is the last thing we want for our beautifully cut squares.
I’ve found these treats last really well, too. If you stored them properly in that airtight container, they should maintain that soft homemade treats texture for about two to three weeks. After that, they start to firm up a bit, but honestly, they are usually long gone by then!
Making Them Perfect for Gifting
Because these are so much better than anything you buy in a box, they make the most incredible, personal gifts, especially around the holidays or as a thank-you treat. This is where your beautiful cutting job pays off!
Instead of just tossing them in a Ziploc bag—which defeats the purpose of making them gourmet—try these simple presentation ideas:
- **Clear Cellophane Bags:** Stack the marshmallows neatly in clear cellophane bags. Tie the top with kitchen twine and add a cute tag that says, “Topped with love (and a little cornstarch).”
- **Mason Jars:** Layer them in clean, wide-mouth mason jars. If you want to go the extra mile (and you should!), drizzle a tiny bit of melted chocolate over the very top layer just before sealing the lid. These look fantastic displayed on a shelf!
- **Small Tins:** For neighbor gifts, small metal tins work great. Just line the bottom with a piece of parchment paper first. These keep the light out and the moisture securely in.
When you gift these, you are truly giving someone a piece of homemade comfort. People absolutely adore receiving something made from scratch, and because they are so easy to make in large batches, they fit perfectly into my ‘cook smarter, not harder’ philosophy for gift-giving.
If you are looking for more inspiration on what you can whip up confidently at home, remember that all my recipes are designed to build your dexterity. You can find plenty of other great ideas over on my simple dessert recipes page!
Frequently Asked Questions About Homemade Marshmallows
I get so many questions about these beauties once people make their first batch! It’s totally normal when you’re getting into DIY marshmallows for the first time. Candy making can feel like chemistry class, but trust me, once you learn the ‘why’ behind the steps, it gets so much easier. Here are the things I hear most often from folks trying this beginner marshmallow recipe for the first time.
Why are my homemade marshmallows sticky even after dusting?
Oh, the dreaded stickiness! This happens for two main reasons, usually. First, if the syrup cooked past 245 degrees F, the sugar structure is too soft, and it never fully sets up properly, even if you whipped it long enough. Second, and this is more common, you didn’t dust them thoroughly enough after cutting! Remember, that cornstarch/powdered sugar mix is your shield against stickiness. After you cut the squares, toss every single piece vigorously in that dust until you can handle it without leaving residue on your hands. If they are still weeping a little syrup, try cutting them again a little later after they’ve had another hour to rest!
Can I use honey or maple syrup instead of corn syrup in this vanilla marshmallow recipe?
This is a fantastic question, particularly for those looking for cleaner ingredients! While yes, you *can* substitute, you have to completely understand the impact it has on structure. Corn syrup is used because it resists crystallization AND it stabilizes the sugar molecules. If you use honey or maple syrup instead of the corn syrup (or the sugar/water substitute we listed), you are introducing a lot more moisture and invert sugars. They need to be cooked higher, and the whipping time might change because the final texture will be chewier and less fluffy and cloud like texture dessert.
For a truly fluffy dessert recipe that rivals store-bought, I really recommend sticking to the recipe’s corn syrup substitution (granulated sugar and water) for your first batch. Once you master that, explore syrups! If you want to try honey, start by swapping only half the corn syrup and see how that texture handles.
How long do homemade marshmallows last?
If you’ve managed to resist eating them all immediately—major props! Because these are simple pantry ingredients and we skip the heavy preservatives found in commercial brands, they have a slightly shorter shelf life, but they are worth it! Stored in an airtight container at room temperature, they stay perfectly soft and delicious for about two to three weeks. If they start to get a little harder after that, don’t toss them! They are still perfectly usable—they just get a bit denser, making them great for melting down into homemade marshmallow squares or dipping in chocolate. They shouldn’t be stored in the fridge, though; that moisture makes them weep.
Are these marshmallows good for making S’mores?
Beyond good—they are the *best* homemade s’mores ingredients you will ever use! This is partly why I love this recipe so much for general cooking dexterity. Because they are so thick and airy, when you toast them over a flame, the outside browns beautifully and caramelizes, while the inside melts into this incredible, flowing ribbon of vanilla flavor. Store-bought ones often just burn on the outside and stay solid on the inside. If you want the perfect surface area for toasting, cut your squares into thick rectangles before they fully set up!
If you feel like you’re ready to tackle something a little different after mastering this batch, you can definitely explore some other great recipes over on my easy weeknight dinners page to keep that cooking confidence high!
Next Steps: Developing Your Gourmet Homemade Candy Skills
So, you’ve conquered the high-wire act of sugar syrup and now you’re staring at a pan full of the fluffiest, most delicious homemade marshmallows in existence. Doesn’t that feel amazing? That’s the Food Dexterity confidence kicking in! You took on a project that intimidates most home cooks, and you nailed the texture. See? You’re already moving beyond just following instructions; you’re building real cooking dexterity.
Now that you know how to handle the temperature and the whipping, you’ve unlocked the door to so many other incredible, simple treats. Don’t stop here! This is just the beginning of your journey into fun, achievable candy making. Think about those flavored marshmallow ideas we briefly touched on—peppermint for Christmas, maybe some toasted coconut on top for summer? Those small tweaks turn this simple recipe into your signature treat.
If you’re feeling really confident and want to try another classic sweet that requires timing and temperature, you absolutely have to try my recipe for the best soft chewy sea salt caramels. Caramels use similar candy thermometer skills, and once you master them, you’ll feel like you can make any gourmet homemade candy under the sun!
I want you to walk away from this feeling empowered. Don’t worry if the first batch wasn’t 100% perfect. The goal is to build the skill to make something wonderful, and these light, airy marshmallows prove you already have it. Keep practicing that temperature control, play with your extracts, and enjoy the satisfaction of making something truly special from scratch!
Estimated Nutritional Data for Homemade Marshmallows
Now, I have to give you the standard disclaimer here, because while I love whipping up a batch of these homemade marshmallows faster than anyone, I am not a registered dietitian! The nutritional information is based on the recipe as written, using standard granulated sugar and corn syrup amounts.
When you look at these numbers, remember that candy is inherently a treat, right? But when you make them yourself, you know exactly what’s going into them—which gives you way more control than the mystery ingredients in a factory bag!
Here is the estimated breakdown per serving (which we’re calculating as 4 squares, because who only eats one?):
- Serving Size: 4 squares
- Calories: 150
- Sugar: 35g (Yeah, it’s sugar candy, folks!)
- Sodium: 5mg
- Fat: 0g
- Protein: 2g
Just keep in mind that these numbers will shift if you opt for the no corn syrup version—using extra sugar instead of corn syrup will slightly change the ratios, so treat these figures as a helpful guide rather than a hard rule. Enjoy these cloud like texture desserts guilt-free, knowing you made them with your own dexterity!
PrintThe Ultimate Easy & Fluffy Homemade Vanilla Marshmallows
Make soft, fluffy, and cloud-like homemade marshmallows from scratch. This easy recipe uses simple pantry ingredients and is perfect for topping hot cocoa, making s’mores, or gifting.
- Prep Time: 20 min
- Cook Time: 15 min
- Total Time: 4 hr 35 min
- Yield: About 3 dozen 1x
- Category: Dessert
- Method: Candy Making
- Cuisine: American
- Diet: Vegetarian
Ingredients
- 3 tablespoons unflavored gelatin powder
- 1/2 cup cold water (for blooming gelatin)
- 1 1/2 cups granulated sugar
- 1 cup light corn syrup (or substitute with 1 cup granulated sugar + 1/2 cup water for a no corn syrup option)
- 1/2 cup water (for syrup)
- 1 teaspoon pure vanilla extract
- 1/4 cup powdered sugar, for dusting
- 1/4 cup cornstarch, for dusting
Instructions
- Lightly grease a 9×13 inch baking pan. Line the pan with parchment paper, leaving an overhang on the sides for easy removal. In a small bowl, whisk together the powdered sugar and cornstarch. Dust the prepared pan generously with this mixture. Set aside.
- In the bowl of a stand mixer fitted with the whisk attachment, sprinkle the gelatin over the 1/2 cup cold water. Let it sit for 5 to 10 minutes to bloom.
- While the gelatin blooms, prepare the sugar syrup. In a medium saucepan, combine the granulated sugar, corn syrup (or sugar/water substitute), and 1/2 cup water. Heat over medium heat, stirring until the sugar dissolves. Stop stirring once it boils.
- Attach a candy thermometer to the side of the saucepan. Cook the syrup without stirring until it reaches 240 degrees Fahrenheit (soft-ball stage).
- Once the syrup reaches 240 degrees F, remove the pan from the heat. Turn the stand mixer on low speed and slowly and carefully pour the hot syrup down the side of the bowl into the bloomed gelatin mixture.
- Increase the mixer speed to high. Beat the mixture for 12 to 15 minutes until it is very thick, glossy, opaque white, and holds stiff peaks. The outside of the mixing bowl should feel warm, not hot.
- Beat in the vanilla extract during the last minute of mixing.
- Working quickly, use a lightly oiled spatula to scrape the sticky marshmallow fluff into the prepared baking pan. Lightly dust the top surface with more of the powdered sugar/cornstarch mixture.
- Let the marshmallows set, uncovered, at room temperature for at least 4 hours, or preferably overnight. Do not refrigerate.
- Once fully set, use the parchment paper overhang to lift the marshmallow slab onto a cutting board dusted with the remaining powder mixture.
- Use a sharp, oiled knife or a pizza cutter to cut the slab into desired squares. Toss the cut pieces in the remaining powder mixture to prevent sticking. Store in an airtight container.
Notes
- For a no corn syrup marshmallow, use 1 cup granulated sugar and 1/2 cup water in the saucepan instead of corn syrup. Cook this mixture to 240 degrees F as directed.
- If you want flavored marshmallows, add 1 teaspoon of extract (like peppermint or lemon) instead of vanilla, or add 1-2 tablespoons of cocoa powder with the dry ingredients for chocolate flavor.
- To make these perfect for s’mores, cut them into thick rectangles before they fully set (about 2 hours in) and let them set completely in that shape.
Nutrition
- Serving Size: 4 squares
- Calories: 150
- Sugar: 35g
- Sodium: 5mg
- Fat: 0g
- Saturated Fat: 0g
- Unsaturated Fat: 0g
- Trans Fat: 0g
- Carbohydrates: 38g
- Fiber: 0g
- Protein: 2g
- Cholesterol: 0mg