
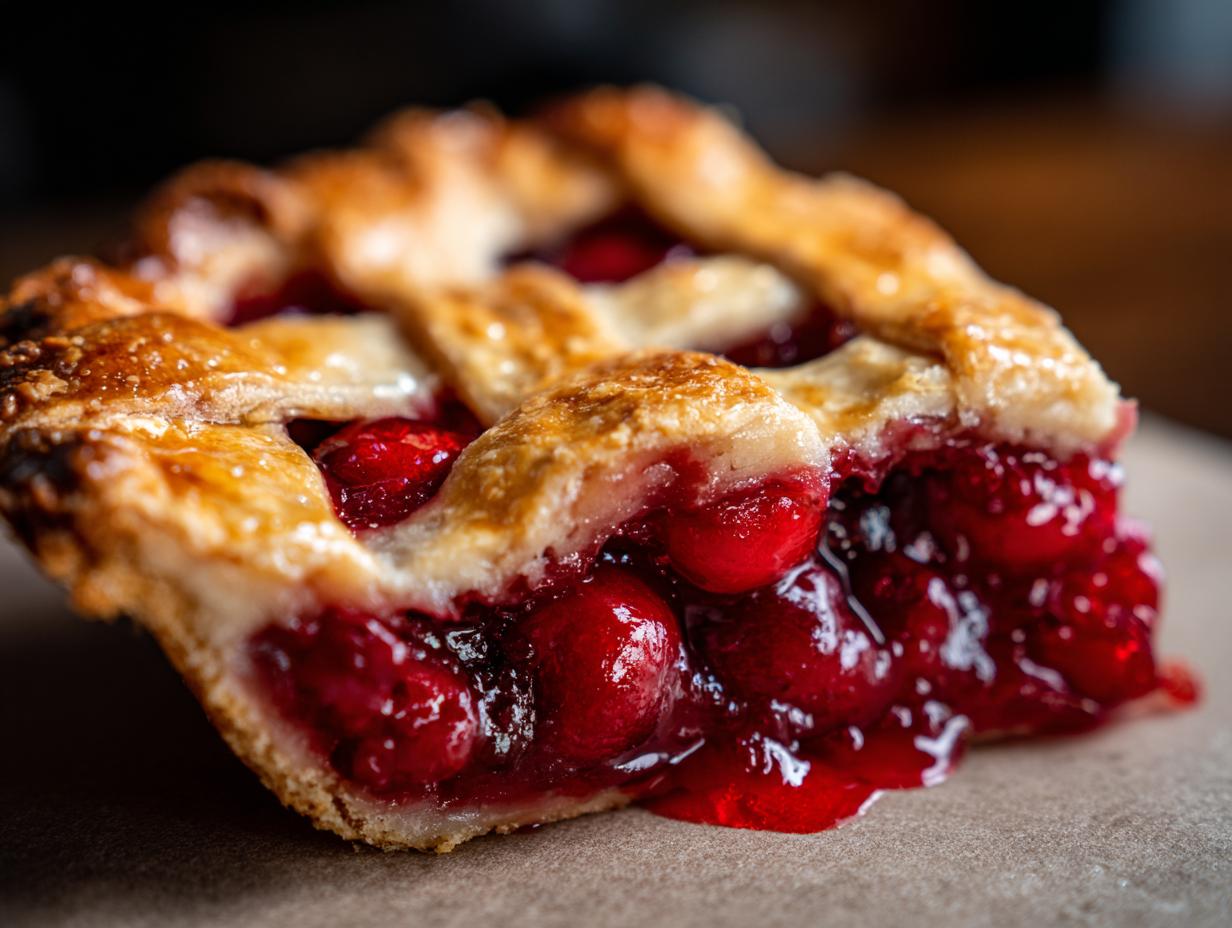
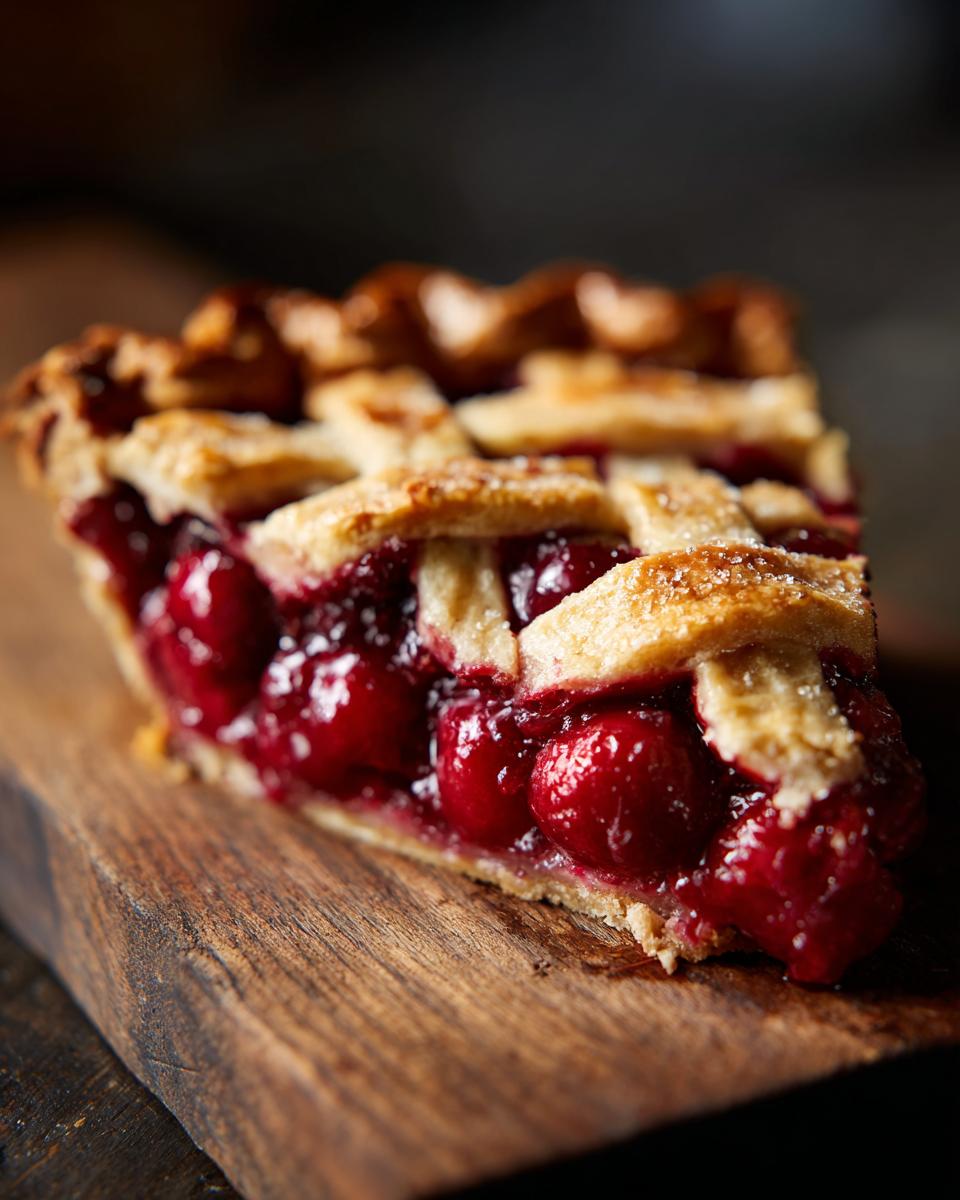
Oh, that perfect slice! You know the one – where the filling is thick and jammy, not runny at all, and the crust is just buttery perfection with those lovely woven strips. Achieving that dream cherry pie feels like a little bit of magic, doesn’t it? I remember chasing that elusive slice for years, trying recipe after recipe, until I finally landed on one that made me feel like I was back in my favorite little café. It’s all about a few key things, and I’m so excited to share them with you. This recipe is my go-to when I want something truly special, because, like we say over at Food Dexterity, cooking should bring joy!
- Why You'll Love This Classic Cherry Pie Recipe
- Ingredients for the Perfect Cherry Pie
- Crafting Your Homemade Cherry Pie: Step-by-Step
- Tips for a Truly Café-Style Cherry Pie
- Ingredient Notes and Substitutions for Cherry Pie
- Making Ahead and Storing Your Holiday Cherry Pie
- Frequently Asked Questions about Homemade Cherry Pie
- Estimated Nutritional Information
- Share Your Delicious Cherry Pie Creation
Why You’ll Love This Classic Cherry Pie Recipe
This isn’t just any pie; it’s the kind of pie you dream about! Here’s why you’ll be making it again and again:
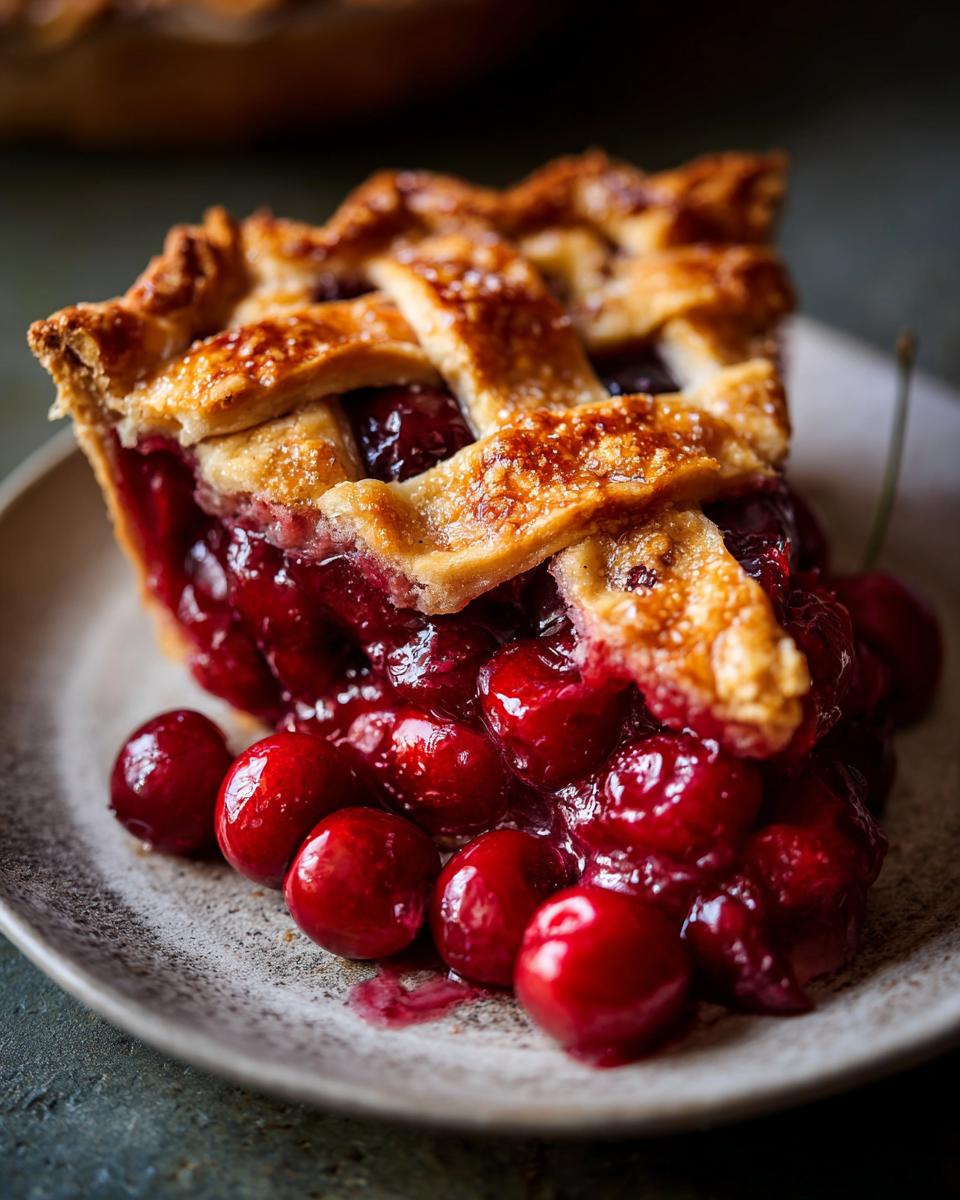
- Thick, Jammy Filling: Say goodbye to runny messes! This filling is just perfectly thick and luscious.
- Buttery, Flaky Crust: We’re talking layers of buttery goodness that practically melt in your mouth.
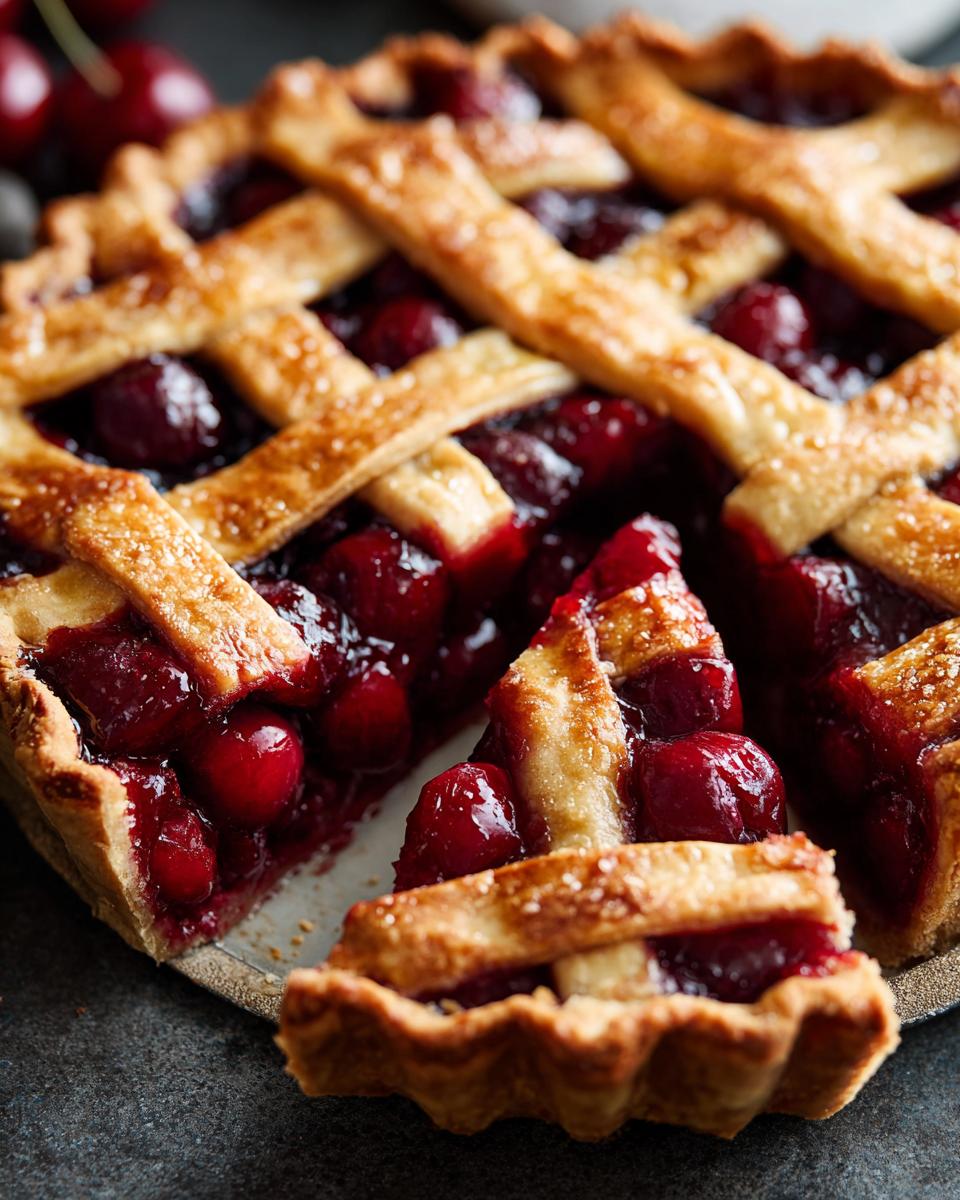
- Café-Style Perfection: It has that impressive look and taste you usually only find at your favorite bakery.
- Holiday Ready: It’s absolutely stunning for any special occasion or holiday gathering.
- Surprisingly Easy: You don’t need to be a pastry chef to get amazing results!
Ingredients for the Perfect Cherry Pie
Alright, let’s talk about what you’ll need to make this absolute dream of a pie. Getting the ingredients just right is step one to success!
- For the dough: 2 ½ cups all-purpose flour, 1 teaspoon salt, 1 cup (2 sticks) unsalted butter (make sure it’s nice and cold, cut into cubes!), and ½ cup ice water (yep, gotta have it super cold!).
- For the filling: 6 cups of beautiful cherries, either fresh or frozen (don’t worry about thawing them if they’re frozen!), ¾ cup granulated sugar, ¼ cup cornstarch for that wonderful thickness, 1 tablespoon of lemon juice to wake up the flavors, and my little secret: ½ teaspoon almond extract.
- And for that gorgeous golden finish: 1 large egg, beaten, for the wash, and 1 tablespoon of granulated sugar to sprinkle on top.
Crafting Your Homemade Cherry Pie: Step-by-Step
Alright, let’s get baking! Making this pie from scratch is honestly so rewarding, and when you follow these steps, you’ll see just how easy it is to get that perfect slice.
Preparing the Buttery Pie Dough
First things first, we need our amazing dough. In a big bowl, whisk together your flour and salt. Then, toss in that cold, cubed butter. I like to use my fingertips or a pastry blender to get it all crumbly, like coarse sand with a few pea-sized butter bits still showing – that’s key for flakiness! Now, slowly add the ice water, just a tablespoon at a time, mixing until it barely comes together. Don’t overwork it! Divide it in half, pat each into a disk, wrap ’em up, and let them chill in the fridge for at least an hour. This step is non-negotiable for a tender crust.
Creating the Thick Cherry Filling
While our dough is chilling, let’s whip up that luscious filling. Grab another bowl and gently combine your pitted cherries, the ¾ cup sugar, the cornstarch (our magic thickener!), lemon juice, and that hint of almond extract. Give it a gentle stir to coat everything. This is what makes this cherry pie filling so wonderfully jammy!
Assembling Your Lattice Cherry Pie
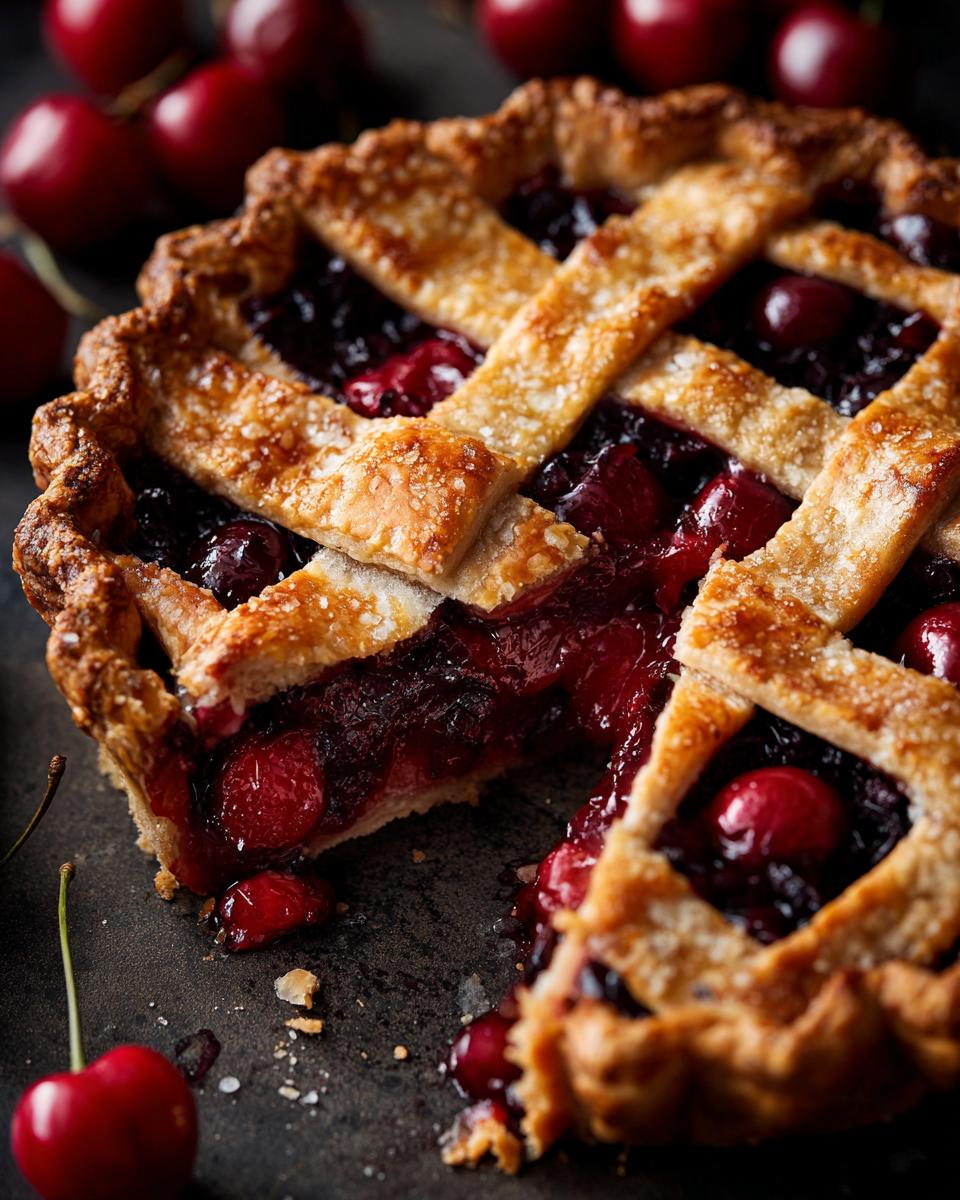
Okay, dough’s chilled, filling’s ready – time to assemble! Preheat your oven to a nice hot 400°F (200°C). On a lightly floured surface, roll out one disk of dough into about a 12-inch circle. Carefully lay it into your 9-inch pie plate, letting it hang over the edges a bit. Now, pour that beautiful cherry mixture into the crust. For the top, roll out the second dough disk. You can cut it into strips for a classic lattice look, weaving them over the filling, or cut out fun shapes. Trim the edges, then crimp the bottom and top crusts together to seal everything up. Brush the whole thing with that beaten egg wash and sprinkle generously with the extra tablespoon of sugar for a golden sparkle.
Baking Your Classic Cherry Pie to Perfection
Now for the best part! Place your masterpiece on a baking sheet (trust me, this catches any bubble-overs!). Pop it into the hot oven for 20 minutes at 400°F (200°C). Then, lower the heat to 375°F (190°C) and bake for another 30-40 minutes. You’re looking for a gorgeous golden-brown crust and bubbly, thick filling peeking through. If the crust starts getting too dark before the filling is fully set, just loosely tent the top with foil. The absolute hardest part? Letting this classic cherry pie cool COMPLETELY on a wire rack for at least 3-4 hours. I know, I know, but it’s super important for the filling to set up properly so every slice is just right!
Tips for a Truly Café-Style Cherry Pie
Want your homemade cherry pie to look like it came straight from a fancy bakery? It’s all in the little details! My biggest secret? Keeping everything super cold when you make the dough. Seriously, we’re talking ice-cold butter and ice water. This makes the butter create steam pockets as it bakes, giving you that incredibly flaky, buttery crust we all love. Also, don’t be shy with the cornstarch in the filling; it’s what makes this cherry pie so beautifully sliceable and not soupy. And a pro tip for amazing flavor? A little splash of almond extract really makes the cherries sing!
Ingredient Notes and Substitutions for Cherry Pie
Sometimes you might not have exactly what the recipe calls for, and that’s totally okay! When it comes to this cherry pie, we have some wiggle room. For the cherries, fresh is amazing, but frozen work like a charm too! If you use frozen, just toss them in straight from the freezer—no need to thaw. This actually helps keep your filling nice and thick. If you’re out of cornstarch, you can use tapioca starch or even a bit of flour, though cornstarch gives the most reliable “jammy” texture. And that almond extract? It’s just a little something extra to make the cherry flavor pop, but if you’re not a fan or don’t have it, a tiny bit of vanilla extract or even a splash of orange juice works nicely too!
Making Ahead and Storing Your Holiday Cherry Pie
Planning a holiday feast? This cherry pie is a lifesaver because you can totally make parts of it ahead of time! Making the dough up to two days in advance and keeping it chilled in the fridge is my secret weapon. Or, if you’re really prepping, you can wrap those dough disks tightly and freeze them for up to a month. Just let them thaw in the fridge overnight before you plan to use them. You can even assemble the whole pie, wrap it well, and freeze it unbaked! Just pop it in the oven straight from frozen, adding a bit of extra baking time. Leftovers? Store any uneaten pie loosely covered on the counter for a day or two if it’s not too hot out, or pop it in the fridge. A quick warm-up in a low oven can bring it back to life beautifully!
Frequently Asked Questions about Homemade Cherry Pie
Got questions about your cherry pie? I’ve got answers! Here are some common things people ask:
Why is my cherry pie filling runny?
Usually, it’s not enough thickener, or the pie wasn’t baked quite long enough for the filling to bubble and set. Using thawed frozen cherries can also release extra liquid, so make sure you’re using them straight from the freezer or adjust your cornstarch!
Can I use canned cherries for this cherry pie recipe?
You can, but it’s not my first choice. Canned cherries are softer and often sweeter, so you’ll want to drain them really well and might need to cut back on the sugar. Plus, that fresh cherry flavor is just unbeatable!
How do I prevent a soggy bottom crust on my cherry pie?
A few things help! Make sure your dough ingredients are super cold for a flaky crust. Also, baking the pie on a hot baking sheet helps conduct heat to the bottom crust. And crucially, let that pie cool completely before slicing – it gives the thick filling time to set up properly!
Estimated Nutritional Information
While every slice of this delicious pie is a treat, here’s a general idea of what you’re getting. Keep in mind these are estimates and can wiggle a bit depending on the exact ingredients and brands you use:
- Serving Size: 1 slice
- Calories: Around 450
- Fat: About 25g (with 15g being saturated fat)
- Carbohydrates: Roughly 55g
- Sugar: Around 35g
- Fiber: About 4g
- Protein: Close to 5g
Share Your Delicious Cherry Pie Creation
I just can’t wait to hear about *your* cherry pie adventures! Did you try it? How did it turn out? Leave a comment below, give it a star rating, or better yet, share a picture of your beautiful creation on social media. You can even reach out to me via my contact page – I love seeing how your pies come to life!
PrintClassic Cherry Pie

A classic homemade cherry pie recipe with a thick, non-runny filling and a buttery lattice crust, perfect for holidays or any occasion.
- Prep Time: 45 min
- Cook Time: 50 min
- Total Time: 135 min
- Yield: 8 servings 1x
- Category: Dessert
- Method: Baking
- Cuisine: American
- Diet: Vegetarian
Ingredients
- 2 ½ cups all-purpose flour
- 1 teaspoon salt
- 1 cup (2 sticks) unsalted butter, cold and cut into cubes
- ½ cup ice water
- 6 cups fresh or frozen pitted cherries
- ¾ cup granulated sugar
- ¼ cup cornstarch
- 1 tablespoon lemon juice
- ½ teaspoon almond extract
- 1 large egg, beaten (for egg wash)
- 1 tablespoon granulated sugar (for sprinkling)
Instructions
- In a large bowl, whisk together flour and salt. Cut in cold butter using a pastry blender or your fingertips until the mixture resembles coarse crumbs with some pea-sized pieces of butter. Gradually add ice water, 1 tablespoon at a time, mixing until the dough just comes together. Divide the dough in half, flatten each half into a disk, wrap in plastic wrap, and refrigerate for at least 1 hour.
- In a separate bowl, combine cherries, ¾ cup sugar, cornstarch, lemon juice, and almond extract. Stir gently to coat the cherries.
- Preheat your oven to 400°F (200°C).
- On a lightly floured surface, roll out one disk of dough into a 12-inch circle. Carefully transfer the dough to a 9-inch pie plate. Trim the edges, leaving about a 1-inch overhang.
- Pour the cherry filling into the pie crust.
- Roll out the second disk of dough. Cut it into strips for a lattice top or cut out decorative shapes. Arrange the lattice strips over the filling, weaving them as you go, or place the shapes on top. Trim the lattice strips and crimp the edges of the pie crust to seal.
- Brush the lattice or top crust with the beaten egg wash and sprinkle with 1 tablespoon of sugar.
- Place the pie on a baking sheet to catch any drips. Bake for 20 minutes at 400°F (200°C).
- Reduce the oven temperature to 375°F (190°C) and continue baking for another 30-40 minutes, or until the crust is golden brown and the filling is bubbly. If the crust starts to brown too quickly, loosely tent the pie with aluminum foil.
- Let the pie cool completely on a wire rack for at least 3-4 hours before slicing to allow the filling to set.
Notes
- For a thicker filling, you can add an extra tablespoon of cornstarch.
- If using frozen cherries, do not thaw them before using.
- Make ahead: The pie dough can be made up to 2 days in advance and refrigerated, or frozen for up to 1 month. The assembled, unbaked pie can also be frozen. Bake from frozen, adding extra baking time as needed.
- For a café-style crust, ensure your butter and water are very cold when making the dough.
Nutrition
- Serving Size: 1 slice
- Calories: 450
- Sugar: 35g
- Sodium: 300mg
- Fat: 25g
- Saturated Fat: 15g
- Unsaturated Fat: 10g
- Trans Fat: 0g
- Carbohydrates: 55g
- Fiber: 4g
- Protein: 5g
- Cholesterol: 60mg