
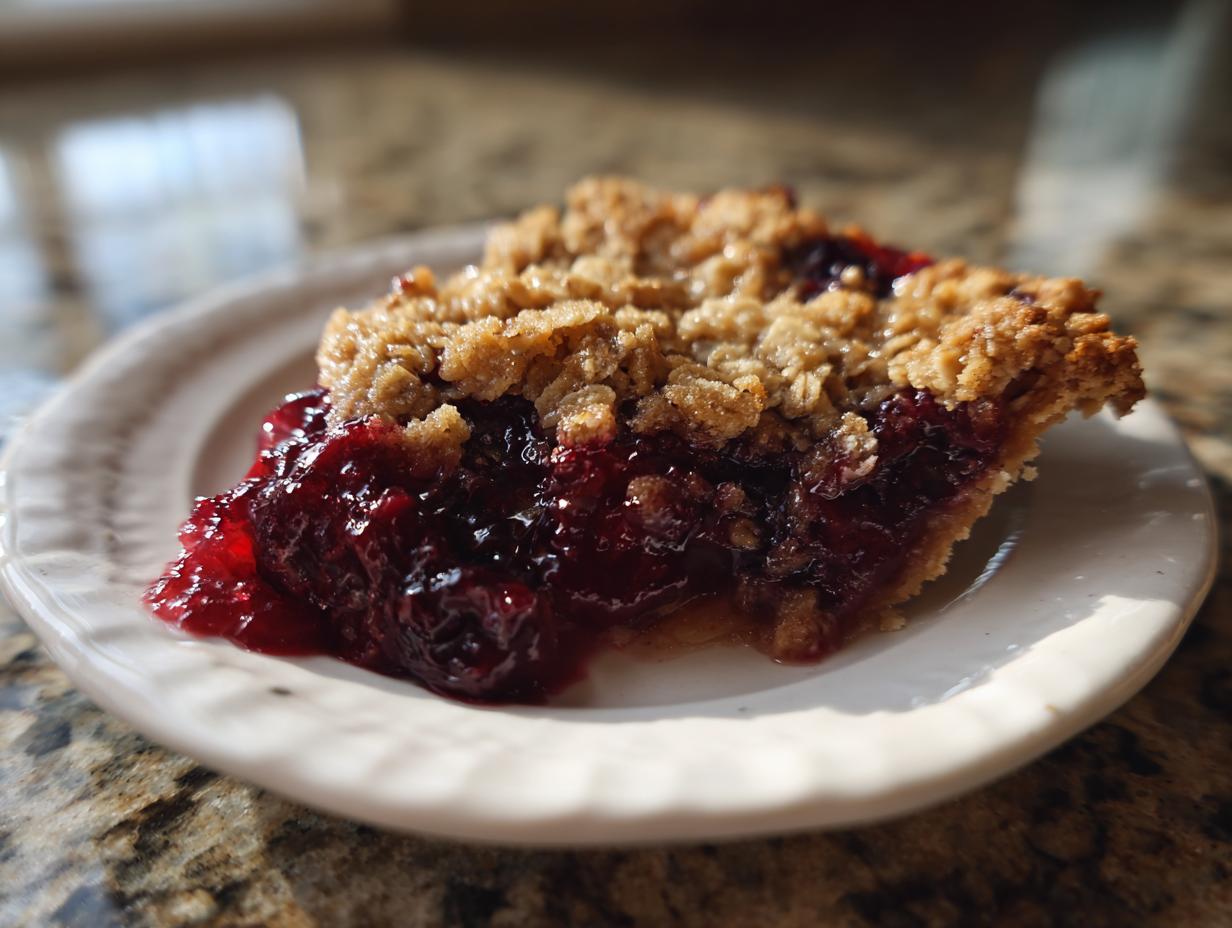
Oh, summer! The air is warm, the sun is shining, and my kitchen is calling for all things bright and fruity. And when those sour cherries are practically begging to be used, there’s only one dessert that truly hits the spot: this incredibly easy sour cherry crisp. Seriously, it’s a total game-changer. Forget fussy crusts and endless rolling; this beauty comes together in about 10 minutes flat. It’s the kind of magic that makes you feel like a baking superhero, even on the busiest weeknights. This recipe reminds me so much of the comforting, soul-satisfying food my grandmother used to make. You know, the kind of food that just wraps you up in a hug? It’s simple, it’s divine, and it’s about to become your favorite summer treat. You can learn more about my cooking philosophy and how I approach these kinds of comforting dishes over on our About page!
- Why You'll Love This Easy Sour Cherry Crisp Recipe
- Ingredients for the Best Sour Cherry Crisp
- How to Make Sour Cherry Crisp: Step-by-Step
- Tips for the Ultimate Sour Cherry Crisp
- Ingredient Notes and Substitutions for Sour Cherry Crisp
- Make-Ahead and Storage for Your Sour Cherry Crisp
- Frequently Asked Questions About Sour Cherry Crisp
- Estimated Nutritional Information
- Share Your Homemade Sour Cherry Crisp
Why You’ll Love This Easy Sour Cherry Crisp Recipe
Seriously, this sour cherry crisp is a lifesaver on those warm summer days! Here’s why you’re going to be obsessed:
- Super Speedy Prep: We’re talking a 10-minute prep time, tops. Perfect when those cherries are calling your name *right now*.
- Just So Easy: No fussy crusts here! It’s just a simple, delicious fruit filling topped with an irresistible crunch.
- Make-Ahead Magic: You can totally get a head start. Prep the components and bake it later—dinner party savior, right?
- Adaptable for Everyone: Got dietary needs? No problem! We’ve got easy swaps for a fantastic gluten-free cherry crisp.
- That Perfect Combo: Sweet-tart cherries meet a wonderfully crisp, oaty topping. It’s pure comfort food heaven.
Ingredients for the Best Sour Cherry Crisp
Alright, let’s get our ingredients ready! This is what you’ll need to make your very own version of the best sour cherry crisp. Trust me, these simple things come together to make something truly special.
- 6 cups fresh or frozen sour cherries, pitted (no need to thaw if frozen!)
- 3/4 cup granulated sugar
- 3 tablespoons cornstarch
- 1 teaspoon lemon zest
- 1/4 teaspoon salt
- 1 cup all-purpose flour
- 1 cup rolled oats (make sure they’re certified gluten-free if you need them!)
- 1/2 cup packed light brown sugar
- 1/2 teaspoon ground cinnamon
- 1/4 teaspoon ground nutmeg
- 3/4 cup cold unsalted butter, cut into cubes
- 1/2 cup chopped pecans or walnuts (totally optional, but adds a nice crunch!)
How to Make Sour Cherry Crisp: Step-by-Step
Alright, let’s dive into making this fabulous sour cherry crisp! It’s genuinely as easy as it sounds, and before you know it, you’ll have a bubbling, delicious dessert ready to go. The whole process is super straightforward, perfect for anyone who just wants a fantastic homemade fruit crisp without the fuss. We’re talking simple steps and even simpler ingredients to get that perfect balance of tart cherries and crunchy topping.
Preparing the Cherry Filling for Your Sour Cherry Crisp
First things first, preheat your oven to 375°F (190°C). Now, grab a big bowl and toss all those beautiful sour cherries (remember, frozen is totally fine and I don’t even bother thawing them!), granulated sugar, cornstarch, that little bit of lemon zest, and a pinch of salt. Just give it a gentle stir to make sure everything’s coated nicely. Pour this lovely cherry mixture right into your pie plate or baking dish. See? Easy peasy already!
Crafting the Perfect Sour Cherry Crisp Topping
Next up is the star of the show – that incredible crumble topping! In a separate bowl, whisk together your flour, rolled oats, packed light brown sugar, cinnamon, and nutmeg. Now, here’s where the magic happens. Add your cold, cubed butter. You can use a pastry blender, or honestly, your fingertips work just great! Rub or cut the butter into the dry stuff until it looks like coarse crumbs, with some slightly bigger, pea-sized pieces of butter still hanging around. Those little butter bits are key to a perfectly crumbly topping! If you’re adding nuts to yours, stir them in now. Don’t overmix it; we want that lovely texture!
Assembling and Baking Your Homemade Sour Cherry Crisp
Sprinkle that glorious crumble topping evenly all over the cherry filling. Try to get it edge-to-edge for maximum crunch in every bite! Now, pop it into your preheated oven. Bake for about 35 to 45 minutes. You’ll know it’s ready when the topping is golden brown and you can see the cherry filling bubbling joyfully around the edges. If the topping starts getting a little *too* happy-looking before the filling is bubbly, just loosely tent it with some foil. Once it’s done, let it hang out on the counter for at least 15-20 minutes before digging in. This waiting period is crucial; it lets the filling thicken up so you get that perfect consistency. It smells amazing, I know, but it’s worth it!

Tips for the Ultimate Sour Cherry Crisp
Okay, so you’ve got the basic steps down, but want to make sure your sour cherry crisp is truly *next-level*? I’ve picked up a few tricks over the years that really make a difference. First off, don’t be afraid of frozen sour cherries! Honestly, they work just as beautifully as fresh ones, and you don’t even need to thaw them – just toss ’em in. For that perfect topping texture, remember not to overwork the butter into the dry ingredients; those little chunks of butter are what create those delightful crispy bits, not a paste. And a soggy bottom? The enemy! Making sure your cherry filling isn’t too watery (the cornstarch helps!) and letting the crisp rest after baking are your secret weapons against that.
Ingredient Notes and Substitutions for Sour Cherry Crisp
You know, picking the right ingredients can make all the difference, and I get asked about them a lot! For this easy sour cherry crisp, don’t stress about fresh cherries if that’s not what you have. Frozen sour cherries are totally my go-to because they work like a charm and save you a step – no thawing needed. Just toss ’em in frozen! If you’re going for a gluten-free cherry crisp, a good quality gluten-free all-purpose flour blend works beautifully in the topping, just make *sure* your rolled oats are certified gluten-free too, to keep everything safe. And nuts? Totally optional! Pecans, walnuts, or even skipping them altogether is fine. Oh, and that cornstarch? It’s pretty important for getting that lovely, thick, not-too-runny cherry filling, so don’t skip it!
Make-Ahead and Storage for Your Sour Cherry Crisp
One of the best things about this easy sour cherry crisp is how forgiving it is! You can totally get a head start, which is a total lifesaver. If you want to prep ahead, make the cherry filling and the crumble topping separately. Tuck them into airtight containers (or just cover the bowls really well) and pop them in the fridge for up to a day. When you’re ready to bake, just assemble and pop it in the oven like usual. If you’ve already baked it, let it cool completely, then cover it snugly and it’ll keep in the fridge for about 3-4 days. Reheat individual slices in the microwave or the whole thing for a bit in a low oven (around 300°F) – still tastes amazing!
Frequently Asked Questions About Sour Cherry Crisp
Got questions about this amazing sour cherry crisp? I’ve totally got you covered! Making this homemade sour cherry crisp is supposed to be fun and easy, so let’s clear up anything that might be buzzing around your mind.
Can I use fresh cherries instead of frozen for this tart cherry crisp recipe?
Absolutely! Fresh sour cherries are fantastic if they’re in season. You’ll want to pit them yourself just like you would with frozen ones. Use them directly in the recipe without thawing, and really, the process is exactly the same. The cooking time might be just a touch less since they aren’t coming straight from the freezer, but keep an eye on it!
What can I use if I don’t have oats for the oat cherry crisp topping?
No oats? No problem! If you’re making an oat cherry crisp and find yourself out of oats, you can substitute them with an extra 1/4 cup of all-purpose flour or even some extra chopped nuts if you have them. Another great option is to use a gluten-free cereal that’s been crushed up a bit, like cornflakes or rice crisp cereal. It won’t be *exactly* the same texture, but it will still give you a wonderful crunch!
How do I know when my easy sour cherry crisp is done baking?
You’ll know your easy sour cherry crisp is ready when the topping is a beautiful golden brown and you can see the cherry filling bubbling up around the edges. That bubbly part is key – it means the filling is hot and has thickened up nicely. If the topping looks like it’s getting too dark before the filling is bubbly, just give it a little tent of aluminum foil and let it finish baking. It’s a pretty simple visual cue!
Estimated Nutritional Information
Just a heads-up, the nutritional info for this sour cherry crisp is an estimate, okay? Actual numbers can bounce around a bit depending on the brands you use and exactly how you make it. But generally, for one serving, you’re looking at around 350 calories, about 15g of fat (9g of that’s saturated), 55g of carbs, a good 4g of fiber, and roughly 3g of protein. Plus, about 45g of sugar. It’s a treat, for sure!
Share Your Homemade Sour Cherry Crisp
Did you whip up this amazing sour cherry crisp? I’d absolutely love to hear all about it! Drop a comment below to let me know how it turned out for you, or maybe share your favorite way to serve it. Better yet, if you have any questions or just want to share a baking victory, feel free to hop over to our Contact page. Your feedback really makes my day!
PrintEasy Sour Cherry Crisp

A simple and delicious summer dessert featuring a tart cherry filling and a crunchy oat topping. Perfect for home bakers.
- Prep Time: 15 min
- Cook Time: 40 min
- Total Time: 55 min
- Yield: 6 servings 1x
- Category: Dessert
- Method: Baking
- Cuisine: American
- Diet: Vegetarian
Ingredients
- 6 cups fresh or frozen sour cherries, pitted
- 3/4 cup granulated sugar
- 3 tablespoons cornstarch
- 1 teaspoon lemon zest
- 1/4 teaspoon salt
- 1 cup all-purpose flour
- 1 cup rolled oats
- 1/2 cup packed light brown sugar
- 1/2 teaspoon ground cinnamon
- 1/4 teaspoon ground nutmeg
- 3/4 cup cold unsalted butter, cut into cubes
- 1/2 cup chopped pecans or walnuts (optional)
Instructions
- Preheat your oven to 375°F (190°C).
- In a large bowl, combine the sour cherries, granulated sugar, cornstarch, lemon zest, and salt. Toss gently to coat the cherries evenly. Pour the cherry mixture into a 9-inch pie plate or an 8×8 inch baking dish.
- In a separate medium bowl, whisk together the flour, rolled oats, brown sugar, cinnamon, and nutmeg.
- Add the cold butter cubes to the dry ingredients. Use a pastry blender, your fingertips, or two forks to cut the butter into the mixture until it resembles coarse crumbs with some pea-sized pieces of butter remaining. If using nuts, stir them in now.
- Evenly sprinkle the crumble topping over the cherry filling.
- Bake for 35-45 minutes, or until the topping is golden brown and the cherry filling is bubbly. If the topping starts to brown too quickly, you can loosely tent the dish with aluminum foil.
- Let the crisp cool for at least 15-20 minutes before serving. This allows the filling to thicken.
Notes
- For a gluten-free version, use a gluten-free all-purpose flour blend in the topping and ensure your oats are certified gluten-free.
- You can make the cherry filling and the crumble topping separately up to 1 day in advance. Store them covered in the refrigerator. Assemble and bake just before serving.
- Serve warm with vanilla ice cream or whipped cream.
Nutrition
- Serving Size: 1/6th of crisp
- Calories: 350
- Sugar: 45g
- Sodium: 50mg
- Fat: 15g
- Saturated Fat: 9g
- Unsaturated Fat: 6g
- Trans Fat: 0g
- Carbohydrates: 55g
- Fiber: 4g
- Protein: 3g
- Cholesterol: 35mg