
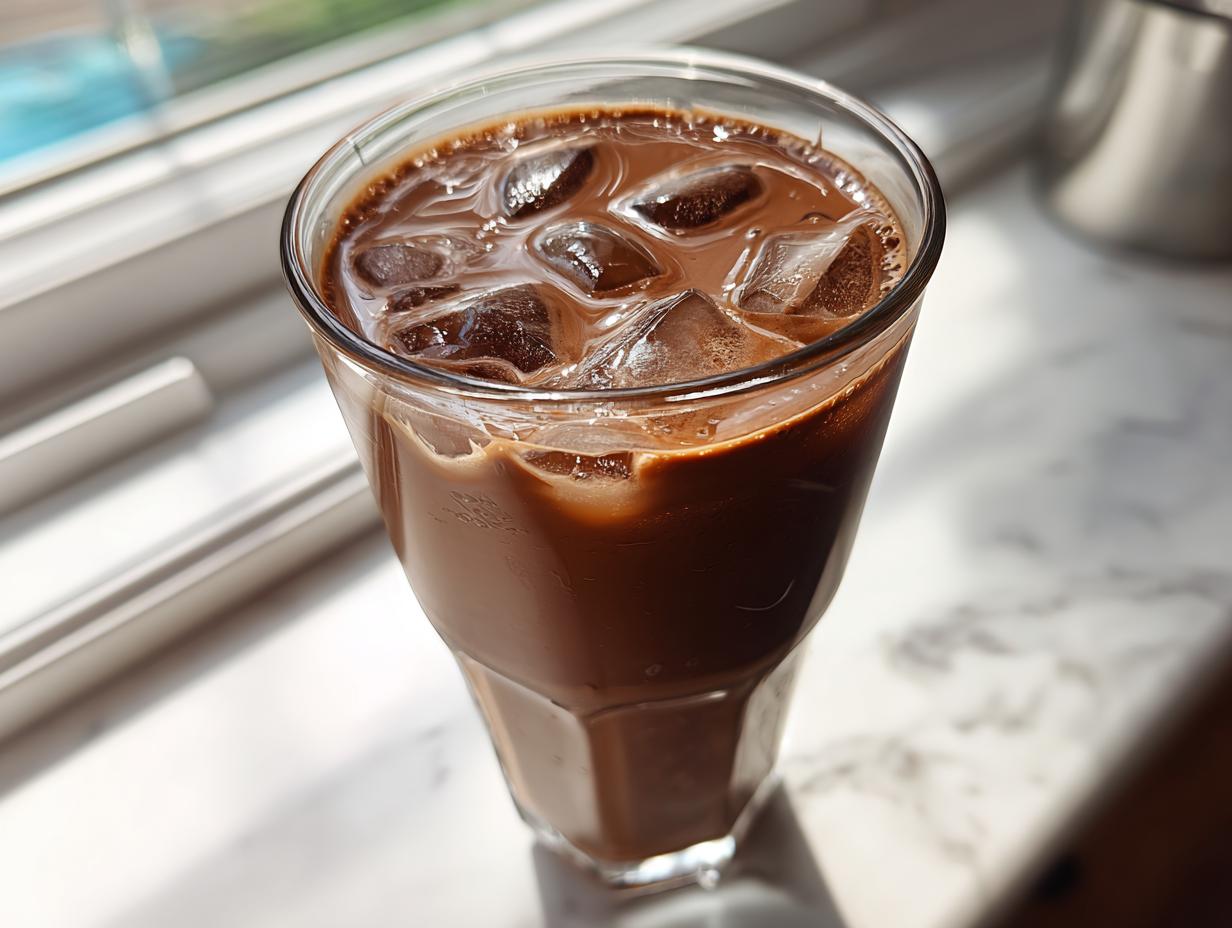
We all have those moments, right? When you just *need* that big, cold glass of deeply satisfying, rich chocolate milk, and you know in your heart that the chalky stuff from the carton just isn’t going to cut it. That’s why I developed this recipe! Here at Food Dexterity, we believe in making the classics achievable, even when life is moving at a million miles an hour. This isn’t just another quick fix; it’s the absolute best homemade chocolate milk you’ll ever taste because we build it around a real, no-fuss cocoa syrup. Trust me, once you try this, you’re never going back to the store-bought bottles again. It’s pure comfort in a glass, ready in minutes!
- Why This Homemade Chocolate Milk Recipe Beats Store-Bought
- Ingredients for the Best Chocolate Milk Recipe
- How to Make the Chocolate Syrup for Perfect Chocolate Milk
- Assembling Your Quick Chocolate Beverage
- Tips for the Best Chocolate Milk Experience
- Variations for Healthy Chocolate Milk Ideas
- Storage and Making a Chocolate Milk Powder Mix
- Frequently Asked Questions About Chocolate Milk
- Sharing Your Decadent Cold Drinks Creation
Why This Homemade Chocolate Milk Recipe Beats Store-Bought
Look, I get it. Store-bought chocolate milk is convenient. But convenience often means sacrificing that deep, luxurious flavor we really crave. When I finally ditched the cartons and started making my own syrup, I felt like I unlocked a secret level of dairy perfection.
This method gives you total control, which is the whole point of Food Dexterity! You’re making something truly better than store-bought chocolate milk because:
- The flavor is unbelievably rich—we’re using real cocoa, not just flavoring.
- You control the sugar! If you like it sweeter or less sweet, you just add more or less syrup.
- No secret gums or stabilizers here; it’s just pure ingredients coming together beautifully.
- The best part? You have that fantastic, thick syrup base ready to go! Seriously, you can even use leftover syrup on ice cream. If you want a dedicated recipe for just the syrup, check out my classic chocolate sauce recipe. It makes this drink unforgettable!
Ingredients for the Best Chocolate Milk Recipe
Okay, gather up your essentials! The beauty of this best chocolate milk recipe is how simple the ingredient list is. We’re keeping things pure because we want that amazing flavor to shine through. Just remember, when you mix these, you’re making a syrup first. That thick syrup is what stops us from getting that annoying gritty texture that plagues instant mixes.
For the Rich Chocolate Syrup
This is the heart of the operation, so be mindful of your measurements here. The hot water is absolutely crucial—it melts everything smooth! Don’t skip it or try to use cold water; you’ll end up with sludge, not syrup.
- 1/4 cup unsweetened cocoa powder (sift it if it looks clumpy!)
- 1/2 cup granulated sugar
- 1/4 teaspoon salt (Don’t skip this; it deepens the chocolate flavor!)
- 1/4 cup hot water
For Assembling the Chocolate Milk
Once you have your syrup ready, the final step is lightning fast. You get to choose your adventure here regarding the milk base. This recipe works great whether you’re using traditional dairy milk or your favorite non-dairy alternative.
- 2 cups cold milk (whole milk gives you the creamiest results!)
- 1 teaspoon vanilla extract
How to Make the Chocolate Syrup for Perfect Chocolate Milk
This step is where the magic—and the texture—is made! We are creating our own luxurious syrup base, which guarantees you won’t end up with that sandy, gritty texture you sometimes find in quick mixes. The hot water is the hero here because it completely dissolves the sugar and cocoa powder.
First things first: take your cocoa powder, sugar, and salt—all those dry ingredients—and put them right into a small mixing bowl. Give them a quick dry whisk just to introduce them to each other. Then, slowly pour in that hot water. You have to whisk this mixture vigorously until everything smooths out. I mean truly smooth! If you see even one tiny lump hanging around, keep whisking. This usually takes just a minute or two until it looks like thick, dark velvet.
Once it’s perfectly smooth and glossy, stir in your vanilla extract. That simple paste is your powerhouse syrup! You can use it right away, which is fantastic for getting that quick chocolate beverage flavor instantly. But here’s the best part: this syrup keeps beautifully. Store it in an airtight container in the fridge, and it lasts up to two weeks. That means you can whip up a batch on Sunday evening and have amazing flavor ready for school lunches all week long! For more great time-saving kitchen tricks, check out my easy 15-minute pizza bagels recipe.
If you want to see someone else’s take on getting that initial chocolate base right before chilling, check out this interesting method here: Sugar & Soul’s Chocolate Milk.
Assembling Your Quick Chocolate Beverage
Now that you’ve mastered the syrup—which, honestly, is the hardest part—making a glass or a pitcher of this easy chocolate milk recipe is so simple it feels a little silly. This is where we turn that amazing syrup into a satisfying, quick chocolate beverage!
For a single glass, which is perfect if you just need a quick treat, grab about 1 cup of really cold milk. I start by swirling in 2 to 3 tablespoons of that rich syrup we just made. Don’t just dump it in! Stir it around with a spoon or a little whisk until everything is thoroughly combined. Taste it! This is your customization moment. If you want it even more decadent, add another half-spoon of syrup. If you used extra rich milk, you might need less.
If you’re feeling ambitious (or you have kids begging for drinks!), you can mix the *entire* batch of syrup with 2 cups of cold milk. Just pour the syrup and milk together in a large jar with a tight lid, seal it up, and shake like crazy! This makes a perfect batch for the week. Remember to give it a good shake before pouring because even with the best syrup, sometimes cocoa likes to settle at the bottom. Enjoy that cold, creamy flavor—it tastes exactly like the best version you could ever buy!
For inspiration on other fun ways to use this mix, I saw someone shaking theirs up and adding a splash of sparkling water for a fizzy chocolate soda—you can see some fun ideas over on this post!
Tips for the Best Chocolate Milk Experience
Getting this recipe right isn’t just about the measurements; it’s about a few little tricks that elevate it from good to absolutely incredible. We want that perfect, smooth dairy drink every time! The number one rule, which might seem obvious, is that your milk needs to be ice cold. Seriously, use milk straight from the back of the fridge, or even add a few ice cubes to your glass while swirling the syrup in. Cold milk stabilizes the flavor better than room temp stuff.
Also, please use a really good quality cocoa powder if you can. Cheap cocoa can sometimes taste dusty, and we’re trying to achieve deep chocolate bliss here! And since we made this fantastic syrup, don’t limit yourself to just cold milk. That syrup base is perfect for making from scratch beverages all over your kitchen. Mix it into hot milk for the richest hot chocolate you’ve ever made. Better yet, if you want to try making a fizzy treat, pour a splash of syrup into a tall glass and top it off with sparkling water. It’s an amazing, sophisticated chocolate soda! Try chilling your syrup after mixing it in with some buttermilk for a fun tangy twist—I’ve used similar techniques when working on my easy soda bread recipe, where activating ingredients correctly is key.
Variations for Healthy Chocolate Milk Ideas
I absolutely love that you’re looking to make this recipe work for you! Just because we’re aiming for decadent flavor doesn’t mean we can’t sneak in some wholesome drink recipes too. Since we control every single ingredient in our syrup, making these versions of healthy chocolate milk ideas is straightforward.
The easiest swap is subbing out that granulated sugar. If you prefer, use maple syrup or even a natural zero-calorie sweetener like stevia. Just remember to start small with the sweetener—you can always add more, but you can’t take it out! I like to use maple syrup because it adds a lovely, subtle depth that pairs perfectly with the cocoa.
Milk choice is huge, too. If you’re cutting dairy, almond milk or oat milk are fantastic choices for this homemade chocolate milk. They both blend beautifully with the syrup. And for a little grown-up twist? Add a tiny pinch of cinnamon or maybe just a dusting of instant coffee powder to the dry cocoa mix. It won’t taste like coffee, but it really deepens that chocolate note.
If you’re making this for busy little ones and focusing on less sugar, check out these great tips over at Yummy Toddler Food for their take on less sugar options. Also, if you love playing with alternative flours in your baking—like in my almond flour pancakes—you’ll have no trouble adjusting the sweeteners here!
Storage and Making a Chocolate Milk Powder Mix
Okay, I know some of you are busy, busy, busy—and I totally get the desire to have a big jar of dry mix ready to go! While my recipe is based on making a liquid syrup that keeps for nearly two weeks (which is super fast!), adapting it into a dry homemade chocolate drink mix requires a little extra step.
For the liquid syrup storage, just make sure it’s tightly sealed and in the fridge. It stays perfect for about 10 to 14 days. That’s usually enough time for me to get through two batches because my son drinks chocolate milk constantly!
If you really want the powder version, you can take that thick paste after mixing the cocoa, sugar, and hot water—before adding vanilla—and spread it super thin on a baking sheet lined with parchment. You’d bake that at a super low temperature until it cracks when cool, then grind it up. It’s a bit of extra oven time, but it works! You can see a great guide on making the powder base without the syrup hassle over at Tasty Done, if you prefer that route over my paste drying method. Just remember, for any good cake or drink recipe, like my German Chocolate Poke Cake, temperature control is always key!
Frequently Asked Questions About Chocolate Milk
I know you might have a few lingering questions once you get into making your own batch, so let’s tackle the most common things people ask me about this recipe. It’s all about making this the go-to for your household!
Can I use this syrup base for hot chocolate?
Oh, absolutely! This is one of the best features of making your own base instead of using a simple mix. That thick, rich chocolate syrup we made becomes the perfect foundation for a decadent cold drink, just as we used it above, but pour it straight into a mug! Just use about 3 tablespoons of syrup for every 1 cup of hot milk. Whisk it well, and you have an old fashioned chocolate milk experience, only warm and comforting. It’s the secret to my best comforting beverages!
How do I make this recipe more kid friendly?
For kid friendly milk drinks, you usually just need to adjust the sugar level a little bit. Since the sweetness in our recipe comes entirely from the granulated sugar mixed into the syrup, you can easily cut back by about 25% when you make the syrup. Kids tend to love the full sweetness, but cutting it back slightly still gives you tons of intense chocolate flavor without being overly sugary, and you can let them add a tiny extra drizzle themselves for fun!
What kind of milk is best for this recipe?
Honestly, whatever milk you love is fantastic here! If you are looking for creaminess reminiscent of premium bottles, whole dairy milk is your winner. But this recipe shines brightly with alternatives too—oat milk makes it incredibly velvety, and almond milk keeps it lighter. We tested it with almost everything while developing our other sweet comfort drinks, and it never fails to blend perfectly, no wonder this method works on nearly every recipe.
How do I ensure I get the ‘better than store bought chocolate milk’ result right away?
It all comes down to temperature! Make sure your milk is straight out of the fridge, almost painfully cold. Then, when you mix the syrup and milk, stir until you can no longer see the syrup layering at the bottom—use a spoon or a small handheld whisk. If you prepare the batch ahead of time, keep it well sealed and give it a really good shake before pouring. It needs that aggressive mixing for that uniform, satisfying texture every single time. I feel this same precision is what makes my white chocolate cheesecake turn out so perfectly!
Sharing Your Decadent Cold Drinks Creation
Alright, you’ve done it! You’ve moved past those dull, chalky drinks and made a truly phenomenal, decadent cold drinks experience right in your own kitchen. That’s what Food Dexterity is all about—building real cooking confidence so you can tackle those everyday cravings with the best possible homemade results.
Now, I am dying to know how this turned out for you! When you made your batch of homemade chocolate milk, what was your genius customization? Did you use oat milk? Did you only use two tablespoons of syrup because you like it dark and less sweet? Did you add a tiny sprinkle of sea salt on top?
Please, please leave a comment down below telling me all about it. Your tinkering helps the next person who comes along feel brave enough to try something new with their own recipe—maybe they’ll discover the next great way to enjoy chocolate milk!
If you’re already feeling inspired to whip up another amazing treat now that you’ve mastered this quick dairy recipe, you absolutely have to try my apple bread pudding next. It’s pure comfort food, and honestly, it tastes just as good made quickly after a busy afternoon of making chocolate milk!
PrintThe Best Homemade Chocolate Milk (Better Than Store-Bought)

Make rich, creamy chocolate milk from scratch using a simple cocoa syrup. This recipe tastes better than any store-bought version and is ready quickly.
- Prep Time: 5 min
- Cook Time: 0 min
- Total Time: 5 min
- Yield: 2 servings 1x
- Category: Beverage
- Method: Mixing
- Cuisine: American
- Diet: Vegetarian
Ingredients
- 1/4 cup unsweetened cocoa powder
- 1/2 cup granulated sugar
- 1/4 cup hot water
- 1/4 teaspoon salt
- 1 teaspoon vanilla extract
- 2 cups cold milk (dairy or preferred alternative)
Instructions
- Make the syrup: In a small bowl, combine the cocoa powder, sugar, and salt.
- Pour the hot water into the dry ingredients. Whisk until the mixture is smooth and all the sugar dissolves. This creates a thick chocolate paste.
- Stir in the vanilla extract into the chocolate paste.
- To serve one glass: Mix 2 to 3 tablespoons of the chocolate syrup with 1 cup of cold milk. Stir well until fully combined.
- For a larger batch, mix the entire syrup batch with 2 cups of cold milk. Stir or shake well before serving.
- Serve immediately over ice if desired.
Notes
- Adjust the amount of syrup you use to control the sweetness and chocolate intensity.
- This syrup stores well in an airtight container in the refrigerator for up to two weeks.
- For a low-sugar option, substitute the granulated sugar with your preferred sweetener, adjusting the amount to taste.
Nutrition
- Serving Size: 1 cup (with 2% milk)
- Calories: 250
- Sugar: 35g
- Sodium: 120mg
- Fat: 8g
- Saturated Fat: 5g
- Unsaturated Fat: 3g
- Trans Fat: 0g
- Carbohydrates: 40g
- Fiber: 2g
- Protein: 9g
- Cholesterol: 25mg