

Listen, when the holidays roll around, you need a side dish that feels like a warm hug, right? I spent years planning huge events, and I learned quickly that the best food has to be achievable, even when life is frantic. That’s why this recipe for classic homemade stuffing is one of my absolute favorites to share. It’s the ultimate comfort food side dish that cuts through all the stress. We’re making something incredibly savory, packed with fresh herbs, and—this is the key—perfectly moist on the inside with those glorious crispy edges everyone fights over.
- Why This Classic Stuffing Recipe Becomes Your Holiday MVP
- Gathering Ingredients for the Best Homemade Stuffing
- Step-by-Step Instructions for Oven Baked Stuffing
- Tips for Making the Ultimate Comfort Food Sides Stuffing
- Serving Suggestions for Your Classic Stuffing Recipe
- Variations on Traditional Stuffing
- Frequently Asked Questions About Making Perfect Stuffing
- Estimated Nutritional Data for This Savory Herb Stuffing
- Share Your Homemade Stuffing Success
Why This Classic Stuffing Recipe Becomes Your Holiday MVP
This isn’t just another side dish; this is the savory herb stuffing that people talk about all year! It’s the definition of comfort food sides done right. Honestly, when people ask me for my go-to recipe that just *works* every time, I point them straight here. You’ll find that making this homemade stuffing results in serious holiday magic. If you love a great crispy main dish, you’ll love the texture we get on this side!
- Deep, buttery flavor that screams festive season.
- Guaranteed moisture thanks to my broth technique.
- An incredibly straightforward process, even for a big spread.
- It tastes so much better than anything you can get out of a box! See what other folks are saying about their holiday tables too!
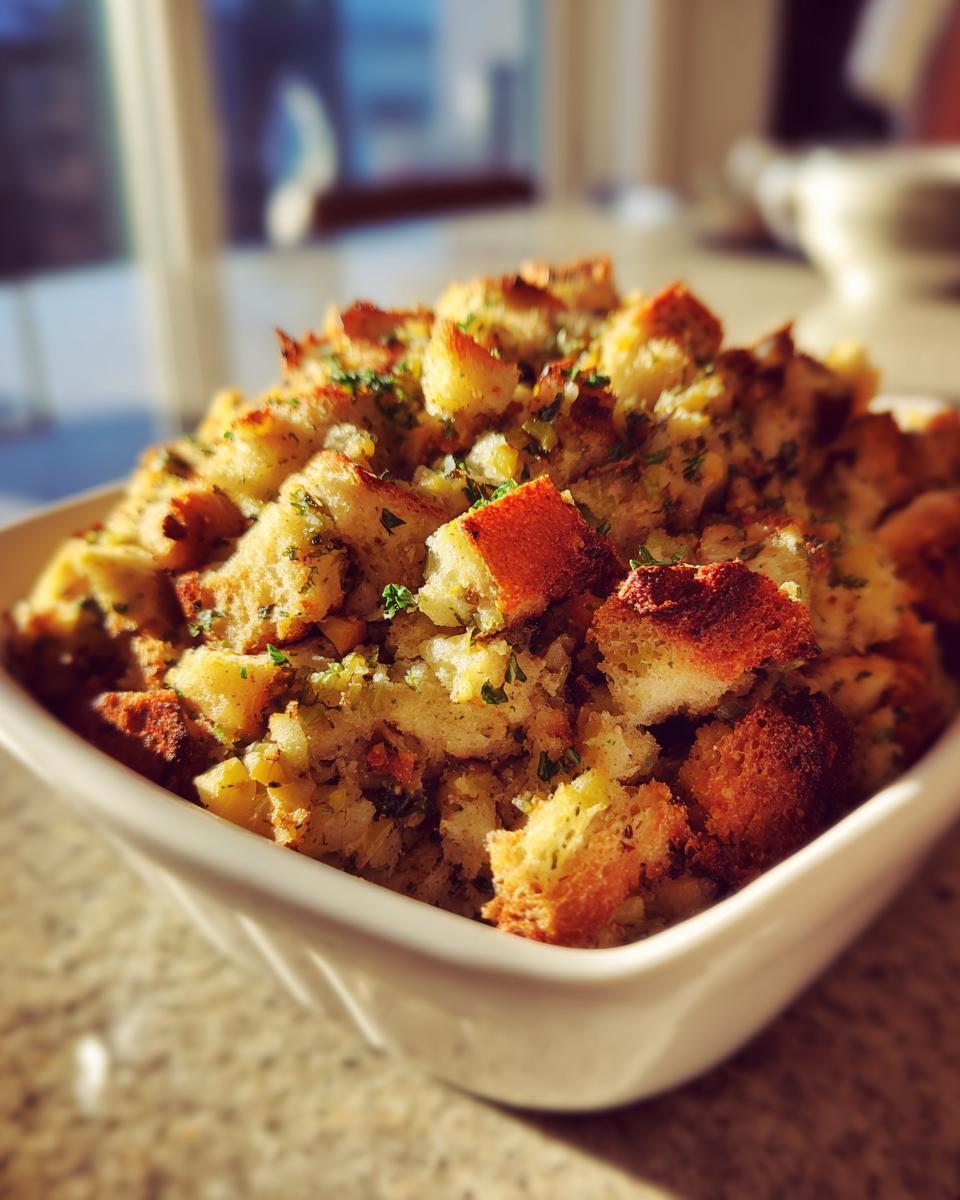
Achieving the Perfect Moist Stuffing Tips and Crispy Stuffing Top
Texture is everything here; it’s what separates amazing stuffing from just okay stuffing. We are aiming for that 50/50 split: soft and fluffy underneath, shatteringly crisp on top. The secret weapon for that perfect texture is Step 2: toasting the bread cubes before anything else. Trust me, if you skip that toasting step, your bread turns to mush when the broth hits it. Toasting gives the cubes structure so they bake up beautifully crunchy on the surface while soaking up just enough liquid inside to stay tender. It’s a small move with a huge payoff for your oven baked stuffing!
Gathering Ingredients for the Best Homemade Stuffing
Okay, the real show starts here! You need quality ingredients to make this the classic stuffing recipe everyone remembers from their best holidays. We aren’t trying to complicate things here; we just want pure, buttery, savory goodness. Laying everything out first really cuts down on kitchen chaos later, which is my whole Food Dexterity mission. Grab your list, because we are making a beautiful base for this **stuffing**.
Here’s what you need to gather up for this truly savory side dish:
- 1 pound dried bread cubes (about 12 cups), make sure they are day-old!
- 1 cup unsalted butter—only the good stuff here!
- 2 cups chopped celery
- 1 large yellow onion, chopped
- 1 tablespoon fresh sage, minced
- 1 teaspoon dried thyme
- 1 teaspoon dried parsley
- 1 teaspoon salt
- 1/2 teaspoon black pepper
- 2 large eggs, lightly beaten
- 2 to 3 cups chicken or vegetable broth
Ingredient Notes and Savory Herb Stuffing Flavor Base
Let’s talk bread first. Using day-old bread cubes is non-negotiable for that perfect texture we talked about. If your bread is too fresh, it just turns into paste when the broth gets involved. If you can’t find day-old loaves, just toss your fresh cubes on a sheet pan and let them air dry for a few hours—or briefly toast them like we do later. Also, while the dried herbs are reliable, if you can get your hands on fresh sage, use it! That fresh flavor really elevates the whole savory herb stuffing profile. Don’t skimp on the butter; this is a holiday treat, after all!
Step-by-Step Instructions for Oven Baked Stuffing
Alright, let’s get this traditional stuffing into the oven! Since this recipe is designed to be an oven baked stuffing, make sure you have your favorite 9×13 dish ready and buttered up before you even start cooking because we move pretty quickly once those veggies hit the heat. Follow these steps exactly, and you’ll have the best thanksgiving stuffing imaginable. Check out this classic homemade stuffing recipe for comparison, but stick with my method for the best results!
First things first: Preheat that oven to 350 degrees Fahrenheit and make sure you’ve buttered your baking dish generously. Then, grab your bread cubes and spread them out. We need to toast them—this is a huge part of getting that famous texture!
Prepping the Bread for Superior Stuffing Texture
Spread those bread cubes into a single layer on a baking sheet. Pop them into the hot oven for about 10 to 12 minutes. You’re looking for them to just start getting lightly toasted around the edges. Do not let them turn into dark brown croutons! If they are too dark, they’ll be bitter later. This toasting step is key to getting that signature crispy stuffing top because it protects some of those outer cubes from turning completely soggy when we add the liquid later on. It builds the structure!
Achieving the Right Moisture Level in Your Stuffing
While the bread is toasting, melt your butter and sauté the onions and celery until they are nice and soft—that takes about 8 minutes. Mix in all your beautiful savory herbs too; your kitchen is going to smell amazing right about now! Once done, combine the toasted bread and the herby veggie mix in a big bowl. Now for the liquid part. Whisk those two eggs with *just* 2 cups of broth first. Pour that over everything and toss gently. This is the most vital part of getting that perfect texture. If it looks dry, add more broth, a quarter cup at a time. Remember what I always say: We want it moist, not swimming! It shouldn’t look wet, but when you squeeze a handful, the moisture should just hold it together. That balance is what makes this a fantastic savory side dish. Pour it into your prepared dish, cover it tightly with foil, and it goes into the oven for 30 minutes!
Tips for Making the Ultimate Comfort Food Sides Stuffing
As someone who has learned the hard way that stressing about one more dish ruins the whole holiday vibe, I’ve built in ways to make this **stuffing** work for *your* schedule. We want this **holiday side dish** to be a joy, not a last-minute panic! These little professional touches, adapted from the ways I manage large-scale events, are what make the difference between good cooking and fearless cooking. If you’re already prepping your amazing gravy, you might as well get the stuffing done early too!
Make Ahead Stuffing and Storage Instructions
This is my favorite trick for keeping my sanity on the big day. Yes, you absolutely can—and probably *should*—make this stuffing ahead of time! Prepare the entire mixture right up to the point where you spread it into the baking dish (that’s Step 6). Then, cover that dish tightly with plastic wrap or foil. You can pop it into the fridge for up to 24 hours. It’s perfect for freeing up oven space or just getting ahead of the game.
Now, here’s the adjustment: when you take it out of the fridge on serving day, it’s going to be cold! When you go to bake it covered for those first 30 minutes, you need to add an extra 10 to 15 minutes to account for that chill. After that, uncover it and bake until that top is golden brown and crispy, just like the recipe says. This ensures you still get that unbeatable texture you see in Grandma’s recipes, but totally stress-free!
Also, a quick note on the crispy top: make sure when you cover it with foil, the foil isn’t actually touching the surface of the stuffing mixture. We need that open air exposure during the last uncovered bake time to guarantee those delicious, crunchy bits form right on top. Don’t skip the foil during the first part, though—that’s what locks in all the steam and keeps the interior wonderfully moist!
Serving Suggestions for Your Classic Stuffing Recipe
Honestly, this savory herb stuffing is so hearty and flavorful that it stands up beautifully next to anything, but some pairings just *sing*. Obviously, it’s essential alongside that big roasted turkey, soaking up all those delicious juices. But don’t stop there! This is fantastic with creamy mashed potatoes or my recipe for crispy roasted sweet potatoes. And please, please make sure you have plenty of rich gravy ready for drizzling. It just ties the whole comfort meal together perfectly!
Variations on Traditional Stuffing
I love how versatile this base recipe is! Once you nail the technique for that perfect texture, you can totally tweak the flavor profile without stressing out. This simple foundation lets you try out those other classic combinations you might be seeing around.
If you want richer flavor, try making a sausage stuffing! Just brown off about half a pound of mild or sweet Italian sausage with your onions and celery, drain off most of the fat, and proceed with the recipe. It adds such a savory depth.

Or, if you want to introduce some brightness, especially for a weekend dinner, toss in about a cup of dried cranberries along with your bread cubes—they plump up beautifully. For a really dark, hearty take, you might even look into a beef stuffing recipe variation, though my base works best with poultry broth. Speaking of fruit, if you like bold flavors, you have to check out my cranberry orange cake sometime too; it’s perfect for dessert!
Frequently Asked Questions About Making Perfect Stuffing
It’s totally normal to have questions when you’re trying to nail that perfect holiday dish! I get asked all the time about ingredient swaps or how to manage timing when you’re juggling twenty other things. That’s what I’m here for—to bring that real-life dexterity to your kitchen. Let’s tackle some of these common concerns so you feel confident serving up the best homemade stuffing.
Can I use fresh bread instead of dried cubes for this stuffing?
You *can*, but honestly, you’d be making this much harder on yourself! If you use fresh, soft bread, it soaks up liquid way too fast. You end up pouring in almost all the broth, and instead of getting that nice, fluffy stuffing that’s light inside, you end up with something dense and almost pudding-like. That’s why we need the bread to be dry—it holds its shape better and gives you that perfect texture contrast between the moist middle and the crispy exterior. If you only have fresh bread, you absolutely must toast it until it’s dry throughout, following Step 2 in the recipe!
What is the difference between stuffing and dressing recipe?
That is such a classic kitchen debate! In the simplest terms, the **dressing recipe** is what we are making here: it’s cooked separately in a baking dish, usually outside the bird. Stuffing, technically, is cooked *inside* the turkey or chicken.
Now, cooking it inside the bird definitely infuses it with beautiful turkey flavor, but it’s trickier to manage temperature-wise, and it often steams rather than bakes, resulting in a much soggier texture. Because I focus on giving you that ideal crispy stuffing top and a consistently moist result, I write this recipe for oven baking, which most folks now just call **stuffing** anyway. It’s foolproof, delicious, and a fantastic comfort food side!
If you were planning to make my recipe *inside* the bird, just be careful; you’d need to reduce the broth slightly—maybe start with just 1.5 cups—and undercook it a little since the internal temperature of the turkey will finish it off. For now, stick to the dish for perfect results!
How far in advance can I safely prepare this stuffing?
I love setting up my holiday schedule, and this recipe makes it simple! You can prepare the mixture right up to the point of baking—Step 6, where you combine the liquid, eggs, and soaked bread. Mix it all together, put it into your buttered dish, cover it tightly with foil, and stash it in the fridge. It’s perfect for up to 24 hours ahead of time. When it’s time to bake, you just need to remember to add about 10 to 15 extra minutes to that initial covered baking time since you are starting cold. You still get that incredible flavor profile, just without the day-of stress. It’s a lifesaver when you’re trying to get that perfect savory side dishes spread together!
Can I substitute the chicken broth? What about using turkey drippings?
Absolutely! While I list chicken or vegetable broth because those are always on hand, the best way to boost the flavor for a traditional stuffing is definitely using turkey drippings if you roasted a bird. If you have about a cup or so of fresh drippings, use that instead of the broth! If you’re making this vegetarian, vegetable broth works perfectly, and you get a wonderful buttery stuffing still, thanks to all that butter and sage.
If you’re in a pinch and don’t have any broth at all—though I highly recommend having some on hand—you could technically thin out a really good quality bouillon paste with hot water, but the flavor won’t be as deep. Try to keep some good broth ready for the best flavor!
Estimated Nutritional Data for This Savory Herb Stuffing
I always want you to feel confident about what you’re serving, but you know how it is with homemade recipes—things change based on how much butter *you* end up using or what brand of broth you grab! These numbers are based on the exact recipe measurements provided for this buttery stuffing. Think of this as a strong guideline, not a strict rulebook, because your kitchen dexterity is what really counts!
Here are the estimated values for one serving:
- Serving Size: 1 cup
- Calories: 350
- Fat: 20g (with 11g Saturated Fat)
- Cholesterol: 75mg
- Sodium: 450mg
- Carbohydrates: 38g (with 2g Fiber and 3g Sugar)
- Protein: 7g
Remember, if you substitute the butter with less fat, or if you use drier bread cubes and less broth, those numbers will shift! If you’re looking for a leaner side dish, you might try swapping half the butter for a little olive oil, but honestly, for this comfort food sides classic, I say embrace the butter! If you’re ever curious about how substitutions affect macros, it’s fun to play around with a recipe builder, like those over at my sauce recipe page sometimes shows ingredient breakdowns! But for this dish, just enjoy the perfection.

Share Your Homemade Stuffing Success
Whew! Now you’ve got the ultimate **stuffing** recipe in your hands. I’ve shown you my tried-and-true methods for getting that perfect balance—crispy where it needs to be and deeply flavorful inside—and I really hope this becomes a staple on your table for years to come.
The goal here at Food Dexterity is always empowerment, not just instruction. So, once you’ve pulled that beautiful, golden-brown dish out of the oven, I would genuinely love to know how it turned out for you! Did you manage to keep that texture perfect while juggling everything else?
Seriously, drop a rating below! Five stars if it tastes like pure holiday magic, but honest star ratings help me know what readers need next. And if you customized it—maybe you added sausage or some of that cranberry brightness we talked about—please let me know in the comments what little twist you added to make it *your* version of the best thanksgiving stuffing. I love seeing how you use your own kitchen sense!
If you have questions while you’re cooking, or if you just want to send a note letting me know the kitchen smelled amazing, head over to my contact page. Happy cooking, and thank you for trusting me with your holiday table!
PrintThe Ultimate Classic Homemade Stuffing Recipe

Make this easy homemade stuffing that delivers crispy edges and a moist, savory interior packed with fresh herbs. This traditional side dish is perfect for your holiday feast.
- Prep Time: 20 min
- Cook Time: 45 min
- Total Time: 65 min
- Yield: 8 servings 1x
- Category: Side Dish
- Method: Oven Baked
- Cuisine: American
- Diet: Vegetarian
Ingredients
- 1 pound dried bread cubes (about 12 cups), preferably day-old
- 1 cup unsalted butter
- 2 cups chopped celery
- 1 large yellow onion, chopped
- 1 tablespoon fresh sage, minced
- 1 teaspoon dried thyme
- 1 teaspoon dried parsley
- 1 teaspoon salt
- 1/2 teaspoon black pepper
- 2 large eggs, lightly beaten
- 2 to 3 cups chicken or vegetable broth
Instructions
- Preheat your oven to 350 degrees Fahrenheit. Lightly butter a 9×13 inch baking dish.
- Spread the dried bread cubes in a single layer on a large baking sheet. Bake for 10 to 12 minutes until lightly toasted. This step helps create the crispy exterior.
- While the bread toasts, melt the butter in a large skillet over medium heat. Add the chopped celery and onion. Cook until soft, about 8 minutes.
- Stir in the fresh sage, thyme, parsley, salt, and pepper into the skillet mixture. Cook for 1 minute until fragrant.
- In a large bowl, combine the toasted bread cubes and the cooked vegetable-herb mixture. Toss gently to combine.
- In a separate small bowl, whisk together the beaten eggs and 2 cups of the broth. Pour this mixture over the bread mixture. Toss until the bread is evenly moistened. Add more broth, a quarter cup at a time, if the mixture seems too dry. You want it moist, not soggy.
- Transfer the stuffing mixture to the prepared baking dish. Cover the dish tightly with aluminum foil.
- Bake covered for 30 minutes. Remove the foil and bake for an additional 10 to 15 minutes, or until the top is golden brown and crispy.
- Let the stuffing rest for 5 minutes before serving.
Notes
- For a make-ahead stuffing, prepare the mixture through step 6, cover, and refrigerate for up to 24 hours. Add 10 to 15 minutes to the covered baking time if baking straight from the refrigerator.
- If you prefer a richer flavor, substitute half of the broth with reserved turkey drippings.
- To achieve the best crispy stuffing top, ensure the top layer of bread cubes is not completely submerged in liquid before the final uncovered baking stage.
Nutrition
- Serving Size: 1 cup
- Calories: 350
- Sugar: 3
- Sodium: 450
- Fat: 20
- Saturated Fat: 11
- Unsaturated Fat: 9
- Trans Fat: 0
- Carbohydrates: 38
- Fiber: 2
- Protein: 7
- Cholesterol: 75