

Oh, honey, I know the feeling. Some nights you crave that warm, savory hug of classic comfort food, but you just don’t have an hour to make it happen. That’s where my food dexterity kicks in—taking everything you love about tacos and simplifying it into a handheld masterpiece. These cheesy pocket tacos are the answer to frantic weeknights when you need dinner on the table fast. We’re talking seasoned ground beef, loads of gooey cheese, all sealed up in a perfectly crispy shell. It’s like a hug you can eat while leaning over the sink, and trust me, it’s ridiculously satisfying. If you’re looking for the easiest weeknight dinners that genuinely taste like you spent ages on them, stick around. You won’t believe how quick these come together!
- Why These Cheesy Pocket Tacos Are Your New Weeknight Winner
- Gathering Ingredients for Ultimate Cheesy Pocket Tacos
- Step-by-Step Instructions: How to Make Cheesy Pocket Tacos
- Achieving Golden Perfection: Cooking Your Cheesy Pocket Tacos
- Serving Suggestions for Loaded Taco Pockets
- Storage and Reheating Cheesy Pocket Tacos
- Frequently Asked Questions About Cheesy Pocket Tacos
- Estimated Nutritional Information for Cheesy Pocket Tacos
- Share Your Comfort Food Taco Twist Creations
Why These Cheesy Pocket Tacos Are Your New Weeknight Winner
I developed recipes that work *with* life, not against it, and that’s exactly what these delicious pockets do. They take all the flavor chaos of a full taco spread and pack it neatly into one tidy, handheld package. You get that classic Tex-Mex punch without needing six different bowls of toppings!
Honestly, these cheesy pocket tacos hit every marker for a perfect weeknight meal. They’re robust, totally craveable, and they disappear fast—which is always a win in my book.
Speed and Convenience for Busy Schedules
We are talking about a total time commitment of about 35 minutes from start to finish. That’s faster than most drive-through lanes! You get all the satisfaction of a full meal, making this one of my favorite quick lunch recipes or dinner ideas when the afternoon runs long. No complicated assembly or long baking times needed for these Quick Dinner Tacos.
The Perfect Crispy Tortilla Pockets Texture
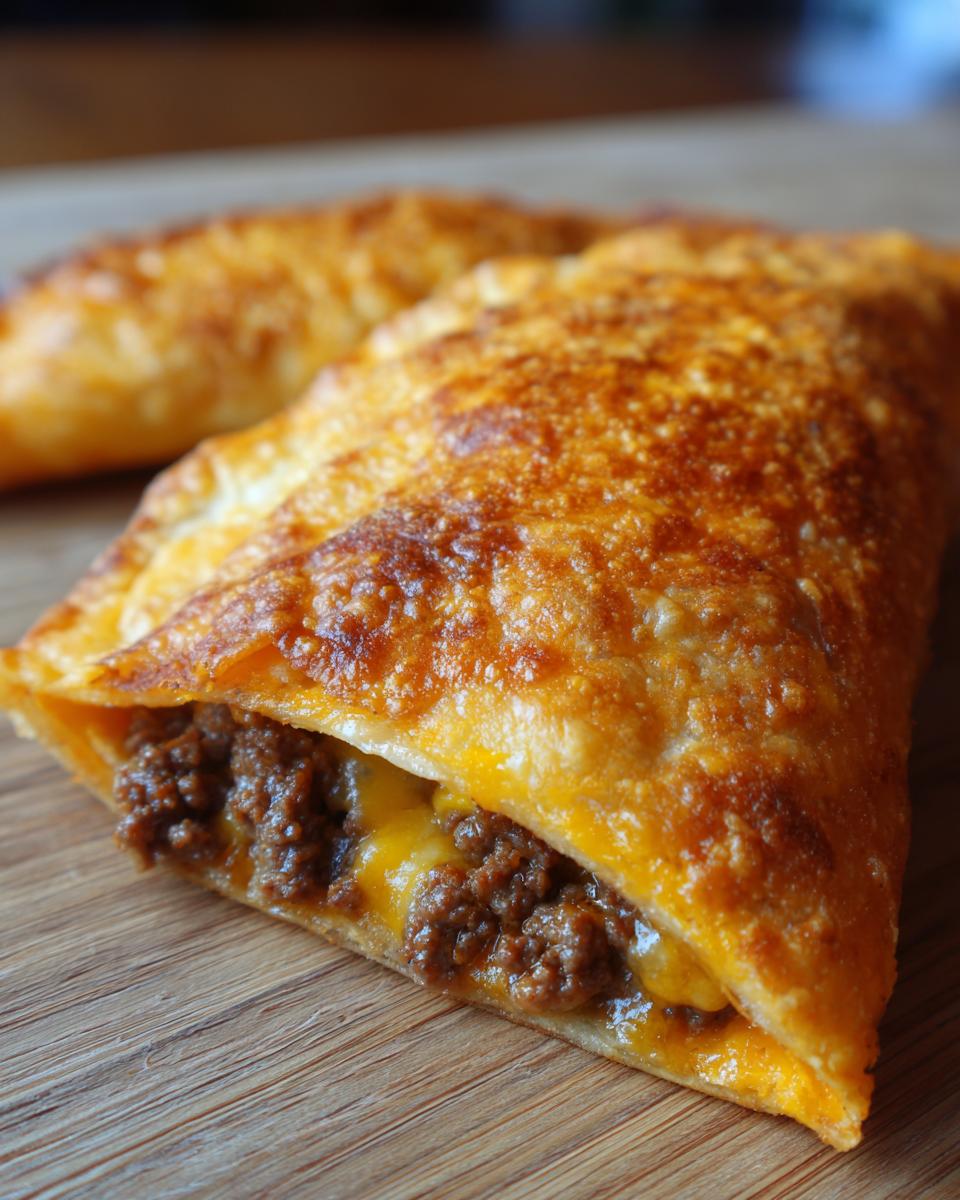
This is the real magic here. You aren’t getting limp, soggy flour tortillas. By spraying them lightly and baking (or air frying!), you achieve these fantastic Crispy Tortilla Pockets. The outside is golden and gives you this wonderful satisfying crunch when you bite in, but guess what’s inside? A ridiculously soft, impossibly gooey center where that cheese mix has completely melted. It’s that contrast in texture—crunchy outside, melty inside—that makes you keep going back for another one.

Gathering Ingredients for Ultimate Cheesy Pocket Tacos
Okay, let’s look at what we need because having the right players on the field makes all the difference in these Stuffed Taco Pockets. We aren’t using a giant list of spices; we’re keeping it super streamlined, which is why this recipe is such a lifesaver on a Tuesday night. The filling is hearty ground beef, the seasoning is a standard packet (easy peasy!), and then we hit the secret weapon: the cheese blend.
The main thing to note is getting that perfect cheese combination. We mix cheddar and Monterey Jack for flavor and melt, but the softened cream cheese and salsa we fold in? That’s what transforms it from just ‘cheese’ to ‘luxuriously creamy and totally melty.’ It keeps the filling moist, too, which is crucial for something that’s going to be baked!
Ingredient Notes and Substitution Guidance
A few quick words on the tortillas—please make sure you grab the small ones, usually called fajita size, about 8 inches across. If you use big burrito tortillas, you’ll end up with floppy pockets that won’t seal right during baking. We need a tight seal because we are locking in steam and cheese!
For the meat, if you can’t do ground beef, no big deal. The recipe notes mentioned you can swap that out for ground turkey, which cooks just as fast, or some shredded chicken if you have leftovers! And if you want to get really fancy with your cheese, try mixing in a handful of Pepper Jack for a little kick. I know some folks who even grab specialty bread recipes for other meals, but for these pockets, stick to the standard small flour tortillas for the best crunch.
Step-by-Step Instructions: How to Make Cheesy Pocket Tacos
Alright, let’s get these amazing Melty Cheese Tacos assembled! Since this is a weeknight meal, we want to move quickly but without rushing the flavor development, especially with that beef. Don’t worry, the process is super straightforward. We’re going to build the texture layers first, getting the filling ready while we prep the cheese. This whole process flows really nicely, so just follow along!
Preparing the Savory Ground Beef Pockets Filling
First things first, get that olive oil hot in your skillet over medium heat. Toss in that pound of ground beef. You need to cook it until it’s fully browned, and this is important: break it up into small crumbles while it cooks. Nobody wants giant chunks here!
Once it looks done, carefully drain off any excess grease. Seriously, drain it well! Now, stir in the taco seasoning packet and the half-cup of water. Bring that to a nice little simmer, let it bubble gently for about five to seven minutes, just until that liquid cooks down and the sauce thickens up a bit. Then pull it right off the heat. That’s the whole filling done in about 10 minutes!
Creating the Melty Cheese Tacos Core
While the beef is simmering, you can whip up the cheese binder. Grab a small bowl and combine your shredded cheddar, the Monterey Jack, that soft cream cheese, and your salsa. Mix everything together really well until it looks like a cohesive, slightly pinkish, thick cheesy paste. If you skip the cream cheese, you won’t get that luscious melt when these bake, so don’t skip it!
Assembling and Sealing Your Handheld Taco Recipes
We need the tortillas to cooperate, so warm them up for just about 15 seconds in the microwave. This makes them pliable so they don’t crack when you fold them. Now, lay a tortilla flat. Put about two tablespoons of that seasoned beef right down the center, leaving about an inch of border around the edge. Top that with about a tablespoon of our cheesy mix.
Fold that tortilla right over to make a half-moon shape. Now, listen up: Press those edges together *hard*. If you have fork-tines you trust, run the tines all around the edge to crimp and seal it shut. This locks in all the flavor and cheese. These sealed beauties are what make the final product our perfect handheld taco recipes!
Achieving Golden Perfection: Cooking Your Cheesy Pocket Tacos
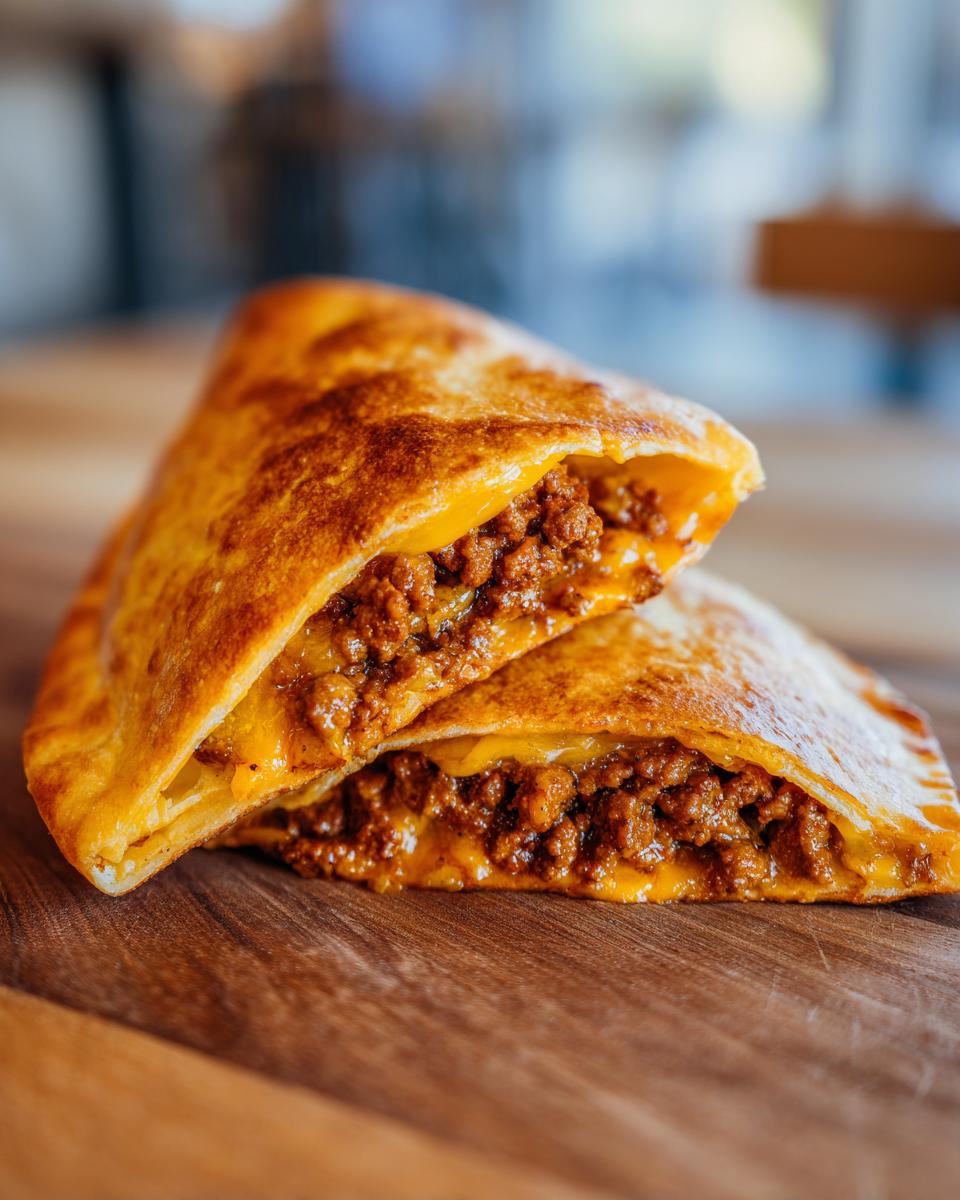
Now that we have them sealed up tight—all those savory fillings locked in—it’s time for the cooking magic. We want these cheesy pocket tacos to be golden brown and wonderfully crisp on the outside. The method you choose really depends on your kitchen setup, but both ways give you a handheld treat that’s just miles better than a soggy wrap.
If you prefer the oven, you get a very even, all-over bake. If you’re leaning into the speed of the air fryer, you get that extra bit of concentrated crunch, very similar to a deep-fried pocket without all the oil. Either way, the fully melted cheese inside is the reward!
Baking Tips for Crispy Tortilla Pockets
We are preheating the oven to 400 degrees Fahrenheit for this step. Lay your crimped pockets onto a baking sheet that you’ve sprayed lightly with cooking spray first. This stops them sticking underneath. Before they even hit the heat, give the tops a nice, light spray of cooking spray too! That fatty coating is what helps them brown up beautifully instead of drying out. Bake them for about 10 to 12 minutes, but you absolutely have to flip them halfway through. That flip is key to getting that classic Crispy Tortilla Pockets look on both sides.
Air Fryer Method for Extra Crunch
If you’re whipping these up for just your immediate family and want them ready in a flash, turn to the air fryer, just like the folks over at Air Fryer Recipes Spot suggest for crispier results. For this, you’ll set your basket to 375 degrees Fahrenheit. They cook much faster since the heat circulates so intensely. The recipe notes say to aim for about 6 to 8 minutes total. Keep an eye on them—check them around the 5-minute mark—because air fryers can vary a ton! This is my favorite way to make air fryer recipes when I need something fast.
Serving Suggestions for Loaded Taco Pockets
Even though these Loaded Taco Pockets are a complete showstopper on their own—especially since they are fully stuffed—they still love company! Since they are Tex-Mex flavored, they crave cool, creamy sides to cut through that savory spice. My absolute favorites are simple homemade guacamole, which is surprisingly easy to whip up, or just a big dollop of cool sour cream.
When I first moved here to Austin, I used to make these while friends gathered for football games, and nobody ever touched the full taco bar once these came out of the oven. A side of my game day guacamole and maybe a fresh, crunchy lettuce garnish is all you really need to make this a wonderful family favorite.
Storage and Reheating Cheesy Pocket Tacos
Nobody wants leftovers to turn sad and soggy, especially when we worked hard to get them that perfect golden crunch! If you happen to have any of these delicious taco pockets left over—though I doubt you will, knowing my family—storage is super simple. Let them cool completely on a rack after they come out of the oven. Once they are room temperature, you can pop them into an airtight container.
They keep wonderfully in the refrigerator for about three to four days. Now, the reheating part is where we save the texture! Please, for the love of crispness, skip the microwave if you can. Microwaving turns everything soft, and we want that satisfying crunch back.
The best method, hands down, is returning them to a hot oven or the air fryer. Set your oven to about 350 degrees Fahrenheit, place the pockets directly on the rack (or on a baking sheet if you’re worried about cheese drips), and heat them for about 5 to 7 minutes. If you use the air fryer, 350 degrees for 3 or 4 minutes works like a charm to crisp them right back up. You’ll be shocked how close they taste to fresh!
Frequently Asked Questions About Cheesy Pocket Tacos
I always get so many questions once people start making these, which tells me they’re a real hit! It’s smart to ask things ahead of time so you can plan your prep. These little flavor bombs travel well, whether you’re preparing them for a party or just tackling a busy week. Don’t hesitate to jump into the comments if you have one I missed! If you ever need a side that’s healthier while you’re making dinner, you should check out my thoughts on chicken vegetable soup recipe easy healthy.
Can I make these Cheesy Pocket Tacos ahead of time?
You absolutely can work ahead on these, which is a huge bonus for party planning or just surviving a frantic Monday. I recommend assembling the entire thing—filling, cheese, folding, and crimping the edges—but stop right before the baking or air frying step. Keep the unbaked Handheld Taco Recipes tightly sealed between layers of parchment paper in a container. When you’re ready to eat, just spray them lightly with cooking spray and bake them according to the main recipe instructions. They’ll taste just as fresh!
What is the best cheese combination for Melty Cheese Tacos?
The recipe calls for a blend of cheddar and Monterey Jack, and that’s a great flavor base. But the real heavy lifter for that beautiful, oozy texture in these Melty Cheese Tacos? That’s the softened cream cheese! It acts like a stabilizer and makes sure that cheese doesn’t seize up when it hits the high heat. If you wanted the ultimate gooey result, you could try adding a little bit more cream cheese or switching the Jack for Asadero cheese, which is famous for melting perfectly.

Are these Stuffed Taco Pockets suitable for vegetarians?
They are one hundred percent adaptable! If you are trying to make these a meatless option—maybe you’re having a mix of eaters—you can easily swap out that seasoned ground beef for hearty vegetarian filling. My go-to substitute for these is usually 12 ounces of rehydrated, crumbled lentils seasoned with the taco packet, or some black beans mashed slightly with a little extra cumin and chili powder. You still get great texture in these Stuffed Taco Pockets without the meat. Just remember that you might need a tiny bit more water (or broth) when simmering the seasoning, since beans don’t release fat!
Estimated Nutritional Information for Cheesy Pocket Tacos
Now, I always want to be upfront when we talk about nutrition. These cheesy pocket tacos are pure comfort food, bursting with flavor from the ground beef and that amazing, gooey cheese core. Because we’re using whole ingredients and making them fresh, you have total control over what goes in, which is better than any pre-packaged snack!
The numbers below are estimates based on the ingredients listed in the main recipe when divided across the 12 pockets. Remember, this is just a guide. If you swap ground beef for turkey, or use low-fat cheese, those numbers are going to shift slightly. As I always say when I’m whipping up easy healthy breakfast ideas, always treat nutritional data as a starting point!
- Calories: 280 per pocket
- Fat: 15 grams (7g saturated fat)
- Carbohydrates: 20 grams
- Protein: 16 grams
- Fiber: 1 gram
- Sugar: 1 gram
- Sodium: 450 mg
For these Loaded Taco Pockets, I find that 16 grams of protein keeps everyone full until dinner time, which is just fantastic for a quick meal component. They balance out beautifully with just 1 gram of sugar, so you know that savory taco seasoning is doing all the heavy lifting on flavor!
Share Your Comfort Food Taco Twist Creations
Well, that’s it! We’ve turned simple tortillas and ground beef into some of the most satisfying cheesy pocket tacos you will ever make. I really hope you found this recipe achievable and, more importantly, that it brought a little joy and deliciousness into your otherwise busy week. That’s what Food Dexterity is all about—making great food feel effortless.
I absolutely live to hear how these recipes work out in your kitchens! Did you make them for a game day snack? Did you stick to the oven or did you go for that extra air-fryer crunch? Don’t be shy! Please jump down below and leave me a rating—even just a quick star review tells me this recipe is working for other busy folks out there.
If you tried something fun, like swapping out the cheddar or adding a completely different topping to your final batch, I want to know! Don’t forget, you can always reach out to me directly through my contact page if you have specific questions about technique or future ideas. Happy cooking, friends, and enjoy every crispy, cheesy bite!
PrintUltimate Loaded Cheesy Pocket Tacos

Make these Loaded Cheesy Pocket Tacos for a quick, satisfying weeknight dinner. You get seasoned ground beef and melted cheese sealed inside crispy baked tortillas for a handheld comfort food twist on tacos.
- Prep Time: 15 min
- Cook Time: 20 min
- Total Time: 35 min
- Yield: 12 servings 1x
- Category: Dinner
- Method: Baking
- Cuisine: Tex-Mex
- Diet: Vegetarian
Ingredients
- 1 tablespoon olive oil
- 1 pound ground beef
- 1 packet (1 ounce) taco seasoning mix
- 1/2 cup water
- 1 cup shredded cheddar cheese
- 1/2 cup shredded Monterey Jack cheese
- 1/4 cup cream cheese, softened
- 1/4 cup salsa
- 12 small flour tortillas (fajita size)
- Cooking spray
Instructions
- Heat olive oil in a large skillet over medium heat. Add ground beef and cook until browned, breaking it up as it cooks. Drain excess grease.
- Stir in the taco seasoning mix and water. Bring to a simmer and cook for 5 to 7 minutes, until the liquid reduces. Remove from heat.
- In a small bowl, combine the shredded cheddar cheese, Monterey Jack cheese, softened cream cheese, and salsa. Mix well until combined.
- Warm the tortillas briefly in the microwave (about 15 seconds) to make them pliable.
- Place about 2 tablespoons of the seasoned beef mixture onto one half of a tortilla. Top the beef with about 1 tablespoon of the cheese mixture.
- Fold the tortilla in half to create a half-moon shape. Press the edges firmly together to seal. You can use a fork to crimp the edges if needed.
- Preheat your oven to 400 degrees Fahrenheit (200 degrees Celsius). Lightly spray a baking sheet with cooking spray.
- Place the sealed pockets on the prepared baking sheet. Spray the tops lightly with cooking spray.
- Bake for 10 to 12 minutes, flipping halfway through, until the tortillas are golden brown and crispy and the cheese inside is fully melted.
- Serve immediately with your favorite taco toppings.
Notes
- For an air fryer method, cook the sealed pockets at 375 degrees Fahrenheit for 6 to 8 minutes, checking halfway through for desired crispness.
- You can substitute ground turkey or shredded chicken for the ground beef.
- If you want extra cheesiness, sprinkle a little extra shredded cheese over the top of the pockets before the final 5 minutes of baking.
Nutrition
- Serving Size: 1 pocket
- Calories: 280
- Sugar: 1
- Sodium: 450
- Fat: 15
- Saturated Fat: 7
- Unsaturated Fat: 8
- Trans Fat: 0.5
- Carbohydrates: 20
- Fiber: 1
- Protein: 16
- Cholesterol: 55