
Seriously, throw out that can of pre-made stuff gathering dust in the pantry. Once you see how easy it is to get that perfect, bakery-quality texture right on your stovetop, you’ll never go back. I spent way too long wrestling with runny, overly sweet fillings when I first started adapting my family’s slow-cooked comfort food into weeknight recipes. But I cracked the code! This foolproof recipe for thick and juicy cherry pie filling from scratch is my pride and joy. It’s ridiculously quick, incredibly flavorful, and uses simple techniques to guarantee sliceable perfection every single time. Trust me, you have the dexterity for this!
- Why This Homemade Cherry Pie Filling Recipe Works (The Dexterity Difference)
- Essential Ingredients for Perfect Cherry Pie Filling
- How to Make Thick Cherry Pie Filling From Scratch
- Tips for the Best Cherry Filling Recipe Success
- Versatile Uses for Your Homemade Cherry Pie Filling
- Storage and Reheating Your Cherry Pie Filling
- Frequently Asked Questions About Cherry Pie Filling
- Nutritional Snapshot of This Easy Cherry Pie Filling
- Share Your Homemade Cherry Pie Filling Creations
Why This Homemade Cherry Pie Filling Recipe Works (The Dexterity Difference)
I know you’ve been there: cutting into a pie, only to have the filling suddenly ooze out looking more like cherry soup than a rich topping. That was my reality until I focused on two non-negotiable elements: the perfect ratio of starch and heat management. That’s what makes this the absolute best cherry filling recipe you’ll try.
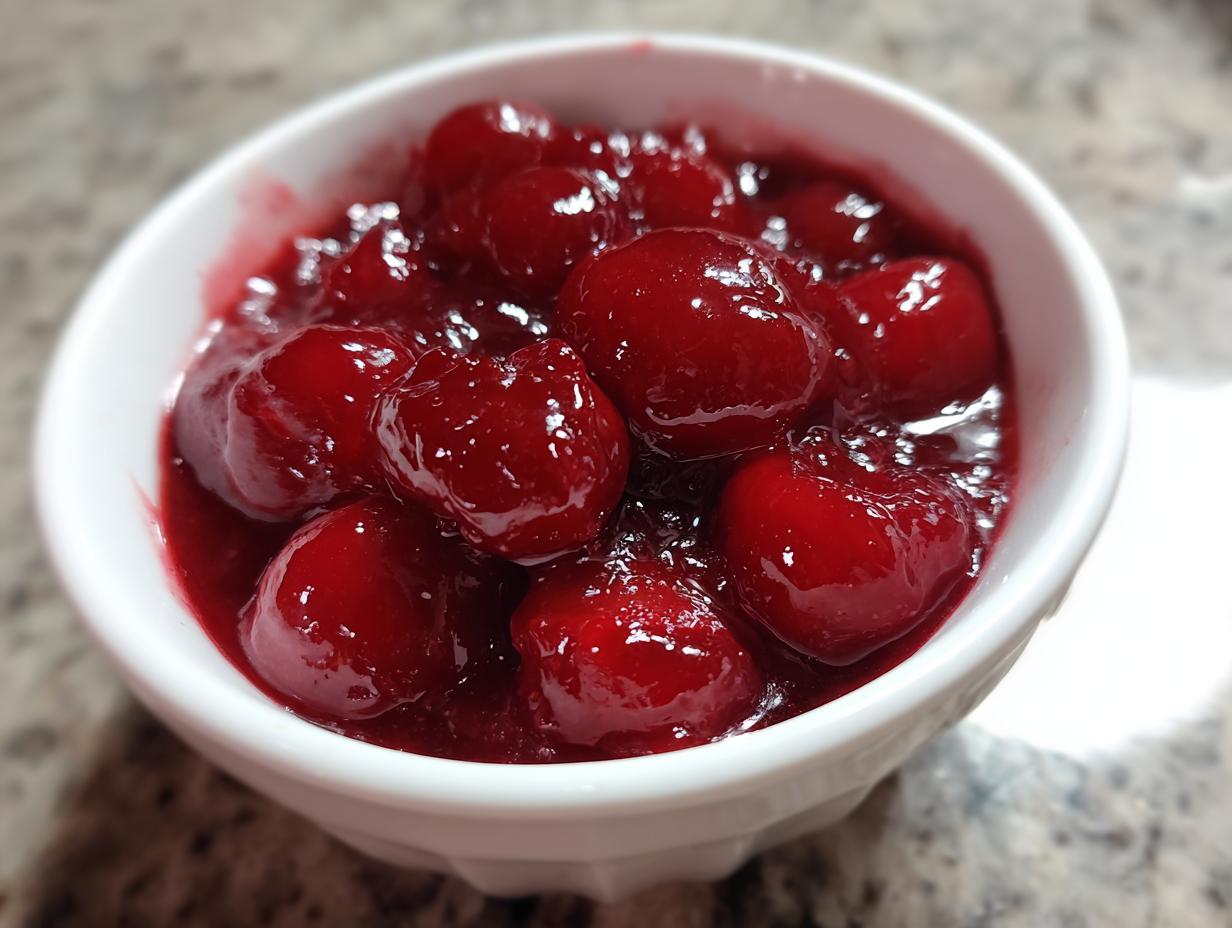
We aren’t messing around with vague instructions. This method turns out a truly thick cherry pie filling that holds its shape beautifully. I vividly remember the first time I saw the mixture bubble up, transforming instantly into a glossy, jewel-toned sauce—it felt like magic! It delivered that intensely juicy cherry filling from scratch look without any of the dreaded runniness.

It’s all about developing confidence with the cornstarch slurry right on the stovetop. If you loved how simple our apple pie filling was, you’re going to fly through this one. You can even check out my tips for using stovetop methods on other fruits right here: stovetop apple pie filling.
Essential Ingredients for Perfect Cherry Pie Filling
Before we turn up the heat, let’s talk about what you need. Remember, we aren’t relying on that stuff from a can—we want vibrant, real flavor! This list is short, which makes the resulting homemade cherry filling recipe even sweeter.
You’ll need your cherries, water, sugar, salt, and the secret weapon: cornstarch. Make sure you whisk that cornstarch together with the sugar *before* it hits the pot. No one wants little white flavor bombs floating around in their perfectly juicy sauce, right?
Cherry Selection and Preparation for Your Cherry Pie Filling
For this recipe, you have a couple of awesome choices! If you’re grabbing fresh cherries, make sure they are lovingly pitted—that’s the only tricky step. If you’re using frozen cherries, and honestly, I often do because they’re so convenient, please, please, please don’t thaw them!
Using them straight from the freezer actually helps control the cooking process and prevents the mixture from getting too liquidy right at the start. While using canned versus homemade cherry filling is a debate for another day, using fresh or frozen lets you control the sugar, and that’s where the real flavor wins are made. Sweet cherries work great, but if you like that gorgeous, eye-watering tartness, grab the sour ones!
How to Make Thick Cherry Pie Filling From Scratch
Okay, deep breaths! This is where the magic really happens, transforming simple fruit into that beautiful, glossy sauce you dream about. It’s genuinely quick, honestly taking less than 10 minutes of active cooking for this from scratch pie filling.
First thing: Get your cherries and water into a saucepan—don’t sweat the frozen ones, they’ll play nice. Then, you bring in that pre-mixed sugar and cornstarch. Heat it over medium. Here’s what I need you to commit to: Stir constantly! I mean it. You need to keep that mixture moving so the cornstarch dissolves evenly and doesn’t just glue itself to the bottom of your pan.
Watch closely. You’ll see it start to change; it goes from watery to thick almost before your eyes. We need that glorious bubble! Keep referring to the full instructions for all the little details, but know that stirring constantly until it coats the back of a spoon is that golden signal that you’ve nailed the texture.

Achieving the Ideal Consistency for Your Cherry Pie Filling
That bubbling stage isn’t just for show, darling. You actually have to cook out the raw starch flavor, so don’t pull it off the heat too soon! It needs that good, rolling boil for a minute or two to completely activate the cornstarch and give you that sturdy, sliceable filling.
Now, if you want to go above and beyond—like, truly achieve that intensely thick cherry pie filling you see in the fancy bakery windows—I have a little trick for you. If you taste it while cooking and think, “Hmm, still a little loose for my liking,” just grab an extra teaspoon of cornstarch. Whisk it with a tablespoon of cold water (it has to be cold!) until it’s smooth, then stir that slurry right into the hot filling during that last minute of cooking. It locks in that thickness immediately!
It’s one of those simple techniques that makes all the difference. It ensures that when you dollop this vibrant cherry pie filling onto your dessert, it stays exactly where you put it. For more ways I use small technique adjustments to boost flavor and texture, check out my tips on making thick and creamy eggnog—you’ll see the same principles apply!
Once it’s thick, take it off the heat fast. You don’t want to overcook the cherries! Next, hit it with that lemon juice and almond extract. That final mix-in elevates the whole experience. You can get the full scoop on cooking times and temperatures from the source link here: 15-Minute Homemade Cherry Pie Filling.
Tips for the Best Cherry Filling Recipe Success
We’ve got the texture locked down, but flavor is where we really shine! Anyone can boil sugar and cornstarch, but making it taste like something from a high-end bakery? That takes a little dexterity. This is what separates a good cherry pie filling from the best cherry filling recipe!
Don’t skip that tiny pinch of salt, even though we’re making something sweet. Salt is crucial—it just wakes up the fruit flavor and keeps the filling from tasting flat. And hey, I know almond extract sounds fancy, but trust me on this one. A little splash cuts through the sweetness and really amplifies that dark, rich cherry note. It makes people think you slaved away for hours, when really, you were done in 20 minutes!
Now, let’s talk cooling. Once you get that perfect consistency and stir in your lemon juice, you need to get it into a separate bowl, and this is crucial: press plastic wrap directly onto the surface of the filling.
If you just let it sit uncovered, you get that nasty, gummy skin forming on top. That skin gets incorporated into your beautiful work when you try to stir it later, and it totally ruins that smooth, luscious texture we worked so hard for. I learned that trick when I was making my famous caramel recipe—it works every time to keep things fresh and smooth! You can see how I keep those caramels perfect here: soft, chewy sea salt caramels.
Once you’ve covered it right to the surface, chill it completely. Chilling isn’t optional; it lets the starch fully set up. If you rush it, you’re back to soup territory. You can find heaps of great inspiration for using this filling in pies over at Laura’s Bakery, too; check out her version of the homemade cherry pie filling recipe.
Versatile Uses for Your Homemade Cherry Pie Filling
The best part about making a batch of this incredible cherry pie filling is that you aren’t locked into just one dessert! That thick, bakery-style consistency means it stays put whether it’s sitting on top of something or layered inside. Honestly, if you go to the trouble of making this shiny sauce, you should use it everywhere, not just for pie crusts.
Think about elevating your breakfast! A spoonful dolloped right onto waffles or pancakes turns an ordinary morning into something special. It’s also unbelievable as a vibrant cherry dessert topping over vanilla ice cream or baked brie. I even swirl it into my baked goods for an extra burst of fruit flavor.
For my non-baking friends, listen up: This is the perfect component for making a stunning no-bake dish. Try spooning it over my chocolate chip cheesecake right before chilling—the tartness cuts through the richness perfectly. It’s also divine warmed slightly and piped into my cinnamon roll bites instead of plain icing. See? Versatility is key when you’re cooking with dexterity!
Storage and Reheating Your Cherry Pie Filling
We’ve done the hard work making this perfect cherry pie filling, so we need to treat it right! My biggest piece of advice here is patience—don’t even think about putting that warm filling into your pie crust.
It absolutely needs at least two hours in the fridge to chill down completely. That resting time is when the cornstarch really sets and locks in that beautiful, thick consistency we aimed for. Don’t skimp on this step!
If you have leftovers, this homemade cherry filling keeps beautifully in an airtight container in the refrigerator for about a week. You can also freeze it! Portion it out into small bags or containers before freezing, and it’s ready to go whenever you need a quick dessert topping later on.
When you pull it out of the freezer, just let it thaw in the fridge overnight. If you need it warm right away—say, for topping my moist pumpkin bread—you can heat it gently on the stovetop or microwave it in short bursts, stirring often until it’s soft again. Remember, reheating makes it thinner, so it’s best used as a sauce when warm! You can find that recipe for easy, super moist, classic pumpkin bread when you’re ready for the next project!
Frequently Asked Questions About Cherry Pie Filling
I get so many great questions about this recipe because everyone wants that perfect, glossy texture! Dealing with fruit fillings can feel tricky, but once you know the little tricks, it’s easy to nail it every time. Here are the things I hear most often about making great cherry pie filling.
Can I use canned cherries to make this cherry pie filling recipe?
Technically, yes, you totally can swap in canned fruit if you’re in a real jam—I’ve done it when I needed a super quick cherry filling! But here’s the deal: Canned cherries are already cooked and usually suspended in a runny syrup. If you use them, you’ll need to drain them really well and probably cut the added water significantly, plus you’ll need to boil it much longer to get that thickness.
To be honest, using the fresh or frozen fruit gives you that bright, intense cherry flavor that makes this recipe shine. If you stick to the recipe exactly, you get a much better result than trying to salvage the texture of canned stuff!
How do I adjust the sweetness for a sour cherry filling recipe?
This is a fantastic question because the character of the fruit changes everything! If you’re using naturally tart or sour cherries, you definitely need to adjust the sugar up slightly to balance that beautiful tang. I usually recommend starting with the sugar listed, tasting it right before you add the lemon juice near the end, and if it makes your mouth pucker a little too much, stir in an extra tablespoon or two of sugar until it tastes balanced to you.
Remember, the lemon juice we add is there for brightness, not sweetness, so you want the cherries themselves to taste full before you add that final citrus kick. It helps create that complex, sweet-tart profile!
What is the best pie filling stabilizer besides cornstarch?
Cornstarch is my go-to because it’s fast and readily available, but if you’re looking for alternatives or better pie filling stabilizer tips, you have a couple of good options! My runner-up is definitely tapioca starch.
Tapioca tends to give a slightly glossier, more translucent finish than cornstarch, and some bakers swear by it for that classic, clear look. You can usually substitute it in a 1:1 ratio for cornstarch, but be warned—tapioca needs a slightly longer cook time to fully activate. Arrowroot powder is another option, but it can break down if boiled too long, so you have to be super careful with the heat!
For more appliance tips that make my kitchen life easier, you should check out how I use my appliances for things like my cream cheese corn casserole. Sometimes the tool makes all the difference!
Nutritional Snapshot of This Easy Cherry Pie Filling
Now, I know when we’re making things from scratch, we aren’t usually counting every little calorie, but I do like to give you a good snapshot of what’s in this glorious cherry pie filling. It’s just good to know what you’re working with, especially when you plan on using this as a topping for waffles or even swirling it into yogurt!
Keep in mind, this is just an estimate based on the ingredients listed—the amount of sugar you use, and whether you choose sweet or sour cherries, will definitely change the final tally for your batch. I calculated this based on yielding about 4 cups of filling, and then calculated the averages per half-cup serving size:
- Serving Size: 1/2 cup
- Calories: About 210
- Sugar: 35 grams (Yes, it’s fruit and sugar, but oh so worth it!)
- Fat: 0.2 grams
- Protein: 0.5 grams
- Carbohydrates: 54 grams
- Cholesterol: 0 mg
As you can see, it’s fat-free and cholesterol-free, which is great news! The bulk is sugar and carbs because, well, that’s the nature of a rich, sweet fruit topping. But hey, it’s honest food, made well, and that’s what the Dexterity mindset is all about!
Share Your Homemade Cherry Pie Filling Creations
Alright, my fellow food dexterists, you’ve done the heavy lifting! You’ve whisked, you’ve stared intently at the bubbling pot, and you’ve achieved that perfect, jewel-toned, sliceable texture. Now, I absolutely need to see what you’ve made!
Did you use this in a classic pie? Did you try swirling it into my no-bake cheesecake? Or maybe you just ate half the batch with a spoon straight from the bowl because it smelled too good to resist—I won’t judge!
Please take a moment to rate this cherry pie filling recipe down below. And more importantly, leave me a comment! I want to hear all the details—was the thickness exactly what you wanted? Did the almond extract make a difference for you?
Snap a photo and tag me on social media! Seeing your creations pop up really fuels my kitchen creativity. Connecting with you all is the best part of what I do here at Food Dexterity. If you ever have a challenge or just want to share a win, don’t hesitate to reach out via my contact page. Happy baking, everyone!
PrintFoolproof Thick & Juicy Homemade Cherry Pie Filling (From Scratch)
Make the best thick cherry pie filling from scratch using fresh or frozen cherries. This easy recipe yields a juicy, bakery-style topping perfect for pies, cheesecakes, or waffles.
- Prep Time: 10 min
- Cook Time: 10 min
- Total Time: 20 min
- Yield: About 4 cups filling 1x
- Category: Dessert Component
- Method: Stovetop Cooking
- Cuisine: American
- Diet: Vegetarian
Ingredients
- 4 cups fresh or frozen sweet or sour cherries, pitted
- 1 cup granulated sugar
- 1/2 cup water
- 1/4 cup cornstarch
- 1 teaspoon lemon juice
- 1/2 teaspoon almond extract (optional)
- Pinch of salt
Instructions
- If using frozen cherries, do not thaw them first. Place the cherries and water in a medium saucepan.
- In a small bowl, whisk together the sugar and cornstarch until no lumps remain. This prevents clumps in your filling.
- Pour the sugar and cornstarch mixture over the cherries and water in the saucepan. Stir gently to combine.
- Place the saucepan over medium heat. Cook, stirring constantly, until the mixture begins to bubble and thicken significantly. This usually takes 5 to 8 minutes.
- Once the cherry pie filling is thick enough to coat the back of a spoon, remove it from the heat.
- Stir in the lemon juice, almond extract (if using), and salt.
- Transfer the homemade cherry filling to a heatproof bowl. Press plastic wrap directly onto the surface of the filling to prevent a skin from forming while it cools.
- Allow the filling to cool to room temperature, then chill completely in the refrigerator for at least 2 hours before using it in your pie or dessert.
Notes
- For a bakery-style cherry filling, use sweet cherries and increase the sugar slightly. For a tart flavor, use sour cherries.
- If you want an extra thick cherry pie filling, dissolve 1 teaspoon of cornstarch in 1 tablespoon of cold water and stir it into the hot mixture during the last minute of cooking.
- This filling works perfectly as a cherry dessert topping for ice cream or waffles.
Nutrition
- Serving Size: 1/2 cup
- Calories: 210
- Sugar: 35
- Sodium: 5
- Fat: 0.2
- Saturated Fat: 0
- Unsaturated Fat: 0.1
- Trans Fat: 0
- Carbohydrates: 54
- Fiber: 2
- Protein: 0.5
- Cholesterol: 0