

Oh, when that first truly crisp autumn air hits, what is the very first thing your kitchen starts whispering about? For me, it’s comfort. It’s that deep, warm craving you just can’t ignore, and while I love a flaky pie crust as much as the next person, who has the time sometimes? That’s where my reality as a busy cook—the one who came from chasing deadlines in Austin—comes in. I needed that nostalgic, home-baked flavor without needing a whole afternoon commitment.
So, forget fuss! I’m handing you the recipe that brings all the cozy vibes of Thanksgiving right to your table without the pastry drama: the Classic Old-Fashioned Apple Crisp with Buttery Oat Crumble. This isn’t some fussy, complicated thing; it’s real food dexterity at work—flavor packed into simplicity. This easy apple crisp delivers thick, tender, cinnamon-spiced apples coated under a layer of crunchy, buttery oats. Trust me, once you pull this out bubbling hot, topped with melting vanilla ice cream, nobody will care that you skipped rolling out dough!

- Why This Classic Old-Fashioned Apple Crisp is Your New Favorite Fall Dessert Recipes
- Gathering Ingredients for the Best Apple Crisp Recipe
- Step-by-Step Instructions for a Classic Apple Crisp
- Tips for Success When Making Apple Crisp
- Serving Suggestions for Your Homemade Apple Dessert
- Storage & Reheating Instructions for Leftover Apple Crisp
- Frequently Asked Questions About This Easy Apple Crisp
- Nutritional Information for This Apple Crisp
- Share Your Cozy Autumn Baking Ideas
Why This Classic Old-Fashioned Apple Crisp is Your New Favorite Fall Dessert Recipes
I know you’re looking for that perfect bite between pie and dump cake, right? That’s exactly what this old-fashioned apple crisp delivers. It’s the ultimate autumn hug in a dish, and honestly, it’s even better than most elaborate **Fall Dessert Recipes** out there because it respects your time. When the leaves start turning, I want something warm and comforting on the table fast. This recipe is the definition of **Comfort Food Desserts** done right.
Why does this one beat everything else? It’s down to three simple things that I always look for in a great homemade dessert:
- It’s ridiculously easy: Just toss and top!
- The apples turn out unbelievably tender, swimming in cinnamon spice.
- That topping? It bakes up perfectly buttery and crunchy every single time.
Plus, if you love my baked goods, you might also enjoy my recipe for Apple Snickerdoodle Bars; they hit that same cozy spot!
Quick Apple Dessert Prep Time Breakdown
This is where this recipe really shines for my busy schedule. When I say quick, I mean it. You only need about 15 minutes total to get this pie dish ready for the oven. Just 15 minutes of active work! After that, it’s hands-off baking time while you set the table or relax a bit. Forty minutes later (about 40 minutes total cook time), you have dessert ready. That makes this a fantastic **Quick Apple Dessert** for weeknights or even last-minute company popping over!
Gathering Ingredients for the Best Apple Crisp Recipe
Pulling together an **apple crisp** is so satisfying because the ingredient list is straightforward—no weird specialty items needed. I always keep my pantry stocked for **Autumn Baking Ideas** because you never know when the craving will hit! When gathering these components, remember that quality really impacts the final texture, especially for that coveted topping.
You will need everything listed here, measured carefully:
- 6 medium apples (peeled, cored, and sliced!)
- 1/4 cup granulated sugar
- 1 tablespoon all-purpose flour
- 1 teaspoon ground cinnamon (don’t skimp here!)
- 1/4 teaspoon ground nutmeg
- 1 tablespoon lemon juice
- 1/2 cup all-purpose flour (for the topping)
- 1/2 cup rolled oats (this is important!)
- 1/2 cup packed light brown sugar
- 1/4 teaspoon salt
- 1/2 cup (that’s one full stick!) cold unsalted butter, cut into small pieces
If you have a little time, check out my recipe for Homemade Applesauce; it reminds you what fresh ingredients taste like!
Ingredient Notes and Substitutions for Your Apple Crisp
Okay, let’s talk apples. I always recommend using a mix to get the best flavor profile—something tart that holds its shape well, like Granny Smith, mixed with something sweeter and softer, like Honeycrisp or Fuji. That balance is what makes this the **Best Apple Crisp Recipe**.
For the **Oat Topping Recipe**, you absolutely must use rolled oats (old-fashioned). Those instant, quick-cook oats will turn to mush and ruin the crunch factor we are aiming for. We need structure!
Finally, about the butter: yes, it needs to be cold! If you find yourself completely out of butter, you can substitute high-quality shortening, but I’ll warn you, you lose that rich, classic dairy flavor that makes this topping so delicious. Butter is worth it for this **simple apple crumble**.
Step-by-Step Instructions for a Classic Apple Crisp
Now, let’s get down to the real joy of making this dessert! This process is so satisfying and rhythmic; you’ll feel like a seasoned baker in no time at all. We are going to tackle the apples first, then build that amazing **Buttery Crisp Topping Recipe**. Follow these simple numbered steps, and you are guaranteed a magnificent apple crisp.
- First things first: Fire up that oven! You want it set to 375°F (190°C). While it heats up, get your 8×8 baking dish lightly greased. Don’t skip this step, or cleanup will be a nightmare!
- In a big bowl, gently toss your prepared apple slices. Make sure they are well coated with the granulated sugar, that one tablespoon of flour, cinnamon, nutmeg, and the lemon juice. We just want them coated nicely—no raw spots showing—so they don’t taste bland next to that sweet topping.
- Spread those spiced apples evenly across the bottom of your baking dish. Try to keep them relatively level so they cook at the same rate.
- Now, for the real star—the topping! In a separate medium bowl, combine the 1/2 cup flour, the rolled oats, the brown sugar, and salt. Mix these dry ingredients well so everything is invited to the party.
- Here is the crucial part for the **Best Apple Crisp Recipe**: Drop in your cold, cubed butter pieces. You need to cut this in quickly, either with a pastry blender or using your fingertips. Stop working the mixture when it mostly resembles coarse crumbs, maybe with a few pea-sized chunks of butter remaining. Those chunks are what make the topping delightfully crisp!
- Take all that crumbly topping mixture and sprinkle it right over the apples in an even layer. Press down just a tiny bit—we want to keep it light for maximum crunch.
- Pop it into the hot oven and let it bake for 35 to 45 minutes. You’ll know it’s done when the topping is golden brown and you see the filling bubbling around the edges like thick lava.
- When it comes out, you absolutely have to let it rest. Seriously, let your apple crisp cool down for at least 15 minutes on the counter. I usually check my apples with a fork after that rest time; they should slice right through without any resistance. If they are still firm, pop it back in for five more minutes!
If you’re looking for another easy, autumnal treat, you should really check out my recipe for Simple Apple Crumble—it’s very close to this one!
Preparing the Cinnamon Spiced Apples Filling
Think of the filling as the tender heart of the dessert; it needs all the spice it can get! The lemon juice is important not just for flavor balance against the sweetness, but it also helps keep those pale apple slices from getting muddy brown while they wait. The goal here is total, even coating before they head into the oven to soften up!
Creating the Perfect Buttery Crisp Topping Recipe
This topping wins awards in my kitchen, honestly. The secret is that cold butter and speed. When you are cutting it in, don’t worry if it looks a little shaggy; that roughness is your friend! If you mix until it’s perfectly sandy, you end up with a texture closer to powdered sugar once baked. We want little pockets of buttery goodness that crisp right up! That coarse texture is the difference between a good crisp and the *best* crisp.
Tips for Success When Making Apple Crisp
Even with an easy **apple crisp** recipe like this, a few little tried-and-true tricks can take it from good to absolutely legendary. Since I’ve made this countless times while juggling work and life, I’ve learned exactly what makes the apples tender and keeps that topping perfectly golden brown. It all comes down to watching your oven during the final stretch!
My main piece of advice for any home baker is to watch the color, not just the clock. If you notice that beautiful oat topping starting to look too dark—I mean really deep brown—before the apples underneath are totally soft? Don’t panic! This happens often, especially if your apples were extra juicy or your oven runs hot. Just grab a piece of aluminum foil and loosely tent it over the baking dish for the last 10 minutes of baking time. This shields the top from too much direct heat while the filling finishes bubbling away happily underneath.
Now, listen close, because this next step is non-negotiable for the best texture. If you cut into this right out of the oven, the filling is going to run everywhere, and you’ll lose that beautiful, thick sauce we worked for. You really, really need to let your wonderful, hot **homemade apple dessert** rest for a good 15 minutes on the counter. This mandatory resting period lets those juices settle down and thicken up just right. It firms up the whole thing, making it stackable and perfect to serve. If you skip this, you end up with apple soup, trust me! A little patience here makes for a much better final presentation, which I used to care about constantly when I was event planning!
If you want another amazingly easy baked apple option without the topping fuss, you have to check out my Apple Pie Dump Cake recipe. It’s pure simplicity!
Serving Suggestions for Your Homemade Apple Dessert
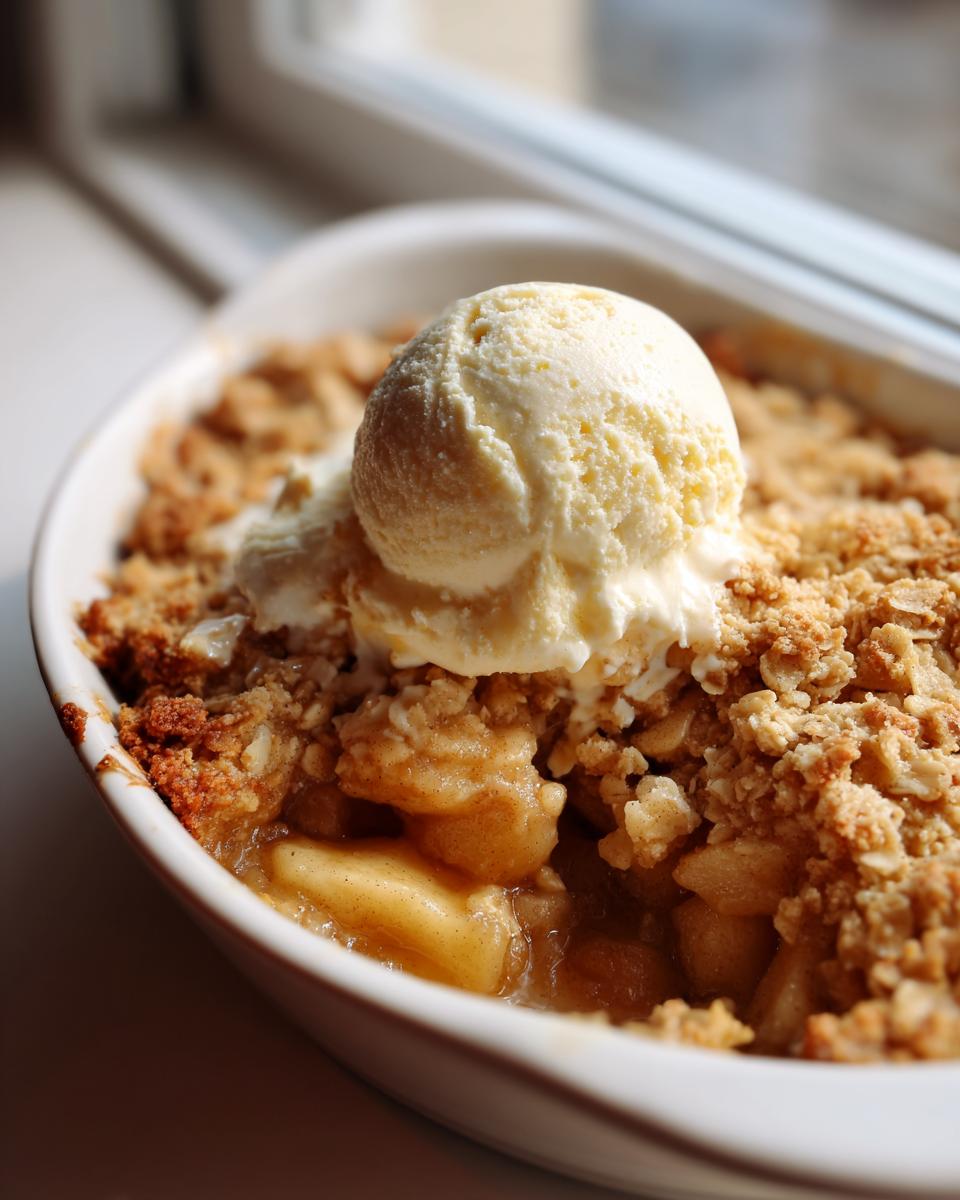
Okay, you’ve done the work, the apples are tender, and that buttery crisp topping is shimmering—now comes the best part of any **Homemade Apple Dessert**! You have to serve this warm. I mean piping hot, straight from its 15-minute cool-down period. The contrast between the warm cinnamon-spiced apples and the cold, creamy topping is just heaven on earth.

If you take away only one piece of advice about this **apple crisp**, let it be this: vanilla ice cream is non-negotiable! That cold, creamy vanilla melting down into those hot oat crumbles is pure magic. It’s literally the best way to eat it, period. But if you’re feeling extra fancy, maybe you have some time before the guests arrive, you could try making my recipe for Butter Pecan Ice Cream for a real showstopper. Sometimes a little drizzle of warm caramel sauce is also just what the doctor ordered for those extra sweet cravings. But honestly, the ice cream is where it’s at!
Storage & Reheating Instructions for Leftover Apple Crisp
The best part about an amazing **apple crisp** is that it’s usually better the next day, provided you store it right! When I plan ahead, I sometimes make a half-batch just to have leftovers for a cozy breakfast (don’t judge!). Because this recipe uses so much butter in the topping, it keeps really well, but temperature matters.
If you have leftovers and they’ve completely cooled down, you can definitely leave that baking dish on the counter, covered tightly with plastic wrap or foil, for about a day. It’s fine at room temperature for 24 hours, especially since it’s being served as a dessert. After that, you’re going to want to move it to the fridge. In the refrigerator, stored tightly covered, this lasts a solid four or five days. It’s still delicious, though the topping will start to lose some of its incredible crunch.
If you’re storing it in the fridge, don’t even think about reheating it in the microwave first, okay? The microwave is only good for warming the apples quickly, but it turns that beautiful oat topping into a soggy mess instantly. I’ve learned this the hard way! To bring back the original magic and get that crisp topping singing again, you need dry heat. Pop your serving size onto a small, oven-safe plate and heat it at 350°F (175°C) for about 8 to 10 minutes. That gentle heat warms everything through and re-crisps the oats perfectly. If you only have a minute, a quick 30 seconds in the microwave *then* a quick toast under the broiler (watch it like a hawk!) works in a pinch, too.
If you enjoy simple baking, you might also love scrolling through all my simple dessert recipes while you wait for those leftovers to warm up!
Frequently Asked Questions About This Easy Apple Crisp
I always get the same handful of questions when people try this **easy apple crisp** for the first time, and that’s totally fine! Cooking should be intuitive, not intimidating. Having the answers ready means you can bake with total confidence. Here are the things I hear most often about making the **best apple crisp recipe**!
Can I make the apple crisp ahead of time?
Oh yes, that’s one of the great things about this **homemade apple dessert**! You can absolutely assemble the whole thing—apples mixed, topping sprinkled—and cover the dish tightly. If you assemble it ahead of time, keep it in the refrigerator for up to 24 hours. When you’re ready to bake, you might need to add about 10 to 15 minutes onto the baking time since everything is starting out chilled instead of at room temperature. Just keep an eye on it until you see those satisfying bubbles!
What is the best apple to use for apple crisp?
I always tell people that using just one type of apple is selling your **apple crisp** short! For the absolute best flavor and texture, you want a mix. I strongly suggest using at least two different kinds. A combination of a tart, firm apple like Granny Smith—which holds up beautifully to baking and doesn’t turn into total mush—paired with a sweeter apple like Honeycrisp or Gala gives you that perfect sweet-and-tart balance in every bite. That combo makes this a true delight among **Fall Dessert Recipes**!

If you ever have extra apples, you can always check out my guide on easy weeknight dinners—sometimes I sneak applesauce into savory dishes!
Nutritional Information for This Apple Crisp
Now, I know some of you bakers are looking for the hard numbers, and I totally get that! But here’s the deal: When you’re making something this homemade and from scratch, those exact calorie counts can really wiggle around on you. It depends entirely on the exact size of your apples, which brand of butter you used, and precisely how generous you were sprinkling that topping!
Because I put so much heart into developing this recipe for real life, I focus more on flavor and ease than the fine print. So, consider this disclaimer: The nutritional breakdown for this **apple crisp** is truly just an estimate based on the ingredients I listed in the recipe card. If you use a lighter hand with the brown sugar (I often do when I’m making it for myself!), your numbers will be lower. If you load it up with extra cinnamon—which you should, by the way—that barely changes the fat content!
Bottom line? This is a glorious, comforting, rich **fall dessert recipe**. Enjoy it as the classic treat it is, knowing that the joy it brings is definitely worth the indulgence!
Share Your Cozy Autumn Baking Ideas
Well, we made it! You have navigated the delicious process of transforming simple apples into the most satisfying, comforting **apple crisp** imaginable. I genuinely hope you loved the simplicity of it—the way that buttery oat topping comes out so golden and crunchy is just the best payoff for such a quick effort.
Now that you’ve got this **autumn baking idea** perfected under your belt, I am dying to know what you thought! Did you serve it warm? Did you go for the mandatory scoop of vanilla ice cream, or maybe you got adventurous?
Please, please, drop a rating below right now—those stars help other busy cooks find this recipe when they need a quick **comfort food dessert**. And if you have a moment, leave a quick comment telling me how you customized it or what you served alongside your crisp. Don’t forget that sometimes dinner needs a cozy side too; I have a fantastic Fall Pasta Salad if you’re planning a harvest spread!
If you’re already craving more autumnal deliciousness, I’ve got you covered for those chilly nights. You absolutely need to try my recipe for Pumpkin Dump Cake next week. It’s even easier than this apple crisp and tastes just like a holiday!
Thank you so much for baking with me today. Happy cooking, and enjoy every warm bite!
PrintClassic Old-Fashioned Apple Crisp with Buttery Oat Crumble

Make this easy apple crisp recipe featuring tender, cinnamon-spiced apples under a crunchy, buttery oat topping. It is a perfect comfort food dessert for fall gatherings.
- Prep Time: 15 min
- Cook Time: 40 min
- Total Time: 55 min
- Yield: 6 servings 1x
- Category: Dessert
- Method: Baking
- Cuisine: American
- Diet: Vegetarian
Ingredients
- 6 medium apples (like Granny Smith or Honeycrisp), peeled, cored, and sliced
- 1/4 cup granulated sugar
- 1 tablespoon all-purpose flour
- 1 teaspoon ground cinnamon
- 1/4 teaspoon ground nutmeg
- 1 tablespoon lemon juice
- 1/2 cup all-purpose flour (for topping)
- 1/2 cup rolled oats (not instant)
- 1/2 cup packed light brown sugar
- 1/4 teaspoon salt
- 1/2 cup (1 stick) cold unsalted butter, cut into small pieces
Instructions
- Preheat your oven to 375°F (190°C). Lightly grease an 8×8 inch baking dish.
- In a large bowl, combine the sliced apples, granulated sugar, 1 tablespoon flour, cinnamon, nutmeg, and lemon juice. Toss gently until the apples are evenly coated.
- Spread the apple mixture evenly into the prepared baking dish.
- In a separate medium bowl, prepare the topping. Combine the 1/2 cup flour, rolled oats, brown sugar, and salt. Mix these dry ingredients together.
- Cut in the cold butter using a pastry blender or your fingertips until the mixture resembles coarse crumbs. Do not overmix; some pea-sized pieces of butter are fine.
- Sprinkle the oat topping evenly over the apple mixture in the baking dish. Press lightly.
- Bake for 35 to 45 minutes, or until the topping is golden brown and the apple filling is bubbly and tender when pierced with a fork.
- Remove from the oven and let it cool for at least 15 minutes before serving.
- Serve warm, ideally with a scoop of vanilla ice cream.
Notes
- For the best texture, use a mix of tart and sweet apples.
- If the topping browns too quickly, loosely cover the dish with aluminum foil for the last 10 minutes of baking.
- This dessert tastes best when served warm with creamy vanilla ice cream.
Nutrition
- Serving Size: 1 serving
- Calories: 380
- Sugar: 35g
- Sodium: 150mg
- Fat: 20g
- Saturated Fat: 12g
- Unsaturated Fat: 8g
- Trans Fat: 0.5g
- Carbohydrates: 50g
- Fiber: 5g
- Protein: 4g
- Cholesterol: 50mg