
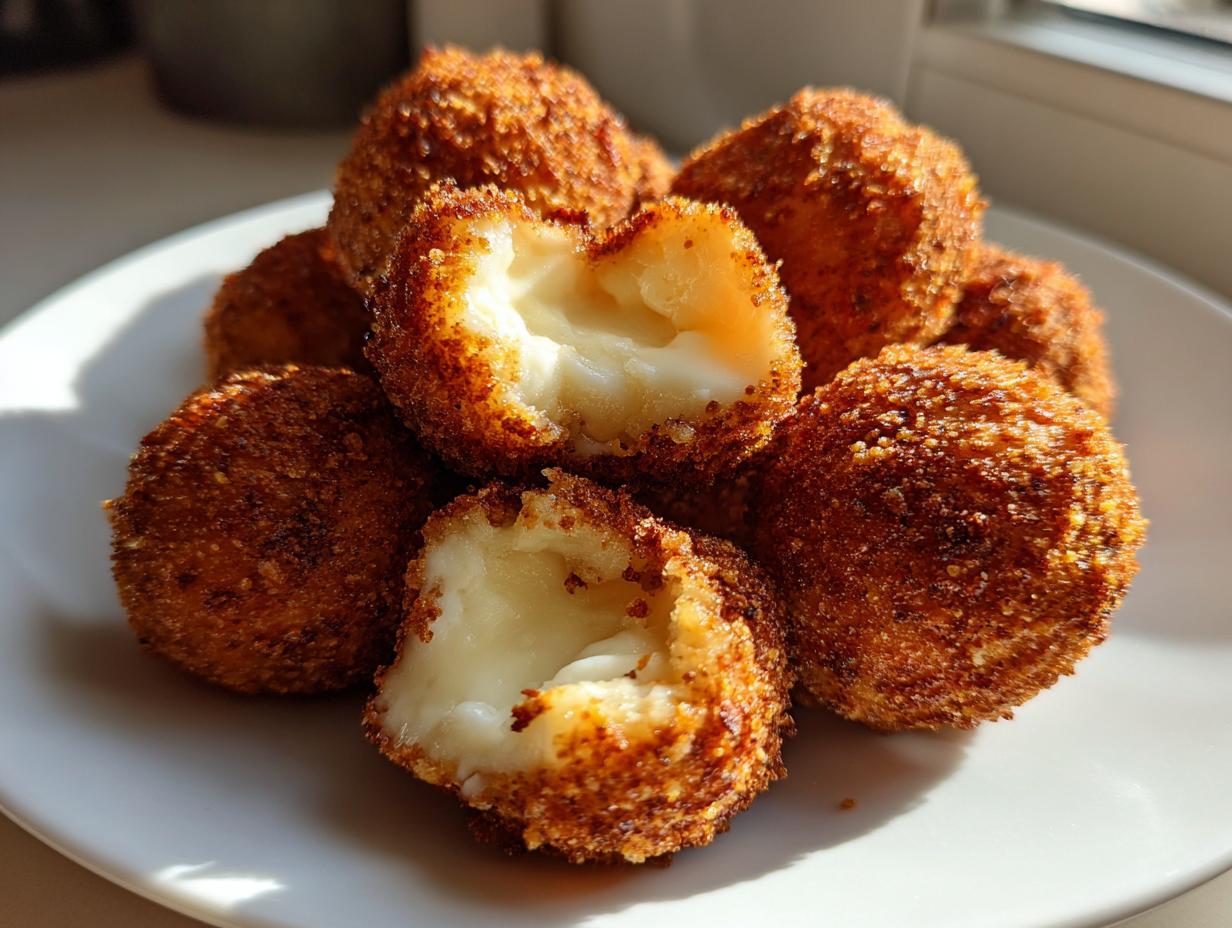
When you’re planning a party, the absolute last thing you want is a fussy appetizer that demands your attention when guests arrive. We all crave that showstopper, that snack that everyone raves about, but without needing a culinary degree to pull it off. That’s where my food dexterity comes in! I’ve taken the idea of a classic cheese ball and miniaturized it, breaded it, and made it crispy. These **goat cheese balls** are utterly addictive: shatteringly crisp on the outside, warm and gloriously creamy on the inside. Trust me, using smart techniques to achieve this gourmet bite makes entertaining so much better. If you need something that screams ‘elegant’ but takes minutes to prep, this is your ticket. I promise this will become one of your very favorite `easy weeknight dinners`—wait, no, that’s wrong! I mean, your absolute favorite `easy party food`!
- Why These Crispy Fried Goat Cheese Balls Are the Best Party Cheese Balls Recipe
- Ingredients for Your Creamy Goat Cheese Bites
- Mastering the Prep: Making Your Goat Cheese Balls Firm
- Step-by-Step Instructions for Perfect Fried Cheese Appetizer
- Quick Cooking Alternative: Air Fryer Cheese Balls
- Serving Suggestions for Your Herbed Goat Cheese Balls
- Make Ahead Party Food Tips for Perfect Goat Cheese Balls
- Variations: Cranberry Pecan Goat Cheese Balls and More
- Frequently Asked Questions About Appetizer Recipes for Guests
- Nutritional Snapshot of These Warm Cheesy Bites
- Share Your Experience Making These Elegant Appetizers
Why These Crispy Fried Goat Cheese Balls Are the Best Party Cheese Balls Recipe
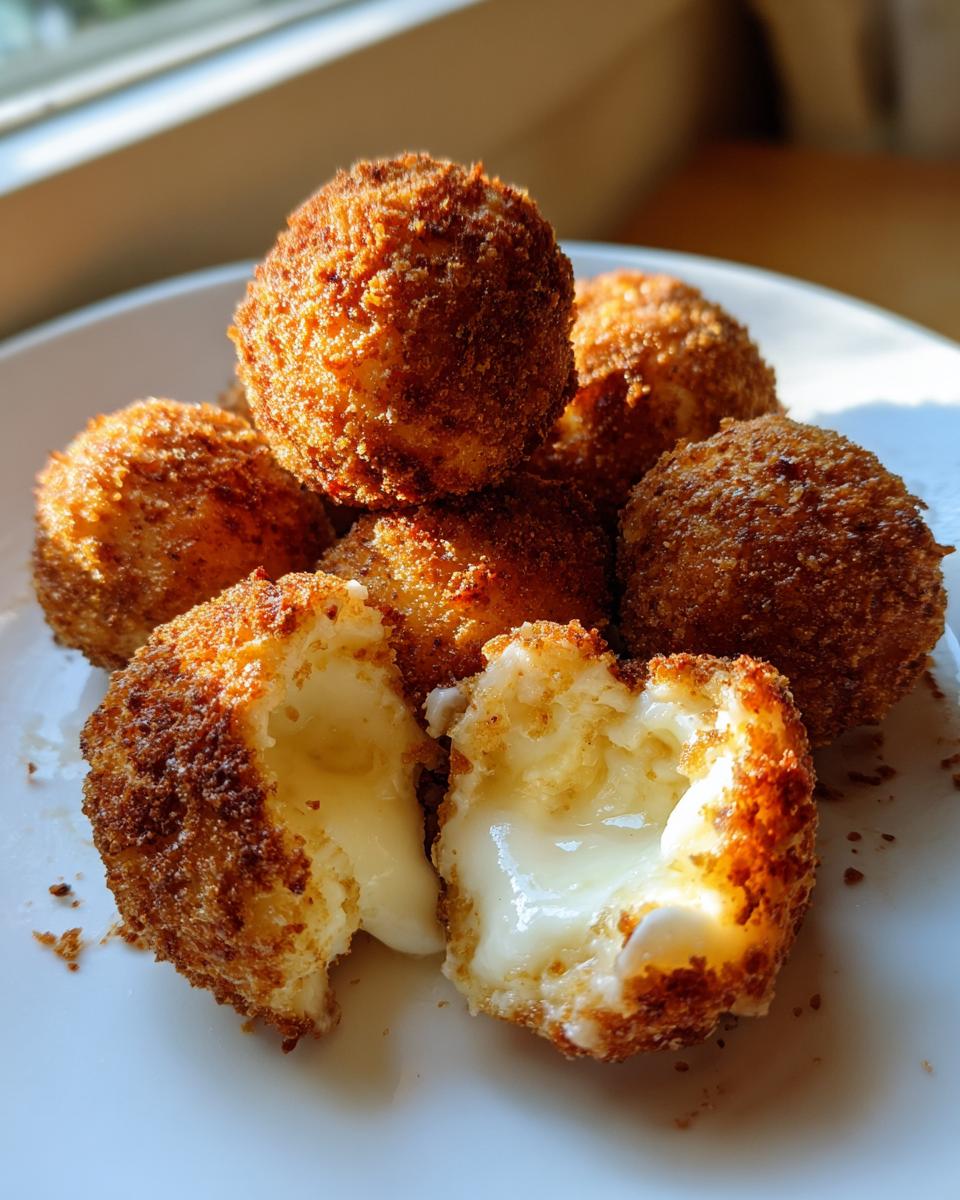
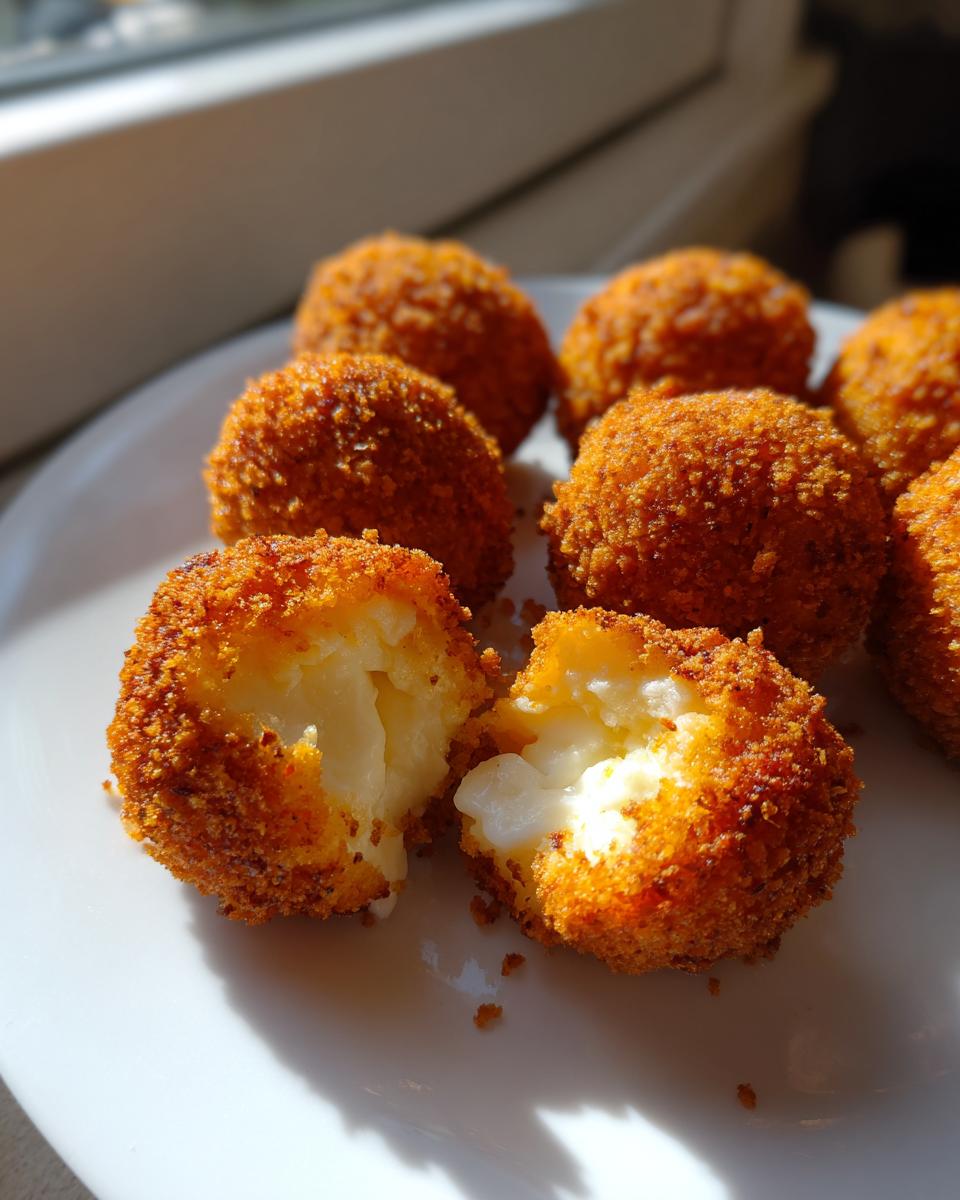
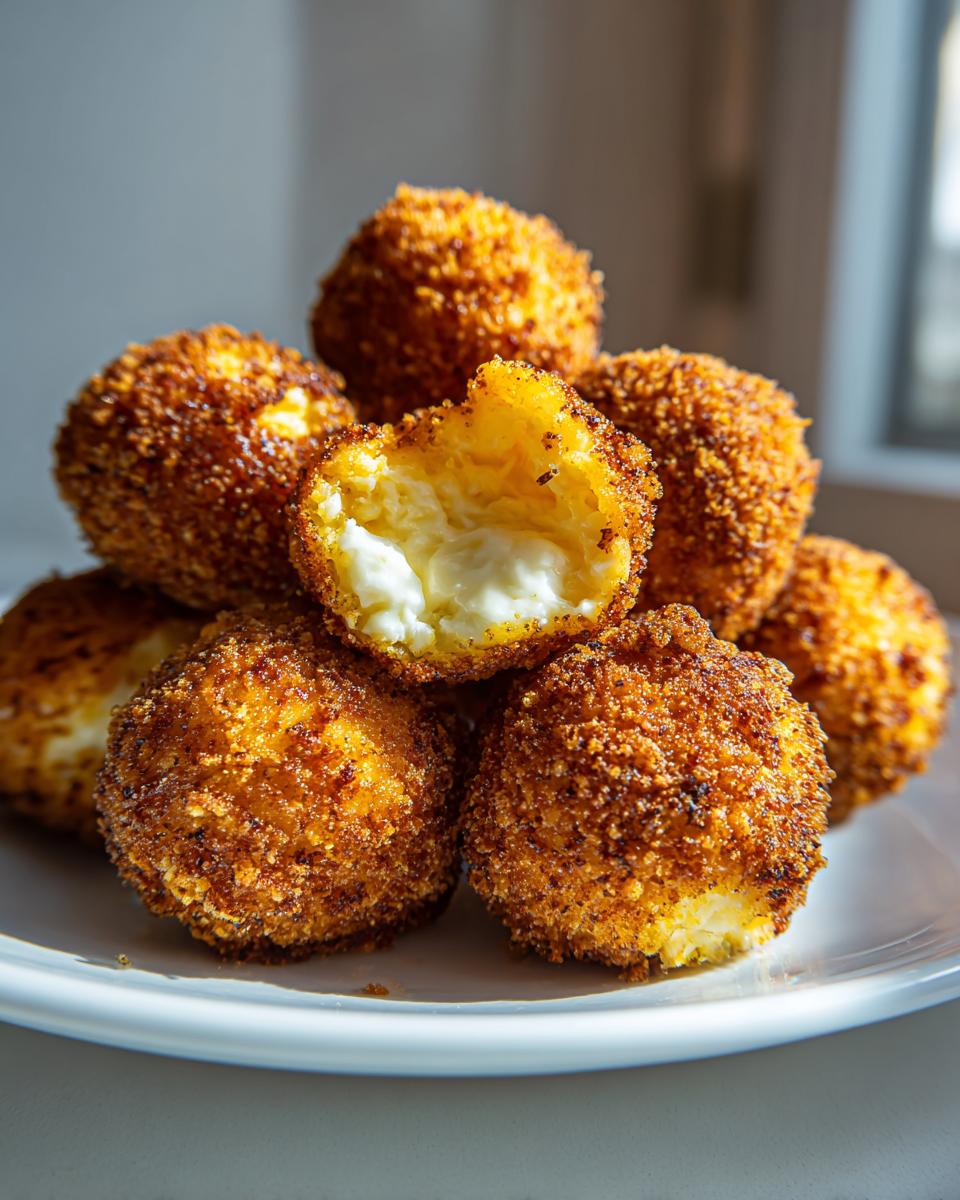
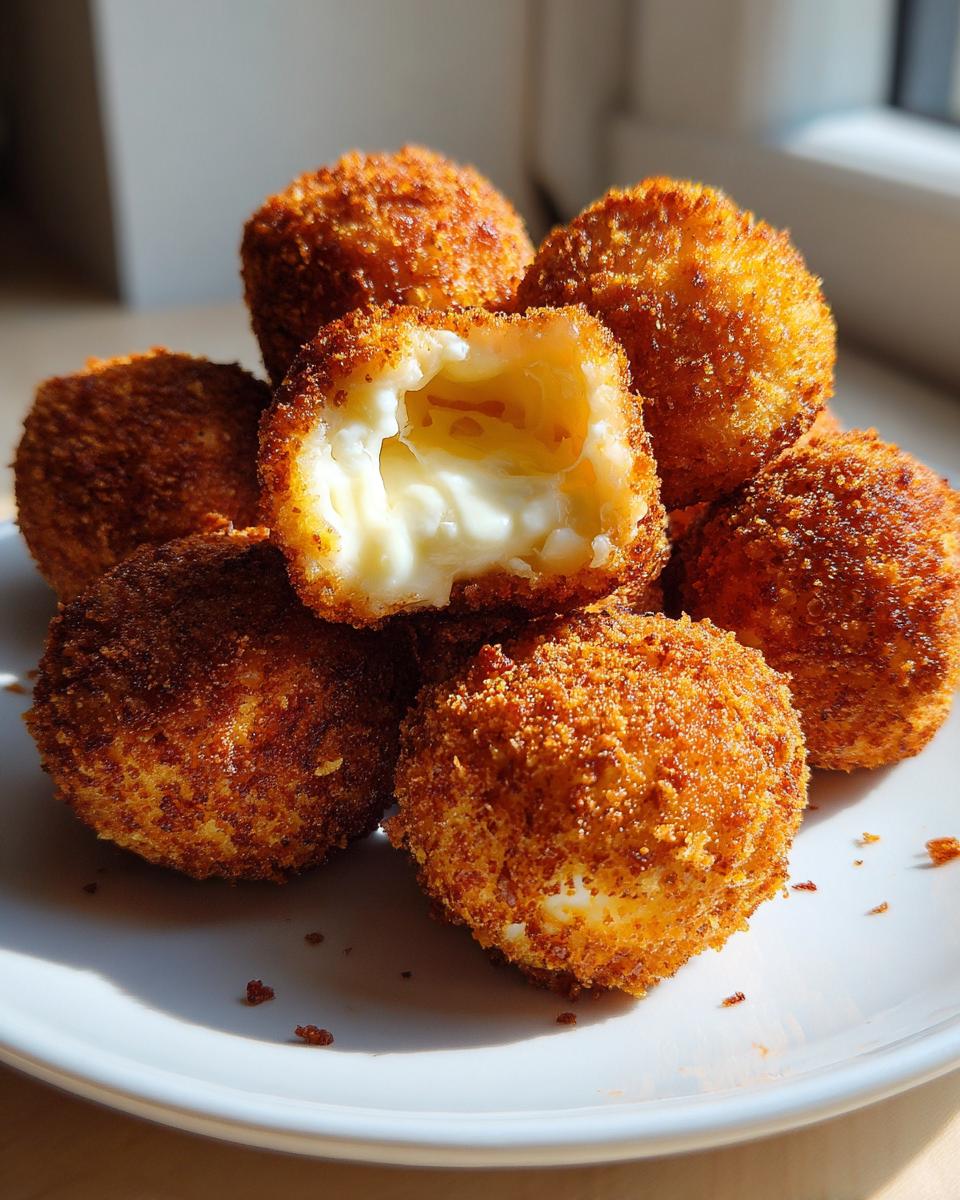
Okay, you’ve seen those big, cold cheese balls sitting out at every single party. They’re fine, but let’s face it—they usually require chips and a fork. These little gems are different! We’re taking something classic and making it instantly better, which is what Food Dexterity is all about. When you bite into these **goat cheese balls**, you get that satisfying PING of crispy coating, followed by the rush of warm, tangy cheese. That texture contrast is everything!
- They hold their shape perfectly, which is a huge win for any host.
- The herbs we mix in make these feel gourmet, not complicated.
- They satisfy that instant craving for `warm cheesy bites` immediately.
Quick Entertaining Snacks Ready Fast
The active prep time here is actually super short. Once you mix your herbs into that soft goat cheese, you’re just rolling, breading, and chilling. Honestly, the chilling time is the most time-consuming part, and that’s just us being patient! Because they cook so fast—just a minute or two in hot oil—you can whip up the next batch seconds before your guests even finish the first plate. Perfect for those last-minute decisions to have people over!
Dual Cooking Methods for Perfect Goat Cheese Balls
I developed this recipe knowing not everyone loves deep frying, and that’s okay! While frying gives you that unbeatable, puffy crispness, I know many of you are looking for healthier or less messy options. So, I included full instructions for the air fryer, too. Whether you call them `Air Fryer Cheese Balls` or the traditional version, you get that amazing creamy pocket of cheese every single time. It just depends on your mood!
Ingredients for Your Creamy Goat Cheese Bites
When you’re making something this simple, the quality and preparation of your ingredients really shine through—so let’s make sure we have everything ready to go! For these wonderfully tangy and creamy cheese bites, we are keeping the flavor profile savory and very straightforward. Remember, the key to success here is using the right kind of cheese and making sure your breading station is laid out perfectly. Before we start rolling, let’s make sure your list matches mine. Finding these exact items will set you up beautifully for success in making these `simple dessert recipes`—oops, appetizers, I mean appetizers!
- 8 ounces soft goat cheese, make sure it’s room temperature!
- 1/4 cup grated Parmesan cheese (the finely grated kind works best here).
- 1 teaspoon dried thyme (it adds that lovely earthy note).
- 1/2 teaspoon garlic powder.
- 1/4 teaspoon black pepper.
- 1 large egg, just give it a light whisk.
- 1/2 cup all-purpose flour.
- 1 cup panko breadcrumbs (Please, use panko! It’s what makes them crispy).
- 1/4 cup finely chopped fresh parsley.
- Vegetable oil, if you plan on frying (otherwise, just have cooking spray on standby for the air fryer).
- Optional: A little drizzle of honey for serving—it is incredible.
Mastering the Prep: Making Your Goat Cheese Balls Firm
Now we move into where the magic starts, and honestly, this is where most people mess up their **goat cheese balls**. You can’t just roll warm, floppy cheese right into the breadcrumbs; it turns into a gooey, herb-covered mess almost instantly. That’s why chilling is non-negotiable!
After you’ve mixed your room-temperature goat cheese with the Parmesan, herbs, and spices until it’s smooth—which feels amazing, by the way, like mixing soft clay—you have to stop and walk away. While you’re rolling them into walnut-sized balls (about 1 inch is perfect), make sure your hands are cool. Then, pop those perfectly formed balls onto a parchment-lined tray and into the fridge for at least 30 minutes. I usually try to give them 45 minutes if I can spare the time. This hard chill sets the structure so they can handle the rigors of breading and frying without collapsing. It’s about building confidence in your appetizer!
Setting Up the Breading Station for Crispy Goat Cheese Balls
Once your little cheese orbs are firm, it’s time for the coating, which is what makes these a truly delightful `fried cheese appetizer`. You need three shallow dishes lined up in the right order—think of it like an assembly line for perfection. Dish one gets the flour. Dish two has your lightly beaten egg. And dish three, the star, gets those glorious panko breadcrumbs mixed with parsley.
The trick here is the final coating. Don’t just roll them gently! After they’ve been floured and dipped in egg, you need to press that panko mixture onto the cheese ball really well. I actually cup my hands around the ball and give it a firm pat or two in the breadcrumbs. You want a thick, tight seal everywhere, otherwise, steam escapes during cooking and makes a weak spot. That firm press ensures you get that amazing, crunchy exterior we are looking for.
Step-by-Step Instructions for Perfect Fried Cheese Appetizer
Okay, they’re coated, they’re chilled, and they are ready for the heat! Frying is the fastest way to get that perfect golden shell around our beautiful **goat cheese balls**. You need to pay close attention here because the cooking time is incredibly short, but if you want to see how I get amazing crispy shells on other things, check out my recipe for that `ultimate crispy buttermilk fried chicken`. Safety first, always! Get a deep, heavy-bottomed pot or Dutch oven ready and pour in about two inches of vegetable oil. We need to bring that oil up to exactly 350°F (175°C).
Trust me, using a thermometer here is worth it! If the oil isn’t hot enough, the coating soaks up grease instead of getting crispy. Once you hit that temperature, gently lower about four or five breaded cheese balls in at a time—don’t overcrowd the pot, or the oil temperature will drop too fast. They will puff up slightly and turn golden brown in just 1 to 2 minutes. Pull them out with a slotted spoon right away, and drain them well on a plate lined with paper towels. They should be screaming hot and ready for dipping!
Quick Cooking Alternative: Air Fryer Cheese Balls
I know not everyone wants to break out the deep fryer, and honestly, for a weeknight snack fest, I don’t blame you! If you prefer less oil, this method for **goat cheese balls** is fantastic. The air fryer does an incredible job of crisping up that panko coating to golden perfection without submerging the cheese in fat.
Preheating is important for the air fryer; get it warmed up to 380°F (195°C). Lightly spray those beautiful breaded balls all over with cooking spray—don’t skip this, or they’ll dry out instead of crisping! Arrange them in a single, non-touching layer in the basket. Seriously, don’t stack them; they need that hot air circulating all around them! They cook fast, usually needing just 6 to 8 minutes total. Remember to pull the basket out halfway through and give them a little flip so both sides get that beautiful golden color. You’ll see the results of your effort when you pull out those `air fryer cheese balls` hot and crispy!
Serving Suggestions for Your Herbed Goat Cheese Balls
Here’s the moment of truth! You’ve nailed the crispiness, and these **herbed goat cheese balls** are hot and ready. They are seriously excellent all on their own, but presentation is everything when you’re serving `gourmet cheese bites`. My absolute favorite move is drizzling a tiny bit of warm honey over the whole plate right before they hit the table. The sweet cuts through the tangy goat cheese perfectly!
If you want a dipping sauce, think about something complementary, maybe a bright fig jam or my favorite, a spicy honey. They look beautiful served on a simple white pedestal platter dusted with a little extra fresh parsley. It’s just that little touch that makes people stop and say, “Wow!”
Make Ahead Party Food Tips for Perfect Goat Cheese Balls
As someone who used to manage massive events, I learned that the key to staying sane during hosting is hiding as much cooking as possible until the last minute. These **goat cheese balls** are fantastic for that! You can totally make these ahead of time, turning them into genuine `make ahead party food`. You have two options here.
First, you can mix the cheese ball base and roll them, chilling them for up to two days before coating. Or, even better, do the whole thing!
Here’s the freezing secret: once they are fully breaded—coated perfectly in that panko mix—lay them out on a parchment-lined tray, just like we did for the initial chill. Pop that tray right into the freezer until the balls are rock solid. Once they are frozen solid, you can transfer them to a sturdy freezer bag. When it’s party time, cook them directly from frozen, but you must remember to add an extra minute or two to the frying or air frying time. That little bit of foresight makes hosting a breeze!
Variations: Cranberry Pecan Goat Cheese Balls and More
The base recipe we have here is absolutely fantastic as it is, especially with that thyme and garlic punch, but why stop being creative? Entertaining is all about making things feel special, and you can customize these bites easily. If you’re looking for something more festive, try rolling half of your chilled cheese balls in finely chopped pecans or dried cranberries right before you bread them—or skip the panko entirely for a real party trick!
If you want to try those festive flavors immediately, check out this recipe for `Cranberry Pecan Goat Cheese Balls`. While that recipe might be different, the concept of adding fruit and nuts works perfectly here!
You can also play around with the herbs inside. If you’re pairing these with, say, roasted chicken later, pull out the thyme and substitute it with a little fresh rosemary. It changes the whole profile of your **goat cheese balls**! Using different herbs is a simple trick to keep your `appetizer recipes for guests` feeling fresh every time you serve them.
Frequently Asked Questions About Appetizer Recipes for Guests
I know sometimes when you’re trying a new appetizer, little questions pop up, especially when dealing with hot cheese! This section is where I try to troubleshoot those common issues so your **goat cheese balls** turn out perfectly every time you’re hosting. Here are the things I get asked most often about serving these `appetizer recipes for guests`!
Why did my cheese balls melt or fall apart when frying?
Oh, that’s frustrating! Nine times out of ten, this happens because the cheese wasn’t chilled long enough before breading, or the oil wasn’t hot enough. If the oil is too cool, the breading soaks up grease before it seals, and the internal heat melts the cheese before the crust sets up solid. Make sure you chill them for that full 30 minutes, and if your oil drops below 340°F while frying, let it recover before adding the next batch. This ensures you get those beautiful, warm, **creamy goat cheese bites** instead of sauce!
Can I use plain cream cheese instead of goat cheese?
You absolutely can substitute it, but honestly, you’ll lose that signature tang that makes these so unique! Goat cheese holds up a tiny bit better structurally once warm, and the flavor is much brighter. If you must use cream cheese, you’ll likely need to add a extra tang back in, maybe mixing in a teaspoon of fresh lemon juice or an extra ounce of Parmesan to firm it up, because plain cream cheese tends to get much softer when heated. This recipe shines with goat cheese!
What’s the absolute best dipping sauce for these savory cheese balls?
If you only serve one thing, make it honey. A drizzle of good quality honey—or even better, hot honey—makes an unbelievable pairing with the herbs and tangy cheese. It hits all the right notes for **gourmet cheese bites**. But if you need a true dipping sauce, a zesty raspberry preserves or a balsamic glaze also cut through the richness really nicely. You want contrast!
Nutritional Snapshot of These Warm Cheesy Bites
I always tell folks that while these **goat cheese balls** are wonderful for entertaining, they definitely fall into the indulgent category! They are packed with flavor, but you should also know what you’re serving. Here is a quick look at what you can expect from the recipe as written for about three bites.
- Calories: About 220 per serving
- Fat: Roughly 18g
- Protein: Around 7g
- Carbohydrates: About 8g
Now, remember that this is just an estimate based on the ingredients I’ve listed, especially since frying oil absorption can vary. For more detailed, everyday healthy options, check out my post on `easy high-protein bean salad recipe`!
Share Your Experience Making These Elegant Appetizers
I truly hope you take the plunge and make these **goat cheese balls** for your next gathering! When you do, I’d be over the moon if you came back here and let me know how you loved them. Seriously, rating the recipe five stars at the top of the page helps other busy hosts find this fantastic appetizer. It only takes a second, and it tells me that my advice on achieving that perfect crispy-creamy balance worked for you!
If you snap a picture of your platter—especially if you drizzled it with that spicy honey—please share it on social media and tag me! Seeing your successful homemade appetizers always cheers me up. If you ran into a snag or have a serving idea I missed, drop it in the comments below. I love hearing how you all adapt things in your own kitchens. For any kitchen questions or just to send a note, you can always reach me directly over at `my contact page`. Let’s keep building our food dexterity together!
PrintCrispy Fried Goat Cheese Balls with Air Fryer Option

Make these easy goat cheese appetizer bites for your next party. They are crispy outside, creamy inside, and you can fry them or use an air fryer.
- Prep Time: 20 min
- Cook Time: 10 min
- Total Time: 50 min
- Yield: 18 servings 1x
- Category: Appetizer
- Method: Frying/Air Frying
- Cuisine: American
- Diet: Vegetarian
Ingredients
- 8 ounces soft goat cheese, room temperature
- 1/4 cup grated Parmesan cheese
- 1 teaspoon dried thyme
- 1/2 teaspoon garlic powder
- 1/4 teaspoon black pepper
- 1 large egg, lightly beaten
- 1/2 cup all-purpose flour
- 1 cup panko breadcrumbs
- 1/4 cup finely chopped fresh parsley
- Vegetable oil, for frying (or cooking spray for air fryer)
- Optional: Honey or spicy honey for dipping
Instructions
- Combine the room temperature goat cheese, Parmesan cheese, thyme, garlic powder, and black pepper in a medium bowl. Mix until fully combined and smooth.
- Roll the cheese mixture into small balls, about 1 inch in diameter. You should get about 16 to 20 balls. Place them on a parchment-lined plate and chill in the refrigerator for at least 30 minutes to firm up. This step is important for easy coating.
- Set up a standard breading station with three shallow dishes. Place the flour in the first dish. Whisk the egg in the second dish. Mix the panko breadcrumbs and fresh parsley in the third dish.
- Working with one chilled cheese ball at a time, lightly dredge it in the flour, shaking off any excess. Dip it into the beaten egg, allowing any extra to drip off. Finally, roll it thoroughly in the panko mixture, pressing gently to make sure the coating adheres completely.
- For Frying: Heat 2 inches of vegetable oil in a deep, heavy-bottomed pot or Dutch oven to 350°F (175°C). Carefully lower 4-5 cheese balls into the hot oil. Fry for 1 to 2 minutes, turning occasionally, until golden brown and crispy. Remove with a slotted spoon and drain on a paper towel-lined plate.
- For Air Frying: Preheat your air fryer to 380°F (195°C). Lightly spray the breaded cheese balls with cooking spray. Place them in a single layer in the air fryer basket, ensuring they do not touch. Air fry for 6 to 8 minutes, flipping halfway through, until golden brown and heated through.
- Serve the warm, creamy cheese bites immediately with a drizzle of honey or your favorite dipping sauce.
Notes
- For a festive look, you can roll half of the chilled cheese balls in finely chopped pecans or dried cranberries instead of the panko coating.
- If you plan to make these ahead, freeze the coated balls on the tray until solid, then transfer them to a freezer bag. Fry or air fry directly from frozen, adding 1-2 minutes to the cooking time.
- Use high-quality goat cheese for the best flavor in these gourmet cheese bites.
Nutrition
- Serving Size: 3 balls
- Calories: 220
- Sugar: 1
- Sodium: 180
- Fat: 18
- Saturated Fat: 10
- Unsaturated Fat: 8
- Trans Fat: 0
- Carbohydrates: 8
- Fiber: 0
- Protein: 7
- Cholesterol: 35