

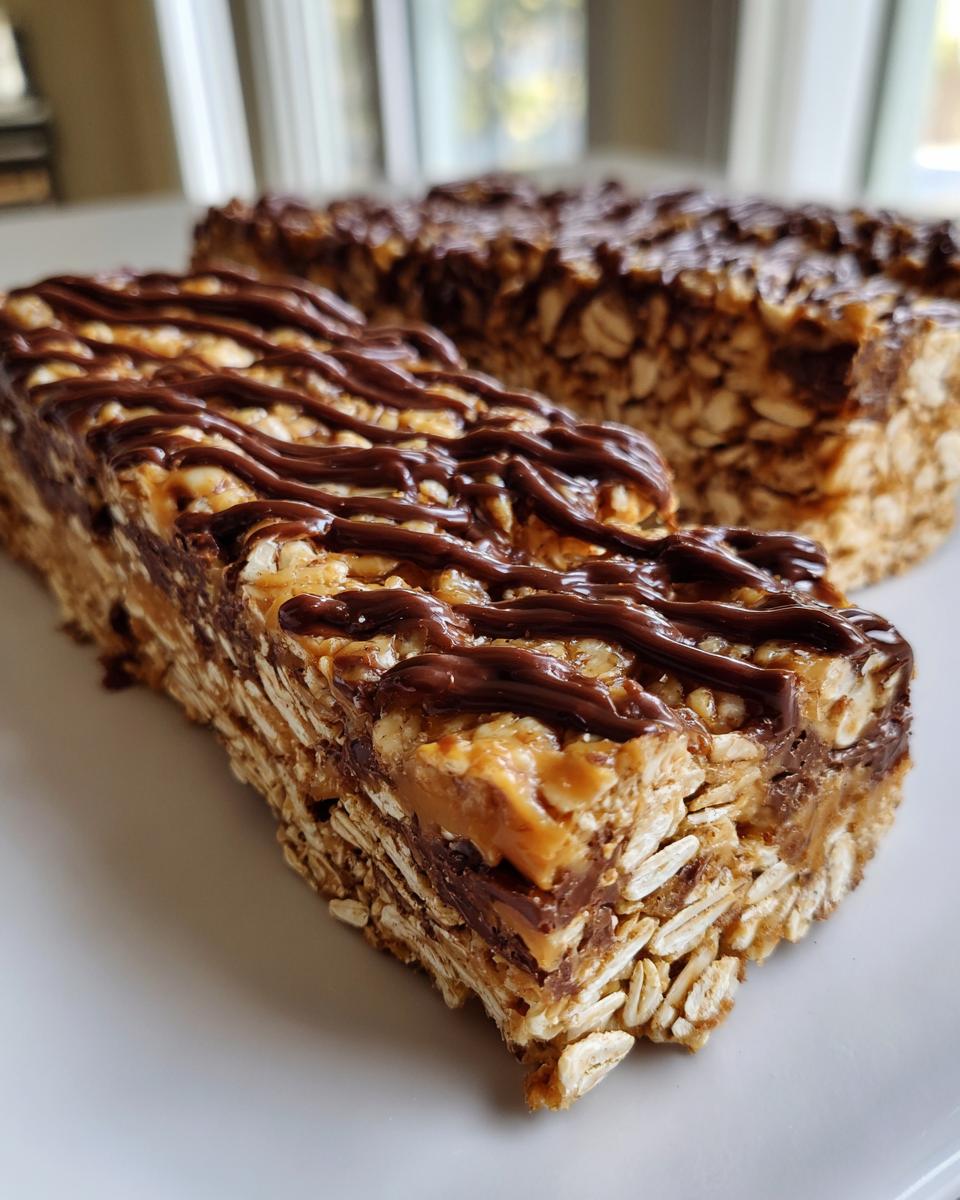
Honestly, trying to find a snack that hits that sweet spot—healthy, high in protein, actually tasty, and fast enough for a real, busy life—feels like a myth, right? We spend way too much money on those cardboard-tasting store-bought options. Well, I’m here to tell you that myth is dead! After trying every combination, I landed on this absolute winner: the Easy No-Bake 5-Ingredient Peanut Butter Protein Bars. Trust me, I tested this little formula until it was perfect for those days when you have zero time but need serious fuel. If you need satisfying homemade protein bars that require zero oven time, stick around. These genuinely work, and they’ve saved my afternoon slump more times than I can count.
- Why These Easy No-Bake 5-Ingredient Protein Bars Are Your New Go-To Healthy Snack Bars
- Gathering Ingredients for Your Homemade Protein Bars
- Step-by-Step Instructions for These No Bake Protein Bars
- Making These Protein Bars Perfect for Meal Prep Bars
- Tips for Success When Making Peanut Butter Protein Bars
- Dietary Variations: Vegan and Low Sugar Protein Bars Options
- Frequently Asked Questions About Homemade Protein Bars
- Understanding the Nutrition in These Protein Bars
- Share Your Simple Homemade Snacks Creations
Why These Easy No-Bake 5-Ingredient Protein Bars Are Your New Go-To Healthy Snack Bars
I’m telling you, these bars crush the convenience factor without messing up your taste buds the way so many packaged snacks do. We’re dealing with maximum payoff for minimum effort here. These genuinely are some of the best tasting protein bars you can make yourself, and they’re built for your real kitchen schedule.
- They skip the oven entirely, which means less time heating up the house—a win in my book.
- They are fantastically sturdy, thanks to the perfect mix of peanut butter and oats.
- You control every bit of sugar and salt, making them ideal for meal prep situations.
Quick Protein Treats Ready in Minutes
Seriously, grab a bowl. You are looking at about ten minutes of active mixing time. That’s it! You combine four foundational ingredients, press them into a pan, drizzle the chocolate, and wait for the magic to happen in the fridge. They are the ultimate no bake protein bars solution when you need something fast.
Building the Best Tasting Protein Bars with Minimal Ingredients
Five ingredients might sound limiting, but these five are flavor powerhouses! Peanut butter and protein powder are the structural base, but that hit of honey and the chocolate topping? That’s what elevates these beyond basic chalky fuel. This simple formula proves you don’t need ten different specialty powders to make fantastic protein bars.
Gathering Ingredients for Your Homemade Protein Bars
Okay, prepping for these homemade protein bars is almost easier than making them! Since we’re only using five components, quality really matters. You need your rolled oats, your protein powder, a sweetener, and of course, peanut butter. For the peanut butter, please grab that natural style—the kind where the oil separates a little bit. It mixes in so much smoother than the highly processed stuff, which helps keep these snacks chewy.

When picking your protein powder, I usually stick with unflavored or vanilla so I can control the final taste with the chocolate, but feel free to play around with chocolate powder if you want maximum deep flavor here. Don’t worry too much about exact brands, just make sure whatever you use blends well when you test it in a little spoon with the syrup first.
Ingredient Notes and Simple Substitutions for Protein Bars
One of the best parts about these high protein recipes is how easy they are to tweak! If you are looking for a vegan protein bars recipe, swap out honey for maple syrup—it works identically here. If you mix everything up and it seems too stiff or dry, don’t panic! Just add water or milk, just a teaspoon at a time, until it nicely comes together. We all have different protein powders, so that moisture check is crucial for getting that perfect, satisfying texture every time.
Step-by-Step Instructions for These No Bake Protein Bars
Now we get to the fun part: putting it all together! Since these are all no bake protein bars, precision isn’t about oven temperatures, but it is about how you mix and press everything down. We want that satisfying, chewy texture, and that starts right here. Follow these steps closely, and you’ll have incredible homemade snacks.
Mixing and Pressing the High Protein Recipes Base
First things first, get your 8×8 dish lined with parchment paper so you have those handy overhang flaps ready for later. This paper is your best friend when you go to lift these bars out!
In your bowl, combine the oats, peanut butter, protein powder, and your sweetener. Don’t just use a spoon at first; mix it until it starts looking like a shaggy mess. Then, you absolutely have to switch to your hands. I know, it’s messy, but you need to squish and knead everything until it forms one thick, uniform dough. If you leave dry patches, your bars will crumble later on. Once it feels like thick cookie dough, that’s when you press it into the pan. Pack it down HARD—really press it into the corners. This tight packing is the secret to making sure these turn out beautifully chewy and stay together when you cut them, not dusty and crumbly.
Chilling and Finishing Your Protein Bars for Beginners
Once it’s firmly packed, it needs time to set up, so pop that pan into the fridge for at least an hour. This chilling is non-negotiable for clean cutting later! While it chills, melt your chocolate chips—I do mine in 30-second bursts in the microwave, stirring well between each one so it doesn’t seize up on you.
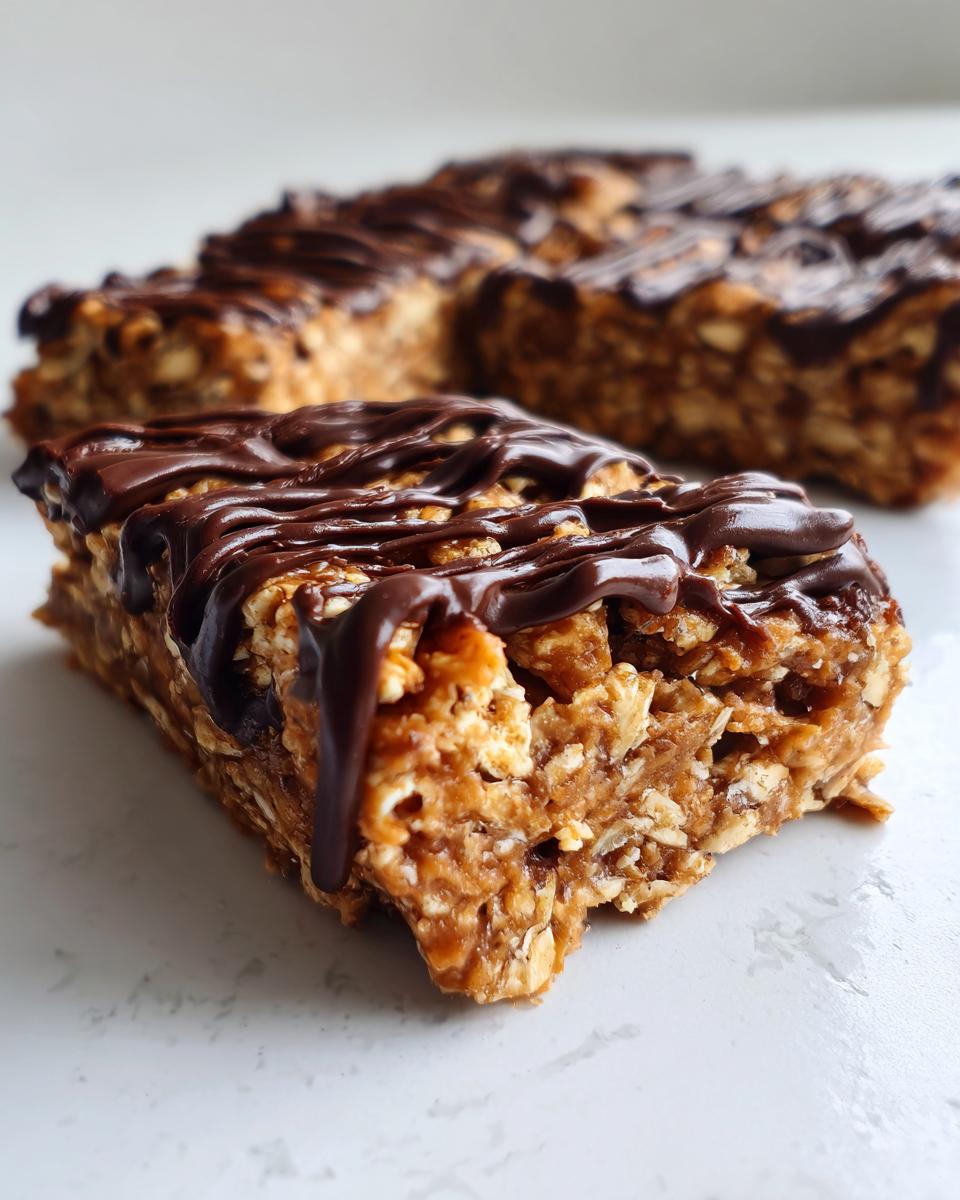
When the base is totally firm, pull it out and drizzle that melted chocolate across the top. Make pretty little zig-zags or just cover the whole thing; it’s your bar! Back into the fridge for another quick 15 minutes until the chocolate hardens completely. Then, use those parchment paper handles to lift the whole slab out and slice it into about 10 or 12 perfect little protein bars for beginners. See? No oven required!
Making These Protein Bars Perfect for Meal Prep Bars
I know you want to make a big batch—that’s the entire point of these meal prep bars! The great news is that these protein bars are actually better after a day or two in the fridge. They really firm up and the ingredients get friendly with each other, which improves that chewy texture we worked so hard to achieve.

When you’re ready to store your batch, make sure they are fully chilled and the chocolate topping is solid. Cut them into your serving sizes—usually 10 to 12 bars from this recipe—and layer them loosely between sheets of parchment paper in a good, airtight container. I always recommend keeping them cold; they really hold their shape best straight from the refrigerator.
If you’re making a huge batch for the whole week, they last up to a week stored in that refrigerated container. Honestly, they rarely last that long around my house! But knowing you have these delicious, high-protein snacks waiting makes dodging those vending machines so much easier. These homemade protein bars are truly built for grabbing and going!
Tips for Success When Making Peanut Butter Protein Bars
Even though this recipe is super simple, I have a few tricks I’ve picked up over the years to guarantee those perfect, chewy protein bars every single time. Texture is everything, right? If they end up too crumbly, it means they weren’t mixed enough or pressed down hard enough.
Remember when I said to use your hands to mix? That’s crucial. You need to feel that dough coming together. If you stop stirring when it *looks* okay but still feels slightly gritty, you’ll end up with dry spots. Keep working it until it feels cohesive and slightly sticky—that’s the ticket for chewy protein bars.
Also, a quick note on the peanut butter: the natural kind is best because it’s less processed, but if yours is running a little thin, your bars might seem too gooey before chilling. If that happens, just stir in an extra tablespoon of protein powder before pressing. Believe me, a slightly stiffer base makes the cleanest cuts!
Dietary Variations: Vegan and Low Sugar Protein Bars Options
One of the things I absolutely love about these five-ingredient protein bars is how adaptable they are! You don’t have to stick to one formula forever. If you’re aiming for a vegan protein bars recipe, that swap is simple: just make sure you use maple syrup instead of honey, and check that your protein powder source is plant-based.
When people ask about low sugar protein bars, that’s where we look closer at our binder. The honey/maple syrup is the main sugar source. If you need to reduce that significantly, you might need a keto-friendly alternative binder, which starts to change the texture quite a bit because the syrup helps hold those oats together. For a very low-sugar option, you might try an alternative sweetener combined with a little extra liquid, but I highly recommend checking out some specialized recipes, like this great one I found for keto options here. But for the standard version, sticking with natural sweeteners keeps these homemade protein bars tasting fantastic!
Frequently Asked Questions About Homemade Protein Bars
I pulled together a few of the questions I see most often about making simple homemade snacks like these. If you have a question that isn’t answered here, please drop it in the comments below!
What’s the best type of protein powder to use for these bars?
This is my favorite question! Honestly, you can use almost anything—whey, soy, pea protein—it really depends on your goals and dietary needs. If you use a very absorbent powder, like some plant-based varieties, you might find your mix is too stiff, so be ready to add that teaspoon of water or milk mentioned in the notes. Vanilla is my default choice because it blends nicely into a great high protein recipes base.
My bars are crumbling instead of being chewy. What went wrong?
That usually means one of two things happened: either the mixture wasn’t pressed down hard enough into the pan, or you didn’t mix it long enough initially. Remember, we want a dough, not just combined crumbs! Really use your hands to mash that mixture into the dish. The tighter you pack it, the better your results will be for those perfect chewy protein bars.
How long do these peanut butter protein bars last if I don’t freeze them?
Because these are no bake protein bars and we aren’t adding chemical preservatives, they do best when kept cold. I find they keep wonderfully in an airtight container in the refrigerator for up to a week. They’ll stay firm and fresh that way. If you leave them out on the counter, they might get too soft, especially if your kitchen is warm.
Can I skip the chocolate drizzle on these quick protein treats?
You absolutely can! If you want a truly minimalist snack, skip the chocolate entirely. Or, you can substitute the chocolate chips with crushed nuts or dried fruit before pressing the bars down. However, the chocolate does add a little extra stability once it sets, so if you skip it, make sure you chill them extra well before slicing!
Understanding the Nutrition in These Protein Bars
I always want to be upfront about what we’re putting into our bodies, even when we are whipping up such quick protein treats! Because we are using simple, whole ingredients, we get a fantastic punch of protein without all the hidden junk store brands sneak in. Here’s a quick look at the estimated numbers for one bar, based on my standard ingredient choices:
- Calories: 220
- Protein: 12g
- Sugar: 8g
- Fat: 13g
Now, here’s my big disclaimer: these numbers are educated guesses based on the pantry staples I use. The brand of peanut butter or the type of protein powder you choose seriously changes the totals! For example, heavier chocolate chips or a sweeter protein powder might bump up that sugar count a touch. But overall, for 12 grams of protein in a satisfying snack, you can’t beat it!
Share Your Simple Homemade Snacks Creations
Well, that’s the entire rundown on how I put together these simple, rock-solid homemade protein bars! They are meant to fit right into your busy rhythm, not take it over. Now that you have the secret sauce, the real fun begins: making them your own.
I’d genuinely love to hear how they turned out for you! Did these meal prep bars make keeping up with your protein goals easier this week? Drop a comment below and let me know what brand of protein powder worked best for you—sometimes one brand blends much better than another.
And please, if you post a picture of your neatly cut squares or that gorgeous chocolate drizzle on social media, tag me! Seeing your finished quick protein treats makes my day. Happy snacking, friends. You deserve something delicious and easy!
PrintEasy No-Bake 5-Ingredient Peanut Butter Protein Bars

Make these simple, no-bake protein bars using just five ingredients. They are chewy, satisfying, and perfect for quick meal prep or an on-the-go snack.
- Prep Time: 10 min
- Cook Time: 0 min
- Total Time: 1 hour 10 min
- Yield: 10 servings 1x
- Category: Snack
- Method: No-Bake
- Cuisine: American
- Diet: Vegetarian
Ingredients
- 1 cup rolled oats
- 1 cup peanut butter (natural style works best)
- 1/2 cup protein powder (vanilla or unflavored)
- 1/4 cup honey or maple syrup
- 1/4 cup dark chocolate chips (for topping)
Instructions
- Line an 8×8 inch baking dish with parchment paper, leaving an overhang on two sides for easy removal.
- In a medium bowl, combine the rolled oats, peanut butter, protein powder, and honey or maple syrup.
- Mix the ingredients thoroughly until a thick, uniform dough forms. You may need to use your hands to fully incorporate everything.
- Press the mixture firmly and evenly into the prepared baking dish. Pack it down tightly to prevent crumbling later.
- Place the dish in the refrigerator to chill for at least 1 hour, or until firm.
- Melt the chocolate chips in a microwave-safe bowl in 30-second intervals, stirring until smooth.
- Drizzle the melted chocolate over the chilled bar mixture.
- Return the dish to the refrigerator for 15 minutes to allow the chocolate to set.
- Lift the bars out of the dish using the parchment paper overhang. Cut into 10 to 12 equal bars.
- Store the finished protein bars in an airtight container in the refrigerator for up to one week.
Notes
- For a vegan option, use maple syrup instead of honey and ensure your protein powder is plant-based.
- If the mixture seems too dry, add one teaspoon of water or milk at a time until it holds together.
- These homemade protein bars taste best when kept cold.
- If you want a stronger chocolate flavor, use chocolate protein powder instead of vanilla.
Nutrition
- Serving Size: 1 bar
- Calories: 220
- Sugar: 8
- Sodium: 110
- Fat: 13
- Saturated Fat: 3
- Unsaturated Fat: 10
- Trans Fat: 0
- Carbohydrates: 18
- Fiber: 2
- Protein: 12
- Cholesterol: 0