
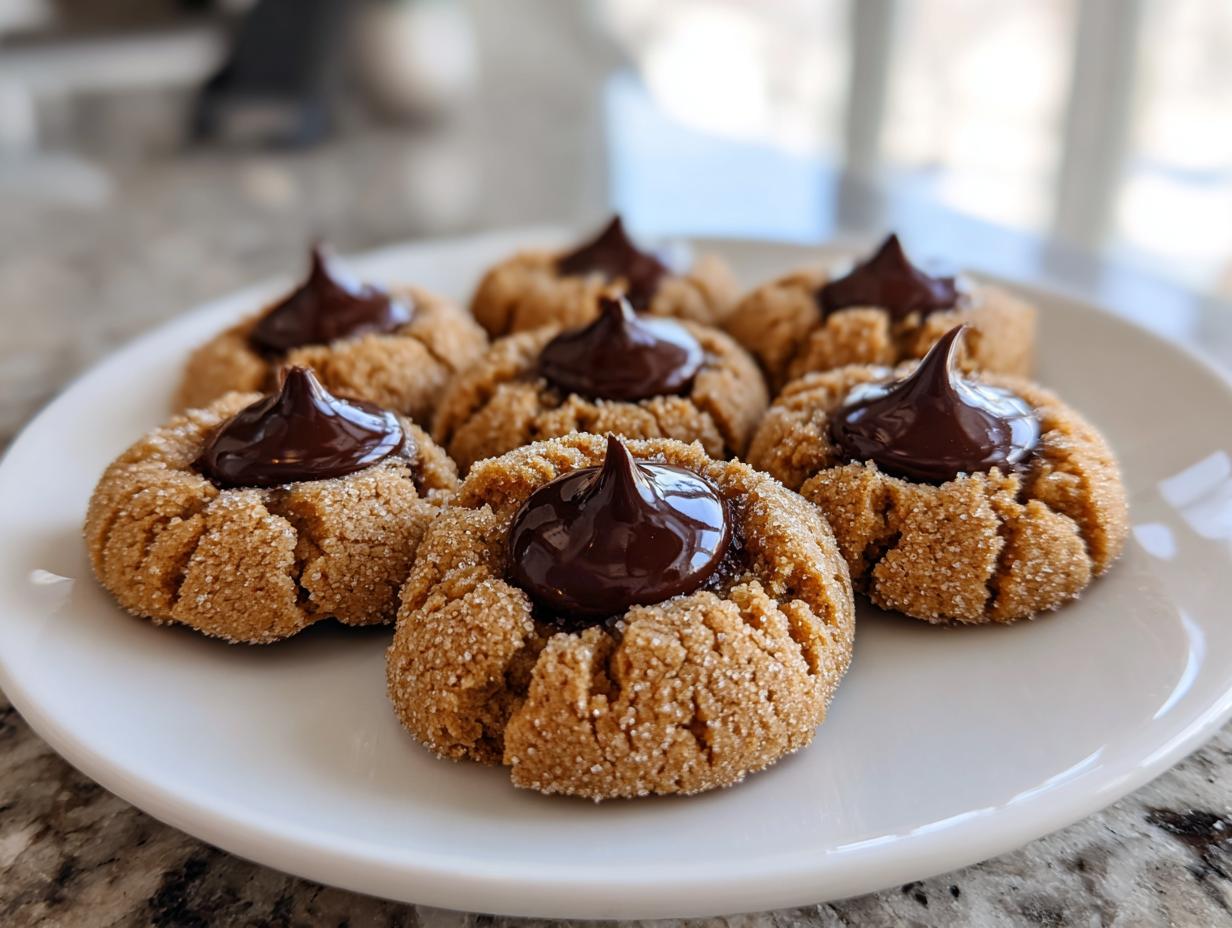
If there’s one smell that instantly whisks me back to holiday baking lessons with my mom, it’s the rich, sweet scent of peanut butter dough mixing with the deep chocolate of a Hershey’s Kiss. But let’s be real—so many beloved recipes end up making cookies that are crisp and dry by the time you want to enjoy them during the week. Not here! We are tackling the absolute classic, the **peanut butter blossom** cookie, and my goal for you is to achieve that perfectly soft, chewy center with beautiful, crackled edges. That’s the Food Dexterity difference: taking those iconic treats and giving you the smart techniques to make them reliably delicious every single time, ensuring they taste just as amazing on day three as they did fresh from the oven.
- Why This Classic peanut butter blossom Recipe Works (Our Secrets for Softness)
- Gathering Ingredients for Iconic Holiday Desserts
- Step-by-Step Instructions for the peanut butter blossom
- Baking Tips for Perfect Cookie Swap Favorites
- Storage and Make Ahead Holiday Baking Recipes
- Estimated Nutritional Data
- Frequently Asked Questions About These Cookies
- Connecting with Charlotte Hayes and Food Dexterity
Why This Classic peanut butter blossom Recipe Works (Our Secrets for Softness)
We’re aiming for the undisputed Best Peanut Butter Cookie here, folks—that means supremely soft and chewy, not crumbly! The reason we get that incredible texture in this peanut butter blossom recipe comes down to a couple of tweaks in the ratio and timing. Trust me, the secret isn’t complicated, but it does rely on paying attention to the dough’s moisture level long before it hits the oven. You want Soft Baked Peanut Butter Treats that hold up well, and this recipe delivers that classic holiday magic.
We’re specifically looking at how other bakers handle moisture, too. If you want to dive deeper into the science of keeping these soft beyond just butter, check out this great insight on achieving that perfect texture here.
The Role of Brown Sugar in Your peanut butter blossom Dough
Forget only using white sugar! The brown sugar in this recipe is crucial. Since brown sugar has molasses in it, it grabs onto moisture better than plain granulated sugar. That molasses is your best friend if you want that wonderfully soft, slightly gooey cookie center that melts right around the chocolate Kiss. It’s an absolute non-negotiable for chewiness!
Achieving Perfectly Cracked peanut butter blossom Tops
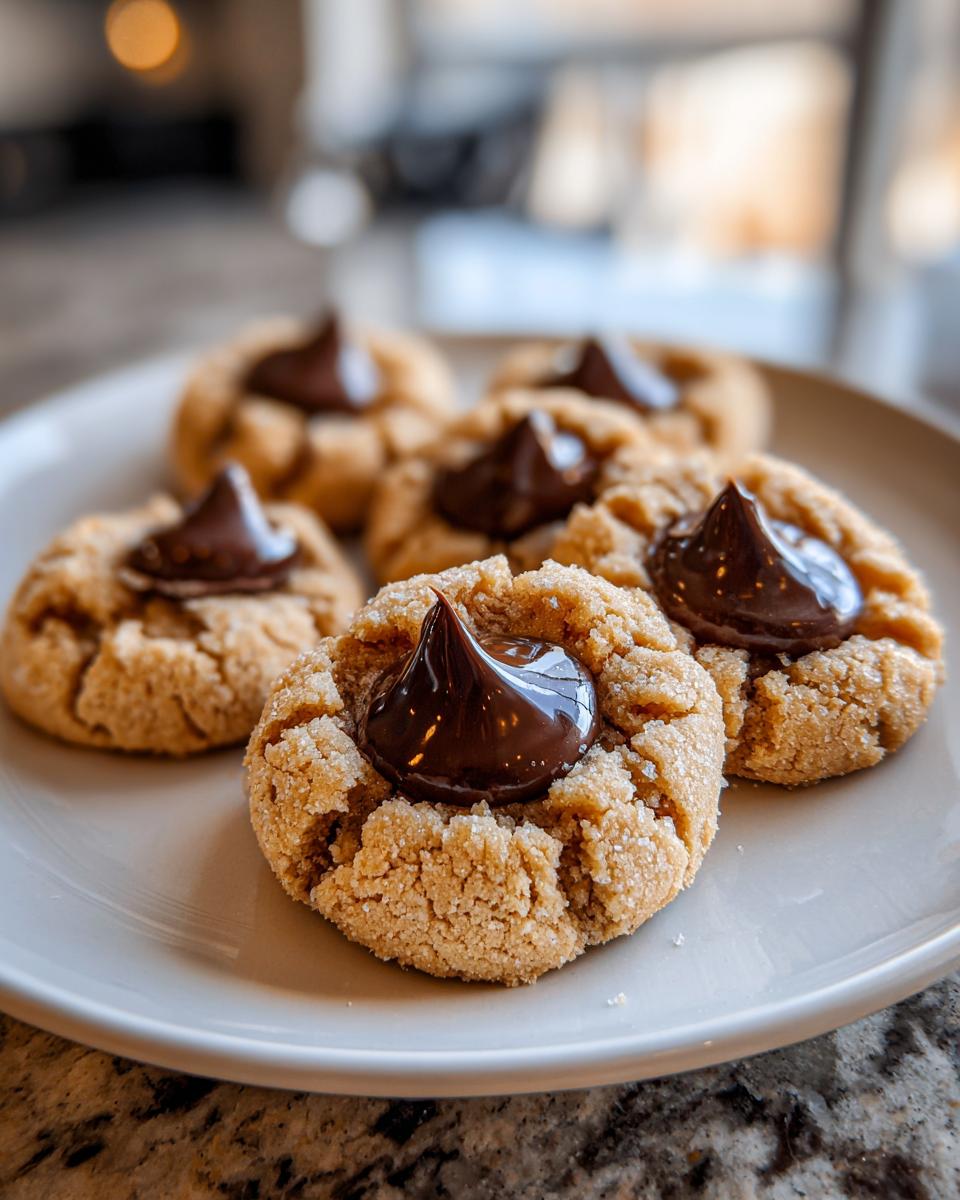
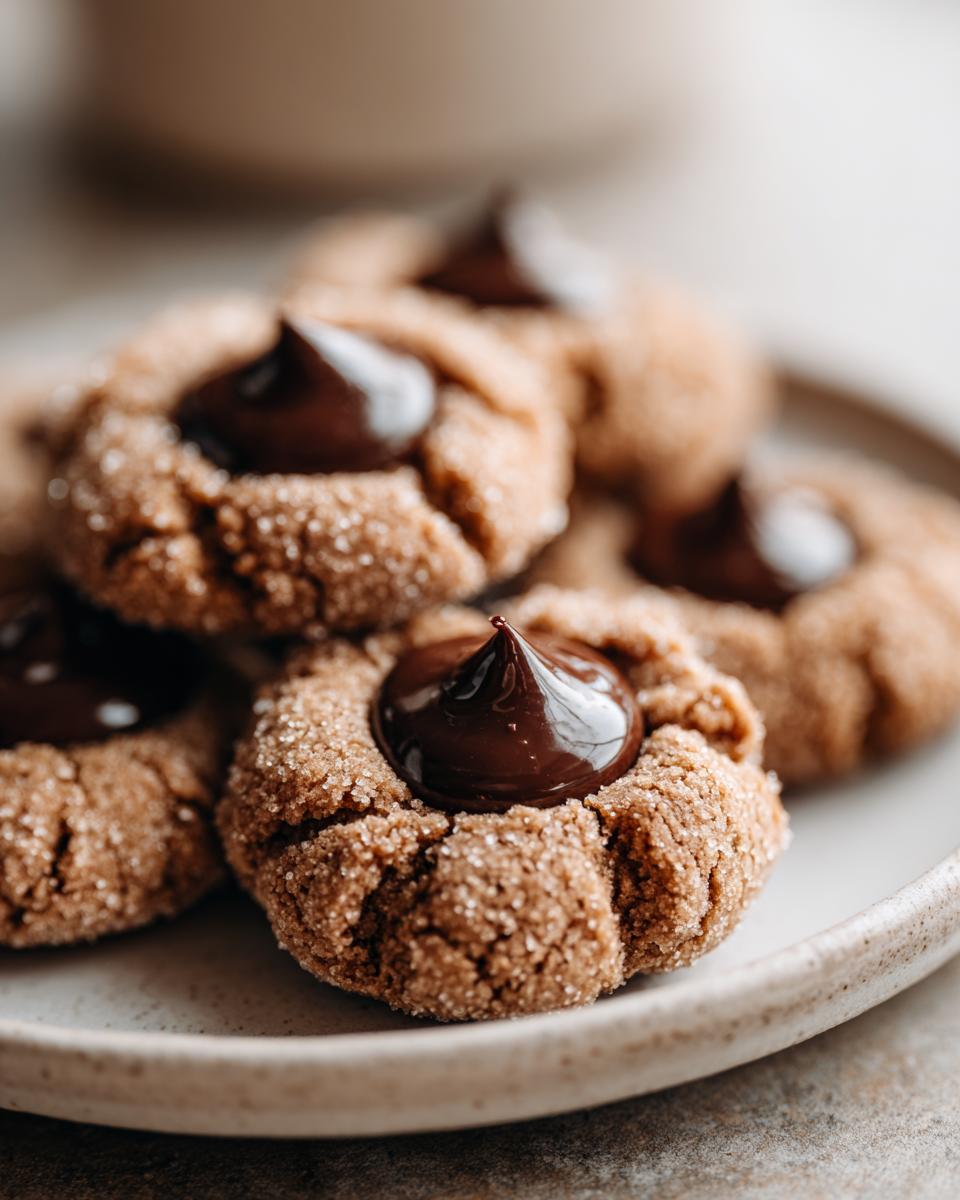
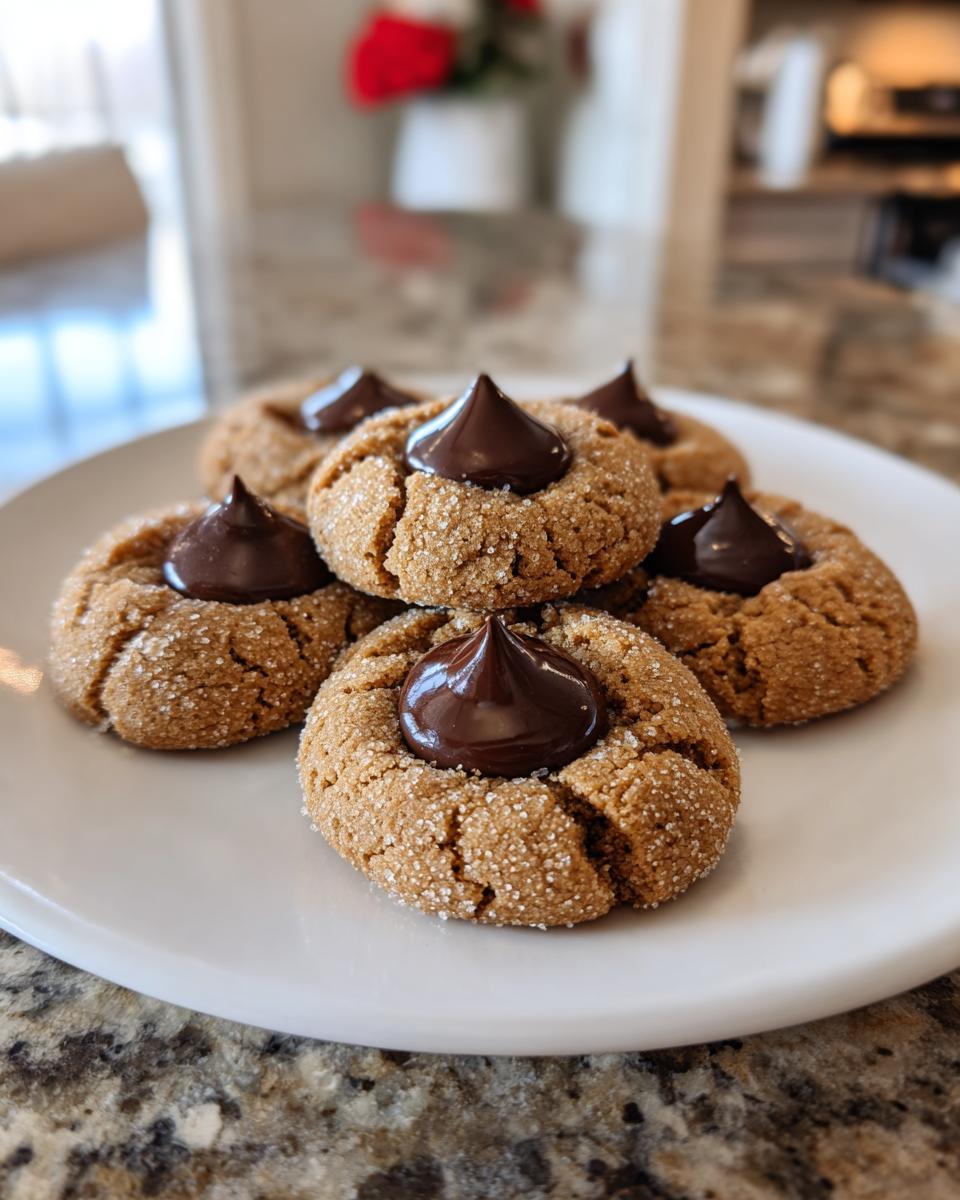
That gorgeous, signature crinkle on top? That’s a combination of two things. First, rolling the dough balls heavily in sugar before baking gives the surface something to grab onto as it spreads. Second, we slightly underbake them! When you pull them out just as they look set but still soft, that residual heat finishes cooking them while keeping the inside tender. Don’t push those bake times too far, or you lose the crackle and the chew!
Gathering Ingredients for Iconic Holiday Desserts
Okay, so you’ve got the technique down for chewiness—now we just need to make sure we have fantastic ingredients on hand! These cookies are so simple, which means the quality of what you put in really shines through. This is a true, from scratch cookie recipe, so grab your measuring cups! Trust me, having everything ready before you start mixing makes the process so much smoother, especially when you’re baking a big holiday batch.
- 1 cup unsalted butter, softened (make sure it’s actually soft, not melted, please!)
- 3/4 cup creamy peanut butter (this is key for the texture!)
- 3/4 cup granulated sugar
- 3/4 cup packed brown sugar (remember, that molasses is our secret weapon!)
- 2 large eggs
- 1 teaspoon vanilla extract
- 2 1/4 cups all-purpose flour
- 1 teaspoon baking soda
- 1/2 teaspoon salt
- About 1 cup granulated sugar for rolling (this creates that beautiful exterior)
- 1 bag (12 ounces) Hershey’s Kisses, unwrapped (have them all unwrapped and ready to go!)
Ingredient Notes and Substitutions for peanut butter blossom
Let’s talk specifics, because these little decisions make a big difference in your final cookie results. For the peanut butter, please stick to the standard, processed creamy kind—that means Jif or Skippy, not the natural, oily kind that separates. Natural peanut butter just won’t cooperate when it comes to making a sturdy, chewy cookie base for your peanut butter blossom. You need that stabilized fat content!
Also, creamy over crunchy, always! Crunchy changes the way the dough rolls and might mess up the smooth surface we need for that perfect crackle. We want smooth dough balls that roll easily in the sugar. Stick to these details, and you’ll have the best batch of from scratch cookie recipes you’ve ever made!
Step-by-Step Instructions for the peanut butter blossom
This recipe is so straightforward, making it one of those fantastic, Simple Dessert Baking projects perfect for any day, though they shine at holiday events! We’ve got this down to a science so you can focus on getting those cookies ready for your big Cookie Swap Favorites platter. Just follow these steps closely, and you’ll have magazine-worthy treats.
- First thing is preheating your oven to 375 degrees Fahrenheit. Always line those baking sheets with parchment paper! It saves cleanup time, and honestly, it helps the bottoms bake evenly.
- Now for the base! In a big bowl, you need to cream your softened butter, peanut butter, granulated sugar, and brown sugar. Beat it until it looks light and creamy—this aeration step is what makes the cookie base soft later on.
- Next, mix in your eggs one at a time so they incorporate fully, followed by that splash of vanilla extract.
- In a separate bowl, whisk together your dry stuff: the flour, baking soda, and salt. Now, here is where we need patience! Add the dry ingredients into the wet ingredients slowly, mixing on low speed until everything is *just* combined.
- Get your other shallow dish ready with that remaining 1 cup of granulated sugar.
- Time for rolling! Scoop the dough into 1-inch balls. You really need to roll them thoroughly in that sugar until they are completely coated. That sugary layer is what creates those beautiful cracks we love.
- Place your sugar-coated dough balls about 2 inches apart on the parchment-lined sheets. They need room to breathe and spread a little.
- Bake them for 8 to 10 minutes. Pay close attention here—they should look lightly cracked but definitely still soft when you pull them out.
- This next part is urgent! Immediately when they come out of the oven, gently press one unwrapped chocolate Kiss right into the center of each warm cookie. The residual heat melts the bottom just enough to secure it.
- Let them sit right there on that hot baking sheet for five minutes; this stops them from breaking when you move them. Then, transfer them gently to a wire rack to cool completely.
For more ideas on keeping your holiday baking organized, you might love my guide to handling delicate cookie doughs before they hit the oven, which uses similar principles!
Mixing the peanut butter blossom Dough: Avoid Overworking
When you get to Step 4, I need you to pause and listen to me: Do not overmix once that flour goes in! If you mix past the point where the flour streaks disappear, you wake up the gluten, and gluten means tough, cakey cookies. We are making a chewy treat, not a bread loaf! Mix only until you no longer see dusty patches of dry flour. That slight bit of remaining unevenness gets combined when you roll them in the sugar anyway. This tip, shared by folks aiming for the best peanut butter blossoms out there, is non-negotiable for texture.
The Critical Chocolate Kiss Placement
This is the moment of truth for getting that gooey center! You must press the chocolate Kiss in immediately after they come out of the 375°F environment. Don’t wait even two minutes, or the cookie will start to set too hard, and you’ll end up cracking the whole thing or pushing the chocolate right through the bottom. Hold the Kiss between your thumb and forefinger, apply gentle, steady pressure straight down into the center, and stop. Do not twist or try to wiggle it around! Just a clean press ensures the chocolate melts beautifully and anchors itself perfectly. Master this, and you’ve mastered the **peanut butter blossom**!
Baking Tips for Perfect Cookie Swap Favorites
Now that the dough is mixed beautifully and you’ve got those sugar-coated balls ready to go, let’s talk about the actual baking. Even with the best dough recipe—and we have that, trust me—oven execution is where things can go sideways fast, especially when you are trying to feed a crowd or get these ready for a big platter. We want these to be the most sought-after of the Classic Peanut Butter Cookies at any swap!
First, oven temperature accuracy is everything. If your oven runs hot, those cookies might look done on the outside but be raw near the center where the Kiss goes. If you suspect your oven temperature is wildly off, a cheap oven thermometer is worth its weight in gold. I keep one in my oven all the time—it helps me trust the process!
When you’re making dozens, pan rotation is important. If you put all your sheets in at once, the ones near the heating element or back wall will brown faster. I always rotate my sheets halfway through the baking time, maybe swapping top rack with bottom rack, to ensure every single cookie swap favorite looks evenly golden. If you want to check out some of my favorite tips for making sure your cookies don’t spread too much in the first place (which also helps them bake evenly), take a peek at how I handle dough consistency in other cookie batches.
Finally, remember that 5-minute rest? I cannot stress this enough! If you try to move the warm peanut butter blossom cookies straight to the cooling rack, they are still structurally weak where the chocolate melted it slightly. They need those few minutes on the hot sheet pan to firm up just enough so they don’t distort or fall apart when you lift them with your spatula. Those few minutes make the difference between a perfect blossom and a sad, flattened puddle. For more encouragement on getting these perfect batches out the door, I always reference tried-and-true methods like the ones found here.
Storage and Make Ahead Holiday Baking Recipes
If you’re like me, holiday baking is a marathon, not a sprint! You need recipes that can be prepped early, and these peanut butter blossom cookies actually cooperate beautifully with a little planning. They are definitely destined to be one of your go-to Make Ahead Holiday Desserts because they hold their shape so well.
For storage of the finished cookies—the ones with the chocolate Kisses already nestled in the center—you want an airtight container. They usually stay fantastically soft at room temperature for about three to four days, provided your kitchen isn’t super humid. I actually find they are almost better on day two because the peanut butter flavor really blooms.

However, my biggest tip for holiday bakers is to freeze them before the Kiss goes on. If you scoop and roll the dough balls (so they are sitting in that nice layer of sugar) and then freeze them on a tray until solid, you can toss them into a big freezer bag. This is such a lifesaver! You can bake these straight from frozen, just add an extra minute or two to the baking time. I have a whole post detailing how I manage my big batch baking schedules for just this reason over on my page about make ahead holiday desserts if you want my full game plan!
The one thing you absolutely cannot freeze is the finished cookie with the chocolate melted on top. The extreme temperature changes can cause the chocolate to bloom—you know, that weird, dusty white film that appears on old chocolate? Nobody wants that on their perfect blossom! So, freeze the dough, bake fresh, then add the Kisses immediately after they come out of the oven. That way, they are always fresh, perfectly soft, and never looking sad and dusty.
Estimated Nutritional Data
Now, I know some of you might be tracking things, and while I preach enjoying the process here at Food Dexterity, giving you the numbers is only fair! Remember, these figures are just estimates. They are calculated based on the standard ingredients I listed above, using USDA averages. If you use a different brand of peanut butter or a different size Kiss, things might shift a tiny bit, but this gives you a really good baseline for these Classic Peanut Butter Cookies.
My goal is always simple, delicious baking, but transparency means sharing the facts, too. These cookies are made with simple ingredients, but they are definitely a treat!
- Serving Size: 1 cookie
- Calories: 160
- Fat: 8g
- Carbohydrates: 20g
- Protein: 3g
- Sugar: 14g (Yes, sugar is high, but that’s what makes them perfect!)
Honestly, when I make a batch of these, I usually hide half of them away so they last longer, following the advice I gave earlier on our make ahead tips. If you’re worried about the sugar content, remember that the rich peanut butter and butter give you satisfying fats that help you feel full faster!
Frequently Asked Questions About These Cookies
I always get so many questions when people try my recipes for the first time, especially when they are as iconic as these! I’ve gathered the most common queries right here to help you troubleshoot or plan ahead. These simple dessert recipes should be stress-free, so let’s get those last bits sorted out!
Can I use crunchy peanut butter in this recipe?
You technically *can*, but honestly, I really advise against it if you’re chasing that classic experience. Crunchy peanut butter means you have little peanut chunks in your dough. This disrupts that beautifully smooth, uniform base we work so hard to create when creaming the fats and sugars. More importantly, those chunks can create weak spots in the dough, leading to more breakage when you roll them or when you press in the Kiss. For the most reliable, classic texture, stick with creamy peanut butter every time.
How long do these cookies stay soft?
If you stored them correctly—in an airtight container, making sure they are fully cooled before sealing them up—they should stay wonderfully soft and chewy for about four full days. That’s thanks to all that good brown sugar and fat we packed in there! After day four, they start to firm up a bit, but they definitely won’t be rock hard. Just make sure you avoid putting them in the fridge, as that circulation actually dries out baked goods much faster. If you need them to last longer, remember my tip about freezing them before you add the chocolate!
Do you have questions about making other simple dessert recipes? Drop them in the comments below!
Connecting with Charlotte Hayes and Food Dexterity
There you have it—the absolute best, chewiest peanut butter blossom recipe I have, ready to grace your kitchen counter! Now comes the best part: hearing about your success. Please, please, please come back here and leave a rating. If you nailed that soft, slightly gooey center everyone dreams about, tell me about it in the comments!
Sharing your results—whether it’s a photo of your perfectly cracked cookies or a note about how easy you found the creaming process—is what Food Dexterity is all about. It helps me know what’s working for real home cooks navigating busy lives. My goal is always to help you build confidence so you stop worrying about rigid rules and start trusting your own instincts in the kitchen.
If you’re curious about how I developed this whole philosophy of achievable, skillful cooking, I laid it all out on my About page. Happy baking, and enjoy every single nostalgic bite of these fantastic cookies!
PrintClassic Chewy Peanut Butter Blossoms
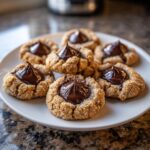
Make the iconic peanut butter blossom cookies. This recipe focuses on achieving a soft, chewy texture and the perfect chocolate kiss center for your holiday cookie platter.
- Prep Time: 20 min
- Cook Time: 10 min
- Total Time: 30 min
- Yield: About 3 dozen cookies 1x
- Category: Dessert
- Method: Baking
- Cuisine: American
- Diet: Vegetarian
Ingredients
- 1 cup unsalted butter, softened
- 3/4 cup creamy peanut butter
- 3/4 cup granulated sugar
- 3/4 cup packed brown sugar
- 2 large eggs
- 1 teaspoon vanilla extract
- 2 1/4 cups all-purpose flour
- 1 teaspoon baking soda
- 1/2 teaspoon salt
- About 1 cup granulated sugar for rolling
- 1 bag (12 ounces) Hershey’s Kisses, unwrapped
Instructions
- Preheat your oven to 375 degrees Fahrenheit. Prepare baking sheets with parchment paper.
- In a large bowl, cream together the softened butter, peanut butter, granulated sugar, and brown sugar until the mixture is light and fluffy. This step helps create a soft cookie base.
- Beat in the eggs one at a time, then mix in the vanilla extract.
- In a separate bowl, whisk together the flour, baking soda, and salt. Gradually add the dry ingredients to the wet ingredients, mixing on low speed until just combined. Do not overmix the dough.
- Pour the remaining 1 cup of granulated sugar into a shallow dish.
- Roll the dough into 1-inch balls. Roll each ball thoroughly in the sugar until fully coated.
- Place the sugar-coated balls about 2 inches apart on the prepared baking sheets.
- Bake for 8 to 10 minutes. The cookies should look slightly cracked on top but still be soft.
- Immediately upon removing the cookies from the oven, gently press one unwrapped chocolate kiss into the center of each warm cookie. The residual heat will soften the chocolate.
- Let the cookies cool on the baking sheet for 5 minutes before transferring them to a wire rack to cool completely.
Notes
- For the chewiest cookies, slightly underbake them. They firm up as they cool.
- If your dough seems too soft to roll, chill it for 15 minutes before shaping. This prevents spreading.
- Press the chocolate kiss straight down into the center; do not twist, as this can cause the cookie to break apart.
- These cookies freeze well before the chocolate kiss is added. Store dough balls frozen and bake directly from frozen, adding 1-2 minutes to the bake time.
Nutrition
- Serving Size: 1 cookie
- Calories: 160
- Sugar: 14g
- Sodium: 95mg
- Fat: 8g
- Saturated Fat: 3g
- Unsaturated Fat: 5g
- Trans Fat: 0g
- Carbohydrates: 20g
- Fiber: 1g
- Protein: 3g
- Cholesterol: 20mg