

Listen, I know the feeling. You crave that shatteringly crisp, golden crust you get at your favorite burger joint, but what you end up with at home are sad, floppy rings swimming in greasy batter. It drives me crazy! That’s why I spent ages perfecting these Ultra Crispy Beer Battered Onion Rings. We are ditching the soggy disappointment forever, I promise.
This recipe isn’t just about dumping ingredients together haphazardly; it’s about building texture and confidence, which is what Food Dexterity is all about connecting you with. Trust me, when you master this simple technique, every burger night, every game day, and every time you need an easy fried appetizer, these will be your absolute go-to. You are going to achieve that restaurant-style crunch right here in your own kitchen!
If you’re curious about the philosophy behind making cooking feel less stressful and more intuitive, you can always check out our story here. But for now, let’s get that oil hot and make some amazing onion rings!
- Why These Are the Best Crispy Homemade Onion Rings
- Ingredients for Perfect Beer Battered Onion Rings Recipe
- Preparing the Onion Rings for Deep Fried Onion Rings at Home
- The Technique for Deep Fried Onion Rings at Home
- Serving Suggestions for Your Crunchy Fried Appetizer Recipes
- Storage and Reheating for Lasting Onion Rings
- Troubleshooting Common Onion Rings Issues
- Frequently Asked Questions About Onion Rings
- Nutritional Snapshot of These Onion Rings
Why These Are the Best Crispy Homemade Onion Rings
I’m telling you, these aren’t just good onion rings; these are game-changing, fry-them-every-weekend level onion rings. When you follow these steps, you stop working hard and start working smart. That’s the joy of achieving mastery in the simple things!
Here’s why you’ll never buy frozen ones again after trying this foolproof method:
- You get those incredible walls of crunchy texture that stay crisp even after dipping.
- The light yet flavorful beer batter adds a subtle, yeasty depth you just can’t get otherwise.
- The whole process, from slicing to serving, moves faster than you think it should!
If you’ve been chasing that perfect, shatteringly crunchy crust, you’ve found your recipe for the absolute best crispy homemade onion rings.

The Secret to Copycat Restaurant Onion Rings
It really boils down to temperature control and carbonation, folks! You need your batter ingredients—especially that beer—to be ice cold. When the frigid batter hits the screaming hot oil (and yes, you need a thermometer for this, trust me!), it shocks the batter, causing the liquid to instantly turn to steam and puff up that glorious, airy crust. That’s what keeps the grease OUT and the crunch IN.
Ingredients for Perfect Beer Battered Onion Rings Recipe
Okay, let’s talk about what you need to pull off these crunchy wonders. Like any good baking project, the quality of your final product depends heavily on what you start with. The most important thing I can tell you upfront? Everything needs to be freezing cold. Seriously, chill that beer, chill those eggs, whatever you can manage!
Gather these items up for your glorious beer battered onion rings recipe:
- 2 large yellow onions
- 1 cup all-purpose flour
- 1 teaspoon salt
- 1/2 teaspoon black pepper
- 1/2 teaspoon paprika
- 1/4 teaspoon cayenne pepper (Just a little kick of heat!)
- 1 cup cold beer (A light lager or pilsner is best)
- 1 large egg
- Vegetable oil, enough for deep frying (about 2 inches worth)
Having these measured out before you heat the oil makes dipping so much less stressful. I learned that the hard way once!
Ingredient Notes and Substitutions for Your Onion Rings
Now, sometimes we run out of beer, or maybe someone in your house isn’t a fan of the taste—that’s fine! Don’t sweat it. If you skip the beer, grab some club soda or sparkling water instead. The carbonation is what we really need to create lift in the batter, so skip flat water!
Also, concerning the onions: Yellow onions are my pick because they have the perfect balance of flavor that stands up to deep frying. Save those milder Vidalia or sweet onions for slicing onto sandwiches. We need a strong onion base for this style of coating. They should slice to about 1/4-inch thick rings—not too skinny, not too chunky!
Preparing the Onion Rings for Deep Fried Onion Rings at Home
This is where we lay the foundation for that beautiful, crunchy exterior. First things first: slice those yellow onions into nice, even rings, aiming for just about 1/4-inch thick. Seriously, thickness matters! If they are too thin, they burn before the batter cooks. Too thick, and you’re eating raw onion in the middle—no fun.
Once sliced, gently separate the rings. If you have time, toss them into a bowl of ice water while you mix the dry ingredients. This helps them firm up and can slightly reduce the chance of the batter tearing when you pull them out next. A little bit of soaking goes a long way for perfect deep fried onion rings at home!
Mixing the Ultra Crispy Batter
Now for the magic vessel! Get a medium bowl and whisk your dry ingredients together first—that’s your flour, salt, pepper, paprika, and cayenne. Whisking them dry ensures the leaveners are evenly distributed. Then, in a separate little bowl, mix your cold beer and the beaten egg.
When you combine the wet into the dry, listen closely: you need to mix gently! I mean it. Whisk just until everything is incorporated. If you beat this mixture until it’s perfectly smooth, you’ll develop gluten, and that makes the coating tough, not light. We are aiming for a batter that is mostly smooth but still has a few visible lumps. That slightly lumpy texture is the hallmark of a perfect beer battered onion rings recipe!
The Technique for Deep Fried Onion Rings at Home
Alright, this is the big moment! We’ve prepped the onions, we’ve got our slightly lumpy, bubbly batter, and now it’s time to introduce them to the heat. The secret to achieving copycat status—that incredible crunch—is all about holding the oil temperature steady. I cannot stress this enough: you absolutely need a candy or deep-fry thermometer if you want to nail this. Guessing leads to greasy failure!
Pour about two inches of your vegetable oil into a sturdy pot—I love my cast iron for this—and get that heat going until the thermometer reads exactly 375 degrees F (190 degrees C). If it’s below that, the batter soaks up oil like a sponge. If it’s too high, the outside burns before the onion cooks! We want that happy medium where the beer batter puffs up instantly.
Working quickly but gently, dip those rings into the batter. Give them a slight shake over the bowl to let the major excess drip off, and then carefully lower them into the hot fat. Do these in small batches! If you crowd the pot, the oil temperature drops instantly, and boom—soggy rings. Let them bubble away for about 2 to 4 minutes, turning them with tongs until they look deeply, happily golden brown. If you want more inspiration for fast meals, check out our page on streamlined cooking!
Draining and Seasoning Your Onion Rings
When those rings look perfect—deep golden and hard-looking—get them out fast with a slotted spoon. Now, pay attention to this pro tip, because it’s the difference between crispy and steamy: Do NOT put them on paper towels. Nope! Stack them on a wire cooling rack that you have set over a baking sheet. Paper towels trap the steam rising off the hot oil, and steam is the enemy of crunch!

As soon as they hit that rack, grab some extra salt—plain table salt works great here—and sprinkle them immediately. They need that light dusting when they are piping hot so the salt sticks right to the surface. This immediate seasoning is what makes them taste like perfect crunchy fried appetizer recipes!
Keep frying in small batches, making absolutely sure the oil jumps back up to 375°F before you add the next set. That temperature recovery is vital for maintaining that exterior structure.
Serving Suggestions for Your Crunchy Fried Appetizer Recipes
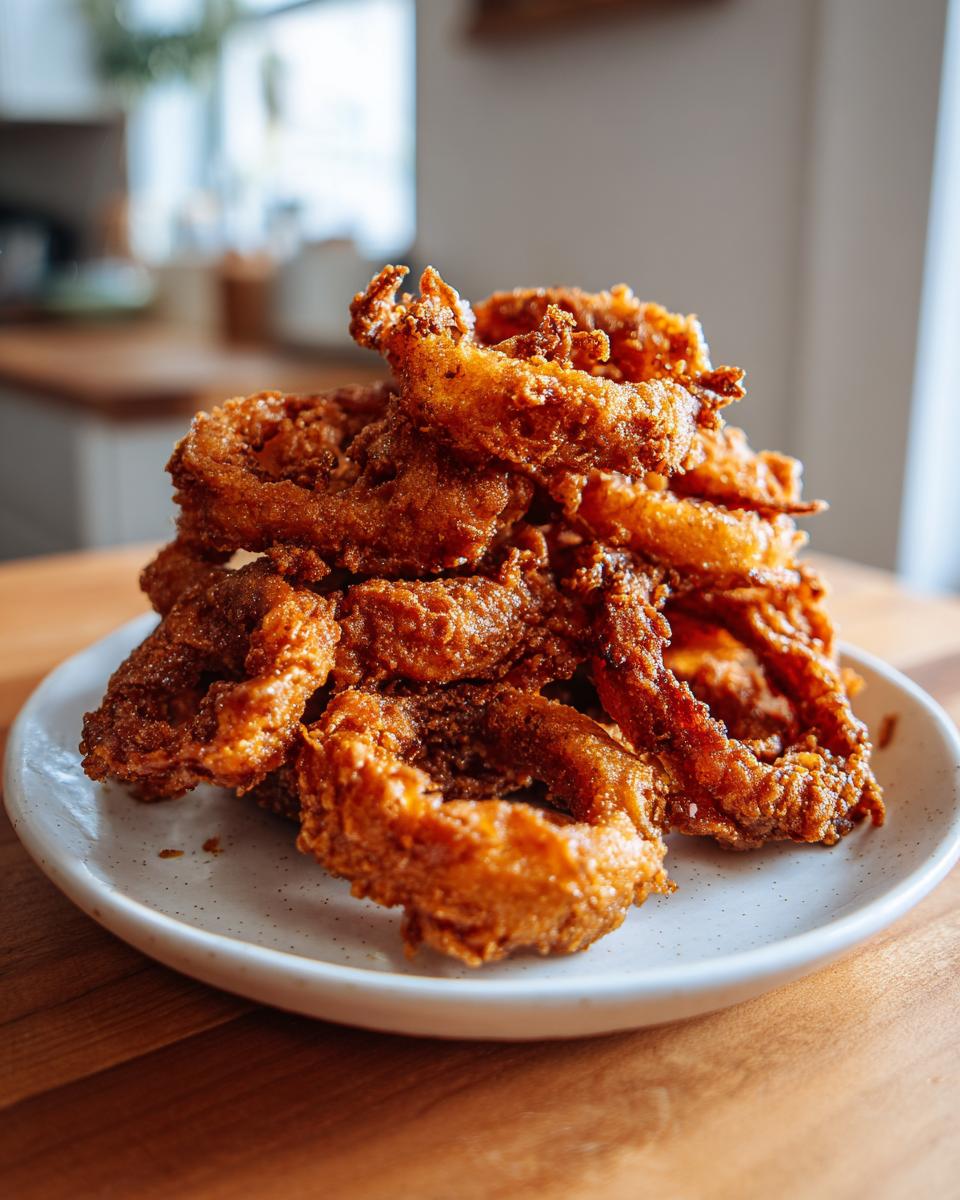
Okay, congratulations! You have successfully created an absolute mountain of perfect, golden, crunchy rings. Now, the best part: deciding what to eat them with! These aren’t just a side dish, they are a whole event. If you’re making these for football season or just a laid-back movie night, they deserve great company.
Since we’re aiming for that full, satisfying experience, I always serve these immediately, piled high on a platter. They look amazing when they’re fresh out of the oil—go ahead and pile them high!

They are the perfect pairing for sloppy cheeseburgers, obviously, but they are also amazing served completely on their own as a fantastic game day snack recipes centerpiece. Just make sure you set out multiple bowls of dipping sauce because everyone will swarm them!
Speaking of sauces, don’t just settle for plain ketchup! I have a super simple, zesty sauce recipe that takes about thirty seconds to whip up and tastes way better than anything bottled:
- Mix together 1/2 cup mayonnaise (the good stuff, please!), 2 tablespoons of ketchup, 1 teaspoon of Dijon mustard, and just a tiny dash of your favorite hot sauce. Stir it up until it’s beautifully pink and tangy.
It’s creamy, it’s got a little bite, and it complements the savory onion flavor perfectly. If you’re looking for other amazing dips and snack ideas that will wow your gathering crowd, you should check out some of our other ideas for things like dips and spreads over on our game day snack hub. But honestly, these rings on their own with that simple sauce? Chef’s kiss!
Storage and Reheating for Lasting Onion Rings
Let’s be real, the absolute best time to eat these ultra-crispy onion rings is the second they come off that wire rack. Seriously, a minute on the cooling rack and they are perfection. If you happen to have leftovers—which I highly doubt you will, but we should always plan for contingencies!—you need to know how to bring that texture back to life.
If you try to store them in a sealed container on the counter, the residual steam will soften the batter, and that beautiful crunch we worked so hard for dissolves into sogginess. Rule number one: Never store them warm!
If you have cooked them and they’ve cooled completely, you can store them in a paper bag, loosely folded, on the counter for about 6 hours, but honestly, they are best eaten the day they are made. Once they are totally cold, just getting them reheated correctly is the key to saving them.
The No-Soggy Reheating Method (Oven or Air Fryer Only!)
If you even *think* about putting these back in the microwave, I will personally hunt you down! The microwave reheats moisture, and we want to toast the outside, not steam the coating. We need dry, consistent heat to pull that moisture back out of the breading.
Your oven is your best friend here. Preheat it to about 375 degrees F. Spread those cold rings out in a single layer on a clean baking sheet—make sure they aren’t touching! Pop them in for about 5 to 8 minutes. You’ll notice them firming right back up and getting that lovely snap back.
If you have an air fryer, even better! It’s practically built for reheating fried foods. Set it to 350 degrees F and fry them for about 4 minutes. Shake the basket halfway through. In no time, you’ll have crispy homemade onion rings that taste almost as good as fresh!
Troubleshooting Common Onion Rings Issues
Even when following the best directions, sometimes the kitchen gods aren’t smiling on us. Don’t panic if your first batch doesn’t look like the magazine shoot! Frying takes practice, and knowing what went wrong is half the battle. I’ve been there, staring into the pot wondering why my hard work resulted in sad, greasy things instead of light, crunchy snacks. Let’s walk through what usually causes trouble so you can fix it on the fly.
Problem: The Batter Sticks to the Bottom of the Pot
This is almost always a temperature issue, or sometimes it’s just that you added too many rings at once. If the oil isn’t screaming hot—and I mean 375°F hot—the batter has time to settle onto the metal before it sets up. The batter melts against the cooler surface, and you end up with a ring permanently fused to your pot!
My Fix: Make sure you wait until the oil is fully recovered its temperature, usually by letting it sit for 60 to 90 seconds between batches. Also, never overcrowd the pot! Only fry 4 to 5 rings at a time, depending on the size of your pot. Give them space to float freely!
Problem: My Rings Are Greasy and Pale
If your finished onion rings look heavy, soak through with oil, and never seem to turn that beautiful deep golden color, your oil temperature is too low. Fat needs high heat to properly seal the crust and cook quickly.
My Fix: Stick rigorously to that 375°F target. If the oil is under 350°F, the batter acts like a sponge, absorbing oil instead of crisping up. It might take a minute longer to come back up to temp between dips, but that minute is the difference between delicious and disgusting.
Problem: The Coating Falls Off or Tears During Frying
This one can be a bit tricky, as it usually has two potential culprits. First, check your batter consistency. If it was too watery—maybe you added a splash too much beer—it won’t cling well. Second, check your onions. Were they really wet when they went into the batter?
My Fix: Always give the heavily battered rings a little shake over the bowl before frying to shed the excess gooey batter. If the onions were wet, try patting them thoroughly dry with a paper towel after you slice and separate them. The batter needs a dry surface to bond with!
Frequently Asked Questions About Onion Rings
I know you might have a few lingering questions, especially if you’re more used to baking things than deep frying! It’s totally normal to be a little hesitant about frying at home, but once you see how easy this setup is, you’ll be a pro. Here are the things folks ask me most often when they try to master these easy side dish ideas.
Can I just bake these onion rings instead of frying them?
Oh, sweetie, I wish I could tell you yes, but for this specific recipe—the one aiming for that authentic, ultra-crispy crust—the answer has to be no. Baking doesn’t generate the same immediate, high heat needed to drive the water out of the batter rapidly. If you bake them, the coating will end up tasting dense, oily, and probably a little floppy, not light and shatteringly crisp.
If you want true copycat restaurant onion rings, you have to commit to the hot oil. Trust me, that initial setup feels like a hassle, but once you see the results, you’ll understand why we go through the trouble!
What is the absolute best oil to use for frying these rings?
For deep frying, you need an oil with a high smoke point, which basically means it needs to handle the high heat of 375°F without starting to smoke and break down. Vegetable oil works fantastic and is usually the most affordable option. I often reach for peanut oil if I have it, because it gives the rings a beautiful, neutral flavor and handles the heat like a champ.
Avoid olive oil or butter, obviously! They burn way too fast. Stick to neutral oils like canola, sunflower, or peanut oil for the cleanest flavor profile in your finished appetizers.
How do I prevent the battered rings from sticking to each other while they fry?
This goes right back to batch size, but here’s another small trick! While you are dipping the rings, try to coat only one or two at a time and immediately place them in the oil, making sure they drop into the oil separated from each other. If you try to line up five rings in the batter and then drop them all in together, they will fuse into one giant onion casserole!
Also, when you place them in the oil, use tongs or a slotted spoon to gently nudge them a little bit as they start to cook—maybe 30 seconds after dropping them in. Gently separating them while the batter is still soft ensures they each get their own personal layer of bubbly, crunchy goodness. This is key for perfect crunchy fried appetizer recipes!
What exactly makes this beer batter feel so light and airy?
The lightness comes entirely from the carbonation, that’s the magic ingredient that behaves like a chemical leavener! When you combine the very cold beer with the flour mixture, the bubbles trapped inside that cold liquid rush out when they hit the 375°F oil. These rapidly expanding bubbles are what push the batter up and away from the onion, creating those fantastic little pockets and voids that make the coating light, airy, and not heavy at all. That’s the secret to those lighter crispy homemade onion rings you wanted!
If you’re looking for more ways to build flavorful, simple meals, don’t forget to browse through all of our ideas for easy side dish ideas post when you have a minute!
Nutritional Snapshot of These Onion Rings
Now, let’s talk about fueling up! I always tease that my food philosophy isn’t about calorie counting—it’s about enjoyment and making food that tastes right—but I know some of you like to keep track of what you’re eating. If you’re making these for a party or just curious, here’s a rough idea of what you’re digging into when you pop one of these golden beauties!
Remember, this is for one serving, and we’re talking about deep-fried foods here, so they naturally soak up oil, which adds to the count. These numbers are estimates based on the ingredients list provided, so your actual results might shift a bit depending on the brand of beer you use or how much oil adheres during the fry.
- Calories: Around 350 per serving
- Total Fat: Roughly 20 grams (Don’t forget, a lot of this is the cooking oil!)
- Carbohydrates: About 38 grams coming mostly from the flour batter and the onions themselves.
- Protein: A modest 6 grams in each helping.
You’ll notice the sugar content is pretty low, which is great! That’s because we rely more on the natural sweetness of the onion and the slight molasses in the brown sugar (though this recipe uses mostly white flour) rather than loading the batter down with extra sugar. These are definitely best enjoyed fresh, right out of the fryer, as an occasional, wonderful treat!
PrintUltra Crispy Beer Battered Onion Rings

Make restaurant-style, ultra crispy onion rings at home using a simple beer batter and proper frying technique. These are perfect as a side dish or a game day snack.
- Prep Time: 15 min
- Cook Time: 15 min
- Total Time: 30 min
- Yield: 4 servings 1x
- Category: Side Dish
- Method: Deep Frying
- Cuisine: American
- Diet: Vegetarian
Ingredients
- 2 large yellow onions
- 1 cup all-purpose flour
- 1 teaspoon salt
- 1/2 teaspoon black pepper
- 1/2 teaspoon paprika
- 1/4 teaspoon cayenne pepper
- 1 cup cold beer (lager or pilsner recommended)
- 1 large egg
- Vegetable oil, for deep frying
Instructions
- Slice the onions into 1/4-inch thick rings. Separate the rings and set them aside.
- In a medium bowl, whisk together the flour, salt, pepper, paprika, and cayenne pepper.
- In a separate small bowl, lightly beat the egg. Add the cold beer to the egg and whisk until just combined.
- Pour the wet ingredients into the dry ingredients. Whisk gently until the batter is smooth but still slightly lumpy. Do not overmix.
- Pour about 2 inches of vegetable oil into a heavy-bottomed pot or deep fryer. Heat the oil to 375 degrees F (190 degrees C). Use a thermometer to check the temperature.
- Working in small batches, dip the onion rings into the batter, allowing excess to drip off.
- Carefully place the battered rings into the hot oil, ensuring they do not stick together. Do not overcrowd the pot.
- Fry for 2 to 4 minutes, turning occasionally, until the batter is deep golden brown and very crisp.
- Remove the onion rings with a slotted spoon and place them on a wire rack set over a baking sheet to drain excess oil. Sprinkle immediately with a little extra salt.
- Repeat with the remaining onion rings, allowing the oil temperature to return to 375 degrees F between batches.
- Serve immediately with your favorite dipping sauce.
Notes
- For the crispiest results, make sure your beer is very cold before mixing the batter. Cold liquid hitting hot oil creates a better crust.
- Do not skip the wire rack; placing fried items directly on paper towels traps steam and makes the coating soggy.
- If you do not want to use beer, substitute with club soda or sparkling water for carbonation.
- To make a simple dipping sauce, mix 1/2 cup mayonnaise, 2 tablespoons ketchup, 1 teaspoon Dijon mustard, and a dash of hot sauce.
Nutrition
- Serving Size: 1 serving
- Calories: 350
- Sugar: 8
- Sodium: 450
- Fat: 20
- Saturated Fat: 4
- Unsaturated Fat: 16
- Trans Fat: 0
- Carbohydrates: 38
- Fiber: 2
- Protein: 6
- Cholesterol: 30