
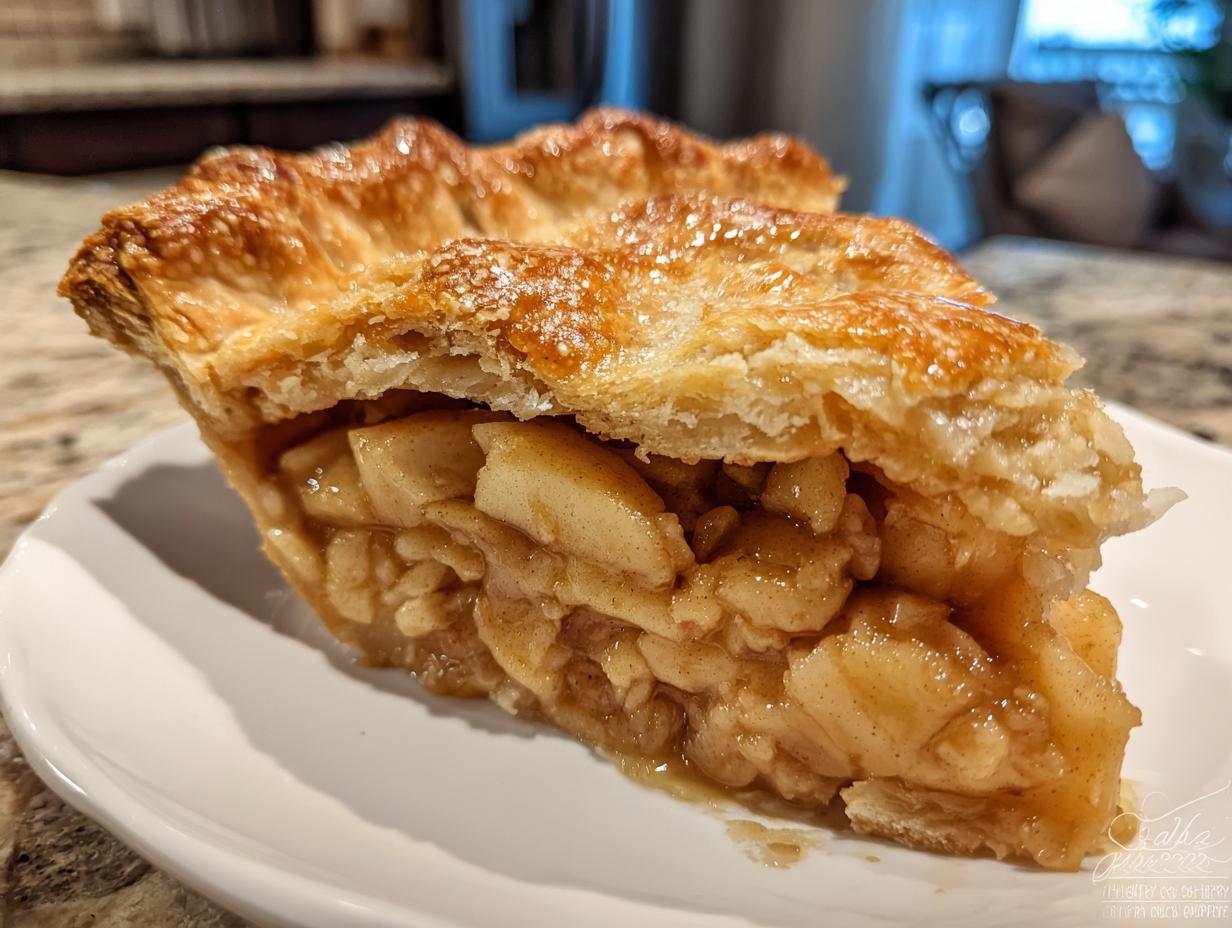
Oh, that smell! Does anything instantly shout ‘cozy kitchen’ louder than a truly perfect, classic apple pie baking away? For me, that scent brings me right back to my grandmother’s counter back in North Carolina, even though my life now feels a million miles away, rushing between events in Austin. I used to think making a truly stunning, bakery-style apple pie from scratch was too fussy for a busy Tuesday night. I was wrong! I’m Charlotte Hayes, and I learned that with a few smart techniques—the kind that build real food dexterity—you can nail that elusive flaky pie crust and get a filling that actually sets, every single time. If you’re looking for the Best Homemade Apple Pie Recipe that delivers absolute comfort and that gorgeous golden finish, trust me, this is the one you need to save right now.
We’re focusing on that traditional build: a thick, buttery double crust packed with warm cinnamon and perfectly tender apples. If you’re looking for an easier seasonal win before you tackle this masterpiece, check out my easy apple crisp recipe, but when you’re ready for the real deal, this is it!
- Why This Is The Best Homemade Apple Pie Recipe Ever
- Gathering Ingredients for Your Classic Apple Pie Recipe
- How to Prepare Your Apple Pie from Scratch Instructions
- Tips for Success: Mastering Your Apple Pie
- Serving Suggestions for Your Apple Pie
- Storage and Reheating Instructions for Leftover Apple Pie
- Frequently Asked Questions About the Classic Apple Pie Recipe
- Understanding the Nutrition Facts for This Apple Pie
- Share Your Experience Making This Simple Homemade Dessert
Why This Is The Best Homemade Apple Pie Recipe Ever
I see so many beautiful pies online, especially on Pinterest, but I know the struggle—bland filling or worse, that dreaded soggy bottom! That’s why I’m so excited to share this apple pie recipe. It’s built to be foolproof, delivering that bakery-style look right in your home oven. We aren’t messing around with fussy techniques; we are focusing on what truly matters for a classic comfort dessert that keeps people asking, “How do you make it so fluffy?”
- It guarantees a perfectly set, not soupy, filling.
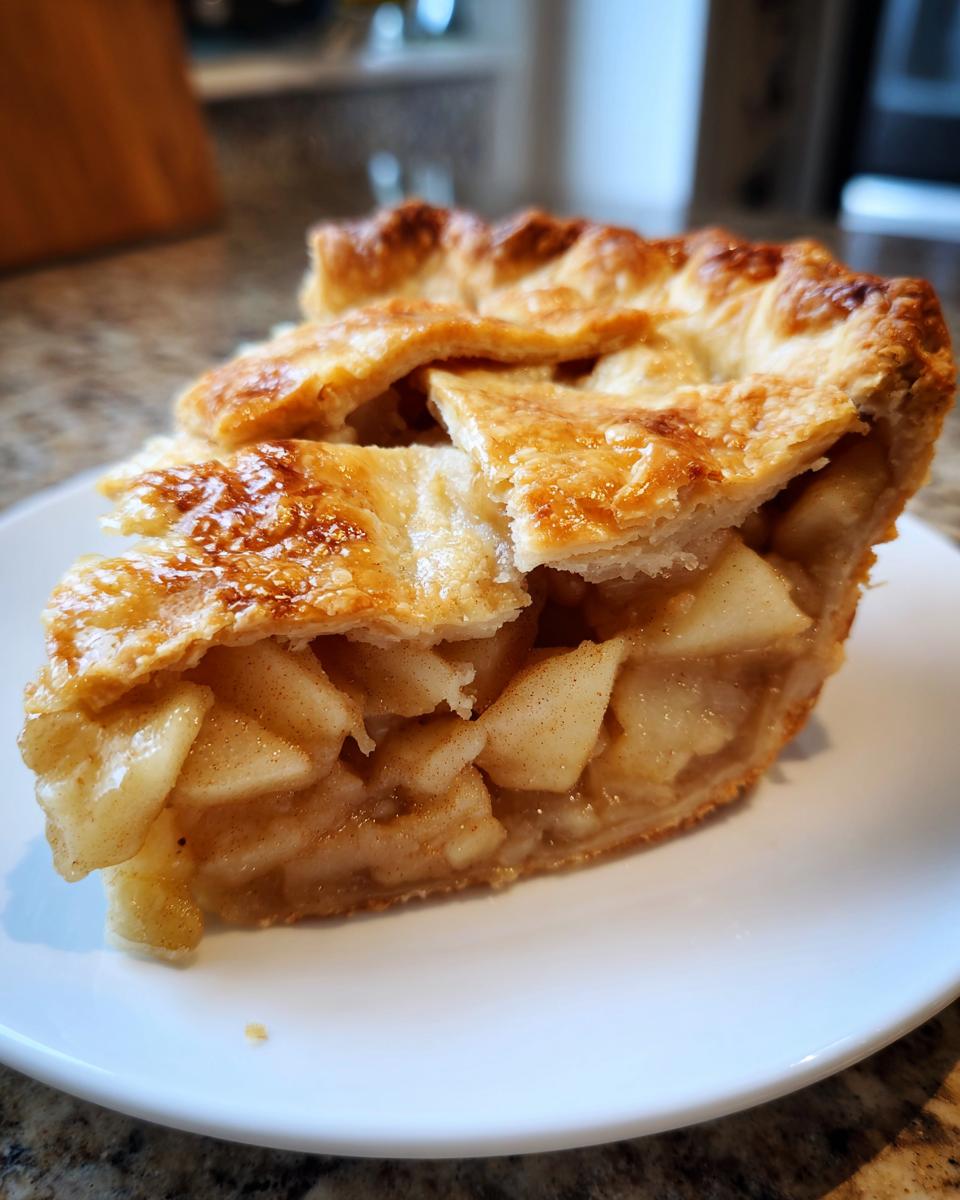
- The crust is reliably buttery and shatters beautifully when you cut it.
- It sticks to the tried-and-true double-crust method that Americans crave.
When you master these basics, you’re practically unstoppable in the kitchen. You can find more deep dives on making pastry perfection over at my flaky pie crust tutorial page, but let’s look at why this specific apple pie works so well.
Achieving That Signature Flaky Pie Crust Tutorial
The secret to that incredible flakiness relies 100% on temperature. You absolutely must keep your butter and water frigid! When the rock-hard, cold butter pieces hit the hot oven, they release steam, which creates those distinct flaky layers we all love in a double-crust apple pie. We use a full top and bottom crust here—no shortcuts—so trapping that cold air is our main job before it even goes into the oven. Keep everything chilled!
The Secret to Perfect Cinnamon Apple Pie Filling
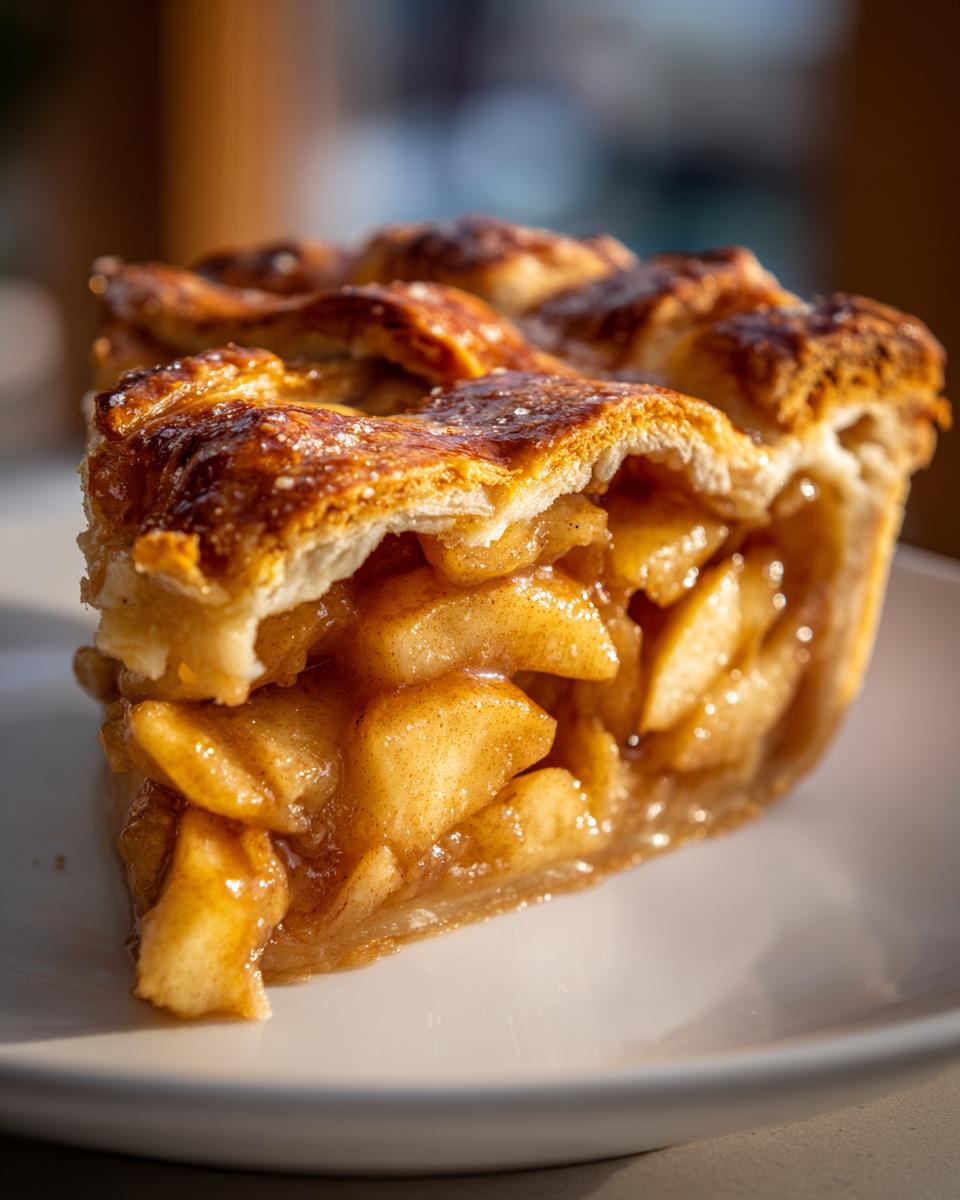
The biggest complaint about homemade pie is watery filling, right? We conquer that by using just enough flour mixed with the sugars to thicken all the apple juices as they cook down. The cinnamon and nutmeg blend here is calibrated perfectly so the cinnamon apple pie filling tastes richly spiced without overwhelming the natural sweetness of the fruit. It sets up firm enough that you can actually slice it neatly!
Gathering Ingredients for Your Classic Apple Pie Recipe
Okay, great baker, this is where the magic starts to feel really real! For a truly show-stopping apple pie, we need to be precise with our ingredients, especially the dough components—that’s how we ensure that buttery crust is crisp, not tough. Don’t stress about finding anything exotic; everything here is ready at your local American grocery store. Before you start mixing, lay everything out so you can see exactly what you need for this homemade apple pie.
If you’ve ever tried making a quick stovetop filling, you might want to bookmark my quick stovetop apple pie filling recipe for a different night, but today we go classic, building the whole thing from scratch!
Dough Ingredients for the Buttery Crust Pie
This dough requires absolute chilling, so make sure your butter and water are seriously cold before you begin. You’ll need:
- 2 1/2 cups all-purpose flour
- 1 teaspoon salt
- 1 cup (2 sticks) cold unsalted butter, cut into cubes
- 1/2 cup ice water, plus more if needed
Filling Ingredients for the Best Apple Pie Ever
For the star of the show—the spiced apple filling—plus the finishing touches that get us that golden polish:
- 6 large Granny Smith apples, peeled, cored, and sliced 1/4-inch thick
- 1/2 cup granulated sugar
- 1/4 cup packed light brown sugar
- 1 teaspoon ground cinnamon
- 1/4 teaspoon ground nutmeg
- 1 tablespoon lemon juice
- 2 tablespoons all-purpose flour (this is crucial for thickening!)
- 1 large egg, beaten with 1 teaspoon water (for the egg wash)
- 1 tablespoon coarse sugar (for sprinkling on top)
How to Prepare Your Apple Pie from Scratch Instructions
This is where we turn those beautiful ingredients into the absolute Best Apple Pie Ever! The steps look straightforward, but the flow matters a lot for success. We have to build that crust structure first, let it rest so it’s cooperative, and then assemble the glorious spiced filling. The biggest mistake folks make is rushing the chill or cutting it too soon—don’t do that! We need patience in the beginning and the end if we want that perfect bakery-style slice. If you’re looking for a great way to use up excess apples, this recipe works perfectly, but if you are super short on time, you might want to check out my apple fritter recipe instead!
Making the Flaky Pie Dough (Chilling Required)
First up, we tackle the dough. Whisk your flour and salt, then go right in with that cold butter. Whether you use a pastry blender or just your fingertips, work the butter into the flour until you have coarse crumbs. I’m talking about pieces ranging from sand-like dust to larger bits about the size of a nice pea—those big pieces are what make the crust flaky, so don’t overwork it! Slowly drizzle in the ice water, stirring just until the dough barely hangs together. Seriously, stop mixing when it still looks a little shaggy. Divide that mass in two, flatten each piece into a disk, wrap them tightly, and send them to the fridge for a mandatory minimum of one hour. That chill time is non-negotiable for us!
Mixing the Cinnamon Apple Pie Filling
While the pastry rests, let’s make the star! In a big bowl, toss all your perfectly sliced Granny Smith apples with both sugars, the cinnamon, nutmeg, lemon juice, and those two tablespoons of flour. Give it a gentle toss—I mean, use your cleanest hands and be gentle!—so every single apple slice is coated evenly with the sweet spice mix. This ensures uniform flavor and helps that filling set beautifully later on.
Assembling and Topping the Classic Apple Pie
Time to roll! On your lightly floured counter, roll out one chilled dough disk into a circle wider than your 9-inch pie plate, maybe about 12 inches across. Carefully lay that dough into the plate, letting the overhang drape nicely. Now, pile in all that glorious apple filling. Roll out the second disk for the top crust. Lay it over the filling, then trim both the bottom and top overhangs to about one inch. Now you need to seal it—crimp those edges however you like, but make sure they are sealed tight! Use a sharp knife to cut several slits right in the center of the top crust. This is your steam escape hatch! Finally, mix your egg and water for the wash, brush it lightly over the whole top, and sprinkle that coarse sugar on for crunch.
Baking and Cooling the Perfect Apple Pie
Get your oven cranked up to 425 degrees F. Pop the pie onto a baking sheet—this catches any buttery drips so you don’t smoke up your kitchen! Bake it hot at 425 degrees F for just 15 minutes. Then, without opening the door if you can help it, reduce the heat down to 375 degrees F and let it bake for another 40 to 50 minutes. You’re looking for a deep golden-brown crust and filling that is visibly bubbling up through those vents. If the edges start looking too dark early on, just loosely tent some foil over them. The last step is the hardest, but you must obey: Let that apple pie cool totally on a rack for at least three hours. If you cut it hot, that beautiful filling turns into soup. Trust me on the wait!
Tips for Success: Mastering Your Apple Pie
Listen, I’ve turned out a few questionable bakes in my day—that’s just part of building ‘food dexterity’! But when it comes to the apple pie, these few little secrets make all the difference between a good pie and the one everyone raves about. We want that satisfying crunch when you tap the top crust, and we want the apples to taste like actual apples, not just sugar. If you’ve got your dough chilling patiently, let’s talk about optimizing that filling and how you can easily switch up the topping for variety. Don’t forget, once you master this fundamental recipe, you can try making my apple pie cookies!
Ingredient Spotlight: Best Apples for Apple Pie
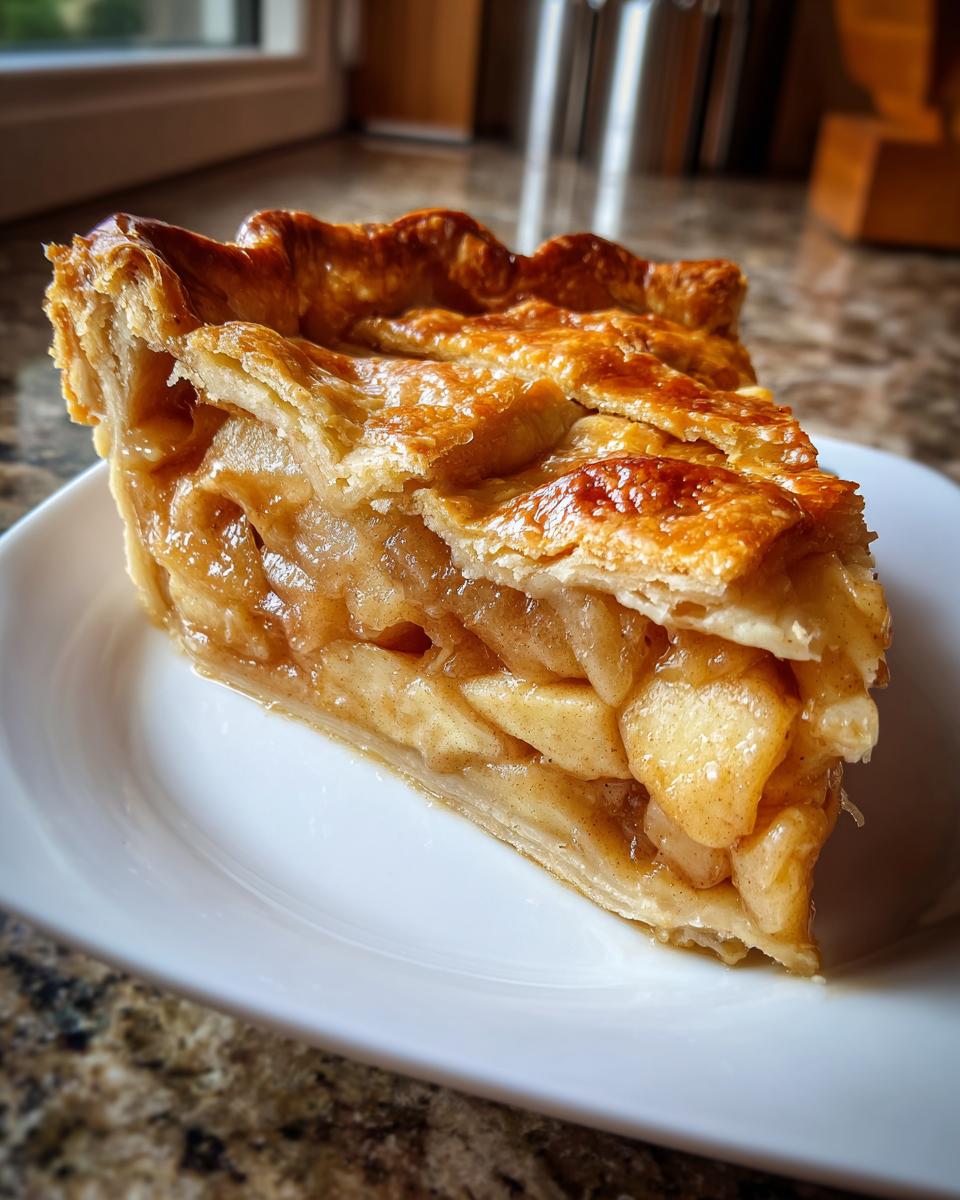
Granny Smiths are fantastic because they hang onto their shape well and bring that essential tartness to cut through the butter and sugar. But even I won’t use *only* Granny Smiths! For the absolute Best Apple Pie Ever flavor, I mix them with a sweeter, slightly softer apple, like Honeycrisp or Gala. The mix gives you that perfect texture combo—some slices stay firm, and some bake down into a rich, almost sauce-like layer. It’s a quick trick that makes the filling flavor sing!
Making an Easy Apple Pie Recipe Variation: Crumble Topping
Sometimes you just don’t want to deal with rolling out that second crust—I totally get it on a busy day! If you’re feeling lazy or just want a change from the classic double-crust, you can easily turn this into a stunning Dutch Apple Pie Recipe with a super simple crumble topping. Just skip Step 4 entirely. Instead, mix together 1 cup of flour, 1/2 cup of packed light brown sugar, 1/2 cup of cold butter (cubed up!), and a half teaspoon of cinnamon until it looks like coarse crumbs. Sprinkle that right over your assembled apple filling instead of the top crust. You’ll still bake it the same way, and you get that delightfully crunchy texture. Isn’t it handy how one base recipe can give you two completely different comfort food desserts?
Serving Suggestions for Your Apple Pie
After all that work creating the perfect apple pie, you deserve the best accompaniment for that first slice! Because this recipe is so comforting and rich, I always keep the extras simple. A warm slice of this homemade apple pie is practically begging for a scoop of good quality vanilla bean ice cream—the contrast between the hot, spiced fruit and the cold, creamy ice cream is seriously unbeatable.
If you’re serving it after a big holiday meal, sometimes even a simple drizzle of homemade caramel sauce takes it over the top. I use a ridiculously easy recipe for caramel crunch topping, and just use the sauce part! It gives you that bakery-style fancy look without any extra fuss. Enjoy every bite!
Storage and Reheating Instructions for Leftover Apple Pie
Okay, let’s talk about the highly unlikely scenario where you actually have leftover apple pie! This rich dessert behaves pretty well on the counter, but storage depends on how long you plan to save it. If you think you’ll devour the rest within about 12 hours, leaving it covered at room temperature is totally fine. But for anything longer, wrap that pie up tightly and tuck it into the fridge—it’ll last comfortably for three or four days that way.
When you want to bring a slice back to life, skip the microwave! Microwaving the crust makes it instantly sad. Instead, reheat individual slices right on a baking sheet in a 350 degree oven for about 8 to 10 minutes. This crisps the buttery crust right back up so it tastes almost freshly baked! If you want ideas for using up those cooled leftovers, my moist applesauce cake recipe uses similar warm flavors!
Frequently Asked Questions About the Classic Apple Pie Recipe
I know pie baking can feel intimidating, but once you get the muscle memory down, you stop needing the recipe so much! People always have great questions about getting that final presentation just right. After all, we are aiming for the Best Apple Pie Ever here, not a flop! I’ve grouped the most common concerns about making this apple pie from scratch right here to help you feel super confident before you even preheat the oven.
If you’re looking for something perhaps less demanding but equally comforting, check out my killer dip recipe—it’s great for parties: homemade blue cheese dip recipe!
What is the best apple to use for an apple pie?
You definitely need apples that fight back a little bit when they bake! Granny Smith apples, which you see in the recipe, are the gold standard because they stay firm and tart. But for the ultimate flavor, I swear by a blend. Try 2/3 Granny Smith and 1/3 a sweeter apple like Honeycrisp or Fuji. This gives you the perfect balance of bright flavor and satisfying texture in your cinnamon apple pie filling.
How do I prevent my Homemade Apple Pie from having a soggy bottom?
This is my favorite question! First, it’s all about the flour in the filling—it absorbs liquid as it bakes, which is key, just like we did in the main instructions. Second, use a baking sheet! Putting that sheet in the oven while it preheats ensures the bottom of your pie plate gets direct, roaring heat right away, crisping up that crust fast. Don’t forget to pull that pie out of the oven right when the filling bubbles thickly!
Can I make the dough for this apple pie ahead of time?
Absolutely, and I highly recommend it! Making the flaky pie crust tutorial dough a day ahead is one of my favorite things to do. After you form the disks, wrap them super tightly in plastic wrap—like, vacuum-sealed tight—and they can chill in the fridge for up to two full days. This extra chilling time actually makes the butter even colder and firms up the gluten development, leading to an even flakier buttery crust pie when you finally roll it out!
Understanding the Nutrition Facts for This Apple Pie
Okay, here’s the deal with the numbers for this absolutely delicious apple pie. Since we’re making everything from scratch—using real butter and whole apples—it’s definitely a comforting treat! Please remember that these figures are just estimates calculated per slice based on the ingredients listed. Your actual values might shift around a little depending on the exact brand of flour or the specific size of the apples you use. We bake for joy here, not for science, but it’s nice to have a rough idea!
If you’re looking for a lighter celebratory drink to go alongside dessert, you should absolutely check out my recipe for easy festive strawberry champagne punch!
- Serving Size: 1 slice
- Calories: 450
- Sugar: 35g
- Sodium: 250mg
- Fat: 25g
- Carbohydrates: 58g
Share Your Experience Making This Simple Homemade Dessert
Whew! You did it! You successfully navigated rolling out the dough, mixing the spice blend, and waiting that incredibly long cooling time for the apple pie to set. I just love hearing about your kitchen adventures, so please don’t be shy!
If this Classic Apple Pie Recipe became your new favorite comfort food, please take a moment to leave a rating right down in the comments below. I especially want to hear about your crust! Did you achieve those perfect flaky layers? Tell me if you stuck with the double crust or tried the crumble topping variation!
Snap a picture of your beautiful, golden-brown masterpiece—especially if you managed to get those perfect slices—and tag me on social media! Seeing your success is honestly the best part of my day. Keep cooking with dexterity, and if you need a fantastic savory counterpoint to all that sweetness, don’t forget to try my recipe for an easy homemade teriyaki sauce!
PrintThe Best Homemade Apple Pie Recipe: Flaky Crust and Perfect Filling

Follow this straightforward recipe to create a classic homemade apple pie with a double, flaky crust and a cinnamon-spiced filling that tastes bakery-level but is simple to make from scratch.
- Prep Time: 45 min
- Cook Time: 65 min
- Total Time: 110 min
- Yield: 8 servings 1x
- Category: Dessert
- Method: Baking
- Cuisine: American
- Diet: Vegetarian
Ingredients
- 2 1/2 cups all-purpose flour
- 1 teaspoon salt
- 1 cup (2 sticks) cold unsalted butter, cut into cubes
- 1/2 cup ice water, plus more if needed
- 6 large Granny Smith apples, peeled, cored, and sliced 1/4-inch thick
- 1/2 cup granulated sugar
- 1/4 cup packed light brown sugar
- 1 teaspoon ground cinnamon
- 1/4 teaspoon ground nutmeg
- 1 tablespoon lemon juice
- 2 tablespoons all-purpose flour (for filling)
- 1 large egg, beaten with 1 teaspoon water (for egg wash)
- 1 tablespoon coarse sugar (for sprinkling)
Instructions
- Prepare the Pie Dough: In a large bowl, whisk together the flour and salt. Cut in the cold butter using a pastry blender or your fingers until the mixture resembles coarse crumbs with some pea-sized pieces of butter remaining. Gradually add the ice water, one tablespoon at a time, mixing until the dough just comes together. Do not overmix. Divide the dough in half, form each half into a disk, wrap in plastic wrap, and chill for at least 1 hour.
- Prepare the Apple Filling: In a large bowl, combine the sliced apples, granulated sugar, brown sugar, cinnamon, nutmeg, lemon juice, and 2 tablespoons of flour. Toss gently until the apples are evenly coated.
- Assemble the Pie: On a lightly floured surface, roll out one disk of dough into a 12-inch circle. Carefully transfer the dough to a 9-inch pie plate. Trim the edges, leaving a 1-inch overhang. Pour the apple filling into the crust.
- Top the Pie: Roll out the second disk of dough. Place it over the filling. Trim the top crust overhang to match the bottom. Crimp the edges to seal. Cut several slits in the top crust to allow steam to escape.
- Apply Egg Wash: Brush the top crust lightly with the egg wash and sprinkle with coarse sugar.
- Bake the Pie: Preheat your oven to 425 degrees F (220 degrees C). Place the pie on a baking sheet to catch any drips. Bake for 15 minutes at 425 degrees F. Then, reduce the oven temperature to 375 degrees F (190 degrees C) and continue baking for 40 to 50 minutes, or until the crust is golden brown and the filling is bubbling. If the edges brown too quickly, cover them loosely with foil.
- Cool: Let the apple pie cool on a wire rack for at least 3 hours before slicing. This allows the filling to set properly.
Notes
- For the flakiest crust, keep your butter and water as cold as possible when making the dough.
- If you prefer a Dutch Apple Pie, skip the top crust and cover the filling with a simple crumble topping made from 1 cup flour, 1/2 cup brown sugar, 1/2 cup cold butter, and 1/2 teaspoon cinnamon, mixed until crumbly.
- Use a mix of tart apples like Granny Smith and sweeter apples like Honeycrisp for the best flavor balance.
Nutrition
- Serving Size: 1 slice
- Calories: 450
- Sugar: 35g
- Sodium: 250mg
- Fat: 25g
- Saturated Fat: 15g
- Unsaturated Fat: 10g
- Trans Fat: 0g
- Carbohydrates: 58g
- Fiber: 3g
- Protein: 5g
- Cholesterol: 60mg