

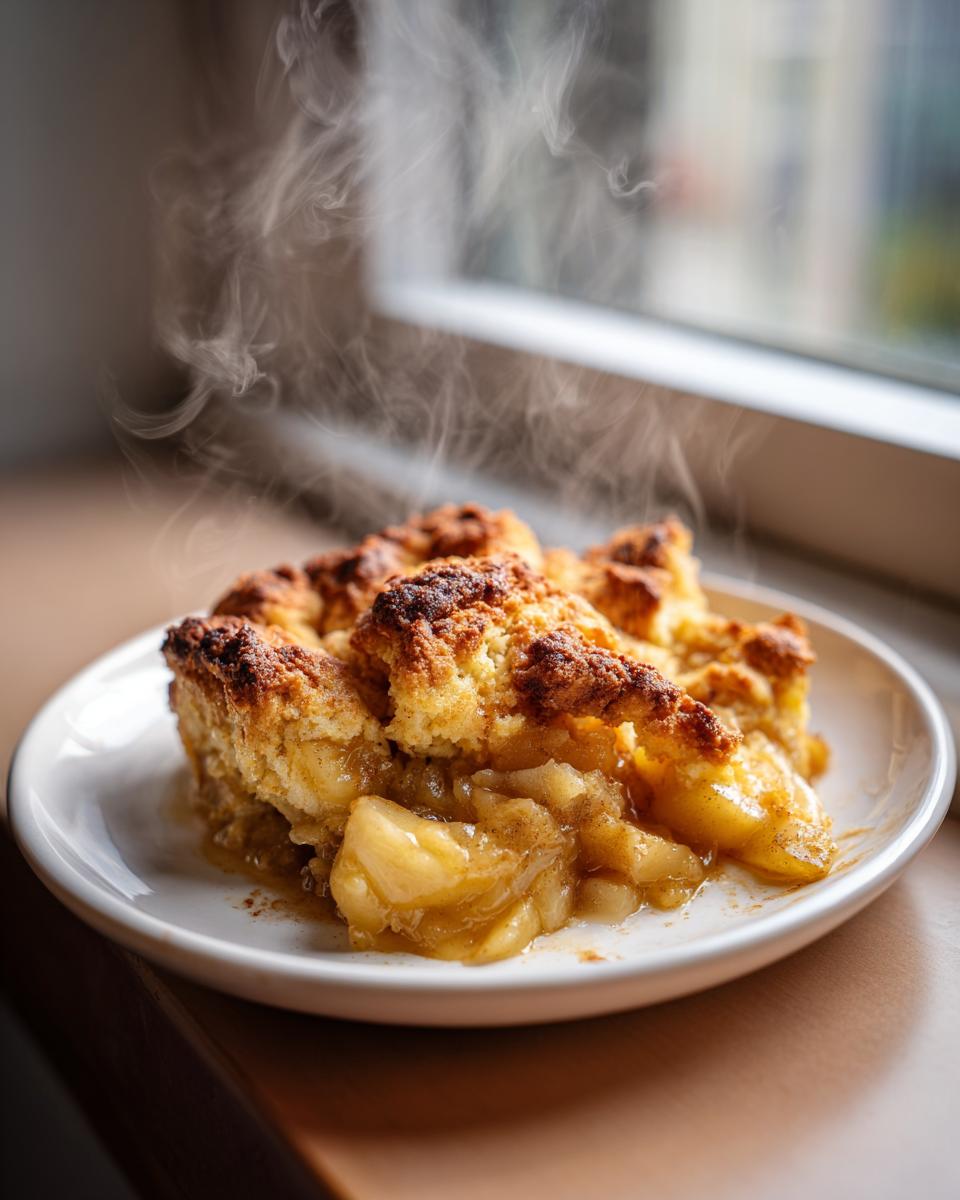
There is just nothing that beats the smell of a warm, baked fruit dessert filling your kitchen, right? It’s instant cozy mode! That deep, sweet spice aroma just signals that everything is right in the world. If you’ve been looking for that perfect hug-in-a-bowl, you’ve landed in the right spot. This is my recipe for the Classic Easy Apple Cobbler with Buttery Biscuit Topping, and honestly, it’s non-negotiable at my house. It’s surprisingly simple! We believe here at Food Dexterity that the best food comes from making achievable, comforting dishes right from scratch, and this apple cobbler is the perfect example of that philosophy coming to life.
- Why This Easy Apple Cobbler Recipe Works for You
- Ingredients for the Best Apple Cobbler
- Step-by-Step Instructions for Homemade Apple Cobbler
- Tips for the Best Apple Cobbler Success
- Variations on the Classic Apple Cobbler
- Serving Suggestions for Your Warm Apple Dessert
- Storage and Reheating Instructions for Apple Cobbler
- Frequently Asked Questions About Apple Cobbler Recipe
- Estimated Nutritional Data for This Apple Cobbler
- Share Your Homemade Apple Cobbler Experience
- Estimated Nutritional Data for This Apple Cobbler
- Share Your Homemade Apple Cobbler Experience
Why This Easy Apple Cobbler Recipe Works for You
Look, I get it. Life is busy, even when the weather gets brisk and screams for warm baked goods. That’s why I perfected this recipe to be a true Quick Apple Dessert that doesn’t sacrifice flavor for speed. This Family Favorite Cobbler delivers maximum comfort with minimal fuss.
- It’s incredibly straightforward; you don’t need fancy equipment.
- The topping bakes up golden and tender every single time.
- It’s perfect for feeding a crowd—just grab a bigger dish!
- It embodies that cozy feeling we chase with all our easy fall desserts around here.
Ingredients for the Best Apple Cobbler
Okay, let’s talk about what goes into this beauty. For our Homemade Apple Cobbler to really sing, you need quality ingredients, but nothing stressful or hard to find! I always keep the filling components separate from the topping components so you don’t accidentally grab the wrong sugar.
For the Spiced Apple Filling
This is where all that juicy, warm flavor comes from. When slicing your apples, think about firmness. I love using Granny Smith for a little tartness, but Honeycrisp works great if you want it sweeter!
- 6 large apples (like Granny Smith or Honeycrisp), peeled, cored, and sliced
- 1/2 cup granulated sugar
- 1/4 cup packed light brown sugar
- 1 tablespoon all-purpose flour (this helps thicken the juices!)
- 1 teaspoon ground cinnamon
- 1/4 teaspoon ground nutmeg
- 1 tablespoon lemon juice
- 1/4 cup cold unsalted butter, cut into small pieces (for dotting the top)
For the Buttery Cobbler Topping
This topping is what makes it a cobbler instead of a crisp, and it’s glorious—kind of closer to a soft biscuit. The key here, and I can’t stress this enough, is that the butter MUST be ice cold. It makes all the difference in creating that tender, flaky bite for your Buttery Cobbler Topping.
- 1 1/2 cups all-purpose flour
- 2 teaspoons baking powder
- 1/2 teaspoon salt
- 1/4 cup granulated sugar
- 1/2 cup cold unsalted butter, cut into small pieces
- 1/2 cup buttermilk (this is crucial for that perfect slight tang and texture!)
- 1 tablespoon milk (just for brushing the top)
- 1 teaspoon coarse sugar (for sprinkling for that ultimate golden crunch)
Step-by-Step Instructions for Homemade Apple Cobbler
Don’t let the two parts scare you; this Classic Dessert Recipe comes together so fast! We’re going to treat the filling and the topping separately, which is the trick to getting everything cooked perfectly without any mushy disasters. If you’re aiming for that perfect warm simple apple bake, follow these steps exactly!
Preparing the Apples and Baking Dish
First things first, get your oven roaring—set it to 375°F (190°C). While it heats up, grease your 9-inch pie dish or 8×8 dish. Now take all those glorious sliced apples and toss them in a big bowl with both sugars, that tablespoon of flour, cinnamon, nutmeg, and the lemon juice. That little bit of lemon is key; it keeps the apples bright and helps thicken up those amazing spicy juices while baking.
Once everything is coated nicely, pour the whole apple mix into your prepared dish. Then, take those little cubes of cold butter for the filling and just dot them randomly over the top of the apples. They’ll melt down and swirl right into the spices—yummy!
Making the Buttery Cobbler Topping
Time for the biscuit magic! In a separate bowl, whisk together the topping flour, baking powder, salt, and topping sugar. Now, take your half-cup of very cold butter pieces and use a pastry blender or your fingertips to work it into the dry mix. You’re aiming for coarse crumbs, like little peas. Seriously, don’t blend it into smooth sand!
When the butter is worked in, pour in the buttermilk all at once. Mix it gently—just until it *barely* comes together to form a shaggy dough. Overmixing here is your enemy; it makes the topping tough instead of fluffy. Stop as soon as you can’t see much dry flour. Trust me on this one!
Assembling and Baking Your Apple Cobbler
Take big ol’ spoonfuls of that topping dough and just drop them over those lovely spiced apples. Don’t stress if you leave little gaps between the scoops—that’s the point of a cobbler! We want those bubbling juices to peek through. Brush those biscuit mounds lightly with milk and sprinkle on that coarse sugar for crunch.
Bake it for about 40 to 45 minutes. You are looking for two things: the topping has to be beautifully golden brown, and the apple filling underneath needs to be thick and bubbling fiercely. Let it rest for about 15 minutes before digging in. That cooling time lets those juices settle down so you don’t burn your mouth off!
Tips for the Best Apple Cobbler Success
Even with an easy recipe like this, a couple of small tweaks can take you from good to absolutely legendary! Since we want that perfect Cinnamon Apple Dessert every single time, let’s chat about how to handle the fruit and the topping. These little pieces of know-how are the difference-makers.
First up, let’s talk apples again. If you just toss in those soft, mealy apples you find in the back of the pantry, you’ll end up with mush. For that satisfying texture—where the apple pieces still hold their shape under the topping—you need firmer varieties. Granny Smith is my absolute go-to because the acidity actually cuts through all that sugar beautifully. If you want something a little sweeter but still firm, go for Honeycrisp or Braeburn. Always slice them about the same thickness, too, so they cook evenly. Consistency is your friend in the baking world!
Now, about that topping: you got a biscuit-style topping here, which means it’s going to be tender and slightly cake-like, especially if you use whole buttermilk like the recipe calls for. If you were dreaming of a crunchier topping, like an apple crisp, you can totally pivot! For a crispier edge, save some of those large butter chunks from the cooler part of the topping mix and sprinkle them right on top of the biscuits before baking. They’ll melt out and crisp up around the edges.
And here’s one I learned the hard way: don’t skip that 15-minute rest period! When that baking dish comes out of the oven, those apple juices are scalding hot and liquidy. If you dive in immediately, everything runs out onto your plate. Letting it sit means the flour and sugar in the juices have a moment to set up, turning those wonderful spices into a thick, glorious sauce. It’s worth the wait, I promise! For more ideas on making warm apple treats even better, check out my tips for a moist cinnamon apple cake—many of those spice secrets apply here!
Variations on the Classic Apple Cobbler
You know I love keeping things simple with the classic version, but our kitchen is all about making food work for *you*. So, if you’re feeling a little creative or just don’t have one ingredient on hand, don’t panic! We can easily tweak this Spiced Apple Dessert without losing that cozy, satisfying feeling.
One of the most fun things people ask about is how to get that decadent flavor layering. Some people love the idea of a Cinnamon Roll Cobbler vibe, and we can get close!
If you have pre-made cinnamon roll dough—the kind you buy in a tube—you can totally use that instead of our biscuit topping! Just cut the rolls into quarters and drop them over the apples exactly where you would drop my biscuit dough. It bakes up sweet, gooey, and completely over-the-top delicious. It’s cheating, but in the best possible way!
Another variation I adore, especially when I want something richer for a weekend bake, is adding nuts and maple. This gives it a lovely autumnal depth. Before baking, toss about a half-cup of roughly chopped pecans or walnuts right in with your apples. Then, in place of the coarse sugar sprinkling on top, drizzle about two tablespoons of real maple syrup over the biscuit bumps before they go into the oven.
That maple syrup caramelizes while it bakes, giving you this incredible shine and a deeper, richer flavor that complements the cinnamon perfectly. This is one of those small additions that tastes like you spent hours slaving away, but really, it was just a quick drizzle! If you’re into playing around with apple flavors in general, you should definitely look at my recipe for apple snickerdoodle bars for more sweet combinations!
Serving Suggestions for Your Warm Apple Dessert
Listen, you made this magnificent, bubbling, hot apple cobbler. Do not, I repeat, *do not* make the mistake of eating it plain right off the spoon while standing over the sink! That’s a crime against baking.
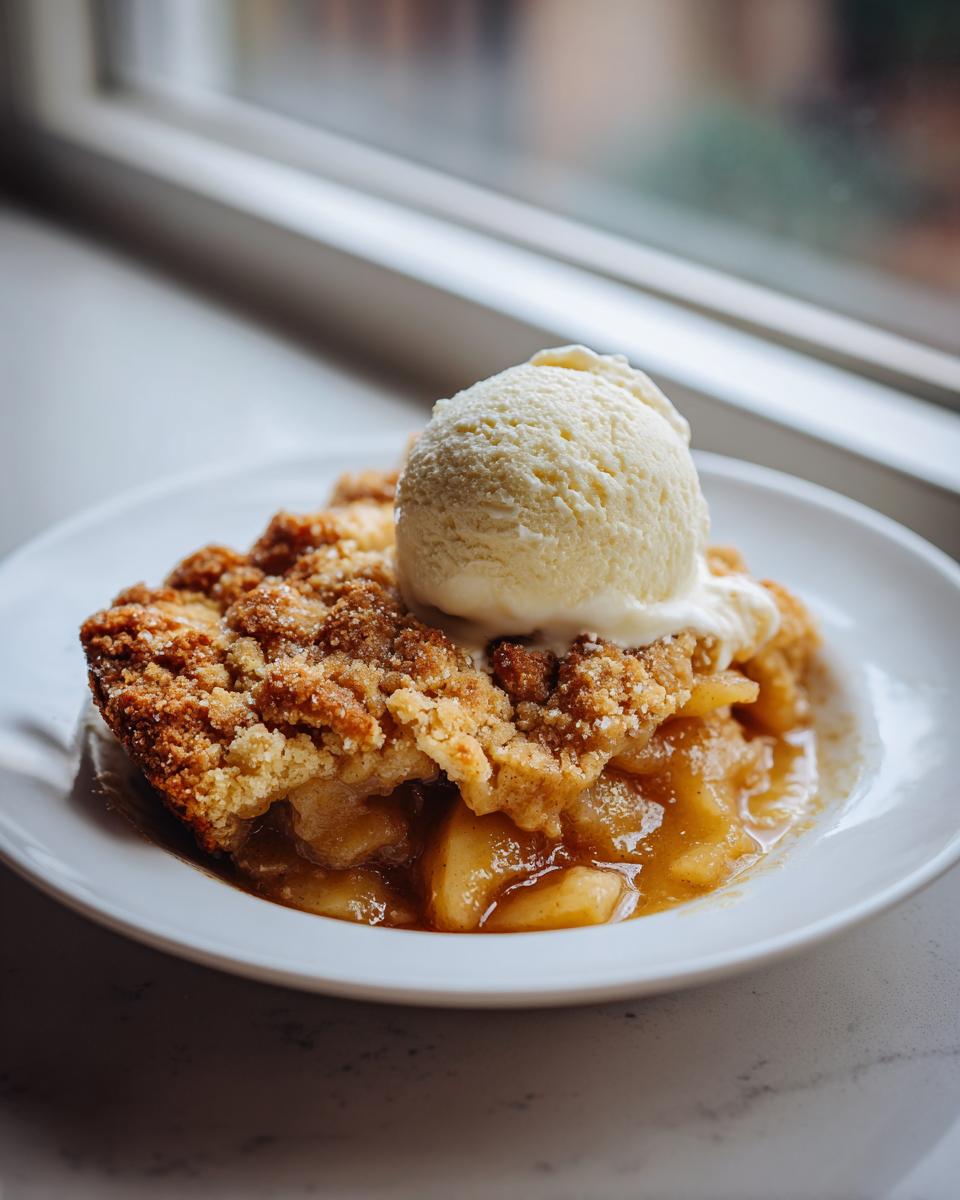
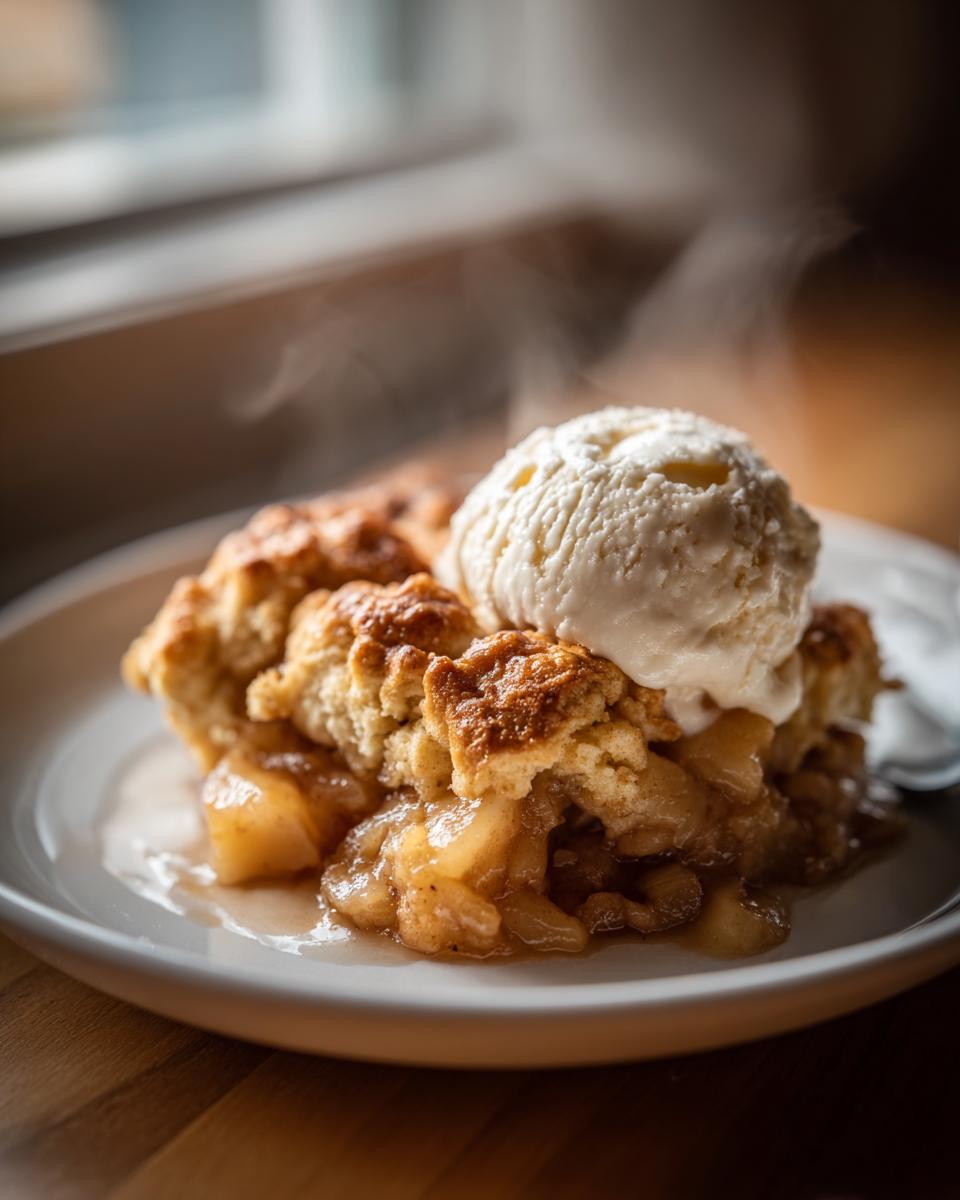
The absolute, number one, can’t-be-argued-with pairing for any warm cinnamon apple dessert is high-quality vanilla ice cream. It’s the law of flavor physics!
When that cold, creamy vanilla hits the hot, tart apples and the buttery biscuit topping, magic happens. The ice cream melts down into the spiced juices, turning into this impossibly delicious, creamy sauce right in your bowl. This is the quintessential Dessert with Ice Cream experience, and it’s what I insist everyone eats when they come over.
But hey, if you’re feeling extra generous or just love a fancy topping—and who doesn’t?—we have a few other ways to dress up your bowl:
- Caramel Drizzle: A dark, rich caramel sauce is heavenly. It doubles down on the brown sugar notes in the filling. If you need a ridiculously easy homemade version, check out my recipe for chocolate sauce recipe; the method for a good caramel drizzle is very similar!
- Whipped Cream: Not the stuff from a can, unless it’s an absolute emergency! Whip heavy cream yourself with just a touch of powdered sugar and a tiny splash of vanilla extract. It stays lighter than ice cream but still gives you that cooling contrast against the hot spices.
- A Nutty Crunch: If you didn’t add pecans to the filling, you can always toast some pecans or walnuts separately and just sprinkle them over the top of the scoop of ice cream. Adds a great texture pop!
If you want to see how they do it up in other kitchens, sometimes I look at the amazing presentations others have made. If you’re looking for more inspiration on classic cobblers, take a peek at this wonderful homemade apple cobbler recipe I found.
Storage and Reheating Instructions for Apple Cobbler
This Comfort Food Dessert is almost always best eaten fresh out of the oven, knowing those apples are perfectly tender and the topping is crisp, but let’s be real—sometimes we have leftovers! And we absolutely should save them, because that warm spiced goodness is too good to waste the next day.
If you have any leftover Apple Cobbler Recipe that you just can’t finish in one sitting, you have a couple of storage choices. First of all, let it cool down completely on the counter. Trying to put a hot dish straight into the fridge just traps steam and makes everything soggy faster, and we absolutely want to avoid a soggy topping!
Storing Your Cobbler
Once it’s totally cool—I mean, room temperature—cover the dish tightly. You can use plastic wrap, or if you stored it in a separate pan, transfer it to an airtight container. It will keep really well on the countertop for about a day, provided your kitchen isn’t super warm or humid. Honestly, for this biscuit-style topping, I prefer the fridge if I know I won’t eat it the next day.
In the refrigerator, your Homemade Apple Cobbler should be good for a solid three to four days. Just make sure it’s covered well so it doesn’t grab any weird fridge smells. The cold temperatures will definitely firm up that buttery topping, so don’t panic when you see it the next morning!
The Best Way to Reheat It
This is the crucial part! If you reheat your From Scratch Apple Cobbler incorrectly, you ruin that lovely work you did on the topping. Microwaving is fast, sure, but it turns the topping distinctly chewy and hard—no thank you!
For the best results, you absolutely need the oven or an air fryer. Pop a slice (or the whole thing, if you’re feeling brave!) onto a baking sheet lined with foil. Bake it at about 325°F (160°C) for about 10 to 15 minutes, or until it’s heated through and you can hear the apple layer starting to bubble gently again. This low and slow process gently revives the topping, bringing back some of that beautiful, tender texture we love.
If you are serving it cold straight from the fridge but still want that ice cream contrast, reheat just the cobbler part for about 10 minutes, then top it with the cold ice cream. That contrast is pretty amazing, too, even if it isn’t piping hot!
Frequently Asked Questions About Apple Cobbler Recipe
I know you’re going to love making this, but before you run off to peel those apples, let’s tackle a few questions that pop up when people try my Apple Cobbler Recipe for the first time. These little details are what separate a good bake from a legendary one!
What apples should I really use for the best texture?
This is probably the most important question for any From Scratch Apple Cobbler! You need apples that hold their shape when they bake, right? If you use something too soft, they dissolve into applesauce, and nobody wants that. My absolute favorite combo is using Granny Smith—they bring perfect tartness—mixed with Honeycrisp. If you can only get one, stick with Granny Smith or maybe a firm Gala. Avoid Red Delicious at all costs; they turn to mush way too fast. You want tender but still distinctly apple-shaped pieces!
Help! My cobbler topping came out soggy on the bottom. What happened?
Oh, I feel your pain! A soggy bottom is the nemesis of a good biscuit topping. Usually, this happens for one of three reasons. First, the apples weren’t cooked down enough before the topping went on, so they released too much liquid too fast. Second, you might have overmixed the topping dough; overmixing develops gluten, which makes the dough dense and less able to resist absorbing the apple juice. Third, and common in every Classic Dessert Recipe like this, is not letting it rest! If you eat it piping hot right out of the oven, the juices haven’t thickened up yet. Give it that crucial 15-minute rest period while you scoop the ice cream; trust me, it helps the base firm up a ton.
Can I make the filling ahead of time? And how long does it keep?
Yes, you absolutely can get a jump start! You can mix the apple filling, toss it with the spices and sugar, and store it sealed tight in the fridge for up to 24 hours. Just keep those chopped apples safe from browning by adding that lemon juice! When you’re ready to bake, assemble the topping fresh, layer it on, and add a few extra minutes to the bake time since the filling will be cold. As for leftovers, they last great for about 3-4 days covered in the fridge. If you want to reheat it, skip the microwave and try warming a slice in the oven or air fryer, like I detailed in my storage notes!
Is this recipe hard to adjust if I need to serve more people?
This is such a simple bake to scale up, which is why it’s a great Comfort Food Dessert for gatherings. Just double everything—the apples, the sugar, and yes, double the topping ingredients too! The main thing you have to watch is the dish size. If you double it, you’ll probably need a 9×13 inch baking dish instead of the 8×8 called for. You might need to add 10 to 15 minutes to the bake time since the pan will be much deeper, but watch for that golden color and the bubbling juices around the edges, just like you would with the original batch.
If you’re looking for other smart ways to cook efficiently for a crowd, check out how I make my simple roasted chicken—great techniques are useful everywhere in the kitchen!
Let me know what you think once you try this! We all share tips, so if you have a trick, share it over on the contact page! Find other great tips on making simple fruit desserts here: Easy Apple Cobbler.
Estimated Nutritional Data for This Apple Cobbler
I always try to be upfront about what we are eating, even when we are indulging in the best comfort food! Here is an estimate for one generous serving of this Warm Apple Dessert based on the recipe provided. Keep in mind, these are just guidelines, and how much ice cream you load on top makes a big difference!
- Serving Size: 1 serving
- Calories: 420
- Sugar: 45g
- Sodium: 250mg
- Fat: 20g
- Saturated Fat: 12g
- Unsaturated Fat: 8g
- Trans Fat: 0.5g
- Carbohydrates: 60g
- Fiber: 4g
- Protein: 5g
- Cholesterol: 50mg
Just a quick note: these figures are based purely on the listed ingredients. If you swap buttermilk for heavy cream or use different apple varieties, the final count will shift a little. But hey, we are enjoying a classic, homemade treat, and that’s what matters most!
Share Your Homemade Apple Cobbler Experience
When you take that first bite of this Buttery Cobbler Topping combined with those tender, spiced apples—tell me about it! Seriously, I live for hearing how your baking turned out. Snap a picture and tag me, or just drop a comment below letting me know if you added pecans or went for the cinnamon roll topping twist!

Every time you make one of our recipes, you’re joining in on the philosophy here: cooking should be joyful, not stressful. If you loved this Simple Apple Bake, please give it a rating down below so others can find this cozy recipe too! I always love checking in on my readers over on my contact page, and you can see how others have enjoyed their bakes, too!
Estimated Nutritional Data for This Apple Cobbler
I always try to be upfront about what we are eating, even when we are indulging in the best comfort food! Here is an estimate for one generous serving of this Warm Apple Dessert based on the recipe provided. Keep in mind, these are just guidelines, and how much ice cream you load on top makes a big difference!
- Serving Size: 1 serving
- Calories: 420
- Sugar: 45g
- Sodium: 250mg
- Fat: 20g
- Saturated Fat: 12g
- Unsaturated Fat: 8g
- Trans Fat: 0.5g
- Carbohydrates: 60g
- Fiber: 4g
- Protein: 5g
- Cholesterol: 50mg
Just a quick note: these figures are based purely on the listed ingredients. If you swap buttermilk for heavy cream or use different apple varieties, the final count will shift a little. But hey, we are enjoying a classic, homemade treat, and that’s what matters most!
Share Your Homemade Apple Cobbler Experience
When you take that first bite of this Buttery Cobbler Topping combined with those tender, spiced apples—tell me about it! Seriously, I live for hearing how your baking turned out. Snap a picture and tag me, or just drop a comment below letting me know if you added pecans or went for the cinnamon roll topping twist!
Every time you make one of our recipes, you’re joining in on the philosophy here: cooking should be joyful, not stressful. If you loved this Simple Apple Bake, please give it a rating down below so others can find this cozy recipe too! I always love checking in on my readers over on my contact page, and you can see how others have enjoyed their bakes, too!
PrintClassic Easy Apple Cobbler with Buttery Biscuit Topping

Follow this simple recipe for a classic apple cobbler featuring tender, cinnamon-spiced apples beneath a buttery, golden-brown biscuit topping. This comforting dessert is quick to make and perfect for family gatherings.
- Prep Time: 20 min
- Cook Time: 45 min
- Total Time: 65 min
- Yield: 6 servings 1x
- Category: Dessert
- Method: Baking
- Cuisine: American
- Diet: Vegetarian
Ingredients
- 6 large apples (like Granny Smith or Honeycrisp), peeled, cored, and sliced
- 1/2 cup granulated sugar
- 1/4 cup packed light brown sugar
- 1 tablespoon all-purpose flour
- 1 teaspoon ground cinnamon
- 1/4 teaspoon ground nutmeg
- 1 tablespoon lemon juice
- 1/4 cup cold unsalted butter, cut into small pieces (for filling)
- 1 1/2 cups all-purpose flour (for topping)
- 2 teaspoons baking powder
- 1/2 teaspoon salt
- 1/4 cup granulated sugar (for topping)
- 1/2 cup cold unsalted butter, cut into small pieces (for topping)
- 1/2 cup buttermilk
- 1 tablespoon milk (for brushing top)
- 1 teaspoon coarse sugar (for sprinkling)
Instructions
- Preheat your oven to 375°F (190°C). Lightly grease a 9-inch pie dish or an 8×8 inch baking dish.
- In a large bowl, combine the sliced apples, granulated sugar, brown sugar, 1 tablespoon of flour, cinnamon, nutmeg, and lemon juice. Toss gently until the apples are evenly coated.
- Pour the apple mixture into the prepared baking dish, spreading it into an even layer. Dot the top of the apples with the 1/4 cup of cold butter pieces.
- Prepare the topping: In a separate medium bowl, whisk together the 1 1/2 cups of flour, baking powder, salt, and 1/4 cup of sugar for the topping.
- Cut in the 1/2 cup of cold butter pieces using a pastry blender or your fingertips until the mixture resembles coarse crumbs with some pea-sized pieces remaining.
- Pour in the buttermilk and stir just until the dough comes together. Do not overmix.
- Drop spoonfuls of the biscuit topping evenly over the apple filling. It does not need to cover the entire surface; gaps are fine.
- Brush the tops of the biscuits lightly with milk and sprinkle with coarse sugar.
- Bake for 40 to 45 minutes, or until the topping is golden brown and the apple filling is bubbling.
- Let the cobbler cool for at least 15 minutes before serving warm with vanilla ice cream.
Notes
- For a richer flavor, substitute some of the apples with pears.
- If you prefer a crispier topping, you can roll the dough out and cut it into rounds or strips instead of dropping spoonfuls.
- This dessert tastes best served warm, allowing the spices and butter to meld with the soft apples.
Nutrition
- Serving Size: 1 serving
- Calories: 420
- Sugar: 45g
- Sodium: 250mg
- Fat: 20g
- Saturated Fat: 12g
- Unsaturated Fat: 8g
- Trans Fat: 0.5g
- Carbohydrates: 60g
- Fiber: 4g
- Protein: 5g
- Cholesterol: 50mg