
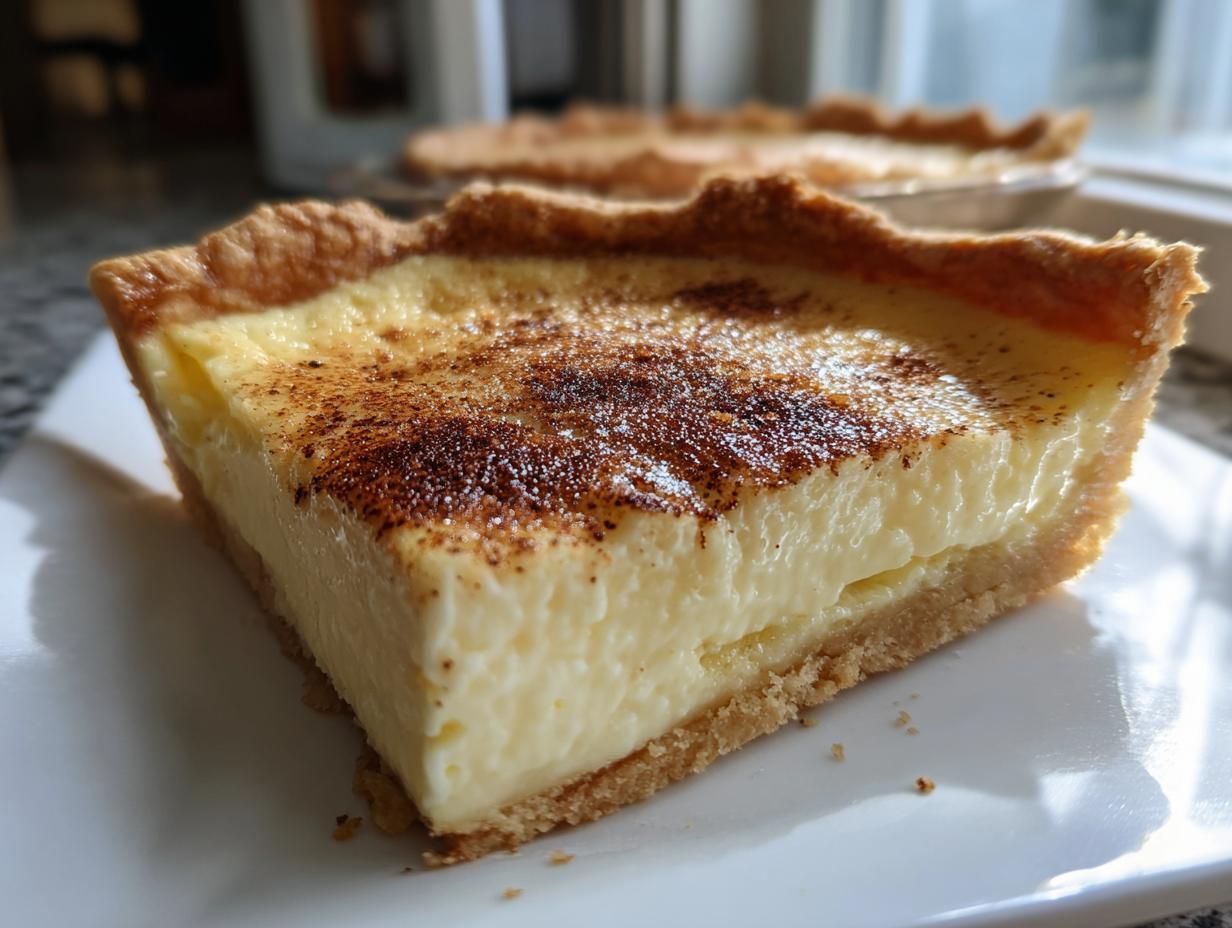
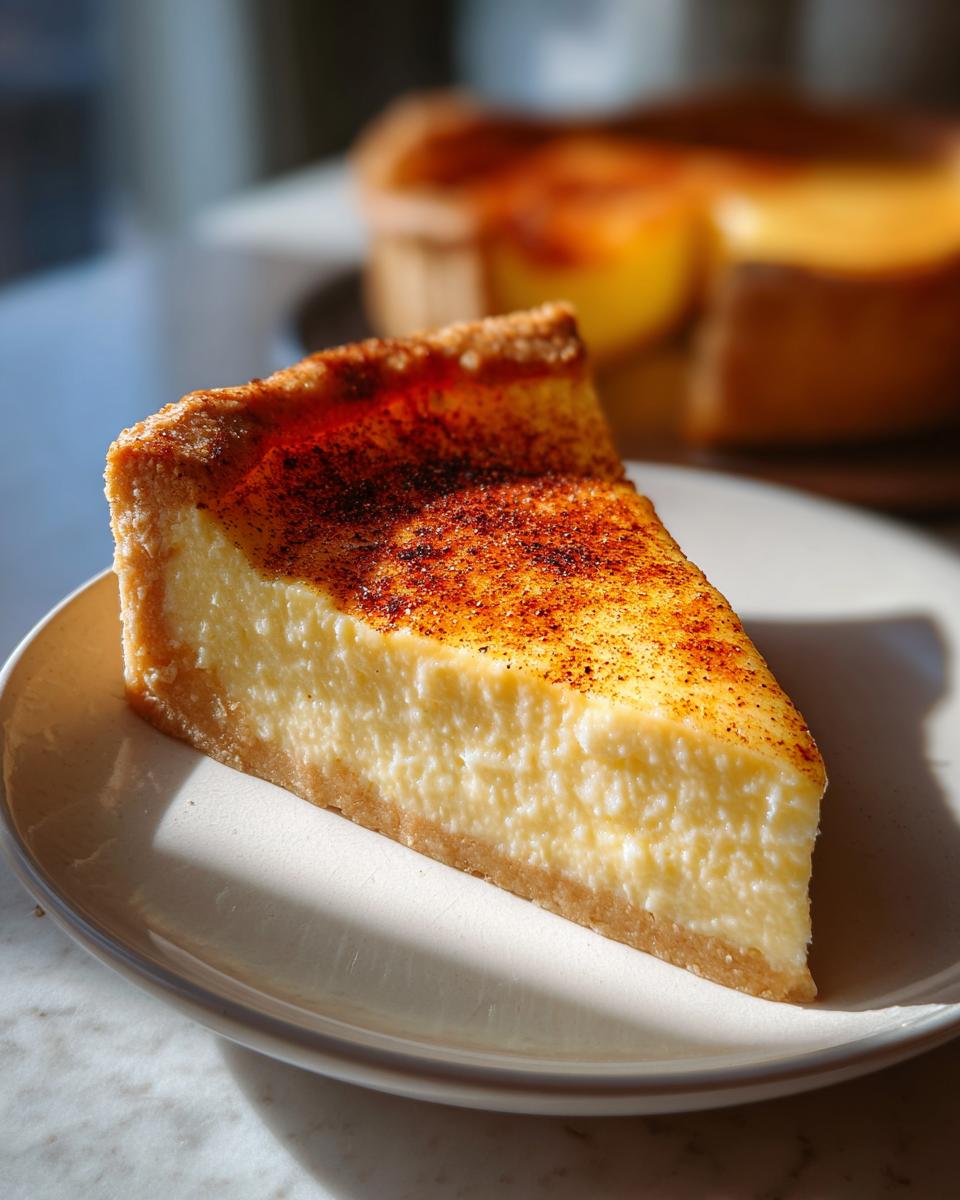
Oh, when you need a hug in dessert form, nothing beats a classic baked custard. Forget fancy layers or complicated techniques; sometimes you just need that simple, comforting sweetness that tastes exactly like home. That’s why I spent ages perfecting this **custard pie** recipe—we’re making The Ultimate Smooth & Creamy Old Fashioned Vanilla Custard Pie, and trust me, it’s shockingly easy. My goal here, just like everything else on this site, is to take something that seems tricky and prove it’s totally achievable. We are aiming for that foolproof, velvety mouthfeel that melts instead of cracks. If you thought a genuinely classic custard pie was out of reach, get ready to be surprised!
- Why This Old Fashioned Custard Pie Recipe Works (Expert Tips for a Smooth Custard)
- Ingredients for the Ultimate Smooth Vanilla Custard Pie
- Step-by-Step Instructions for Your Easy Homemade Custard Pie
- Tips for a Perfect, No Crack Custard Pie Every Time
- Ingredient Notes and Substitutions for Your Custard Pie
- How to Serve and Store Your Classic Custard Pie Recipe
- Variations on the Traditional Custard Pie
- Frequently Asked Questions About Making Custard Pie
- Estimated Nutritional Breakdown for This Rich Dessert Recipe
Why This Old Fashioned Custard Pie Recipe Works (Expert Tips for a Smooth Custard)
So, why do people end up with grainy or cracked custard? Honestly, it usually comes down to rushing the gentle steps. This custard pie recipe focuses on technique, not complicated ingredients. We want that comforting, smooth texture that makes you close your eyes after the first bite. If you want to see all my best tricks for a fail-proof egg custard recipe, I have a whole post dedicated to it! Here are the secrets I stick to religiously when baking this classic dessert.
Achieving the Perfect Creamy Custard Pie Filling Texture
The number one mistake folks make is whipping the eggs too hard! If you beat them like you’re making meringue, you introduce tons of air. When that air heats up in the oven, boom—cracks! For a truly perfect Creamy Custard Pie Filling, grab your whisk and just combine the eggs, sugar, and milk until they are friendly with each other. That’s it! Also, using good old whole milk really ensures the custard sets up rich; don’t skimp there unless you absolutely have to.
The Secret to a Buttery Flaky Pie Crust for Your Custard Pie
My recipe calls for putting the filling directly into the unbaked crust, and this is key for that tender bottom layer. If you try to pre-bake or blind bake this delicate filling, you risk having a soggy or tough crust underneath the custard, which ruins the whole vibe! We want that Buttery Flaky Pie Crust to practically melt away when you bite through to the creamy filling underneath. Make sure your dough is chilled right up until it hits the oven.
Ingredients for the Ultimate Smooth Vanilla Custard Pie
Okay, now for the easy part! This is why I love a good, Old Fashioned Egg Custard Pie; the ingredient list is so short and basic. You probably have almost everything for this Simple Dessert Pie in your pantry right now. Remember, precision matters when we are talking about that perfect, silky texture, so measure carefully! Here is exactly what you’ll need to gather before we mix up this wonderful easy recipe.
- 1 (9-inch) unbaked pie crust (store-bought or homemade—no need to pre-bake this one!)
- 3 large eggs (just eggs, no whites or yolks separated!)
- 1/2 cup granulated sugar
- 1/4 teaspoon salt
- 1 teaspoon pure vanilla extract (please use the real stuff—it makes a difference!)
- 2 2/3 cups whole milk
- A small pinch of ground nutmeg (this is just for sprinkling on top before it bakes!)
That’s it! No crazy thickeners, no cornstarch hiding in the shadows. Just simple flavors coming together beautifully. This lean list is why this custard pie is such a classic comfort food dessert.
Step-by-Step Instructions for Your Easy Homemade Custard Pie
Don’t be intimidated by the word “baked”! This recipe for a custard pie is so simple, you’ll whip it up faster than you can decide on your movie choice for the evening. We are focusing on keeping things gentle so everything mixes just right. I try not to rush any of these steps, especially the resting part at the end. Since we are using an easy weeknight dinner style of baking here, speed is great, but texture is king!
Preparing the Custard Pie Filling Base
First things first: get that oven warming up to 350°F (175°C) and pop your unbaked pie crust right into the dish. Now, onto the filling. Take your three eggs and just whisk them lightly—I mean it, light! We are not trying to make a fluffy meringue here; too much air equals cracks later. Once they are barely broken up, add that sugar and salt and stir until they dissolve. Slow and steady wins the race for a perfect No Crack Custard Pie! Finally, gently fold in your whole milk and vanilla until it looks milky and uniform. See? That’s all there is to the base!
Baking and Setting the Custard Pie
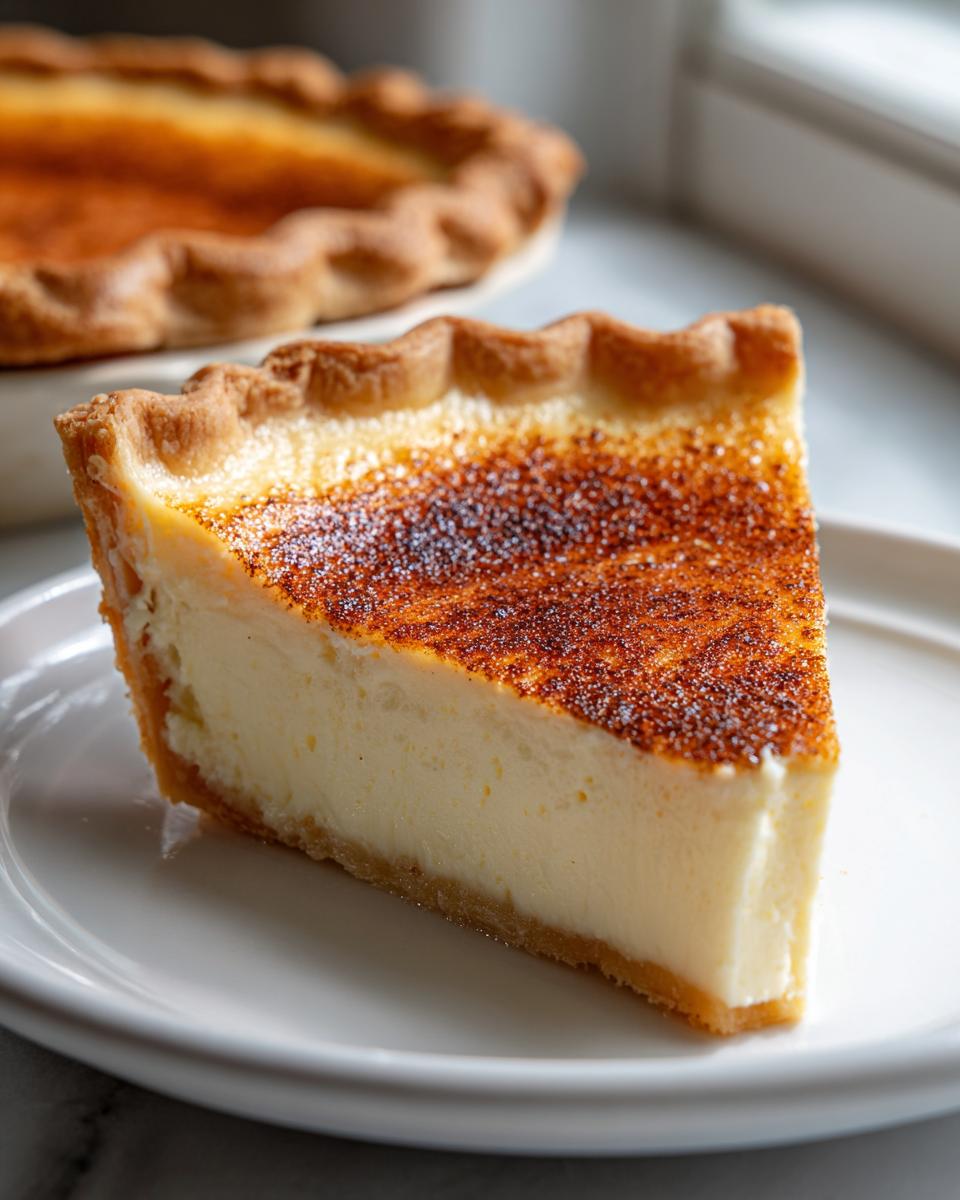
Pour that beautiful liquid right into your waiting crust and sprinkle just a tiny dusting of nutmeg over the top—it’s just for looks and a tiny bit of warmth! Bake this treasure for about 45 to 55 minutes. Here’s where you need an eagle eye: the edges should look completely set, but when you gently tap the side of the pie dish, the very, very center should still wobble just a tiny bit, like thick gelatin. If it shakes like water, give it 5 more minutes. Don’t let the crust edges turn deep brown early on, though! Pro tip: If you see them browning too fast, quickly cover just the edges with a ring of aluminum foil about halfway through baking. That keeps the crust happy while the middle finishes setting perfectly.
Tips for a Perfect, No Crack Custard Pie Every Time
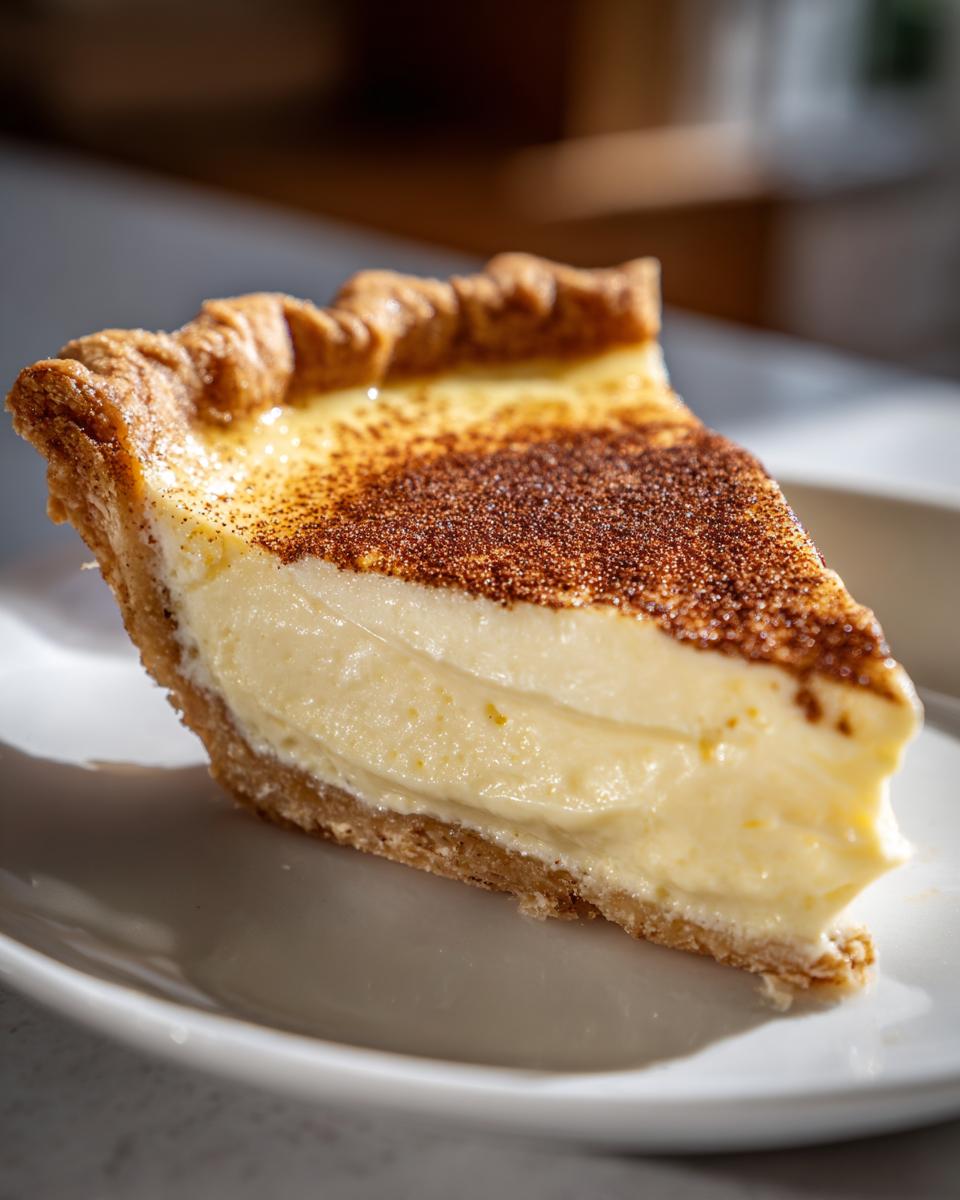
Look, I get it. Every time you go to make an egg custard pie, you hold your breath waiting for those dreaded hairline cracks to show up when it cools down. It’s the single most frustrating thing about baking a silky dessert! But seriously, these next few tips are the reason I can confidently serve this custard pie at holiday dinners without hiding any flaws. If you follow this advice, you’re going to end up with a stunningly smooth surface that looks professionally made.
First, let’s talk about temperature control. You really want to bake your custard pie in a moderate oven, like the 350°F we use here. If the oven is too hot, the outside cooks way too fast while the middle is still liquid, and that rapid expansion is what causes tears. Be patient and let the oven do its gentle work!
My second big pointer involves how you handle the actual custard after it comes out. You absolutely must avoid drastic temperature changes. Don’t put that hot pie straight from the oven into the deep freeze of the refrigerator! That shock is terrible for the custard structure. Let it cool slowly on the counter for at least an hour before you even think about chilling it. This gradual cooling lets the proteins in the eggs relax beautifully, guaranteeing a wonderfully smooth result.
Did you know running a thin, sharp knife around the edge about ten minutes before you actually think it’s done can help? As the pie cools and shrinks slightly, a knife score helps guide that shrinkage away from the center. It sounds fussy, but for those picture-perfect slices, a little bit of pre-slicing intervention goes a long way in preventing surface cracks on your beautiful custard pie.
Ingredient Notes and Substitutions for Your Custard Pie
One of the best parts about making a true, Old Fashioned Egg Custard Pie is how honest the ingredients are. There’s nowhere to hide anything! Because the filling is mostly eggs, milk, and sugar, ingredient quality really shines through. I get so many questions about what happens if you don’t have exactly what the recipe calls for, both for this custard pie and general simple dessert recipes.
Let’s talk dairy first—the milk! The recipe calls for whole milk, and I push it because the fat content is crucial for that luxurious, velvety set. If you use skim milk, your creamy custard pie filling might seem a little… thin. It will still bake up fine, but it won’t have that satisfying richness we are aiming for. Now, can you swap it? Absolutely! If you want to make it extra decadent, especially for a holiday treat, swap out half a cup of that whole milk with heavy cream. Wow, talk about rich! Just don’t go too heavy on the cream, or the texture might get too heavy.
Next up is the vanilla. I used the word ‘pure’ vanilla extract for a reason. Imitation vanilla has a slightly sharp, artificial flavor that just doesn’t sing with the subtle sweetness of the egg custard. If you have high-quality vanilla bean paste, that’s even better—it gives you those gorgeous little black specks that show everyone you made this from scratch! If you happen to be out of vanilla extract but have almond extract, you can use a tiny bit of that for a totally different, almost marzipan-like note. But start small—maybe a quarter teaspoon—because almond packs a big punch!
Finally, the flour in the crust. If you’re using a store-bought crust, great! But if you’re making your own Buttery Flaky Pie Crust from scratch, make sure you use all-purpose flour. I wouldn’t stress about messing with cake flour here; the high fat content from the butter is doing most of the structural work in the crust, so simple AP flour works perfectly with this filling.
How to Serve and Store Your Classic Custard Pie Recipe
Okay, this is the hardest part, honestly. Your custard pie is baked! It smells heavenly, and you want to grab a fork right now, but trust me, resisting that urge is the final skill you need to master for a perfect result! If you cut into this hot from the oven, you’ll end up with soup, not slices. We need patience to achieve that truly beautiful, sliceable texture in our Classic Custard Pie Recipe.
The recipe calls for a mandatory cooling period, and you absolutely need to respect it. Take the pie out of the oven and let it sit right on the counter, undisturbed, for a minimum of two hours. This gives the eggs time to finish setting up outside of the oven’s heat so they don’t seize up when they hit fridge temperatures. I know, I know, waiting is brutal when you’re ready for simple dessert recipes to hit the table!
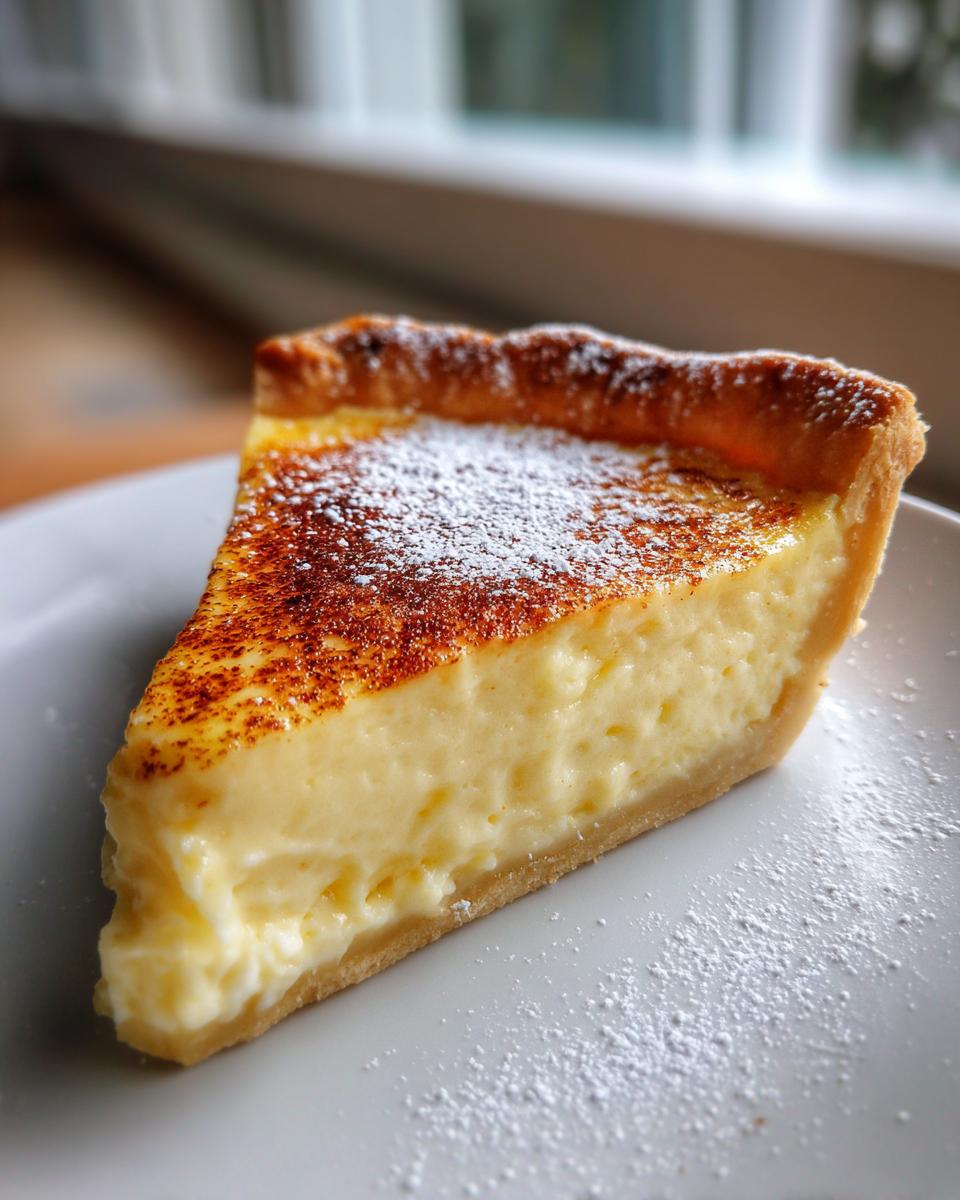
But here’s my real secret for serving: After that first hour on the counter, cover the whole thing loosely—foil is perfect—and move it into the refrigerator for at least another two hours, maybe even four if you can manage it. Chilled custard sets firmer, making it so much cleaner to slice. When you do cut it, use a long, thin knife and wipe that blade clean between every single slice. This prevents any drag from pulling the custard, keeping those beautiful edges sharp and neat for everyone!
When it comes to leftovers, this custard pie is actually fantastic stored in the fridge. It stays moist and flavorful for about three or four days covered tightly. Unlike some baked goods, it really doesn’t benefit from reheating. Just pull a slice out of the fridge about twenty minutes before you plan to eat it—room temperature or slightly cool is the absolute best way to enjoy that smooth, velvety filling.
Variations on the Traditional Custard Pie
While I absolutely adore the pure, straightforward flavor of the classic vanilla custard pie, sometimes you just want to jazz things up a tiny bit, right? It’s great when a recipe is so flexible that you can make it feel new every time you bake it. Since this is such a simple base—just eggs, milk, and sugar—it takes well to little additions that make it feel special, especially around the holidays.
If you want a little more warmth in that filling, don’t just rely on the tiny sprinkle of nutmeg on top! You can mix about a half-teaspoon of ground cinnamon right into the milk and egg mixture when you stir everything together. It gives you that cozy, slightly deeper flavor many people associate with a proper Old Fashioned Egg Custard Pie. You still want to keep the nutmeg dusting on top for that beautiful finish, of course!
For those who have asked about switching things up completely, you can definitely dip your toe into other custard territory. Chocolate is surprisingly simple here! Melt about two ounces of high-quality bittersweet chocolate and whisk it into the warm milk before you combine it with the eggs. It results in a rich, decadent chocolate custard that is just as smooth but tastes completely different. Or, if you’re feeling extra adventurous and want something a little more unique, some folks have had fun adding toasted coconut flakes to the mix—it gets a little closer to that Southern style pie world, though it won’t give you the layered effect of a true Magic Pie. You can peek over at some ideas for an old-fashioned egg custard pie for general inspiration on flavor boosts!
Frequently Asked Questions About Making Custard Pie
I know sometimes, even with the best instructions, you just have a few lingering thoughts before you commit to baking! Trust me, I’ve been there. Asking questions is the best way to learn. We want this to be an easy win, whether it’s your first time making a custard pie or you are just testing out my slightly different method. Here are the few things I hear most often about making this Simple Dessert Pie. If you need more ideas on quick meals while that pie is chilling (I know the wait is hard!), check out my thoughts on quick lunch recipes!
Can I use a pre-baked crust for this custard pie?
Oh, I really wouldn’t recommend it for this recipe, no. This Odl Fashioned Egg Custard Pie is designed to have the custard fill an unbaked shell. If you pre-bake that crust, it gets too firm and dry, and when you pour in the liquid filling, the bottom ends up getting soggy or it just won’t set right against the custard. We need that unbaked crust to essentially steam and bake alongside the silky filling so they marry together—that’s how we get that perfect base layer for this rich dessert recipe!
What is the best way to reheat a slice of custard pie?
Here’s a little secret about delicate egg custards: they don’t love being reheated much! The texture is really best either chilled, straight from the fridge, or just brought out to sit on the counter for about 20 minutes until it loses that deep chill. Giving it a blast in the microwave or oven tends to change the delicate structure we worked so hard to achieve, sometimes making it rubbery or watery. So, stick to cool or room temperature—it tastes the most comforting that way!
How do I prevent my baked custard pie from cracking?
This is the million-dollar question for any great baked egg dessert! Seriously, it all comes down to being gentle. Remember what I said about the eggs? Don’t whip them into a frenzy; we need minimal air incorporated. Think of it like stirring softly, combining ingredients without whisking vigorously. Then, when it comes out of the oven, make sure you pull it when it still has that slight jiggle in the absolute center. If you bake it until it stops jiggling completely, residual heat will overcook it as it cools, and that expansion/contraction is what causes those awful cracks on your beautiful custard pie!
Estimated Nutritional Breakdown for This Rich Dessert Recipe
Now, I have to level with you—I’m a baker, not a nutritionist! These numbers are just estimates based on the standard recipe ingredients, and they really can change depending on what brand of milk you buy or if you use a slightly different pie crust. But if you generally stick to what I’ve outlined here for this comforting custard pie, you should be in the ballpark for a slice of this rich dessert recipe.
For one slice of our custard pie, here is what you can generally expect:
- Calories: 280
- Sugar: 22g
- Sodium: 180mg
- Fat: 14g
- Saturated Fat: 6g
- Carbohydrates: 28g
- Protein: 9g
It’s a wonderful, satisfying comfort food dessert, perfect for serving after a big meal, especially during holidays! But remember, always view these figures as a general guide. If you are tracking macros or counting calories strictly, you’ll want to plug your specific brand ingredients into your favorite tracking app for the most accurate read. Enjoy it guilt-free!
PrintThe Ultimate Smooth & Creamy Old Fashioned Vanilla Custard Pie

Make a classic, old-fashioned vanilla custard pie with a perfectly smooth, velvety filling and a buttery, flaky crust. This simple recipe uses basic ingredients for a comforting dessert ideal for holidays or any dinner.
- Prep Time: 15 min
- Cook Time: 50 min
- Total Time: 2 hours 5 minutes
- Yield: 8 servings 1x
- Category: Dessert
- Method: Baking
- Cuisine: American
- Diet: Vegetarian
Ingredients
- 1 (9-inch) unbaked pie crust (store-bought or homemade)
- 3 large eggs
- 1/2 cup granulated sugar
- 1/4 teaspoon salt
- 1 teaspoon pure vanilla extract
- 2 2/3 cups whole milk
- Pinch of ground nutmeg (for topping)
Instructions
- Preheat your oven to 350°F (175°C). Place the unbaked pie crust into a 9-inch pie dish. Do not pre-bake the crust.
- In a medium bowl, whisk the eggs lightly. Do not over-beat the eggs, as this can introduce too much air and cause cracks.
- Add the sugar and salt to the eggs. Whisk until just combined.
- Stir in the vanilla extract.
- Slowly pour the whole milk into the egg mixture while whisking gently until everything is smooth.
- Pour the custard filling into the unbaked pie crust.
- Carefully sprinkle a small pinch of ground nutmeg over the top of the filling.
- Bake for 45 to 55 minutes. The pie is done when the edges are set, but the center still has a slight jiggle when gently shaken.
- Remove the pie from the oven. Let it cool completely on a wire rack for at least 2 hours before slicing. The custard will finish setting as it cools.
- Chill the pie for at least 2 hours before serving for the best, creamiest texture.
Notes
- To prevent the crust edges from burning, cover them loosely with aluminum foil halfway through the baking time.
- For a crack-free custard, bake the pie until just set and avoid opening the oven door frequently during the first 30 minutes of baking.
- If you prefer a richer flavor, substitute 1/2 cup of the whole milk with heavy cream.
Nutrition
- Serving Size: 1 slice
- Calories: 280
- Sugar: 22
- Sodium: 180
- Fat: 14
- Saturated Fat: 6
- Unsaturated Fat: 8
- Trans Fat: 0.5
- Carbohydrates: 28
- Fiber: 1
- Protein: 9
- Cholesterol: 110