

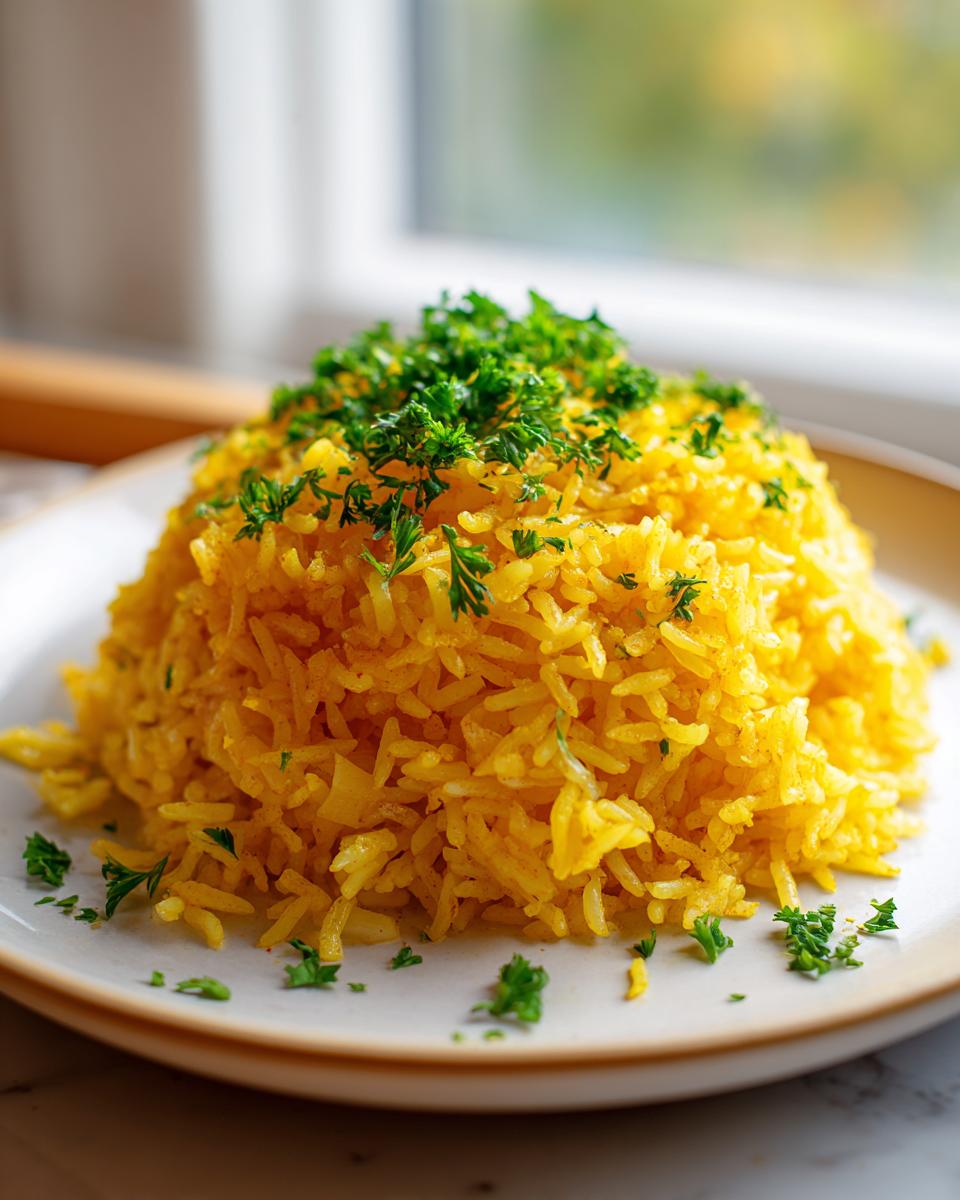
Oh, you know how I feel about side dishes—they shouldn’t be boring fillers! They need to sing alongside the main event. If you’re tired of plain white rice, get ready, because this turmeric rice is about to be your new weeknight hero. This is my Easy One-Pot Garlic and Turmeric Rice, and seriously, it brings the sunshine right to your plate. It’s so simple, uses ingredients you probably have already, and delivers that gorgeous golden color without any fuss. Watching rice turn that vibrant yellow shade? Instant joy! Plus, everything cooks together in one pot, which means cleanup is basically a dream. You absolutely need to try this one for your next busy dinner; it’s flavorful magic in under 35 minutes. You can check out some other quick meals right here: easy weeknight dinners.
- Why This Easy One-Pot Garlic Turmeric Rice Is Your New Favorite Side Dish
- Ingredients for Your Flavorful Turmeric Rice
- The Best Turmeric Rice Flavor: Building Aromatic Rice Sides
- Step-by-Step Instructions for One Pot Rice Dinner
- Tips for Making Perfect Golden Rice Recipe Every Time
- Serving Suggestions for Your Lemon Turmeric Rice
- Storage and Reheating Instructions for Turmeric Rice
- Frequently Asked Questions About This Healthy Rice Side Dish
- Estimated Nutritional Information for This Turmeric Rice
Why This Easy One-Pot Garlic Turmeric Rice Is Your New Favorite Side Dish
I cook nearly everything on the stovetop, and this recipe nails that whole ‘set it and forget it’ vibe. What makes this simple turmeric rice so great? Honestly, it hits every single point I look for when I’m planning dinner. It’s fast, it’s ridiculously easy, and it looks like I spent way more time on it than I actually did. That stunning color instantly makes any plate feel special—it’s the definition of a Golden Rice Recipe!
Speed and Simplicity: Quick Rice Recipes Ready Fast
We’re talking about a total time of around 35 minutes, most of which is just hands-off simmering. If you need a reliable Weeknight Rice Side Dish that doesn’t require watching pots or stirring constantly, this is it. Since it’s all in one pot, cleanup is just rinsing the saucepan. Zero fuss, maximum payoff.
Achieving That Perfect Fluffy Turmeric Rice Texture
Listen, nobody wants sticky, clumpy rice when they’re expecting a side dish. The secret to that beautiful, Fluffy Turmeric Rice texture is two-fold. First, you really need to rinse that basmati rice until the water runs mostly clear—it washes off the extra starch. Second, and this is crucial, you *must* let it steam off the heat after cooking. That resting time lets the grains firm up perfectly!
Ingredients for Your Flavorful Turmeric Rice
Okay, let’s talk about what goes into this beauty. When you look at the list, you’ll see we aren’t using a million things, which is part of why it’s so great for quick meals! We focus on getting the base flavor *right* before we even turn on the heat. The real stars here are, of course, the turmeric for that amazing color, but we can’t forget the garlic—it’s what separates this from just plain yellow rice.
Here’s what you need to gather up before you start chopping:
- 1 tablespoon olive oil
- 1 tablespoon butter
- 2 cloves garlic, minced
- 1 small onion, finely chopped
- 1 1/2 cups basmati rice, rinsed
- 1 teaspoon ground turmeric
- 1/2 teaspoon salt
- 1/4 teaspoon black pepper
- 2 1/4 cups chicken or vegetable broth
- 1 tablespoon fresh lemon juice
- 2 tablespoons fresh parsley, chopped (for garnish)
Ingredient Notes and Simple Substitutions
I always list exactly what works best, but I know kitchens are versatile! For the rice type, I insist on Basmati Rice with Turmeric because its long grains stay separate and fluffy—it just handles liquid perfectly. If you need to swap the broth, you absolutely can! For a really rich, luxurious side, try making this a Coconut Milk Rice Recipe by swapping out half of the broth for full-fat canned coconut milk. It adds a lovely richness that complements the earthy turmeric so well. Just remember to stir it in really well with the broth before it comes to a boil!
The Best Turmeric Rice Flavor: Building Aromatic Rice Sides
This is where we go from plain rice to something truly special, my friends. Building flavor upfront—what I call the flavor base—is the absolute key to getting those amazing, Aromatic Rice Sides that people rave about. We aren’t just waiting for the turmeric to color the water; we are developing deep, toasty notes right in the pan first.
We use both oil *and* butter here, which is my secret for that richer, almost smoky taste that makes this feel like a truly Buttery Turmeric Rice. My top tip? Don’t rush the aromatics! Toasting your spices along with the onions and garlic wakes them up. I mean, really wakes them up! It lets the turmeric bloom in the fat before the liquid hits, making that color pop even brighter. Honestly, if you need a great reference for fantastic flavor building, check out how I handle garlic in my mashed potatoes; the principle is the same!
If you want to see a similar approach to building deep flavor in a totally different dish, take a look at this garlic turmeric rice recipe; it confirms that sautéing those aromatics first is the way to go!
Infusing the Base: Onion and Garlic Rice Recipe Technique
The order of operations in this step matters SO much. First, you always want to cook your onion down until it’s soft and sweet, maybe about four minutes. If you rush the onion, you get a sharp, raw bite, and we don’t want that in our Garlic Rice Recipe. The onion needs time to release its sugars and soften up nicely.
Once the onion is translucent, that’s when the garlic goes in! Garlic burns shockingly fast—I mean, in literally 30 seconds it can go from fragrant to bitter. So, you add it right after the onion, count to about 60, and then you move on to the next step. That quick sizzle is just enough to release that incredible smell without turning it bitter. Trust me, properly handling the onion and garlic is 90% of the battle for incredible flavor here.
After that, we toss in the rinsed rice along with the turmeric, pepper, and salt. Stirring everything constantly for just a minute coats every single grain in that lovely spice and fat mixture. It sounds small, but that minute of stirring is huge for flavor distribution and texture!
For more inspiration on building flavor using savory elements, you might love fiddling around with garlic parmesan mashed potatoes; the base technique for flavor infusion is similar!
Step-by-Step Instructions for One Pot Rice Dinner
Now for the fun part—watching this amazing One Pot Rice Dinner come together! Since everything happens right in that single saucepan, it feels almost magical. It’s incredibly straightforward, but you need to follow the timing cues I’m giving you here. This recipe ensures that your grains absorb the broth beautifully, leading to that incredible flavor and color we’ve been talking about.
We start where we left off: after we toasted the rice grains in the butter and spice mixture. Okay, here is the exact rundown:
- Pour in the broth. Bring the whole thing up to a steady boil. Don’t hover, but make sure it’s actually boiling.
- Once you see those lively bubbles, this is the magic moment! Immediately reduce the heat down to the absolute lowest setting your stove will allow—we’re talking a gentle simmer now, not a raging boil. Cover that saucepan tightly. Yes, I mean *tightly*!
- Let it cook, undisturbed, for 15 minutes. Seriously, walk away. Don’t lift that lid to peek, or you lose all the steam you’ve trapped!
- After the 15 minutes are up, turn the burner completely off. But here’s the second non-negotiable step: leave the pot completely covered and let it just stand there for an additional 10 minutes. This resting phase lets the residual steam finish cooking the center grains evenly.
- Finally, take the lid off, fluff it gently with a fork—you’ll see how beautiful and separate the grains are!—and stir in your fresh lemon juice. Garnish with parsley, and dinner (or side dish!) is served. If you’re looking for other one-pot amazingness, you have to check out my one-pot sausage and rice skillet dinner recipe.
Crucial Timing: Simmering and Resting the Turmeric Rice
I can’t emphasize this enough: that 15 minutes of simmering with the lid *on* is non-negotiable. When you trap the steam, you’re creating a mini-oven that cooks the rice evenly from top to bottom. If you lift the lid, that heat escapes immediately, and the top layer ends up dry while the bottom burns.
But the 10-minute rest *after* turning the heat off is just as important! That’s when the grains fully hydrate and get that signature fluffy turmeric rice texture. If you eat it straight off the heat, it can sometimes be a bit gummy. That rest time allows the moisture to distribute evenly throughout the pot, resulting in perfect, vibrant grains every single time. It’s worth the extra patience, trust me on this one!
Tips for Making Perfect Golden Rice Recipe Every Time
You have the method down, but making this truly shine—getting that gorgeous, Vibrant Rice Recipes look—comes down to a few tiny little details I’ve picked up over the years. We want this Golden Rice Recipe to look like it came straight out of a fancy magazine, right? It’s all about respecting the grain.
First things first, let’s talk rinsing again, because I know my philosophy on this can seem tedious, but it’s vital for that fluffy texture. Make sure you don’t just swish the rice around in the bowl. You need to actively rub the grains against each other until the water comes out almost clear. Washing away that surface starch is the single best thing you can do to avoid gummy rice. It’s a simple thing, but it makes such a massive difference for this turmeric rice recipe!
Another pro tip that ramps up the flavor without adding any real work is what I call the ‘Bloom and Butter’ technique. When those spices—the turmeric, salt, and pepper—hit the hot butter and oil mixture right before the broth, they lightly toast in the fat. This deepens the earthy flavor of the turmeric and makes that golden yellow color even richer. It’s similar to how you’d toast spices before starting a great curry. I love seeing how much flavor you can coax out of simple ingredients; it reminds me of getting the best crunch on oven roasted potatoes.
And lastly, if you’re using a less expensive pot, keep the heat even lower during that simmer phase. Sometimes standard stovetops have hot spots, and that can cause scorching on the bottom layer. Slow and steady wins this race! If you want to see another fantastic example of a buttery, flavor-packed side dish, take a peek at this recommendation for buttery turmeric rice; it nails that rich base flavor perfectly!
Serving Suggestions for Your Lemon Turmeric Rice
This rice is so versatile, which is exactly what I love about pulling together a quick meal. Because we hit it with that bright zest of lemon at the end and kept the spices warm but simple, this Lemon Turmeric Rice acts like the perfect canvas for almost anything. It’s one of those incredible, Flavorful Rice for Curry bases that soaks up sauce beautifully but stands up perfectly fine on its own too.
When I make a batch of this, I’m usually planning on serving it alongside something savory that needs a gentle, aromatic counterpoint. Don’t feel limited to just Indian dishes, either! The lemon really pushes it toward a Mediterranean vibe, too.
Here are a few things I pair this sunny rice with constantly:
- Grilled or Baked Fish: A simple white fish like cod or tilapia, seasoned with salt, pepper, and maybe a dash of dried oregano, sings next to the lemon in the rice.
- Lemon Herb Chicken: If you’re grilling chicken breast, marinate it simply with lemon juice, thyme, and garlic. The flavors absolutely cross-pollinate beautifully between the protein and the rice. If you need a super easy chicken reference, check out my easy Caesar chicken recipe—it’s a different flavor profile, but the simplicity matches!
- Roasted Vegetables: Roasted broccoli, asparagus, or even chickpeas tossed with olive oil and salt become instantly elevated when served over this vibrant rice. The lemon cuts through the slight bitterness of the roasted greens perfectly.
- Simple Curries: Yes, it’s an absolutely fantastic vehicle for a lighter curry, especially a vegetable korma or a mild chickpea curry. The color just makes everything look so much more appealing than plain grains!
Honestly, because this turmeric rice is so light and fluffy, it never weighs down the plate, which is exactly what you need when you’re trying to keep weeknight meals feeling fresh and light!
Storage and Reheating Instructions for Turmeric Rice
The fantastic thing about this one-pot rice is that it tastes just as good almost as good the next day! Because we worked so hard to make sure this turmeric rice was fluffy and not mushy to begin with, it holds up really well in the fridge. You just need to be gentle when bringing it back to life.
For storage, you want to let the rice cool down just slightly—don’t put a piping hot pot straight into the fridge, that’s never a good idea for food safety reasons. Once it’s cooled to warm, scoop the leftovers into an airtight container. It keeps great in the refrigerator for about three to four days. I often make a double batch just so I have a super-fast side ready for lunch leftovers!
Now, reheating is where people sometimes mess things up and end up with dry, hard little clumps of rice. To restore that perfect fluffy texture we spent all that time building, you need steam!
My go-to method is the microwave. Transfer the amount you want to eat back into a microwave-safe bowl. Before you cover it (use a damp paper towel over the top or a loose lid), add just a tiny splash—maybe a teaspoon—of water or chicken broth right over the portion. That tiny bit of liquid turns to steam when heated and rehydrates those happy grains beautifully. Heat it in short bursts until it’s steaming hot all the way through. Trust me, that tiny bit of added moisture makes all the difference!
Frequently Asked Questions About This Healthy Rice Side Dish
I know when you’re trying out a new favorite, you’re going to have questions! Since this turmeric rice recipe is so adaptable, people often ask me about swaps. It’s great that you’re thinking about variations, too. We want this to be your go-to, flexible Healthy Rice Side Dish, right? Here are a few things I hear all the time when people are first making this delicious golden side.
Can I use Jasmine or long-grain white rice instead of Basmati Rice with Turmeric?
You totally can! Basmati is my first choice because those grains are naturally longer and tend to stay super separate and fluffy, which is why I love it for a Fluffy Turmeric Rice side. If you use standard long-grain white rice or Jasmine, the results will still be terrific, but you might need a *slight* water adjustment. Long-grain white rice usually absorbs water a little faster. I’d start by cutting the broth down by about a quarter cup initially—maybe use 2 cups instead of 2 1/4 cups—just to be safe. And always make sure you stick to that no-peeking rule during simmering, no matter what rice you use!
How to make this a Coconut Milk Rice Recipe?
Oh, that’s a fantastic idea for added richness! The Coconut Milk Rice Recipe variation is a showstopper, especially if you’re serving it with something spicy. To make this switch, you simply replace *half* of the required broth with full-fat canned coconut milk. So, instead of 2 1/4 cups of broth, you’ll use 1 cup of coconut milk and 1 1/4 cups of broth. Make sure you incorporate the coconut milk fully when you add the rest of your broth and bring it to a boil.
My other tip for this swap is to be extra gentle when turning the heat down to simmer. Coconut milk is heavier and can sometimes settle a bit quicker than broth. It’s worth it, though—that creamy texture against the turmeric is heaven! If you’re looking for other ways to make healthy swaps, I have some great ideas over in my section for healthy breakfast ideas.
How can I make this recipe spicier?
If you like your rice with a little kick, it’s super easy to customize! You don’t want to mess too much with the turmeric because that’s what gives us our beautiful color, but you can easily increase the heat level elsewhere. Right when you add the turmeric, salt, and pepper, stir in about 1/4 teaspoon of cayenne pepper or a pinch of red pepper flakes. That will give you a nice, warm heat without changing the flavor profile too drastically. You can play around with the amount until you find your perfect level of spice!
Estimated Nutritional Information for This Turmeric Rice
Now, I know some of you are tracking macros or watching certain ingredients, so I always like to give a general snapshot of what you can expect from this turmeric rice. This information is based on the recipe yielding four servings, using the broth specified, and doesn’t include any extra toppings or salts added at the table. Think of this as a friendly little guide, not a strict scientific measurement!
We focused on keeping this flavorful side dish wholesome and bright, and the numbers reflect that—minimal sugar and a decent serving size to accompany your main course. Keep in mind that if you swap vegetable broth for a richer option, or use less oil, these figures will naturally shift!
Here is the breakdown based on estimates:
- Serving Size: 3/4 cup cooked
- Calories: 280
- Fat: 6g
- Saturated Fat: 2g
- Carbohydrates: 50g
- Fiber: 1g
- Protein: 6g
- Sugar: 1g
- Sodium: 450mg (This varies widely based on your broth choice! Be cautious here.)
- Cholesterol: 5mg
Because we are using pantry staples and simple aromatics, this remains a really solid, healthy rice side dish. If you’re worried about the sodium content, which is the main ingredient affected by your choice of broth, just make sure you use low-sodium broth or dial back the added salt slightly. We always have control over what goes into our food, which is the best part of cooking things yourself!
PrintEasy One-Pot Garlic and Turmeric Rice

Make this vibrant, fluffy turmeric rice on the stovetop in under 30 minutes. This simple side dish uses garlic and butter for a rich, aromatic flavor that pairs well with many main courses.
- Prep Time: 10 min
- Cook Time: 25 min
- Total Time: 35 min
- Yield: 4 servings 1x
- Category: Side Dish
- Method: Stovetop
- Cuisine: American
- Diet: Vegetarian
Ingredients
- 1 tablespoon olive oil
- 1 tablespoon butter
- 2 cloves garlic, minced
- 1 small onion, finely chopped
- 1 1/2 cups basmati rice, rinsed
- 1 teaspoon ground turmeric
- 1/2 teaspoon salt
- 1/4 teaspoon black pepper
- 2 1/4 cups chicken or vegetable broth
- 1 tablespoon fresh lemon juice
- 2 tablespoons fresh parsley, chopped (for garnish)
Instructions
- Heat the olive oil and butter in a medium saucepan over medium heat.
- Add the chopped onion and cook until softened, about 4 minutes.
- Add the minced garlic and cook for 1 minute until fragrant. Do not let the garlic brown.
- Stir in the rinsed basmati rice, turmeric, salt, and pepper. Cook for 1 minute, stirring constantly to coat the rice grains.
- Pour in the broth. Bring the mixture to a boil.
- Once boiling, immediately reduce the heat to low, cover the saucepan tightly, and simmer for 15 minutes without lifting the lid.
- Remove the saucepan from the heat and let it stand, covered, for an additional 10 minutes.
- Remove the lid, fluff the rice gently with a fork, and stir in the fresh lemon juice.
- Garnish with fresh parsley before serving.
Notes
- Rinsing the basmati rice removes excess starch, which helps you achieve fluffy rice.
- For a richer flavor, substitute half of the broth with coconut milk.
- This recipe is a great base; add a pinch of cumin or coriander for an Indian-style flavor.
Nutrition
- Serving Size: 3/4 cup cooked
- Calories: 280
- Sugar: 1
- Sodium: 450
- Fat: 6
- Saturated Fat: 2
- Unsaturated Fat: 4
- Trans Fat: 0
- Carbohydrates: 50
- Fiber: 1
- Protein: 6
- Cholesterol: 5