

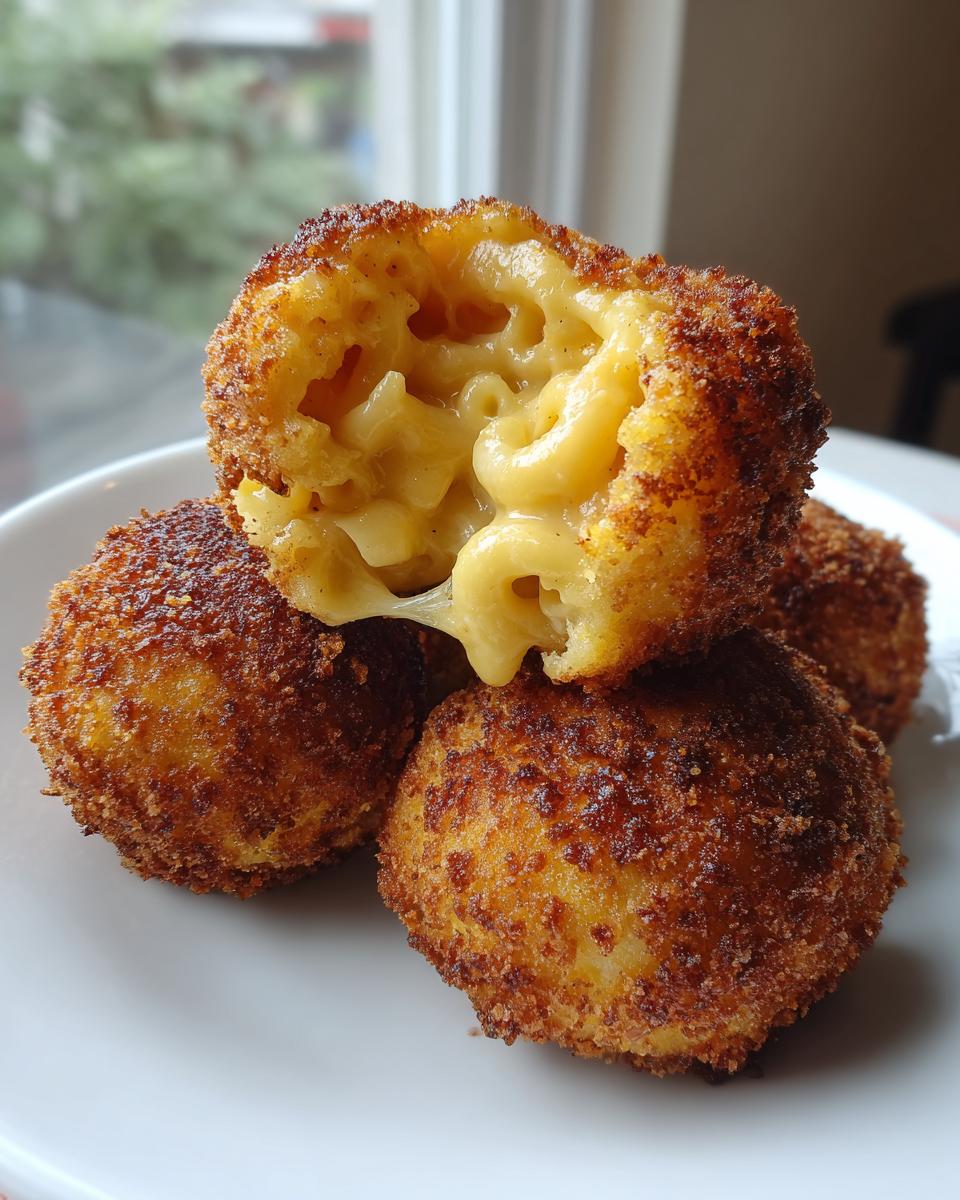
Oh my gosh, are you ready for party perfection? When I think of game day snacks or the appetizers that disappear first at any holiday party, it’s almost always comfort food that wins. And honestly, nothing beats turning yesterday’s leftover macaroni and cheese into these incredible, show-stopping fried mac and cheese balls. Seriously, texture is everything here. We are aiming for an unbelievably crispy golden shell that cracks open to reveal the absolute gooiest, cheesiest center you can imagine. Trust me, I spent ages perfecting the freeze-and-bread method so these never ooze out on you!
- Why These Are the Ultimate Fried Mac and Cheese Balls
- Gathering Ingredients for Your Homemade Mac and Cheese Balls
- Step-by-Step Instructions for Perfect Fried Mac and Cheese Balls
- Air Fryer Mac and Cheese Bites Alternative Method
- Tips for Making Make Ahead Mac and Cheese Balls
- Serving Suggestions and Cheesy Dipping Ideas
- Storing and Reheating Your Fried Mac and Cheese Balls
- Frequently Asked Questions About Fried Mac and Cheese Balls
- Estimated Nutritional Data for This Ultimate Cheese Snack Recipe
- Share Your Golden Fried Goodness
Why These Are the Ultimate Fried Mac and Cheese Balls
If you’re looking for the best party finger foods that everyone—kids and adults—will beg you to make again, stop scrolling. These aren’t just okay appetizers; they are the ultimate deep fried comfort food! We focus ruthlessly on two things: volume and texture. Who wants a lukewarm, soft bite when you can have a perfectly crunchy shell yielding super creamy results? These homemade mac and cheese balls become the star of any get-together, making them essential game day snacks.

Achieving the Perfect Crispy Mac and Cheese Bites Coating
You absolutely must use panko breadcrumbs here; regular crumbs just don’t create the same light, shatteringly crisp shell we’re after. Also, pay close attention to that quick half-hour freeze before breading! That brief chill solidifies the outside just enough so that when the balls hit the hot oil, they hold their shape perfectly. No messy cheese blowouts allowed!
The Secret to a Gooey Cheese Appetizer Interior
The magic starts with using mac and cheese that is already thoroughly chilled, almost stiff. If you try to roll warm or room-temperature mac and cheese, it just melts immediately when it touches the hot oil. By starting firm, the outside has time to crisp up and create that golden fried goodness before the cheese center turns into pure lava. That contrast is what makes them so addictive!

Gathering Ingredients for Your Homemade Mac and Cheese Balls
You don’t need fancy stuff to make these amazing creations! Honestly, the very best part about these easy cheesy appetizers is that they are an incredible way to use up leftover mac and cheese. No sadness in this kitchen—just delicious reinvention. Make sure you have your breading station supplies ready to go before you even start scooping your chilled mix. Here is exactly what you’ll need for about 18 of these incredible crowd pleasing snacks.
- 4 cups cooked macaroni and cheese (leftover works well, just make sure it’s COLD!)
- 1 cup all-purpose flour
- 2 large eggs, beaten well
- 1 cup panko breadcrumbs (don’t substitute these!)
- 1 teaspoon garlic powder
- 1/2 teaspoon salt
- 1/4 teaspoon black pepper
- Vegetable oil, enough for frying (about 2 inches deep)
Step-by-Step Instructions for Perfect Fried Mac and Cheese Balls
Okay, this is where the dexterity comes in! We need precision so our filling stays inside and our coating gets super golden and crunchy. I’ve watched too many perfectly nice balls deflate because someone rushed the chilling or overcrowd the pot. Follow these steps exactly, and you’ll get crispy mac and cheese bites every single time.
Preparing and Shaping the Mac and Cheese Base
First things first: your mac and cheese has to be cold. If it’s soft, pop it in the fridge for at least two hours (or overnight!). Once it’s firm, scoop out about 1.5-inch portions and roll them gently between your palms into nice round balls. Place them on a parchment-lined sheet. Now, for the critical step: freeze them for 30 minutes! If you are planning to make these ahead of time, this is when you’d wrap the tray and put them in the freezer for later. That chill is what locks the structure in before frying.
Setting Up Your Breading Station for Fried Mac and Cheese Balls
Set up three shallow dishes side-by-side. Dish one gets your flour. Dish two gets your beaten eggs—just a quick dip here. Dish three is the star: mix your panko breadcrumbs with the garlic powder, salt, and pepper. You need to work systematically: Flour first (shake off the excess), then egg (let it drip), and finally, press that panko coating on really firmly so it sticks everywhere. Don’t be shy about pressing the crumbs into the ball!
Deep Frying Technique for Golden Fried Goodness
Heat your oil in a Dutch oven until it hits a steady 350°F. You absolutely must use a thermometer here, otherwise, the oil is either too cold—making your balls soggy—or too hot—burning the outside before the inside melts! Carefully drop in only 3 or 4 balls at a time; overcrowding will drop the oil temperature instantly. Fry them for just 2 to 3 quick minutes, turning them gently until they look deep golden brown. Scoop them out and place them on a wire rack over paper towels to drain off that excess oil. They must be served hot for that perfect melting reward!

Air Fryer Mac and Cheese Bites Alternative Method
Now, I know not everyone wants to deal with deep frying, and honestly, I get it! Sometimes you just need that crispy texture without pulling out the big pot of oil. Good news! These Crowd Pleasing Snacks translate beautifully to the air fryer. It gives you that gorgeous golden color and fantastic crunch, just with a tiny bit less of the oil splatter. It’s a perfect option for a weeknight treat or when you’re making a smaller batch.
The key here is preparation. You absolutely must complete the breading process exactly as described for frying—the flour, egg, and seasoned panko layering is essential for a crisp crust. Once they are fully breaded and frozen (don’t skip that freeze!), transfer them to your air fryer basket. Be sure to spray them lightly with a neutral cooking spray, just to help that panko really brown up nice.
Set your air fryer temperature to 380°F (195°C). Cook them for about 10 to 12 minutes total. Remember to flip them halfway through! This ensures they get evenly browned on all sides. Pull them out when they look golden, and you’ll have crispy, gooey results that are just as impressive as the deep-fried version, only way faster to clean up!
Tips for Making Make Ahead Mac and Cheese Balls
This is my favorite trick for busy weekends or when I know company is coming! Making these ahead of time is so simple, and it means you can have fresh, hot homemade mac and cheese balls ready to go in minutes when the doorbell rings. The secret is freezing them *after* they are fully breaded—never before! If you freeze them before breading, the coating won’t stick right when you try to fry them later.
After you finish coating those beautiful little balls in the seasoned panko, lay them out on a baking sheet just like you did for the quick 30-minute pre-freeze. Pop that entire tray into the freezer until they are completely solid. This usually takes about an hour or two, depending on how cold your freezer runs. Once they feel like little frozen rocks, you can transfer them right into a heavy-duty freezer bag. Make sure to squeeze out all the air and seal it tight!
When game day rolls around and you’re ready to fry, you don’t even need to thaw them out, which is the best part of this whole ‘make ahead’ strategy. Just carefully drop those frozen beauties straight into your 350°F oil.
Because they are frozen solid, you just need to extend that frying time slightly. We are looking for that deep golden color, so budget an extra minute or maybe two—aiming for about 3 to 4 minutes total cooking time. Keep an eye on them because the outside cooks fast! The result is still that perfect balance of crispy shell and piping hot, gooey center. It’s the ultimate lazy host trick, if you ask me!
Serving Suggestions and Cheesy Dipping Ideas
Okay, your incredible Game Day Snacks are fresh out of the fryer—crispy, golden, and smelling amazing! Now we need the right vehicle for dipping, because let’s be real, no fried masterpiece is complete without a satisfying sauce situation. The dipping sauce can absolutely make or break the whole experience, so you want robust flavors that can stand up to that savory cheese and crunchy panko. This is key if you want your fried mac and cheese balls to be memorable!
The classic combo everyone expects, and honestly, the one I usually reach for first, is a good, bright marinara sauce. It brings a nice acidity that cuts right through the richness of the fried cheese, which is exactly what we need. Just make sure it’s warm if you can manage it! Ranch dressing is another non-negotiable favorite in my house, especially when kids are around. The cool creaminess is just heavenly against the hot, salty crust.
But for something really special that brings a little kick? You have to try a simple spicy aioli. It takes two minutes to whip up, and wow, does it take these bites up a notch. You just mix a bit of mayonnaise with a squeeze of lemon juice, a dash of smoked paprika, and enough hot sauce—I use sriracha, usually—to get the heat level right for your crew. Trust me on the spicy aioli; it makes these feel like a true restaurant appetizer!
When you present these, pile them high on a platter. I like to arrange the balls around a couple of small bowls filled with your dipping sauces. If you want to add a little visual flair, just sprinkle a tiny pinch of fresh parsley over the top of the balls right before serving. It gives a nice pop of color against all that beautiful golden brown!
Storing and Reheating Your Fried Mac and Cheese Balls
Oh, the eternal struggle: what do you do when you have only two or three fried mac and cheese balls leftover? You definitely don’t want to throw them out, but microwaving them is a culinary tragedy waiting to happen—we all know that just leads to rubbery exteriors and sad, sweaty cheese.
The most important rule for saving these cheesy treats is simple: keep them dry and keep them cool. If you think you’ll eat them within the next day or so, an airtight container in the refrigerator is totally fine. Make sure they aren’t stacked too tightly, or they might stick together and lose a bit of that glorious crispness. I usually just put a piece of paper towel down first to absorb any lingering surface moisture.
If you’re planning to save them for the long haul—maybe for the next big tailgate party—the freezer is your best friend! Just like we froze them before frying, they handle freezing beautifully. Lay them in a single layer on a tray until solid, then transfer them into a heavy-duty freezer bag. They last great for about a month this way.
Bringing Back the Crunch: The Best Reheating Methods
When it comes time to revive these beauties, we are avoiding the microwave at all costs! Microwaving heats the cheese but steams the crust. We want a crispy reheat, which means we need dry heat, and that means the oven or the air fryer.
The oven works great if you have a bunch to warm up. Preheat your oven (or toaster oven, which is even better for small batches!) to about 350°F (175°C). Spread the cold balls out on a baking sheet—don’t let them touch! Bake them for about 8 to 10 minutes. Give them a gentle shake halfway through. You want them piping hot all the way through with a nice crisp comeback on the coating.
For only a few balls, the air fryer is king. Place them in the basket, making sure there’s a little space between them for the air to circulate. Set it to 375°F (190°C) for roughly 4 to 6 minutes. Honestly, the air fryer is my go-to because it brings back that just-fried exterior texture shockingly fast. Seriously, they taste nearly identical to fresh when reheated this way. Just remember to check them closely so they don’t burn since they heat up so quickly!
Frequently Asked Questions About Fried Mac and Cheese Balls
I always get a ton of questions whenever I post these cheesy delights, probably because everyone wants to nail that perfect crispy shell and gooey center. Here are the big ones people ask me the most about making these fantastic Party Finger Foods!
Can I bake these entirely instead of frying them?
You totally can bake them, but let’s manage expectations: They won’t achieve that same deep, golden, shatteringly crisp exterior you get from frying. Baking them makes them more like a breaded casserole topping that’s softened. If you want to bake them, use the air fryer instructions above—that gets you much closer to the real deal than a traditional oven bake, which tends to dry them out.
What kind of cheese is best for the gooiest center?
You want a good melter! While the mac and cheese base you start with dictates most of the flavor, sharp cheddar is always a must for that beautiful tang. I also love tossing in a handful of Monterey Jack or Fontina because they are super melty and stretchy. That combination gives you the best gooey cheese appetizer experience when you bite in!
Can I use mac and cheese that isn’t leftover?
Yes, absolutely! If you’re making a fresh batch of mac and cheese just for these balls, that’s great. But you must—and I mean *must*—let that fresh batch chill in the fridge until it is very firm, usually 3 to 4 hours, or even overnight. If it’s too soft, you risk the filling melting before the crust sets, and we don’t want that sad cheese puddle!
Can these be made without any dairy products?
That’s a tough one for this particular snack, since they are the ultimate deep fried comfort food! The cheese is the main event. If you need a dairy-free option, you would need to swap in dairy-free mac and cheese and then use a breadcrumb coating that doesn’t involve regular eggs, though the texture will definitely change significantly.
Estimated Nutritional Data for This Ultimate Cheese Snack Recipe
Because these absolutely decadent fried mac and cheese balls are comfort food at its finest, they do clock in a bit rich, but that’s what makes them such a special treat, right? When you’re planning for your parties or game days, you should always keep serving size in mind. This data is based on the recipe yielding about 18 balls and assumes a serving size of three of these golden, cheesy delights.
Remember, since we are deep-frying these bites, the exact oil absorbed will change things slightly, so I always tell people to view this information as a solid estimate rather than a hard fact. I used standard creamy mac and cheese ingredients when figuring these out, so your personal cheese selection might shift things. Here’s the breakdown for our ultimate cheese snack recipe:
- Serving Size: 3 balls
- Calories: Approximately 350 per serving
- Fat: Around 22g total
- Saturated Fat: About 10g
- Trans Fat: Roughly 0.5g
- Carbohydrates: 28g
- Protein: 10g
- Sugar: Just 3g
- Sodium: Higher on the scale, around 650mg (cheese is salty work!)
- Cholesterol: About 75mg
See? Totally worth it for that crispy, melty experience! Enjoy your deep fried comfort food!
Share Your Golden Fried Goodness
Whew! We did it! You now know the secrets to achieving that unbelievable crunch and the molten cheese center in these fried mac and cheese balls. They are seriously one of the best holiday appetizer ideas imaginable because everyone goes absolutely wild for them.
Now, I’m dying to know how they turned out for you! Did you stick with the classic deep fry, or did you try the air fryer route? Did you use leftover pizza mac and cheese or something extra sharp?
Please, please, please let me know in the comments below. Drop a rating on the recipe—five stars if I successfully convinced you that these are the best party finger foods on the planet! And if you snapped a picture of your golden, crunchy creations, tag me on social media. I seriously love seeing your kitchen successes. It helps build that sense of community here at Food Dexterity, and seeing your beautiful results keeps me inspired to whip up even more amazing, achievable recipes for all of us!
PrintClassic Crispy Fried Mac and Cheese Balls

Make crispy fried mac and cheese balls with a gooey center. This recipe is perfect for parties, game day, or as a satisfying appetizer.
- Prep Time: 20 min
- Cook Time: 15 min
- Total Time: 35 min
- Yield: About 18 balls 1x
- Category: Appetizer
- Method: Deep Frying
- Cuisine: American
- Diet: Vegetarian
Ingredients
- 4 cups cooked macaroni and cheese (leftover works well)
- 1 cup all-purpose flour
- 2 large eggs, beaten
- 1 cup panko breadcrumbs
- 1 teaspoon garlic powder
- 1/2 teaspoon salt
- 1/4 teaspoon black pepper
- Vegetable oil, for frying
Instructions
- If your macaroni and cheese is soft, chill it in the refrigerator for at least 2 hours until firm enough to scoop.
- Scoop the chilled mac and cheese and roll it into 1.5-inch balls. Place the balls on a baking sheet lined with parchment paper. Freeze for 30 minutes to help them hold their shape during frying.
- Set up a standard breading station: Place flour in one shallow dish, the beaten eggs in a second dish, and mix the panko breadcrumbs, garlic powder, salt, and pepper in a third dish.
- Working with one ball at a time, dredge it completely in the flour, shaking off excess.
- Dip the floured ball into the egg mixture, allowing excess to drip off.
- Roll the ball thoroughly in the seasoned panko breadcrumbs, pressing gently to make sure the coating adheres completely.
- Heat about 2 inches of vegetable oil in a deep pot or Dutch oven to 350°F (175°C). Use a thermometer to monitor the temperature.
- Carefully place 3-4 balls into the hot oil, ensuring you do not overcrowd the pot.
- Fry for 2 to 3 minutes, turning occasionally, until the exterior is deep golden brown and crispy.
- Remove the balls with a slotted spoon and place them on a wire rack set over paper towels to drain excess oil.
- Serve immediately while the center is hot and gooey.
Notes
- For an air fryer method, spray the breaded balls lightly with cooking spray and cook at 380°F (195°C) for 10-12 minutes, flipping halfway through, until golden.
- These balls freeze well. Place uncooked, breaded balls on a tray and freeze solid. Transfer to a freezer bag. Fry directly from frozen, adding 1-2 minutes to the cooking time.
- Serve with marinara sauce or ranch dressing for dipping.
Nutrition
- Serving Size: 3 balls
- Calories: 350
- Sugar: 3
- Sodium: 650
- Fat: 22
- Saturated Fat: 10
- Unsaturated Fat: 12
- Trans Fat: 0.5
- Carbohydrates: 28
- Fiber: 1
- Protein: 10
- Cholesterol: 75