
Oh, that smell! You know the one—when the aroma of freshly baked bread just wraps around you like a warm blanket? That’s the smell of immediate comfort, and trust me, I chased that scent even when my life was pure chaos.
When I was deep in event planning, I didn’t have hours for fussy doughs, but I craved that bakery magic. That’s where my ‘Food Dexterity’ kicked in. I took those traditional, complex homemade recipes and figured out how to make them brilliant, fast, and totally approachable. This specific soft white yeast bread is the result of that work. It’s my absolute go-to because it delivers the softest, fluffiest loaf without demanding you spend all day by the mixer. Seriously, if you’ve been waiting for a foolproof yeast bread recipe for beginners, this is it. Get ready for bread that tastes homemade but feels incredibly simple!
- Why This Soft White Yeast Bread Recipe is Foolproof
- Gathering Your Ingredients for Perfect Yeast Bread
- Step-by-Step Instructions for Your Homemade Bread Recipe
- Expert Tips for the Best Homemade Bread Recipe
- Storing Your Fluffy Loaf Bread
- Serving Suggestions for This Quick Yeast Bread
- Frequently Asked Questions About Baking Yeast Bread
- Understanding the Nutrition in Your Homemade Bread Recipe
- Share Your Fluffy Yeast Bread Creations
Why This Soft White Yeast Bread Recipe is Foolproof
If you’ve ever been intimidated by yeast bread, stop right now! My whole philosophy here at Food Dexterity is taking those big, scary recipes and making them manageable. This process is designed to keep your effort low while maximizing that soft, pillowy result you see in bakery windows. It’s the perfect Beginner Bread Recipe for building those first few baking wins!
Minimal Effort: The Easy Yeast Bread Approach
We aren’t kidding around with the kneading here. While we do give the dough a quick five to seven minutes just to build enough structure for a great rise, it’s definitely not an all-day affair. Think of it as a quick stretch and a handshake for your dough, not a deep tissue massage. It’s all about getting enough gluten developed so your loaf has something to hold onto when those bubbles form.
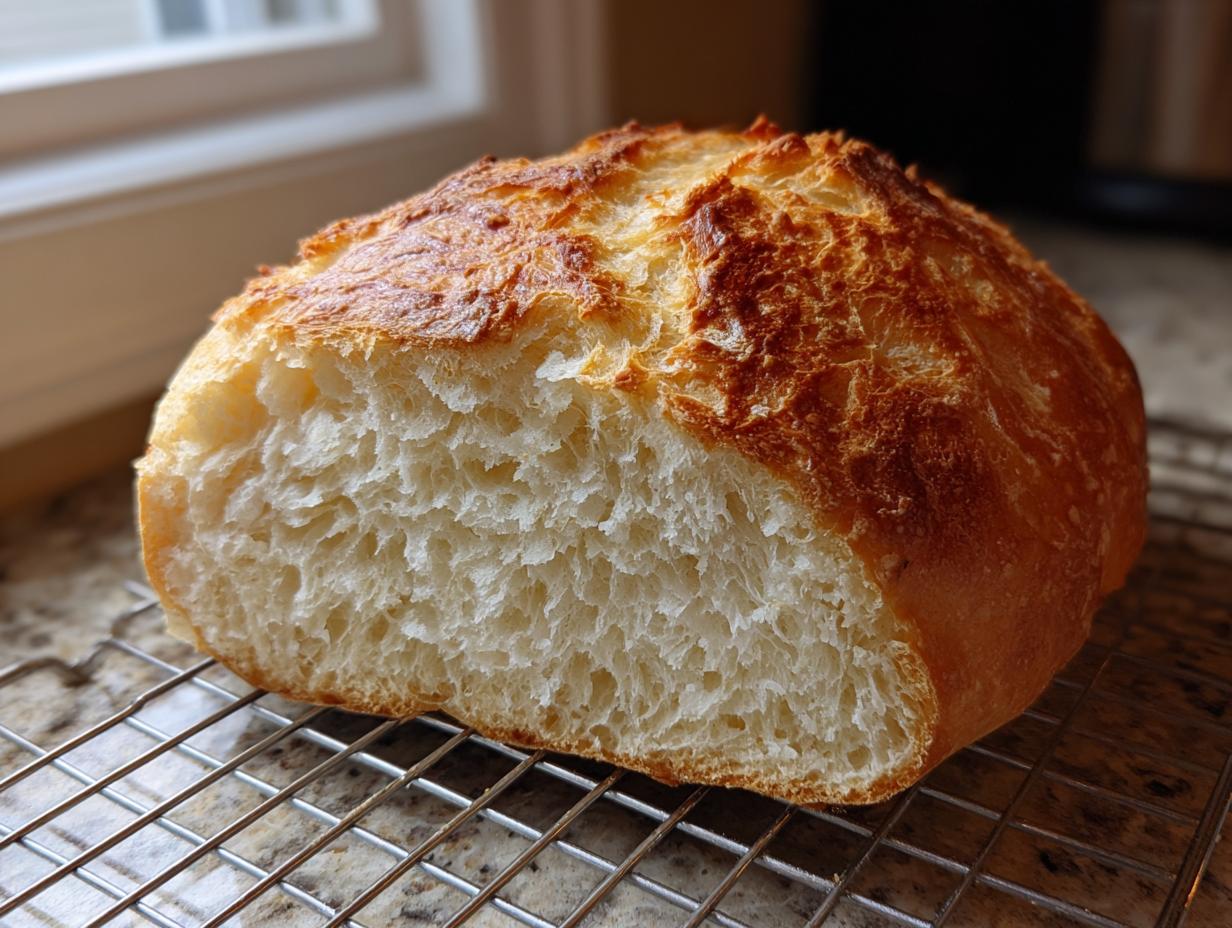
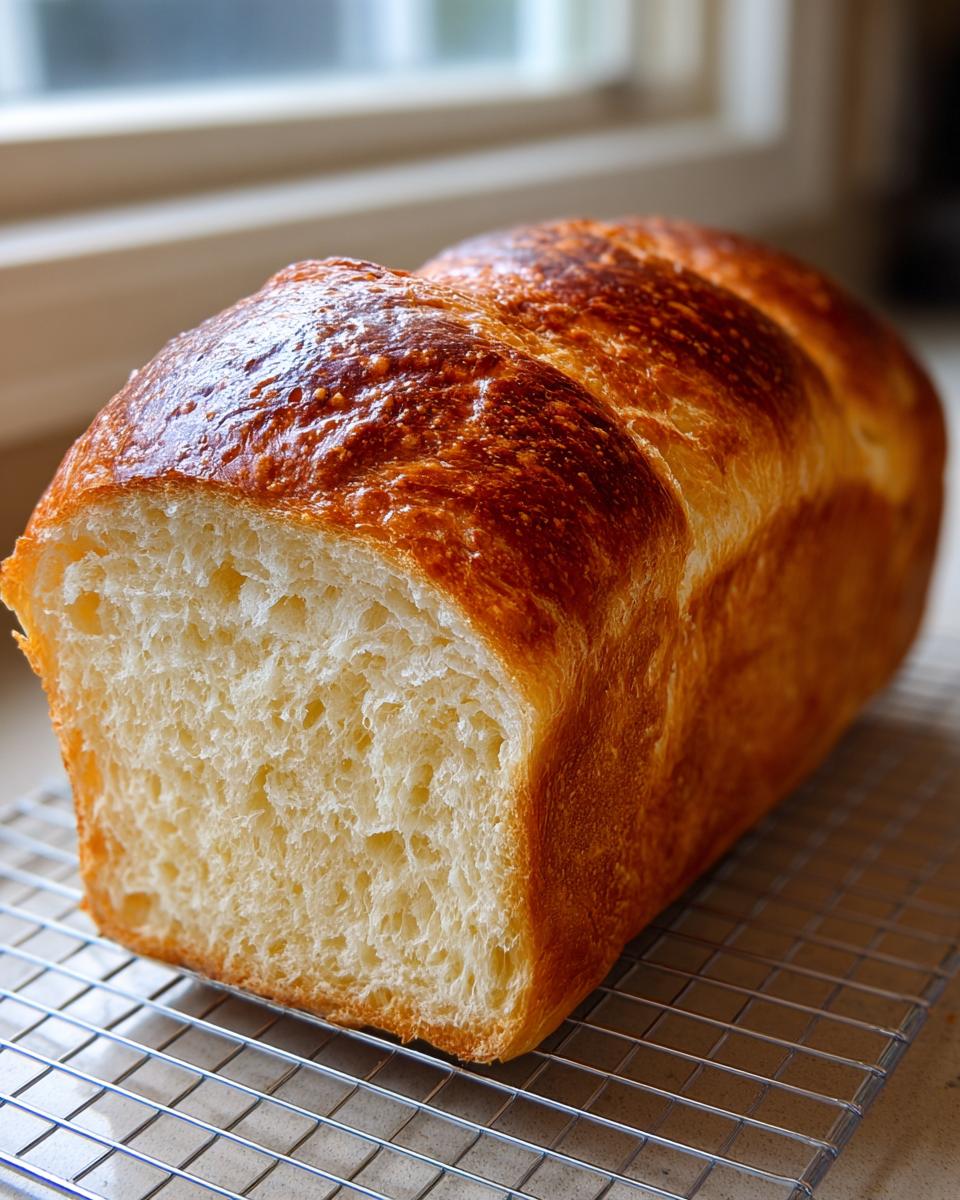
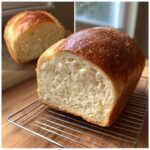
Achieving That Bakery-Style Soft White Bread Texture
The secret to that impossibly Fluffy Loaf Bread texture isn’t in complicated steps; it’s in our simple ingredient choices. We use milk instead of water, which adds fat and softness right from the start. Plus, we rely on that second rise to give the dough enough strength to lift beautifully in the pan. Don’t forget to check out my guide on easy homemade blue cheese dip recipe—it’s amazing with warm slices of this bread!
Gathering Your Ingredients for Perfect Yeast Bread
Before we even think about turning on the oven, we need our players lined up! Making fantastic yeast bread is surprisingly budget-friendly since it relies on humble pantry staples. Don’t skip the milk warming step; cold ingredients slow down your yeast friend! I always check my pantry before heading out, but easy homemade teriyaki sauce recipe day is coming soon, so maybe skip buying prepared stuff this week!
Here is exactly what you need for one beautiful, fluffy loaf:
- 1 cup warm milk (aim for 105–115°F—nice and bath-water warm, not hot!)
- 2 teaspoons instant yeast
- 2 tablespoons granulated sugar (to feed that yeast!)
- 1 teaspoon salt
- 3 tablespoons unsalted butter, melted
- 3 cups all-purpose flour, plus more for dusting
Step-by-Step Instructions for Your Homemade Bread Recipe
This is where the magic happens, and honestly, watching this simple yeast bread dough come alive is half the fun. We’re moving through this in three main phases: waking up the yeast, the main mix and first nap, and finally, getting it ready for the oven. If you’ve got about two hours total, you’re golden. If you’ve already made my easy chicken enchiladas recipe, you know I love a good timeline, and this one flows perfectly!
Activating the Yeast and Mixing the Simple Yeast Dough
First things first: check your yeast! This is the most important part of any yeast bread recipe. In a big bowl, mix your warm milk, the instant yeast, and the sugar. We let this sit for about five minutes. If you don’t see foam or bubbles forming on top? Whoops! Your yeast is dead or your milk was too hot—that means starting over. This foam is proof that your bread has the power to rise! Once it’s happy and foamy, stir in your salt and that melted butter.
Kneading and the First Rise for Your Yeast Bread
Now, bring on the flour, cup by cup, mixing until it gets too hard to stir. Turn that shaggy mess out onto a lightly floured surface. We need to knead, but don’t freak out! You’re just working the dough for about 5 to 7 minutes until it feels smooth and elastic. It shouldn’t stick to your hands much anymore. Pop that smooth ball into an oiled bowl, cover her up, and find a warm spot—like the top of your fridge or a slightly warm oven with just the light on. Let it nap for 60 to 90 minutes, or until it’s doubled. That first rise builds the flavor foundation!
Shaping and the Second Rise Before Baking This Yeast Bread
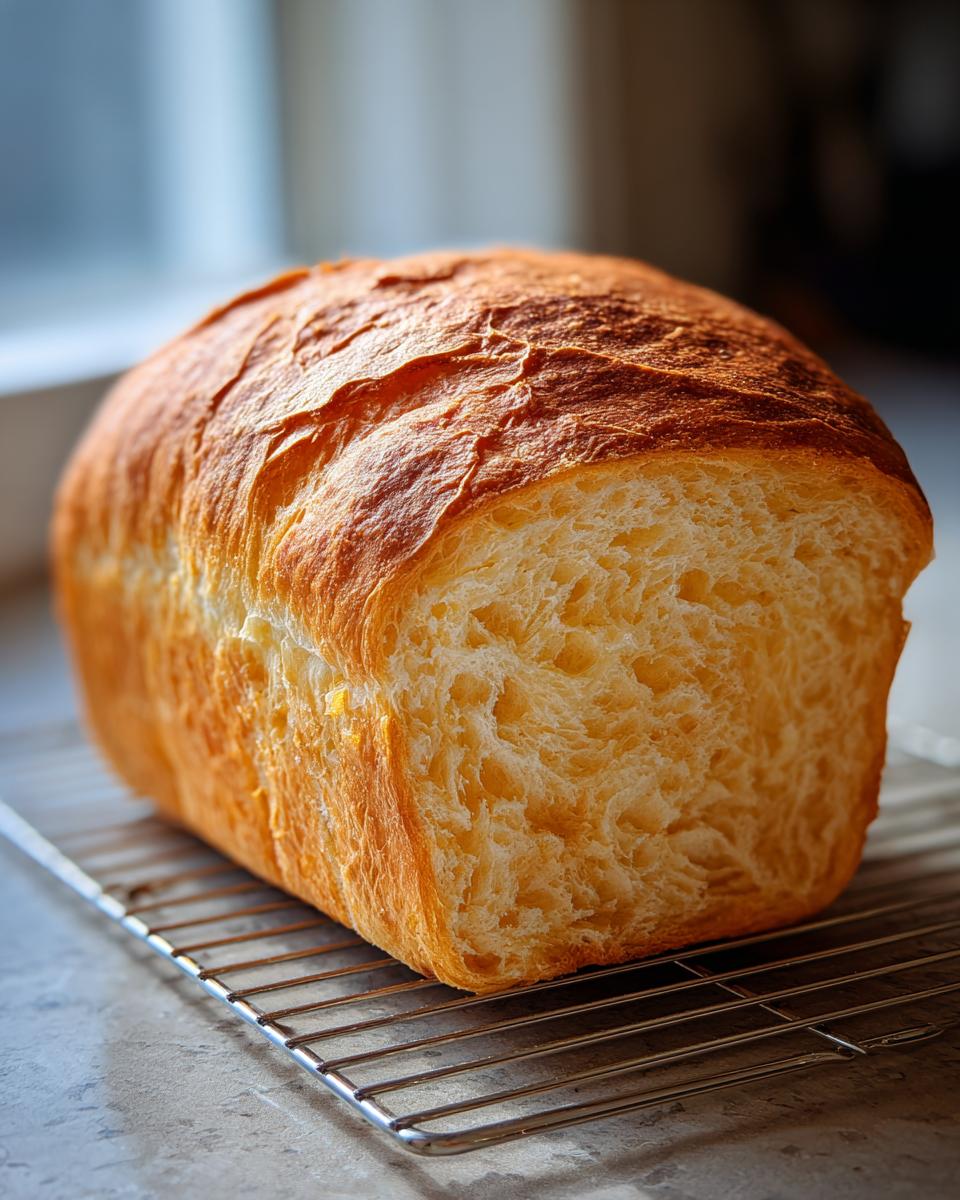
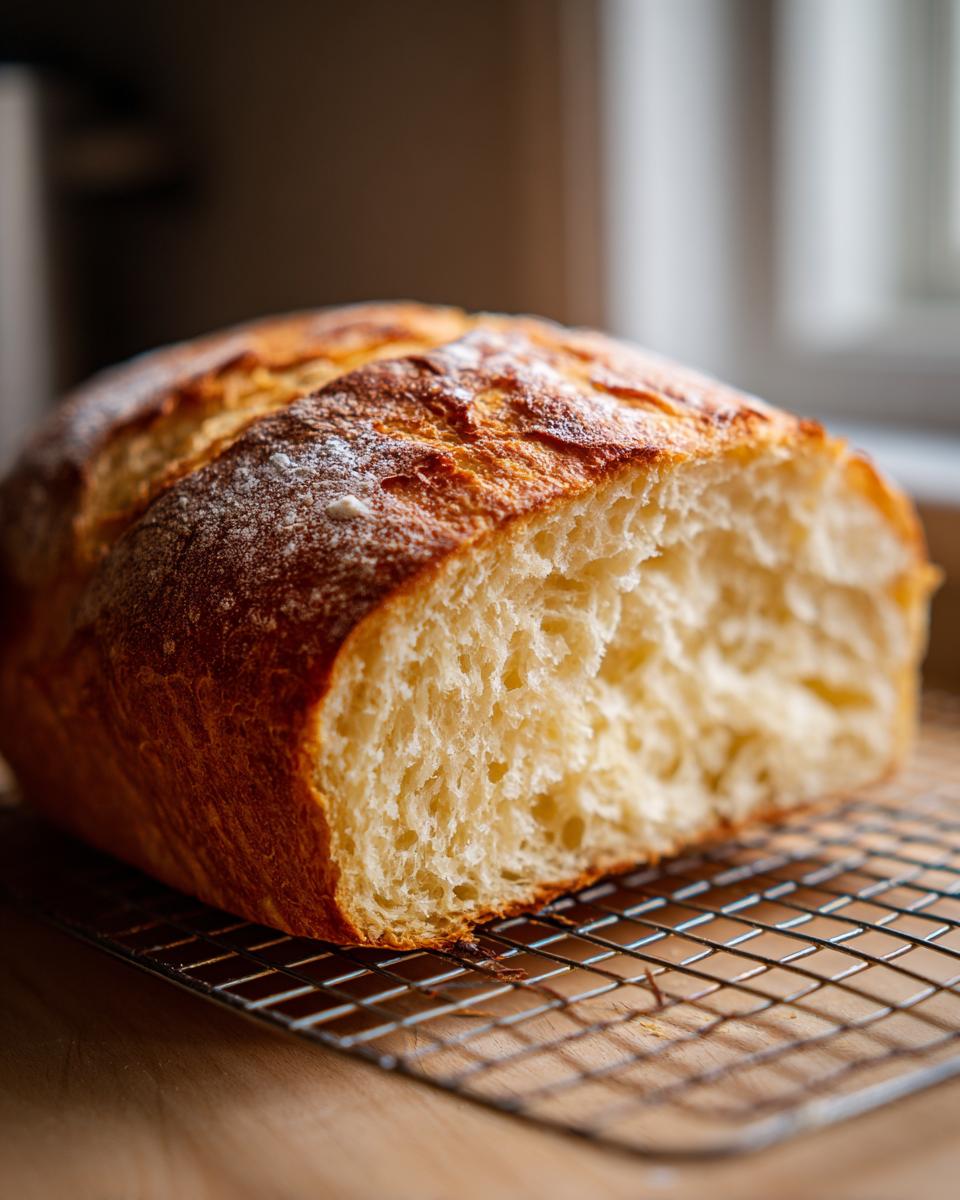
When the dough has puffed up big, give it a gentle punch to deflate it—that releases the big gas pockets. Gently shape it into a log and tuck it snugly into your greased 9×5 inch loaf pan. Cover it lightly again and let it go for its second rise. This one is shorter, usually 30 to 45 minutes; you want the dough to crest about an inch over the pan’s edge. During the last 15 minutes of this final rest, crank that oven up to 375°F (190°C). Then, bake it for 30 to 35 minutes until it’s deeply golden brown. Don’t forget to cool it immediately on a rack! And when you’re done slicing, you can always test your leftovers with some easy homemade blue cheese dip recipe.
Expert Tips for the Best Homemade Bread Recipe
So, you’ve got your golden loaf, but we can always push this Easy Bread Baking experience further! These little tricks I picked up over the years—the ones that seem minor but make a huge difference—are what shift a good loaf into something truly special. Trust me, a little extra step right at the end can save you from a slightly dry crust.
Achieving a Tender Crust on Your Yeast Bread
This is the easiest way to guarantee that luxurious, soft bite we are aiming for. As soon as that pan comes out of the oven, while the bread is still screaming hot, grab a little bit of extra melted butter—you only need a tablespoon or two. Brush it lightly, but completely, over the entire top crust. It seals in the moisture beautifully, keeping the crust tender, and adds just a tiny hint of buttery flavor. It’s magical, honestly, especially if you plan on making this into a Homemade Sandwich Loaf later in the week!
Troubleshooting Common Yeast Bread Issues
If your dough is rising slowly, check your milk temperature first. If it was too hot (over 120°F), you probably killed your yeast, and nothing short of starting over will revive it. If the kitchen is just chilly, try creating my little emergency rise box—I detailed how I do it in my guide on best homemade english muffin nooks & crannies! If your bread is dense even after rising well, go back and check your kneading time; sometimes we rush it and the gluten just can’t stretch enough to hold that light, Fluffy Loaf Bread structure.
Storing Your Fluffy Loaf Bread
Okay, you successfully baked this gorgeous, soft loaf of yeast bread. Now we need to keep that fluffiness locked in! Don’t just wrap it tightly in plastic wrap right away, because that can actually make the crust a little soggy.
For the first few hours while it cools completely, you should let it sit on a wire rack. This lets steam escape! Once it’s totally cool, wrap it tightly in plastic wrap or stick it in an airtight container. Seriously, this keeps my Soft White Bread perfect for sandwiches for days. If you want it to last longer, though, you can always slice it up and freeze what you won’t eat this week. If you need a dessert recipe after you’ve eaten all your bread, check out my moist old-fashioned applesauce cake recipe!
Serving Suggestions for This Quick Yeast Bread
Honestly, the best way to enjoy this Quick Yeast Bread is immediately, while it’s still a little warm. A thick smear of good salted butter melting into the soft crumb is pure heaven—you absolutely deserve it after baking!
But if you manage to let it cool down even a little, this loaf turns into the *best* foundation for sandwiches you’ve ever made. Forget those squishy store-bought slices! It’s also absolutely fantastic served right alongside a hearty bowl of something warm, like my French onion soup recipe. That crust soaks up broth like a champion!
Frequently Asked Questions About Baking Yeast Bread
Welcome to the Q&A section! I know when you’re Baking From Scratch for the first time, you get nervous about tiny details. Especially when it comes to keeping that little yeast packet alive! I’ve gathered the things people ask me the most about this exact yeast bread recipe so you can bake with total confidence.
Can I substitute active dry yeast for instant yeast in this yeast bread recipe?
Yes, you absolutely can! That’s one of the great things about Instant Yeast Recipes—they are flexible. If you only have active dry yeast, you need to use a little more, so bump that up to about 2 1/4 teaspoons, and you *must* proof it first. Mix the active dry yeast and the sugar right into the warm milk (Step 1) and wait until it’s foamy, which usually takes about 5 to 10 minutes. After that, you treat the rest of the recipe exactly the same way.
How long does it take for the yeast bread dough to rise?
The clock is more of a suggestion than a rule in bread making, which I learned the hard way! For the first rise, I said 60 to 90 minutes, but if your kitchen is cold, it might take a full two hours. The real indicator isn’t minutes—it’s volume! You are looking for the dough to double. For the second rise, aim for 30 to 45 minutes, but again, check that it’s crowned an inch above the pan rim before baking. If you want to dive into the worlds of longer fermentation, check out my guide on the sourdough starter guide from scratch!

It’s just that simple! Don’t sweat the timeline too much; just watch the dough. That’s the best way to learn great homemade bread recipe skills.
Understanding the Nutrition in Your Homemade Bread Recipe
Alright, deep breath! I know sometimes when we’re making something this comforting, we try not to look too closely at the numbers, but knowledge is power, right? This is where we get to see just how wholesome this Homemade Bread Recipe really is!
Remember, because we’re Baking From Scratch with real ingredients like milk and butter, these numbers are just an estimate. They change depending on the exact flour or milk used, but it gives you a great ballpark idea for planning your week. For more ideas on how to factor this bread into a balanced day, take a peek at my post on healthy breakfast ideas!
Here’s the breakdown per slice:
- Serving Size: 1 slice
- Calories: 150
- Fat: 3g (Saturated Fat: 2g)
- Carbohydrates: 28g
- Protein: 4g
- Sugar: 2g
- Cholesterol: 8mg
See? Pretty reasonable for something that tastes this good and fills your whole house with that incredible yeast bread smell. It’s simple goodness!
Share Your Fluffy Yeast Bread Creations
Now that you’ve made the best soft white yeast bread—or maybe you tried adding some herbs? I absolutely need to know how it went!
Please hop down to the comments and leave a rating if this quick, fluffy loaf was a success for you. And if you snap a picture of that beautiful golden crust, tag me on social media! Seeing your success in Baking From Scratch is seriously the best part of my day. If you need to reach out directly, you can always check out my contact page!
PrintCloud-Soft, Easy Yeast Bread: A Foolproof Homemade Loaf
Bake a soft, fluffy yeast bread loaf that tastes like it came from a bakery. This simple recipe uses basic ingredients and is designed to be foolproof for beginner bakers.
- Prep Time: 20 min
- Cook Time: 35 min
- Total Time: 1 hour 50 min
- Yield: 1 loaf 1x
- Category: Baking
- Method: Mixing and Baking
- Cuisine: American
- Diet: Vegetarian
Ingredients
- 1 cup warm milk (105-115°F)
- 2 teaspoons instant yeast
- 2 tablespoons granulated sugar
- 1 teaspoon salt
- 3 tablespoons unsalted butter, melted
- 3 cups all-purpose flour, plus more for dusting
Instructions
- In a large bowl, combine the warm milk, instant yeast, and sugar. Let this mixture sit for 5 minutes until it becomes foamy. This confirms your yeast is active.
- Stir the salt and melted butter into the yeast mixture.
- Gradually add the flour, one cup at a time, mixing until a shaggy dough forms.
- Turn the dough out onto a lightly floured surface. Knead the dough for 5 to 7 minutes until it becomes smooth and elastic. You are building gluten structure here.
- Lightly grease a clean bowl with oil. Place the dough in the bowl, turning it once to coat. Cover the bowl with plastic wrap or a clean kitchen towel.
- Let the dough rise in a warm place for 60 to 90 minutes, or until it has doubled in size. This is the first rise.
- Gently punch down the risen dough to release the air. Shape the dough into a uniform loaf and place it into a greased 9×5 inch loaf pan.
- Cover the pan loosely and let the dough rise again in a warm spot for 30 to 45 minutes, or until the dough has crowned about 1 inch above the rim of the pan. This is the second rise.
- Preheat your oven to 375°F (190°C) during the last 15 minutes of the second rise.
- Bake for 30 to 35 minutes, or until the top is golden brown and the internal temperature reaches 200°F (93°C).
- Remove the bread from the pan immediately and place it on a wire rack to cool completely before slicing.
Notes
- For an extra soft crust, brush the top of the loaf with melted butter immediately after removing it from the oven.
- If your kitchen is cool, place the covered dough in the oven with just the light turned on to create a warm environment for rising.
- This recipe is excellent for making homemade sandwich bread.
Nutrition
- Serving Size: 1 slice
- Calories: 150
- Sugar: 2
- Sodium: 200
- Fat: 3
- Saturated Fat: 2
- Unsaturated Fat: 1
- Trans Fat: 0
- Carbohydrates: 28
- Fiber: 1
- Protein: 4
- Cholesterol: 8