
Okay, if you’ve ever stressed out trying to figure out what to serve when guests suddenly show up—or maybe you’re trying to plan a big event like birthdays or the Super Bowl—I get it. You need something that tastes incredible but doesn’t involve you hovering over the stove all night. That’s why I always keep this hanky panky recipe in my back pocket. It’s one of those rare, glorious, retro party snacks that everyone loves. Coming from my background in hectic event planning, I learned fast that comfort food needs a modern, efficient twist. This easy appetizer recipe takes all the deep, savory flavor of a classic comfort dish and whips it up so fast, you’ll wonder where it’s been all your life. Trust me, this cheesy, meaty topping on toasted bread is pure magic. If you love dips that are easy to make portable, you should definitely check out my recipe for easy cranberry brie bites too!
- Why This Classic Hanky Panky Recipe Works for Any Event
- Gathering Your Ingredients for the Hanky Panky Recipe
- Step-by-Step Instructions for the Best Hanky Panky Recipe
- Expert Tips for Perfect Hanky Panky Recipe Results
- Serving Suggestions for This Classic Comfort Food Appetizer
- Storage and Reheating Instructions for Leftover Hanky Panky
- Troubleshooting Common Hanky Panky Recipe Issues
- Frequently Asked Questions About the Hanky Panky Recipe
- Nutritional Estimates for This Party Food Ideas Recipe
Why This Classic Hanky Panky Recipe Works for Any Event
Sometimes, you just need a guaranteed win, right? That’s exactly what these Hanky Pankies deliver. They hit that perfect intersection of nostalgia and flavor that makes them an absolute powerhouse among retro party snacks. Seriously, when I was hustling with events, knowing I could pull this together in under 30 minutes was a lifesaver. It’s the ultimate easy appetizer recipe.
Quick Assembly for Game Day Finger Food
You only need about 15 minutes of actual hands-on time here, which is amazing! If you’re scrambling before the big game or have last-minute company, these fly together faster than you can set out your chips and dip. These are the perfect game day finger food because they hold their structure and don’t get messy. But you know I always have more ideas for when you need something easy!
Simple Crowd-Pleasing Appetizers: The Flavor Profile
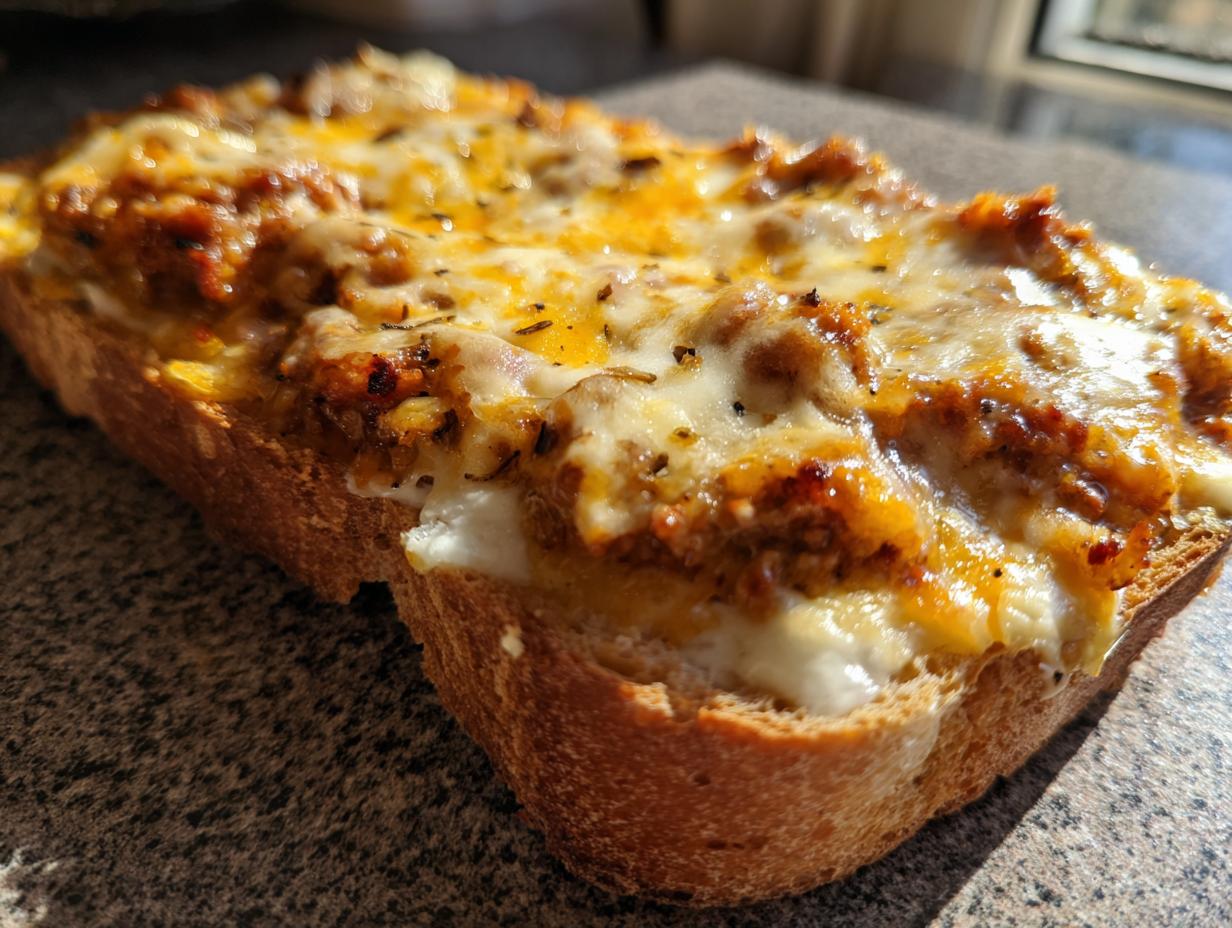
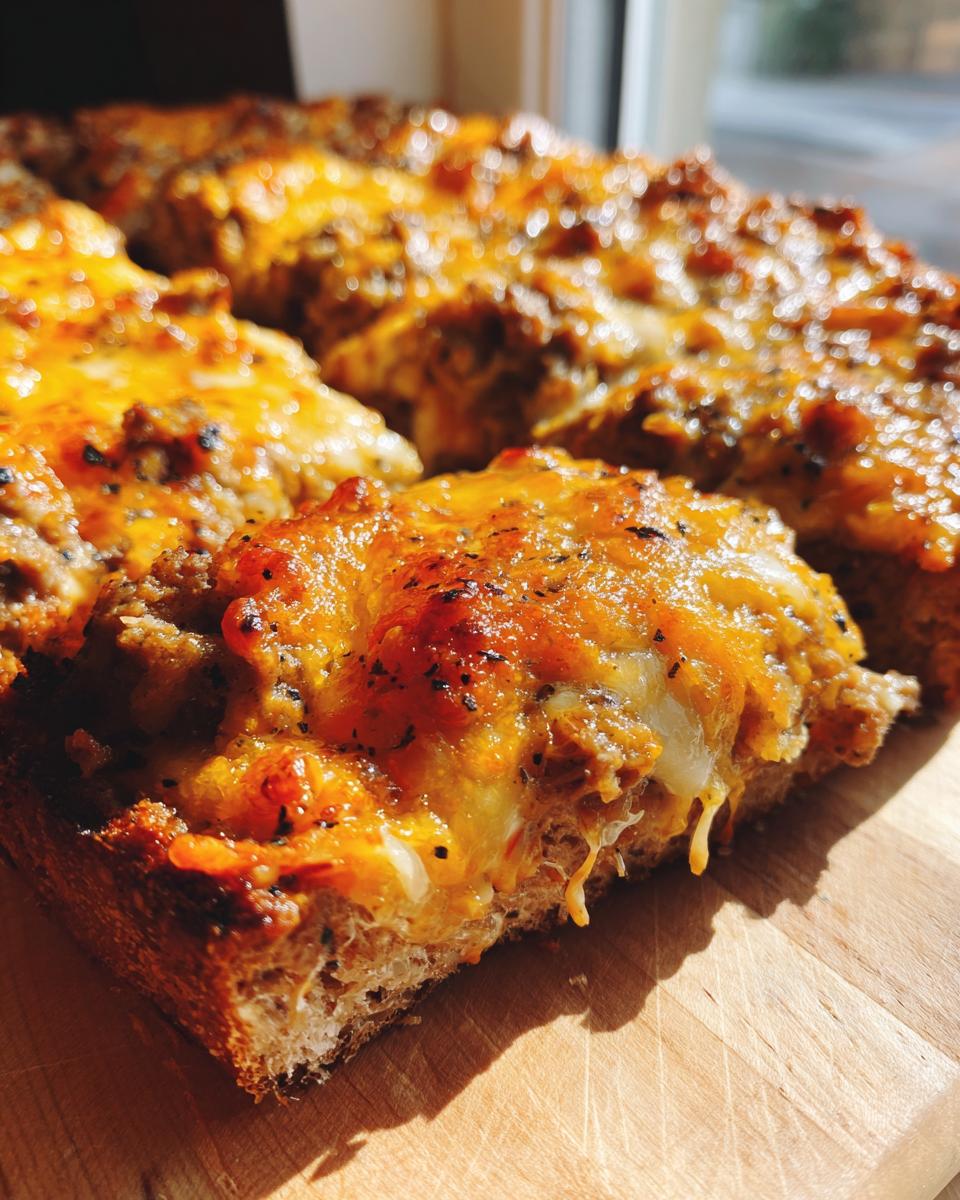
What’s the flavor bomb here? It’s that seriously savory, deeply cheesy, meaty mixture. It’s rich, salty, and so satisfying. That heavy, warm topping contrasts unbelievably well with the crisp, toasted base—whether you use pumpernickel or crackers. They melt in your mouth, which is why they are exactly what I call a simple crowd-pleasing appetizer. Everyone asks for the recipe!
Gathering Your Ingredients for the Hanky Panky Recipe
This is the part where we get organized, and honestly, preparing your ingredients right upfront is my biggest secret to keeping the assembly process fast. If everything is ready to go, we can have this hearty mixture bubbling in the oven in under 15 minutes! Make sure you grab some good quality sharp cheddar—it makes a huge difference in the flavor payoff. If you’re looking for other great ways to use that cream cheese, I have my cream cheese sausage balls recipe that everyone adores. Now, let’s look at exactly what we need for this legendary hot dip.
The Meaty Base and Dairy Components
We need a real punch of flavor here, so we use two types of meat—pork sausage and ground beef, using one pound of each. Don’t skimp on the fat content; it helps keep this mixture mouthwateringly tender! The dairy is crucial too. You absolutely must soften that 8-ounce block of cream cheese—take it out a good hour early. If it’s cold, you’ll end up wrestling with chunks instead of getting that smooth, velvety texture we need. Then, tear into that 10-ounce package of sharp cheddar cheese. Freshly shredded is always better, but the pre-shredded works fine if you’re in a rush!
Choosing the Right Base for Your Hanky Panky Recipe
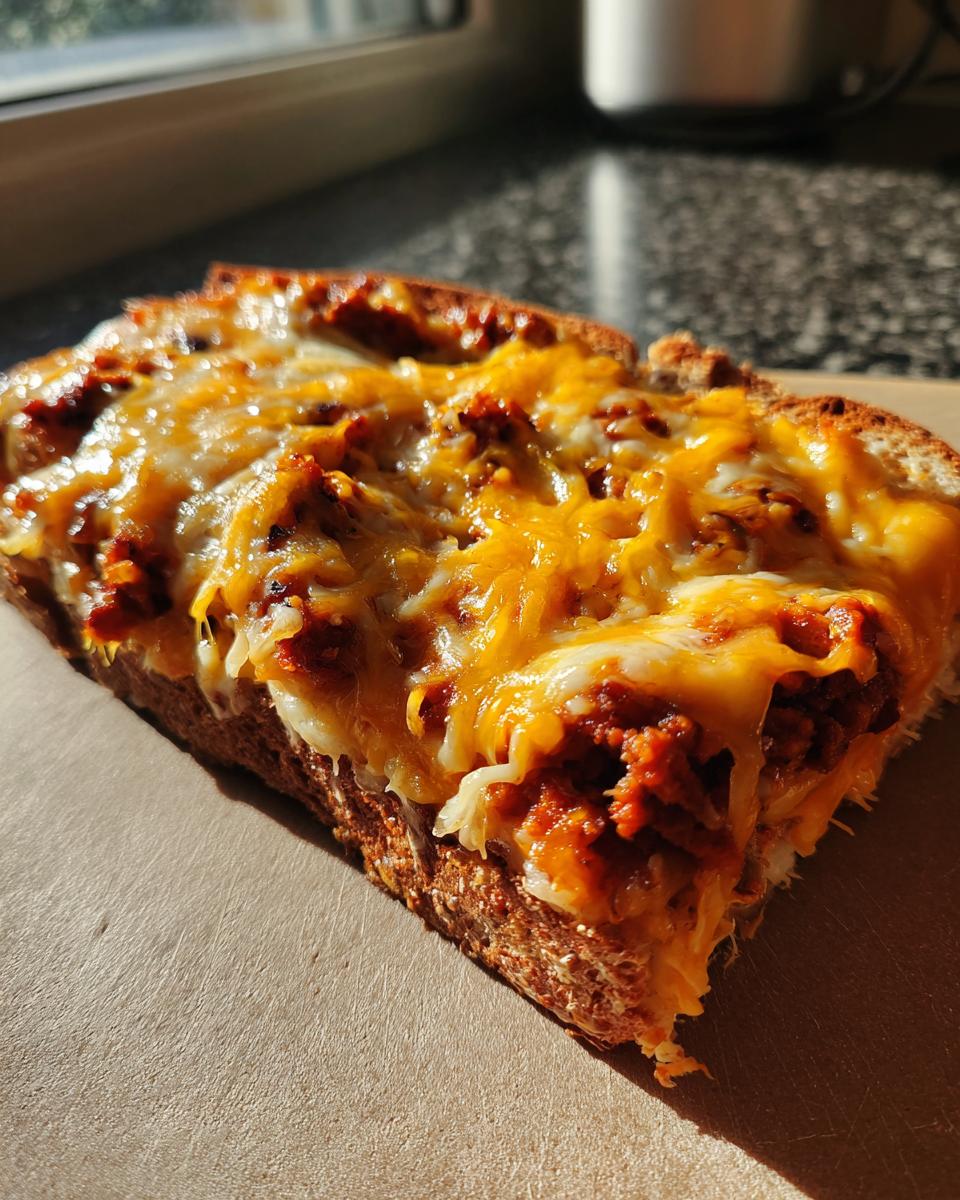
Now for the vehicle! The traditional and, in my opinion, best choice for these pumpernickel bread appetizers is a thin-sliced loaf. Pumpernickel adds a faint molasses sweetness and a great dark color that looks fantastic once it’s toasted under that cheesy topping. However, if you can’t find a good loaf, don’t panic! You can totally use sturdy crackers here. Make sure they are hearty—thin, cheap crackers will dissolve right under the weight of the meat mixture, and we want structure, not soup!
Step-by-Step Instructions for the Best Hanky Panky Recipe
Alright, time to bring this incredible mixture to life! Honestly, the process is surprisingly straightforward, but there is one tiny, critical step involving the meat that you can’t skip if you want these sausage cream cheese bites to stay crisp and not slide off your bread. We are moving fast, so get your oven warmed up to 350 degrees Fahrenheit and lightly grease a big baking sheet before you even touch the skillet. Remember, we want this appetizer bubbling hot, not sitting sadly in a puddle of grease!
If you are looking for something similar but even faster—like a spoonable appetizer that stays in the bowl—check out my guide to making a quick hot dip recipe. But for now, focus here. We’re making tradition!
Cooking the Meat and Draining Fat
This is where we build the flavor foundation, so take your time cooking the pound of pork sausage and pound of ground beef in a large skillet over medium heat. You need to use that sturdy wooden spoon to totally break up the meat as it cooks—think fine crumbles, not big chunks. Once everything is browned, I mean absolutely everything, bring the skillet over to the sink and drain off every last drop of fat. Dump it, drain it, press it down with a spatula to squeeze out any hiding pockets of grease. If you skip this, the topping will be soupy, and nobody wants that soggy base!
Creating the Cheesy Meat Dip Appetizer Filling
Now that the meat is clean and back in the empty skillet over low heat, it’s time for the magic! Add your softened cream cheese, the sharp cheddar, Worcestershire sauce, and all those lovely spices (onion powder, garlic powder, pepper, and salt). Now, you have to stir this continuously! Keep that heat low so you don’t scorch the cheese clinging to the bottom of the pan. You are aiming for a uniform, smooth, velvety mixture—that perfect cheesy meat dip appetizer consistency that coats the meat beautifully. This should take just a few minutes until it’s perfectly melted.
Assembling and Baking Your Sausage Cream Cheese Bites
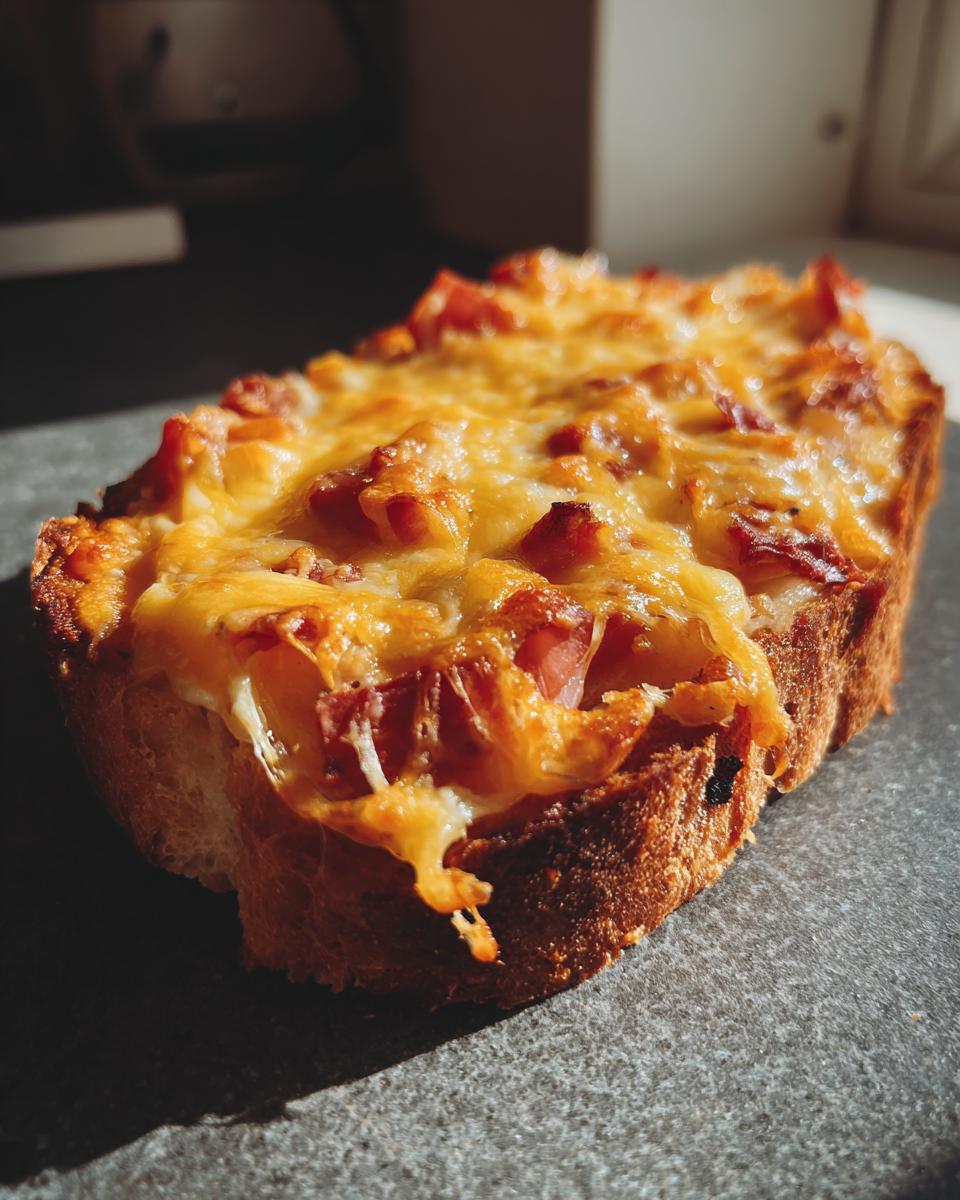
Once your filling is smooth and everything is combined, take it off the heat *right away*. Spread a nice, generous dollop onto each slice of pumpernickel bread or your sturdy cracker. Don’t pile it too high, or it will spill over when it melts! Place those loaded slices onto your prepped baking sheet. Pop them into that 350°F oven for about 10 to 12 minutes. You are watching for two things: the cheese topping is totally bubbly, and the edges of the bread just start to look toasted and golden brown. The minute they come out, serve these appetizer bites easy to eat while they are still piping hot—that’s the best way to enjoy them! Of course, if you need more party inspiration, you can always look at what others are pinning, like these recipes found over here.
Expert Tips for Perfect Hanky Panky Recipe Results
You followed the steps, and you nailed the cheesy meat dip, but maybe you want to tweak things next time, or perhaps you need to prep for a huge crowd next weekend. That’s where having a few extra tricks up your sleeve comes in handy! Cooking, especially for parties, is all about making things work for *your* schedule, not the other way around. I’ve adapted so many classic dishes to fit my fast-paced life, and these tips are what I use to guarantee the best results every single time.
Ingredient Substitutions for Your Hanky Panky Recipe
While pumpernickel is my tried-and-true foundation—I love that slightly dark, earthy flavor it brings—don’t feel locked in! If you can’t find it, rye bread works beautifully and gives you a very similar vibe. For the crunchiest, easiest version, switch to sturdy crackers, just make sure they are thick enough to handle that rich topping. Now, about spice: if you like a little kick, this is the perfect spot to add it in! I always suggest a quarter teaspoon of cayenne pepper if you’re serving adults who enjoy a bit of heat. Taste your mixture right before spreading it on the bread, and give it a little stir before you go any further. If you need a comforting main dish sometime too, I have a fantastic sausage tortellini soup recipe!
Make Ahead Party Snacks Preparation
This is huge for me. If I’m hosting a big holiday party, I refuse to make everything the day of. The great news is that these sausage cream cheese bites are fantastic make ahead party snacks! Once you have the topping mixed, you can assemble the entire tray of bread slices—just cover the whole baking sheet tightly with plastic wrap. You can refrigerate them for up to 24 hours. The only thing you need to remember is to give them a little extra baking time. Since they go into the oven cold, you’ll need to add about 3 to 5 extra minutes to that baking time. Keep an eye on them until they are bubbly, and they’ll be perfect. If you’re thinking about other party appetizers, I’ve also got great info on other recipes like this one that people rave about.
Serving Suggestions for This Classic Comfort Food Appetizer
Since this classic comfort food appetizer is rich and hearty, it really shines when served as one of several offerings. These are non-negotiable for game days, obviously, but they are equally fantastic piled high for holiday gatherings when people are grazing for hours. I love putting them out alongside some fresher elements to balance the richness, like a simple veggie platter or maybe some crisp apple slices to cut through that creamy cheese. They are completely addictive, so be warned: you might want to double the recipe if you’re serving a bigger crowd! If you’re hosting a big dinner soon, you absolutely have to check out my thoughts on the best classic homemade stuffing recipe.
Storage and Reheating Instructions for Leftover Hanky Panky
So, the party is over, and miraculously, you have a few of these glorious cheesy bites left over. Don’t you dare throw them out! These sausage cream cheese bites reheat surprisingly well, provided you use the right technique. The biggest enemy here is sogginess, because we want that satisfying crisp bottom, not a limp cracker!
For storage, you need to cool any leftovers completely first. Once they are room temperature, transfer them into a sturdy, airtight container. They keep well in the fridge for about three or four days, which is handy if you want a quick lunch or late-night snack during the week. Also, if you want a sauce to go with your leftovers or your next batch, you absolutely have to try my easy Big Mac sauce copycat recipe!
When it comes to reheating, the microwave is your enemy! It heats up the meat and cheese perfectly, but it turns that beautiful toasted pumpernickel edge into something chewy and sad. Instead, use the oven or a toaster oven.
- Preheat your oven to a low 300°F. You don’t want high heat, just enough to warm everything through gently.
- Lay the leftover Hanky Pankies out in a single layer on a baking sheet—no overlapping!
- Bake for about 5 to 7 minutes. You’re looking for the cheese topping to just barely start glistening again, and the bread edges should feel firm.
This gentle reheating process melts the cheese back to that perfect, gooey texture while helping the sturdy bread base crisp up again. Enjoy them hot, and relive the party all over again!
Troubleshooting Common Hanky Panky Recipe Issues
Listen, even the best of us run into little hiccups in the kitchen! The hanky panky recipe is super forgiving, but since it relies on melted cheese and cooked meat, there are two main things that can sometimes go a little sideways. Don’t sweat it if this happens; it just means you know exactly what to watch out for next time! I’ve definitely had those moments where I thought I was rushing, and the filling just didn’t look right. If you’re making something hearty next time that needs a bit of careful cooking, make sure you check out my taco pasta one-pot cheesy skillet recipe!
Here are the two big ones I see beginners run into, and how to fix them, or better yet, avoid them next time!
Mixture is Too Greasy: The Dreaded Soggy Base
If you get your topping mixed and it looks wet, oily, or like it’s going to slide right off your pumpernickel slices before it even hits the oven, then you know what happened: you didn’t drain that meat thoroughly enough. When you cook ground beef and sausage, they release a ton of liquid fat! If you skip draining it, that fat gets mixed right into your cheese, and when it bakes, it separates and pools on the bread. Eww!
The fix? If you catch it early, move the meat back to the skillet, turn the heat to medium, and cook off some of that excess moisture without the cheese in there. You can even blot it with a couple of paper towels laid over the meat. Next time, use a colander and let it sit for a few minutes, pressing down hard with a spatula to physically squeeze out every bit you can. A drier meat base equals crispier appetizer bites easy to hold!
Filling is Grainy or Separated
This happens when the cheese doesn’t incorporate smoothly into the meat. There are two main culprits here. First, if your cream cheese was cold when you added it, it’s going to fight the hot meat and never fully melt into a smooth base. It ends up looking clumpy, or what some people call grainy.
The second reason is high heat! If you leave the cheese mixture cooking on medium-high heat for too long, the cheese starts to break, releasing its oils unevenly, and that texture goes grainy, too. My rule is always to add the cheese when the meat is back in the pan over the LOWEST heat setting, and don’t stop stirring until it’s just melted. Gently stir constantly until everything is just combined and velvety. If yours looks grainy, try stirring it off the heat for a minute or two; sometimes, pulling it away from the direct heat source is just enough to calm down the cheese and bring it back to smooth perfection.
Frequently Asked Questions About the Hanky Panky Recipe
I know you love this recipe, and sometimes when you’re planning a party menu, details matter! I always get asked the same things when people try this for the first time, especially about substitutions or how to make it fit their theme. If you’re trying to figure out a great dip pairing, you should definitely bookmark my beer cheese dip recipe—it’s fantastic alongside these!
Can I make this hanky panky recipe without sausage?
You totally can, but I’m going to be honest with you: the pork sausage gives this filling a certain savory depth and spice blend that’s hard to replicate! If you have to skip it, using all ground beef works just fine; it just makes for a slightly less complex flavor profile overall. If you try ground turkey instead, you absolutely must add a little extra seasoning, maybe some paprika or a pinch more onion powder, just to boost that flavor back up. Remember, the whole point is big flavor in a small bite!
What other bread works besides pumpernickel for this appetizer bites easy serving?
Oh, that’s a great question for when pumpernickel just isn’t hitting right that day! As I mentioned before, rye bread is an excellent swap; it has that same sturdy structure and great earthiness. If you want something super crunchy and bite-sized, use hearty crackers. I mean sturdy crackers—the kind that won’t crack when you try to spread the mixture on them! You could even take slices of a day-old French baguette, toast them lightly first, and use those. Any solid base will work for these appetizer bites easy to hold!
Is this considered an old school appetizer?
Yes! Absolutely, 100%! This is the definition of an old school appetizer. Ask anyone who grew up attending holiday parties in the 70s or 80s, and they’ve probably had a version of this. It totally falls into that lovely category of comforting, slightly retro party food that just refuses to go out of style because it tastes so darn good. It’s pure nostalgia baked onto toast! For more excellent party food ideas in that vein, check out what the folks at Quick Bite Chef are doing!
Nutritional Estimates for This Party Food Ideas Recipe
Now, I always want to be straight with you lovely bakers and cooks. When we talk about rich, cheesy, meaty deliciousness, we aren’t exactly diving into the low-calorie sector, right? These Hanky Panky bites are pure comfort, meant for celebrating!
The numbers below are just estimates based on the ingredient ratios I’ve listed—specifically using the sausage, beef, sharp cheddar, and pumpernickel as the base. If you swap out the meat for leaner options or use whole wheat crackers, your count will change! Also, remember this recipe yields a huge batch (about 30 servings), so these stats are per single, bite-sized piece.
- Serving Size: 1 piece
- Calories: About 180
- Fat: Around 14g
- Saturated Fat: Roughly 7g
- Protein: About 10g
- Carbohydrates: 4g
- Sodium: Uh oh, about 350mg (that’s the cheese and sausage talking!)
They are wonderfully satisfying, which is why they make such a great base for your party food ideas. Enjoy them warm and know that you’ve made something truly special!
PrintClassic Hanky Panky Appetizer Recipe

Make this easy appetizer recipe, a retro party snack featuring a savory, cheesy meat mixture served on toasted bread. It is a simple crowd-pleasing appetizer perfect for game days or holidays.
- Prep Time: 15 min
- Cook Time: 12 min
- Total Time: 27 min
- Yield: About 30 servings 1x
- Category: Appetizer
- Method: Baking
- Cuisine: American
- Diet: Vegetarian
Ingredients
- 1 pound ground pork sausage
- 1 pound ground beef
- 1 (8 ounce) package cream cheese, softened
- 1 (10 ounce) package shredded sharp cheddar cheese
- 1 teaspoon Worcestershire sauce
- 1/2 teaspoon onion powder
- 1/4 teaspoon garlic powder
- 1/4 teaspoon black pepper
- 1/4 teaspoon salt
- 1 loaf pumpernickel bread, sliced thinly or 1 package sturdy crackers
Instructions
- Preheat your oven to 350 degrees Fahrenheit. Lightly grease a large baking sheet.
- In a large skillet over medium heat, cook the ground pork sausage and ground beef together. Break the meat apart as it cooks. Drain off all the excess grease completely.
- Return the cooked meat to the skillet. Reduce the heat to low.
- Add the softened cream cheese, shredded cheddar cheese, Worcestershire sauce, onion powder, garlic powder, black pepper, and salt to the meat mixture.
- Stir constantly until all the cheese is fully melted and the mixture is smooth and well combined. This is your cheesy meat dip appetizer filling.
- Spread a generous layer of the hot mixture onto each slice of pumpernickel bread or cracker. Do not overload the bread.
- Place the prepared bread slices or crackers on the baking sheet.
- Bake for 10 to 12 minutes, or until the topping is bubbly and the edges of the bread are lightly toasted.
- Serve these appetizer bites warm immediately.
Notes
- For a slightly different texture, you can substitute the pumpernickel bread with rye bread or sturdy water crackers.
- If you prefer a spicier flavor, add 1/4 teaspoon of cayenne pepper to the cheese mixture.
- You can assemble these sausage cream cheese bites ahead of time. Cover the assembled bread slices and refrigerate for up to 24 hours. Add 3-5 minutes to the baking time if baking directly from the refrigerator.
Nutrition
- Serving Size: 1 piece
- Calories: 180
- Sugar: 1
- Sodium: 350
- Fat: 14
- Saturated Fat: 7
- Unsaturated Fat: 7
- Trans Fat: 0.5
- Carbohydrates: 4
- Fiber: 0
- Protein: 10
- Cholesterol: 45