

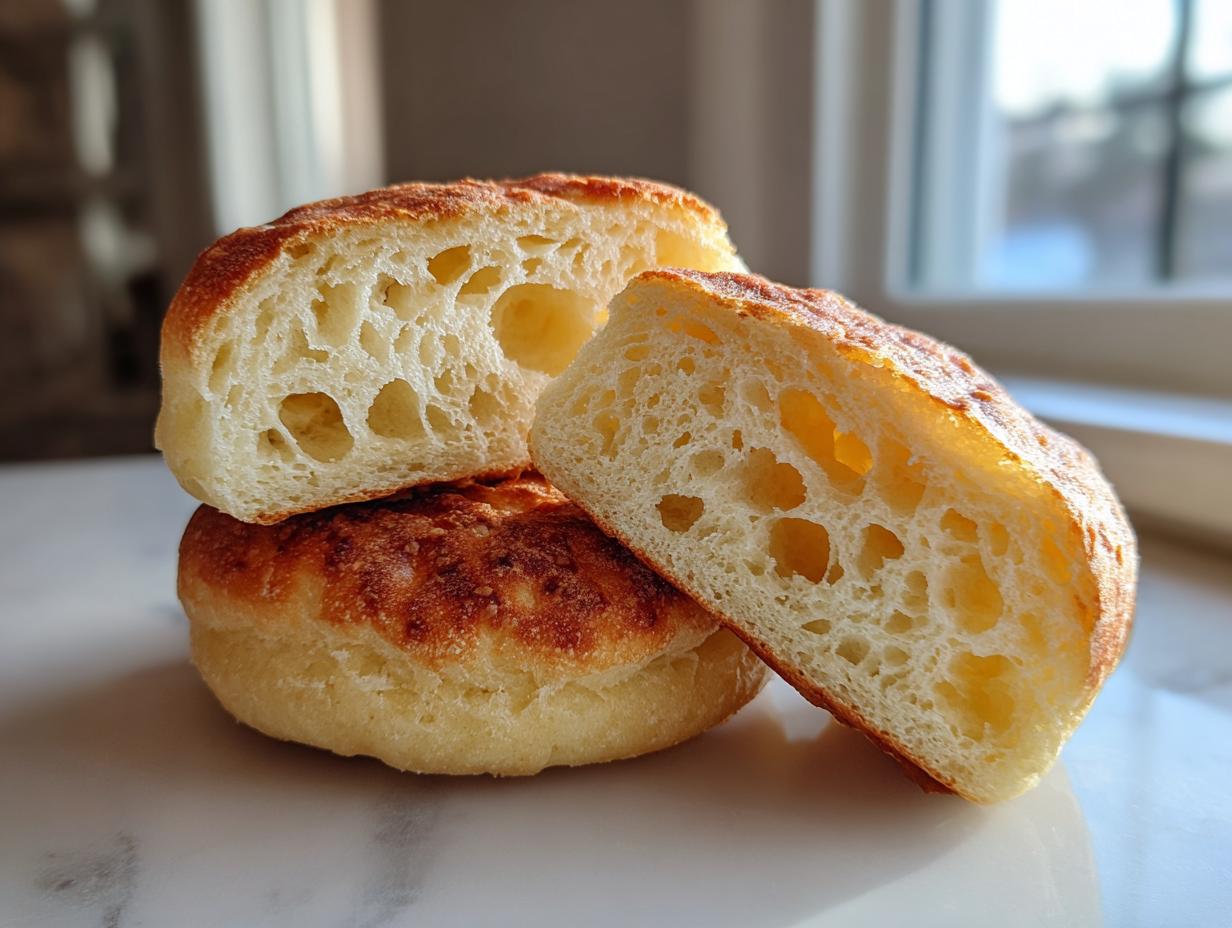
Oh, the sheer joy of a weekend morning! If you ask me, there’s no better way to truly ground yourself than starting the day with something made completely by your own two hands, especially when that something smells incredibly comforting. That’s why I’m thrilled to share what might be my favorite breakfast project: authentic, homemade sourdough english muffins. Forget those sad, packaged things—we’re aiming for that spectacular texture, the one with all the tiny air holes, the famous ‘nooks and crannies,’ just begging for butter to melt down into them.
This recipe relies on a slow, overnight fermentation process. It deepens the flavor beautifully, waking up the tang of the sourdough, and honestly, it makes the actual morning prep so much easier! For me, baking bread like this is my tether back to my grandmother’s kitchen in North Carolina. It’s about slowing down, even just a little, and creating something heartfelt. Trust me, once you master these stovetop beauties, you’ll never look back.
You’ll want to make sure your starter is happy and active before you start, but don’t worry if you’re new to this! I’ve built these steps for simplicity. If you need a refresher on feeding your starter, pop over to my guide on sourdough starter maintenance. Let’s get mixing!
- Why These Are The Best Sourdough English Muffins You Will Make
- Gathering Ingredients for Your Overnight Sourdough English Muffins
- Step-by-Step Instructions for Stovetop Sourdough English Muffins
- Tips for Perfect Sourdough English Muffins Every Time
- Serving Suggestions for Homemade Sourdough English Muffins
- Storage and Reheating Sourdough English Muffins
- Frequently Asked Questions About Sourdough English Muffins
- Nutritional Estimates for Your Sourdough English Muffins
- Share Your Perfect Sourdough English Muffins Creations
Why These Are The Best Sourdough English Muffins You Will Make
Honestly, I wouldn’t share a recipe unless I truly thought it was the best thing you could whip up for breakfast. We’re talking about the kind of homemade english muffins that put the grocery store versions to shame! My goal here is making sure you get that crackly, toasted exterior but an interior that is soft and wonderfully fluffy.
- Amazing flavor depth thanks to the overnight chill, which gives that authentic sourdough tang.
- They stay perfectly tender and manage to be light, not dense or heavy like some sourdough breads can turn out.
- The process is surprisingly straightforward once you get into the rhythm of the over-rest.
This is how you get those fluffy sourdough muffins everyone dreams about! You can check out my deeper dive on mastering this texture right here: achieving perfect nooks and crannies.
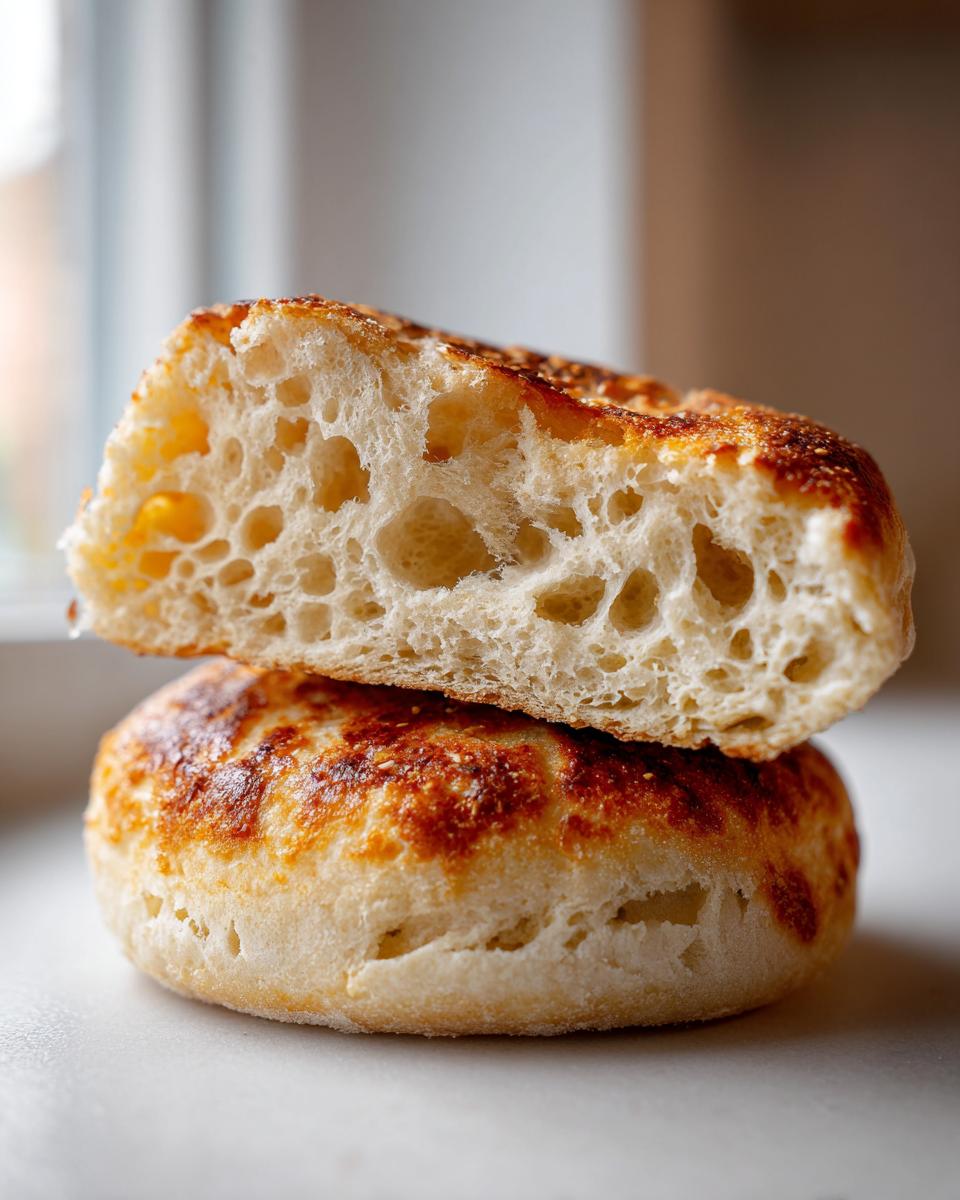
Achieving Perfect Nooks and Crannies in Your Sourdough English Muffins
This is the million-dollar question, right? It all comes down to two things we focus on: gentle handling and time. When we mix and shape, you absolutely must avoid aggressively punching the air out of that dough. Those delicate air pockets created by the starter and the long, cold rest are what become those glorious tunnels when they hit the hot griddle. Remember, we are treating this dough carefully—it’s earned its rest!
Gathering Ingredients for Your Overnight Sourdough English Muffins
Before we even think about mixing, let’s get our ducks in a row ingredient-wise. This recipe is pretty simple, which I love! We need an active starter—that means one that has been fed recently and is bubbly and ready to go to work. You also need the right temperature milk, just slightly warm, to encourage the starter to perk up during that initial hour rest. Melting the butter isn’t complicated, but don’t let it get hot, we just need it liquid!
Here is what you’ll need:
- 1 cup active sourdough starter (fed 4-8 hours prior)
- 1 cup warm milk
- 2 tablespoons unsalted butter, melted
- 1 tablespoon honey
- 1 teaspoon salt
- 1 teaspoon baking soda
- 3 cups all-purpose flour, plus more for dusting
Ingredient Notes and Sourdough Starter Flexibility
The starter is the star here, so make sure it’s active, guys! Using starter that’s already passed its peak means less rise for you the next day. Now, if you’re staring at a jar of sleepy, unfed starter, don’t panic! You can totally use that unfed sourdough discard muffins by swapping it in for the active starter. If you do that, however, you need to add about 1/2 teaspoon of instant yeast to the wet ingredients to make sure we still get that lift. It happens! For more on keeping your starter happy, check out my baking resource guide here.
Step-by-Step Instructions for Stovetop Sourdough English Muffins
Alright, let’s get baking! Now that we have our ingredients ready, this is where that overnight planning pays off. The actual hands-on work tomorrow morning is going to be so fast—it’s honestly one of the best parts of this recipe for an easy sourdough breakfast. Just follow these steps closely, especially with how you handle the dough after the chill. You can even plan ahead and turn the leftovers into amazing little pizzas later on; check out my recipe for English Muffin Pizza when you’re done here!
Mixing and Overnight Cold Fermentation for Sourdough English Muffins
First thing, mix up your starter, warm milk, melted butter, and honey in a big bowl. Don’t whisk it like crazy; just combine it gently. Then, throw in the salt and three cups of flour. Stir it all up with a sturdy wooden spoon until you’ve got what looks like a messy, shaggy ball. That’s right, it won’t be smooth! Cover it up tight and leave it on the counter for just one hour. After that hour, sprinkle the baking soda right on top and gently fold the dough over itself a few times so the soda gets worked in. It’ll puff up a tiny bit! Then, cover it again and pop the whole bowl into the fridge for 8 to 12 hours. That long, cold rest is developing flavor like nobody’s business!
Shaping and Cutting the Dough Rounds
The next morning, lightly flour your counter—and I mean light! Scrape that cool dough out, but remember my golden rule: be gentle! You want to keep all those beautiful air bubbles trapped inside. Pat it gently with floured fingers until it’s about half an inch thick. Now, grab your 3-inch cutter and start punching out the rounds. Don’t twist the cutter; press straight down and lift up. If you twist, you seal the edges and block those nooks from forming later! Collect those scraps, press them softly together (no serious kneading!),—we are just bringing them into alignment—and cut the rest.
Cooking on the Griddle: Mastering Stovetop English Muffins
Time for the stove! This step is crucial for that signature outside crust. You need a dry cast-iron skillet or a heavy griddle warmed up over medium-low heat. I mean it—no butter, no oil! Placing your dough rounds onto the hot, dry surface is what creates those distinctively browned sides. Let them cook slowly for about 6 to 8 minutes on the first side until they are golden brown. You are aiming to cook them slowly enough that the center gets done before the outside burns. We’re aiming for an internal temperature around 200°F inside to make sure these stovetop english muffins are cooked all the way through. They’ll look pale on the sides; that’s exactly where the buttered knife (or fork!) goes in to split them later.

Tips for Perfect Sourdough English Muffins Every Time
Now that you’ve gone through the process, let’s talk about those little moments that separate a good muffin from a *great* one. Because I want confidence in your baking, here are a few small things I always do when making my batch of sourdough english muffins. This is the stuff that makes the difference between a slightly flat disc and a muffin that practically bursts open when toasted!
First up: don’t be tempted by a knife for splitting! Use a fork to gently pierce the edges and separate the two halves. Seriously, pull them apart with a fork—this preserves those precious nooks and crannies inside, which is exactly what traps all the melted butter. If you slice them, you cut those tunnels right in half! This is key for all you beginners sourdough english muffins bakers!
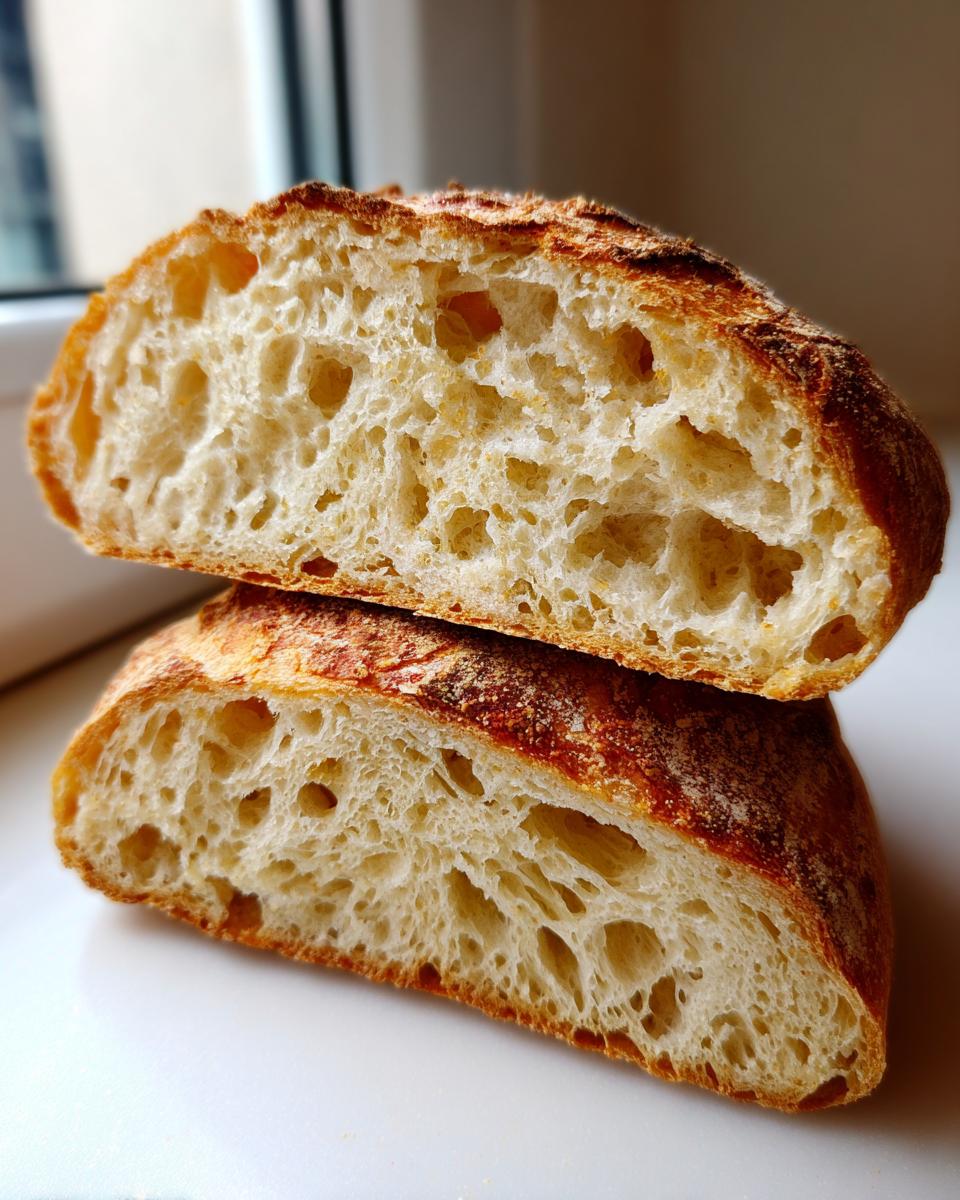
Secondly, make sure your griddle isn’t too hot. I know you want that golden color fast, but rushing the cook time means the interior stays gummy. Medium-low is your friend here. If you want more beginner know-how, I mention some of the best tips for avoiding mistakes over at this texture guide. Also, for some great visual confirmation, check out the tips shared by my friends over at Wise Mom Blogger!
Serving Suggestions for Homemade Sourdough English Muffins
Now that you’ve got ten beautiful, craggy, perfectly textured muffins cooling on the rack—the smell in the kitchen must be amazing, right?—what are you going to do with them? Honestly, my first instinct is always to hack one open immediately and slather it with butter while it’s still warm, just to taste it plain. That simple sourdough tang shining through is pure magic.
But these aren’t just for snacking! They are the absolute bedrock of a fantastic breakfast or brunch. They are designed for thick layers of good quality jam or maybe some homemade lemon curd, if you’re feeling fancy. Don’t limit yourself to sweet toppings, though!
For a heartier meal, these homemade muffins are miles better than anything store-bought for breakfast sandwiches. I love making a batch on Sunday and using them all week for egg and cheese sandwiches or layering them up like a proper Eggs Benedict. If you’re looking for dipping ideas (yes, dipping!), you know I have you covered with my easy homemade blue cheese dip recipe—it sounds weird, but salty cheese and tangy bread are winners!
The key takeaway here is that these muffins are sturdy enough to handle whatever you throw at them, so get creative, even if it’s just a piece of sharp cheddar melting into those glorious nooks.
Storage and Reheating Sourdough English Muffins
Because these sourdough English muffins are so good—and frankly, taste so much better than anything you grab off a shelf—it’s smart to have a plan for leftovers. If you manage to have any left after breakfast, that is! The good news is that they store like a charm, which makes them a fantastic component of a healthy homemade breakfast routine since you prep all the work the night before.
First thing: you must let them cool completely on the wire rack before you even think about bagging them up. If you seal them while they are warm, that steam turns into condensation, and we absolutely cannot have soggy bottoms on our muffins; that defeats the whole purpose!
For short-term storage, say three or four days, just keep them in a paper bag on the counter. The paper lets them breathe a little while keeping them contained. If you know you won’t get to them before then, freezing is the way to go. Once they are totally cool, wrap them tightly in plastic wrap first, and then tuck that plastic-wrapped bundle into a freezer-safe zip-top bag. They freeze beautifully for up to three months! Yes, you can completely freeze them and they will still have that great texture, which is amazing for quick weekday mornings. Trust me on this one!
When you’re ready to eat a frozen muffin, you don’t even need to thaw them out. You can split the frozen muffin in half and place both sides directly into your toaster slots. It takes a minute or two longer than a thawed muffin, but the result is perfect—toasted crisp outside, soft inside, ready for whatever toppings you put on your savory homemade teriyaki sauce creations!
Frequently Asked Questions About Sourdough English Muffins
It’s normal to have a few questions when diving into sourdough bakes, especially when you are aiming for those specific nooks! I tried to make this recipe as beginner-friendly as possible—it really is one of the most rewarding things you can bake—but sometimes little things trip us up. Here are the main things I hear folks ask about when they follow my sourdough english muffins recipe.
Can I make these sourdough english muffins recipe without a starter?
That’s a fantastic question! Since we are using sourdough starter, this recipe is naturally designed to be yeasted by the wild cultures doing their long-fermentation work overnight. So, technically, no, not without swapping something out! If you don’t have a starter going right now, you can absolutely substitute 1 cup of all-purpose flour with 1 teaspoon of instant yeast, skip the long overnight rest, and let the dough rise at room temperature for about an hour instead. It won’t have that deep, complex sourdough tang, but you will still get a satisfyingly delicious muffin! If you need help caring for your starter for next time, I go over everything in my guide here.
Why are my homemade english muffins flat and not fluffy?
Ugh, the dreaded flat muffin! Don’t sweat it; this is almost always a technique issue, nothing to do with the ingredients themselves. The number one reason these end up flat is over-handling the dough after the cold rest. When you punch or aggressively knead that dough before cutting the rounds, you are literally squeezing out all the lovely gas the starter worked so hard to create. You want to pat it out gently! The second reason is often a sleepy starter. If your starter wasn’t very active or bubbly when you started the mix, it just doesn’t have the power to lift the dough adequately during that initial rest period.
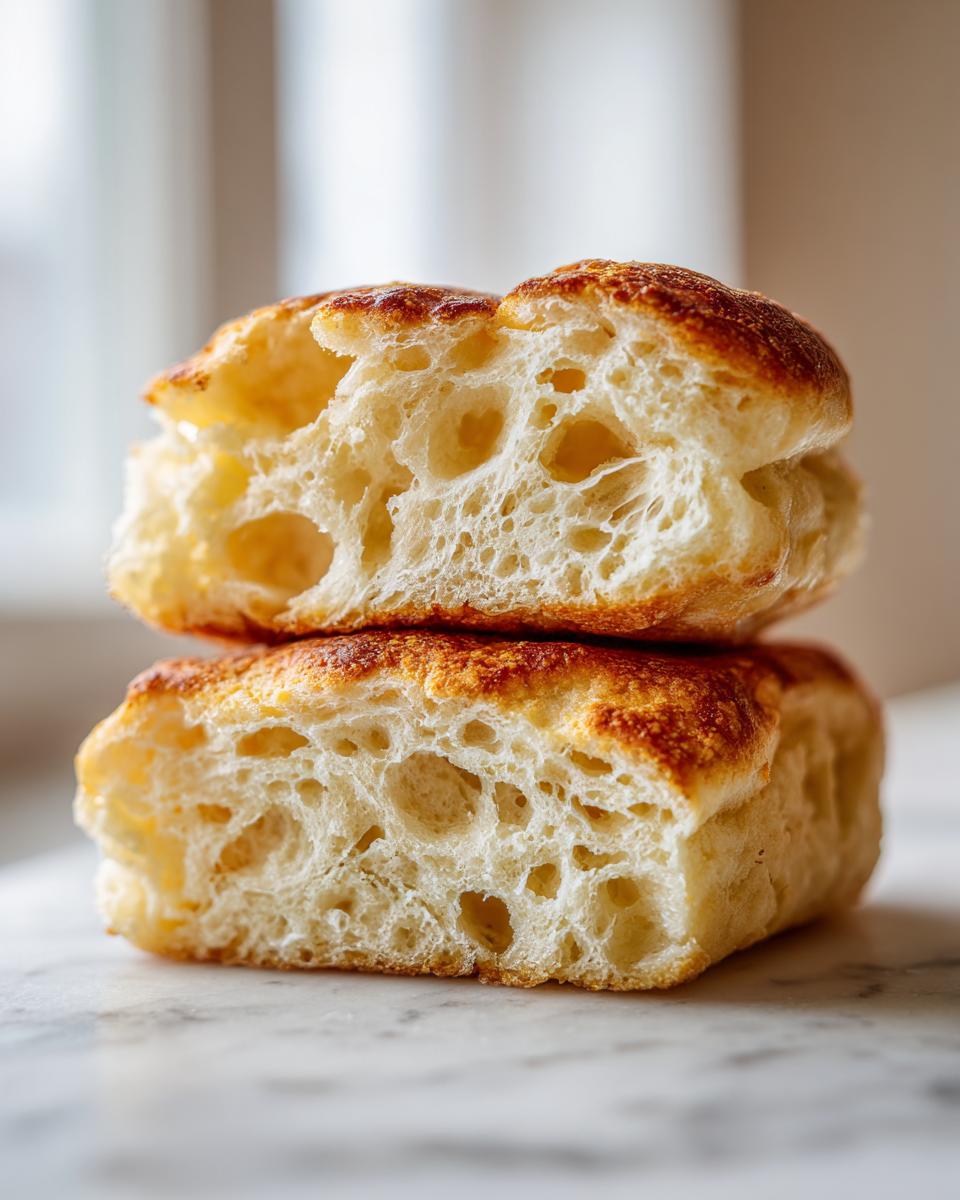
Nutritional Estimates for Your Sourdough English Muffins
You know, as much as I preach about flavor and comfort, I also believe in knowing what’s going into our bodies. It’s nice knowing that by making these homemade english muffins ourselves, we’re usually cutting down on all those preservatives found in the store-bought stuff. It makes for a much better start to that healthy morning routine!
I ran the numbers based on the recipe above, but please remember these figures are just estimates. Every single ingredient varies—how much flour you use when dusting, or the exact fat content in your milk—so your final count will shift a bit. Think of this as a fun guideline rather than a strict mandate!
Here are the general estimates for one glorious muffin, split in half:
- Serving Size: 1 muffin
- Calories: 220
- Fat: 5g
- Saturated Fat: 3g
- Carbohydrates: 40g
- Protein: 6g
- Sugar: 1.5g
- Sodium: 350mg
For me, seeing the low sugar count is a win, especially since that sweetness comes naturally from a tiny bit of honey rather than tons of added white sugar. It’s just another reason why making your own sourdough english muffins is so satisfying!
Share Your Perfect Sourdough English Muffins Creations
Okay, now you’ve got the recipe drilled down, you’ve rocked that overnight rest, and you’ve got those beautiful, craggy muffins coming off the griddle. I am dying to know if you nailed those nooks and crannies! Please, please, take a picture of your glorious batch and tag me on social media. Seeing your home-baked successes is what keeps my fire lit in the kitchen.
While you’re at it, would you mind leaving a quick star rating right here on the page? It helps other folks who are nervous about diving into sourdough know that this recipe is tried, true, and totally doable. Which topping won out for you? Were you a classic butter-and-jam purist, or did you make a savory breakfast sandwich masterpiece? Drop a comment below and tell me all about your favorite way to enjoy your fresh, homemade sourdough english muffins!
If you run into any hiccups along the way, or you just want to send me a note about how much you loved the texture, feel free to reach out! You can always get in touch through my contact page. Happy baking, friend!
PrintThe Ultimate Overnight Sourdough English Muffins with Perfect Nooks and Crannies

Make easy, homemade sourdough English muffins using your active starter. This overnight recipe cooks on the stovetop to achieve the classic crispy exterior and soft interior full of nooks and crannies, perfect for toasting.
- Prep Time: 20 min
- Cook Time: 20 min
- Total Time: 12 hr 40 min
- Yield: 10 muffins 1x
- Category: Breakfast
- Method: Stovetop Griddling
- Cuisine: American
- Diet: Vegetarian
Ingredients
- 1 cup active sourdough starter (fed 4–8 hours prior)
- 1 cup warm milk
- 2 tablespoons unsalted butter, melted
- 1 tablespoon honey
- 1 teaspoon salt
- 1 teaspoon baking soda
- 3 cups all-purpose flour, plus more for dusting
Instructions
- In a large bowl, combine the active sourdough starter, warm milk, melted butter, and honey. Mix until just combined.
- Add the salt and flour to the wet ingredients. Mix with a wooden spoon until a shaggy dough forms. Do not overmix.
- Cover the bowl tightly with plastic wrap and let the dough rest at room temperature for 1 hour.
- Sprinkle the baking soda over the dough. Gently fold the dough over itself several times until the baking soda is incorporated. The dough will become slightly puffier.
- Cover the bowl again and place it in the refrigerator for an overnight cold fermentation, 8 to 12 hours. This develops flavor and texture.
- The next morning, lightly dust a clean work surface with flour. Gently scrape the dough out of the bowl.
- Pat the dough out to about 1/2 inch thickness. Do not knead or punch down the dough aggressively; you want to keep the air bubbles that create the nooks and crannies.
- Use a 3-inch round cutter (or a biscuit cutter) to cut out the English muffin rounds. Gather the scraps, gently press them together, and cut out any remaining rounds.
- Heat a dry cast-iron skillet or griddle over medium-low heat. You do not need oil or butter for cooking.
- Place the dough rounds on the preheated griddle, leaving space between them. Cook for 6 to 8 minutes per side, until golden brown. The internal temperature should reach 200 degrees Fahrenheit.
- Remove the cooked muffins from the griddle. Let them cool completely on a wire rack before splitting them open with a fork to reveal the nooks and crannies.
Notes
- For the best nooks and crannies, avoid using a knife to split the muffins; use a fork to gently separate the halves.
- If you prefer to use sourdough discard instead of active starter, use 1 cup of unfed discard and add 1/2 teaspoon of instant yeast to the wet ingredients.
- These homemade English muffins freeze well. Cool completely, then store in an airtight bag for up to three months. Toast directly from frozen.
Nutrition
- Serving Size: 1 muffin
- Calories: 220
- Sugar: 1.5
- Sodium: 350
- Fat: 5
- Saturated Fat: 3
- Unsaturated Fat: 2
- Trans Fat: 0
- Carbohydrates: 40
- Fiber: 1
- Protein: 6
- Cholesterol: 15