
When you need a dessert that truly shouts ‘celebration’ but still feels like it came straight from your cozy kitchen—the kind of baking that makes you stop and close your eyes after the first bite—you go big. And nothing says big, beautiful indulgence like the magic combination of chocolate and peanut butter. Trust me, I spent years figuring out how to capture that perfect, rich flavor combo so it feels completely decadent yet totally approachable. This chocolate peanut butter cake isn’t just moist; it’s ridiculously, unbelievably rich. It’s exactly what we aim for here: making those special, showstopper moments achievable for everyday bakers.
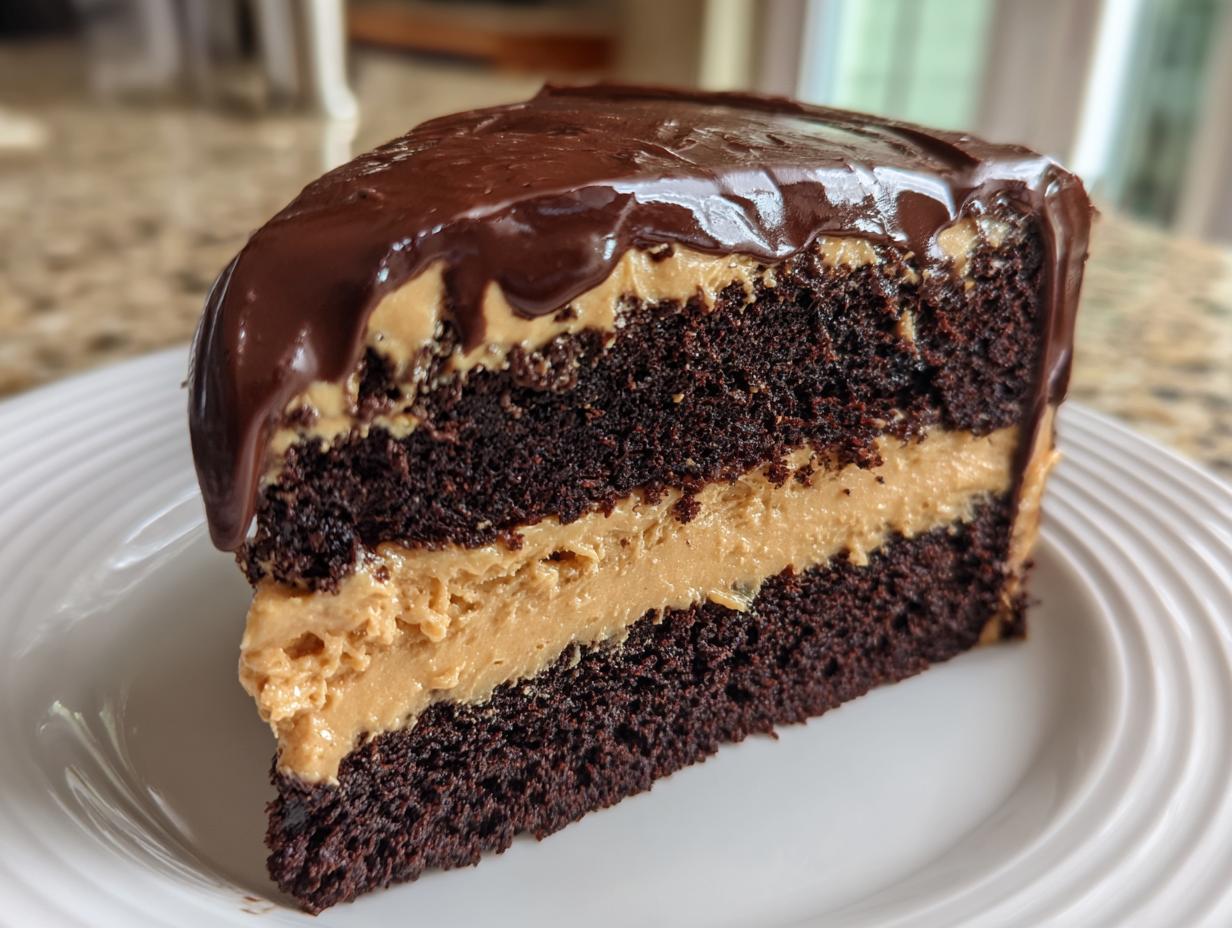
This recipe is proof that you don’t need complicated steps to get a stunning result. We’re mixing up the best parts of a rich dark chocolate cake, pouring on a blanket of creamy peanut butter frosting, and finishing it off with that glossy ganache drip. If you’re looking for the ultimate pairing of sweet and salty perfection, you’ve found your keeper.

If you are looking for more easy, yet show-stopping sweets, check out my collection of simple dessert recipes—but honestly, this cake is already setting the bar pretty high!
- Why This Chocolate Peanut Butter Cake is Your Next Favorite Indulgent Dessert Baking Project
- Gathering Ingredients for Your Chocolate Peanut Butter Cake
- Step-by-Step Instructions for the Chocolate Peanut Butter Cake
- Expert Tips for the Best Ever Cake for Birthdays: Mastering the Chocolate Peanut Butter Cake
- Variations on the Chocolate Peanut Butter Cake Theme
- Serving Suggestions for This Decadent Chocolate Cake
- Storage and Reheating Instructions for Your Chocolate Peanut Butter Cake
- Frequently Asked Questions About Making a Chocolate Peanut Butter Cake
- Sharing Your Ultimate Comfort Baking Creation
Why This Chocolate Peanut Butter Cake is Your Next Favorite Indulgent Dessert Baking Project
I genuinely believe this is the ultimate comfort baking recipe because it delivers on every single promise. We’re not messing around with dry results; we’re aiming for pure, luxurious dessert satisfaction without needing a catering degree. When I talk about flavor dexterity, this is what I mean—taking two powerhouse flavors and making them sing together perfectly. You deserve a cake that feels truly special, even if you made it standing in your regular kitchen on a Tuesday night.
Making this cake means you get bragging rights later! It looks like something you’d order at a fancy bakery, but you mixed it yourself with ingredients you found at the local market. It just clicks, you know?
Key Features of This Ultimate Chocolate Peanut Butter Cake
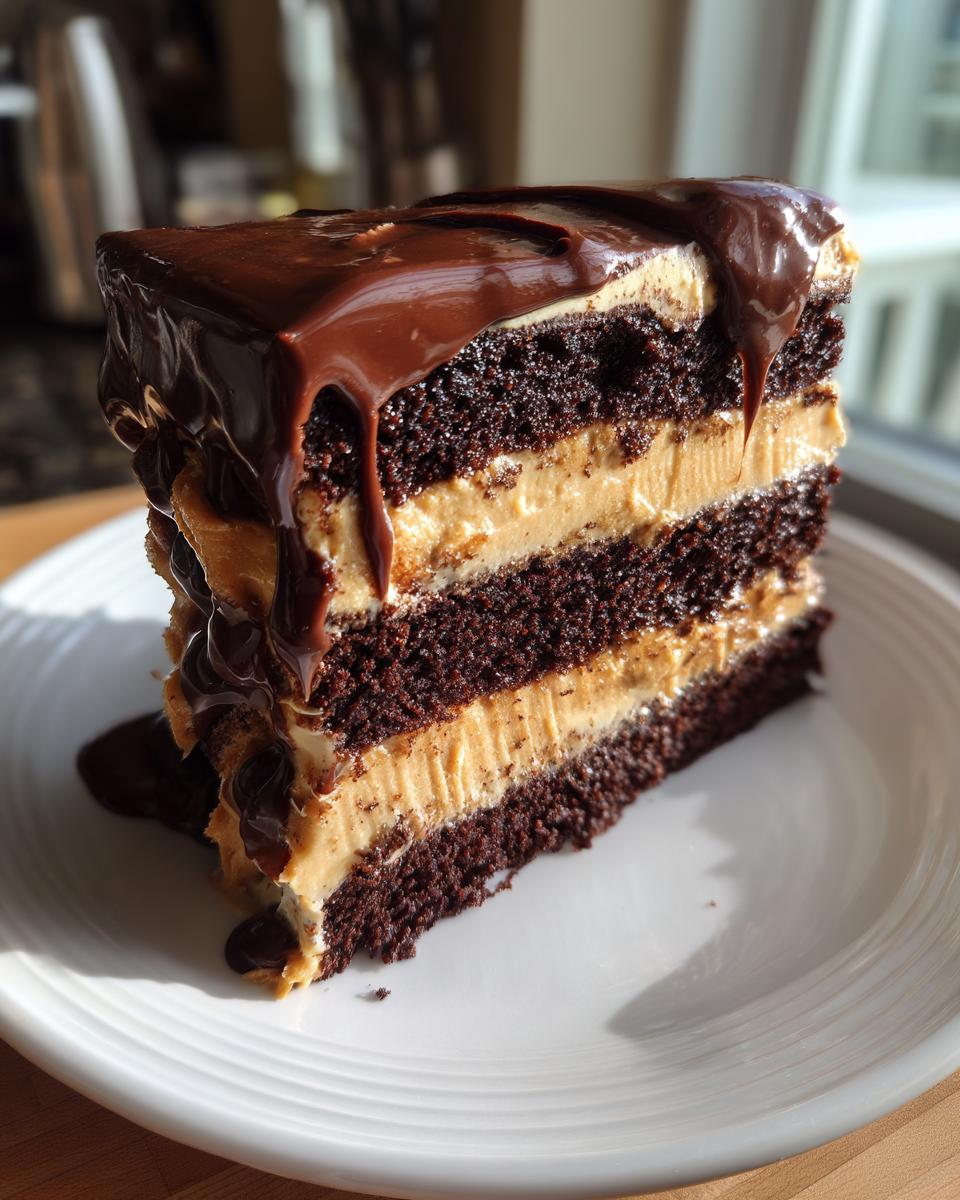
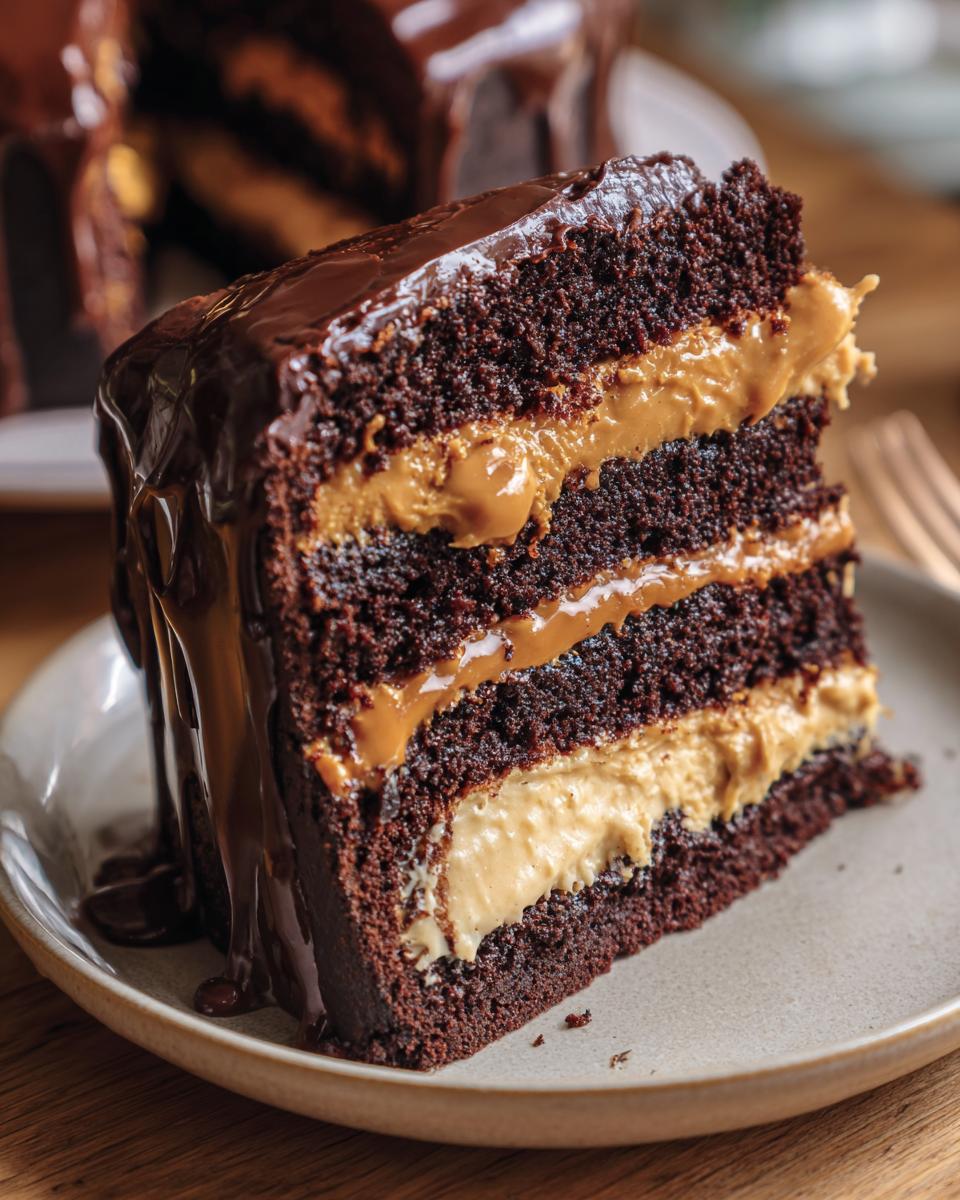
- Layers That Never Quit: We are talking about incredibly moist chocolate cake layers. They stay soft and tender days after baking, which is key for any great chocolate peanut butter cake. No crumbling here!
- The Perfect Centerpiece: This is definitely one of my favorite layer cake ideas. It’s rich enough for a milestone birthday but balanced enough for a simple weekend treat.
- The Dreamy Frosting: The creamy peanut butter frosting recipe is light but deeply flavorful. It cuts through the richness of the chocolate just beautifully—that sweet and salty balance is everything!
- That Show-Stopping Drip: Who can resist a glossy finish? The simple chocolate ganache topping looks professional but is incredibly easy to achieve, guaranteeing compliments every time.
Gathering Ingredients for Your Chocolate Peanut Butter Cake
Okay, now that we know how amazing this chocolate peanut butter cake is going to be, let’s talk about what we need to pull it off. Getting the right stuff is half the battle, and when you use quality ingredients, you don’t have to fuss as much later!
I like to organize my ingredients by station. It keeps my countertop feeling sane while I’m mixing. If you want to level up your chocolate game even more, you might want to check out my secret for making the best chocolate milk recipe—that same rich cocoa flavor is what we’re chasing here.
For the Moist Chocolate Cake Layers
This is where we build the foundation for that wonderfully moist chocolate dessert! Remember, that hot water or coffee isn’t just for color; it blooms the cocoa powder and makes the crumb incredibly tender. Don’t skip it!
- 1 3/4 cups all-purpose flour
- 3/4 cup unsweetened cocoa powder
- 1 3/4 cups granulated sugar
- 1 1/2 teaspoons baking soda
- 3/4 teaspoon baking powder
- 3/4 teaspoon salt
- 2 large eggs
- 1 cup buttermilk (make sure it’s room temperature if you can!)
- 1/2 cup vegetable oil
- 2 teaspoons vanilla extract
- 1 cup hot water or hot coffee (Coffee deepens the chocolate flavor, trust me!)
For the Creamy Peanut Butter Frosting Recipe
This frosting needs to be smooth enough to spread without tearing the delicate cake layers and rich enough to stand up to that deep chocolate. We’re using creamy peanut butter here, not the natural kind that separates—that’s important for the texture of the creamy peanut butter frosting recipe.
- 1 cup creamy peanut butter
- 1/2 cup unsalted butter, softened (make sure it’s actually soft, not melted!)
- 3 cups powdered sugar
- 1/4 cup milk or heavy cream
For the Chocolate Ganache Topping
This is the final crown jewel! It’s so simple, yet it elevates the whole thing into a true homemade celebration cake. You only need two things for the perfect shiny glaze.
- 4 ounces semi-sweet chocolate (chopped is easiest!)
- 1/2 cup heavy cream
Step-by-Step Instructions for the Chocolate Peanut Butter Cake
Alright, deep breath! This is where we turn simple ingredients into pure magic. Even though this is a showstopper chocolate peanut butter cake, the steps are really straightforward, I promise. Just follow the order, and you’ll nail that perfect texture!
If you’re looking for ideas for different frosting styles later on, I have a great post on a classic chocolate frosting recipe, but for now, let’s focus on getting this beauty baked!
Preparing and Baking the Chocolate Peanut Butter Cake Layers
We have to get those layers perfectly baked before we stack them up nice and high. Don’t forget to preheat first—it makes such a difference in how the cake starts rising!
- First things first: Crank that oven up to 350 degrees F (175 degrees C). Get two 9-inch round cake pans ready. You need to grease them really well and then dust them with flour so nothing decides to stick when we try to flip them out later.
- Grab a big bowl and whisk together all your dry ingredients: that flour, cocoa powder, sugar, baking soda, baking powder, and salt. Whisking ensures everything is evenly distributed, which prevents those weird little pockets of baking soda we don’t want.
- Now it’s time for the wet stuff that isn’t hot yet! Add the eggs, the buttermilk (make sure it’s not ice-cold!), your oil, and vanilla extract right into that dry mix. Use your electric mixer on medium speed and beat it for a solid two minutes. This is important for structure!
- Here’s the trick for the moist chocolate dessert:Carefully stir in that cup of hot water or hot coffee. I mean, *carefully*. This makes the most amazing, super thin batter. Don’t panic when you see how runny it is; that’s exactly the texture we want for ultimate moisture!
- Divide that lovely, thin batter evenly between your two prepared pans. Aim for them to be about the same height so your layers stack up straight.
- Bake them for 30 to 35 minutes. When you test them by inserting a wooden pick or toothpick in the center, it absolutely must come out clean. If it has wet batter, give it 3 more minutes and check again!
Making the Creamy Peanut Butter Frosting Recipe
While the cakes are doing their thing cooling down, we whip up the star of the show—that creamy peanut butter frosting recipe!
- Once the cakes are out of the oven, let them chill in their pans for about 10 minutes. Then, *gently* invert them onto a wire rack to cool completely. You cannot frost a warm cake, or you’ll end up with a melted, soupy mess.
- In your mixer bowl, start by creaming that softened butter and the peanut butter together until they look smooth and happy.
- Now, add the powdered sugar gradually, alternating with that milk or cream. Start slow, or you’ll wear sugar dust all over your kitchen! Keep mixing until it’s light, fluffy, and the creamy peanut butter frosting recipe looks exactly how you want it—smooth, spreadable, and delicious.
Creating the Chocolate Ganache Topping
This is what takes your cake from great to “I need a fork right now.” It’s so easy, it feels like cheating!
- Chop up your semi-sweet chocolate and place it in a heatproof bowl.
- Heat your heavy cream in a small saucepan until it just starts simmering—you’ll see a few tiny bubbles around the edges, don’t let it boil hard!
- Pour that hot cream right over the chopped chocolate. Now, the secret: Stop fussing with it! Let it sit undisturbed for five full minutes. This lets the heat melt the chocolate evenly.
- After five minutes, gently whisk the chocolate and cream together until it’s beautifully smooth and glossy. Let this mixture cool down slightly until it’s still runny but not scorching hot—we want it to be a lovely, pourable consistency before it goes on the cake.
Assembling Your Homemade Celebration Cake
Time for the payoff! Let’s stack this ultimate comfort baking dream up.
- Place one cooled cake layer onto your serving plate or cake stand.
- Take about one-third of that wonderful peanut butter frosting and spread it evenly across the top. Don’t go too close to the edge if you don’t want huge frosting escapees later!
- Carefully set the second cake layer right on top, pressing down just a tiny bit so it settles flat.
- Use the rest of your peanut butter frosting to cover the top and sides of the entire cake. Make it look as rustic or as perfectly smooth as you like—this is your homemade celebration cake!
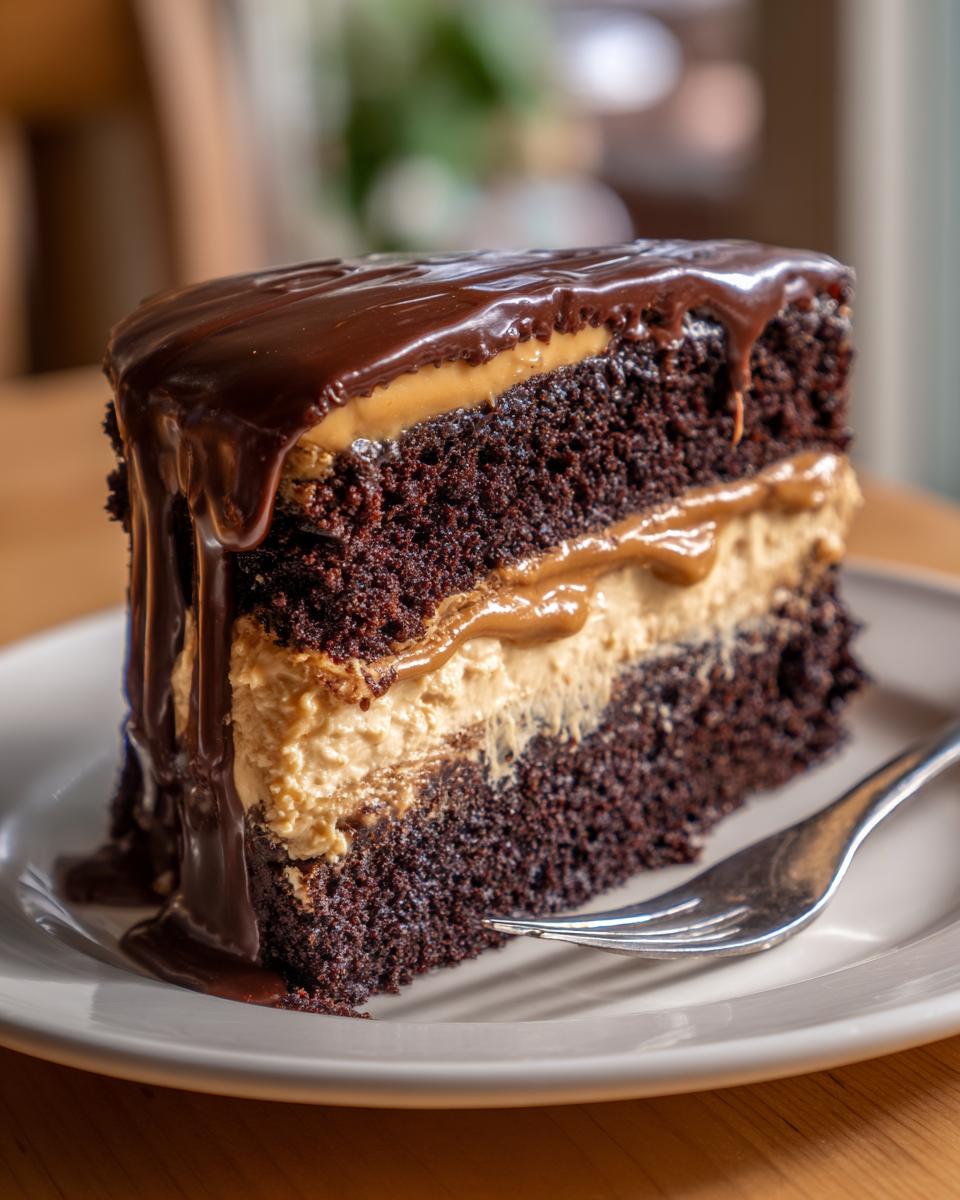
- Finally, pour that slightly cooled chocolate ganache right over the top center. Tilt the cake slightly as you pour, or use an offset spatula to guide it so it drips down the sides naturally. It looks so impressive!
- Pop the whole thing in the fridge for just a little while to let the frosting firm up a bit before you slice into this amazing chocolate peanut butter cake. Enjoy the masterpiece!
Expert Tips for the Best Ever Cake for Birthdays: Mastering the Chocolate Peanut Butter Cake
Now that you have the basic steps down for this best ever cake for birthdays, I want to share the little secrets that take it from great to legendary. When people ask me how I get this chocolate peanut butter cake so rich and perfect every time, it’s these tiny tweaks that make all the difference. We’re aiming for ultimate indulgence without any panic!
Baking is fun, but solving those little on-the-fly problems is what builds real confidence in the kitchen. If you’re looking for another classic cake that’s just as rewarding to master, you should look at my guide for an easy, moist, old-fashioned fruit cake recipe—similar lessons apply!
Ingredient Tweaks for a Rich Dark Chocolate Cake Base
If you really want that deep, almost brooding flavor in your layers, skip the hot water entirely. Use strong, freshly brewed hot coffee instead! You won’t taste coffee, I promise; you’ll just taste a way deeper, darker version of chocolate. It’s the single best trick for a rich dark chocolate cake.
Also, when you’re adding dairy, temperature counts! When you bring your 1 cup of buttermilk up to room temperature before mixing it in, it emulsifies so much better with the oil and egg. That means a smoother batter and a more uniform crumb structure. It’s baking science in action!
Troubleshooting Your Creamy Peanut Butter Frosting Recipe
The most common issue with any buttercream, especially one with peanut butter, is the consistency. We want that creamy peanut butter frosting recipe to glide on easily.
If your frosting seems too thick—like you’re wrestling a brick—add your milk or cream one teaspoon at a time. Don’t dump it all in at once! If you accidentally added too much liquid and it looks soupy? Don’t despair! Just add a quarter cup more powdered sugar and beat it again on high speed until it comes back together. It always saves itself!
Variations on the Chocolate Peanut Butter Cake Theme
I love that this recipe kicks off a trend for two flavor cake recipes because while this combo is stellar, sometimes you want to tweak things up! That’s the beauty of baking—you can take one solid, trustworthy base, like our incredibly moist chocolate cake layers, and make it your own. Whether you want a slightly different texture or just a stronger peanut butter punch, we have fun options here.
If you are someone who loves experimenting with different forms of chocolate treats, you absolutely need to check out my recipe for chocolate crinkle cookies. They are pure fudgy chocolate goodness!
Adding Reese’s Inspired Elements to Your Chocolate Peanut Butter Cake
If we are making a chocolate peanut butter cake, why not lean into the classic candy connection? This is where we turn it into the ultimate Reese’s inspired cake recipe. I think this works best once the cake is fully assembled, but you can certainly mix some into the frosting if you want them hidden!
- After you’ve frosted the entire exterior of the cake but before you pour the ganache on top, grab a bag of those delightful peanut butter cups and chop them up roughly.
- Sprinkle those chopped treats all over the top edge of the cake. They look fantastic against the dark ganache we add next.
- For an extra decadent touch—especially if this is the best ever cake for birthdays compared to standard layer cake ideas—you can press the chopped cups right into the filling layer between the two cakes! Just be gentle when adding the top layer.
Creating a Chocolate Peanut Butter Swirl Dessert Effect
This variation is subtle, but it gives you a gorgeous marbling inside the actual cake layers, delivering that wonderful chocolate peanut butter swirl dessert look when you slice into it. It adds a little visual interest right in the crumb itself.
You’ll want to do this before you pour the batter into the pans. After you have mixed your thin chocolate batter (Step 4 in the instructions), take about a quarter of a cup of your finished creamy peanut butter frosting recipe—make sure it’s been sitting out for a minute so it’s really soft.
Gently dollop that frosting randomly over the surface of the batter inside the mixing bowl. Then, take a butter knife or a skewer and use a figure-eight sweeping motion just a few times to create swirls. Don’t over-mix! We just want streaks. Then, divide that swirled batter between your pans and bake as directed. It creates a lovely patterned center for your indulgent dessert baking.
Serving Suggestions for This Decadent Chocolate Cake
Okay, you pulled it off! You made this towering, gorgeous chocolate peanut butter cake, and now it’s time to serve it up. Honestly, this cake is so rich and flavorful on its own, it scarcely needs anything extra. That’s the beauty of making something truly satisfying—you don’t have to mask that amazing flavor with elaborate sides. This is peak indulgent dessert baking, ready to shine!
When I bring this out for company, I keep the presentation simple because the cake does all the heavy lifting. It’s about letting the chocolate and peanut butter combination speak for itself.
Perfect Pairings for Your Peanut Butter Dessert Inspiration
While this cake is incredible on its own, sometimes you want that perfect little companion beverage or side scoop to balance the richness. Remember, we’re aiming for that ultimate flavor experience!
- The Classic Pairing: Cold Milk. I’m serious about this! A tall, chilled glass of cold whole milk cuts through the richness of the chocolate layers perfectly. It brings you right back to childhood and frankly, it’s the best palate cleanser for this kind of intense flavor.
- Vanilla Bean Ice Cream: If you need a temperature contrast, you can’t beat a small scoop of high-quality vanilla bean ice cream melting slowly next to a warm slice. The coolness and the clean vanilla enhance both the dark chocolate and the salty peanut butter beautifully.
- Coffee or Espresso: Since we used coffee in the cake (if you followed my tip!), serving it alongside a small espresso or a strong black coffee is heavenly. It deepens the chocolate notes even further. If you are looking for a lighter drink option, though, you could always try my Peanut Butter Banana Smoothie earlier in the day!
Keep the accompaniments light, and let this peanut butter dessert inspiration take center stage!
Storage and Reheating Instructions for Your Chocolate Peanut Butter Cake
Making such a big, beautiful chocolate peanut butter cake means you probably have leftovers, which is the best kind of problem to have! The main thing we need to worry about here is keeping those delicate layers moist and making sure the creamy frosting doesn’t get weird or too stiff in the fridge.
This isn’t a cake you want sitting out on the counter for days, not with that lovely buttercream holding all that peanut butter goodness in there. But don’t worry, keeping leftovers fresh is super simple, and you’ll be thanking yourself later when you have a perfect slice ready for an afternoon treat!
Here is how I handle leftovers of this magnificent creation. You want to preserve that incredible moisture we worked so hard to achieve!
Storing the Frosted Chocolate Peanut Butter Cake
Once this chocolate peanut butter cake is fully assembled with the frosting and topping, the refrigerator is its best friend, but you have to cover it right!
- First, if you have any exposed cake edges near the bottom (where the ganache might not have completely sealed it), gently press some plastic wrap against those sides. This acts as a barrier against fridge odors and moisture loss.
- Then, use a cake dome or an inverted large bowl to cover the whole thing loosely. You want air to circulate slightly so the frosting doesn’t sweat, but you need enough cover to protect it.
- In the fridge, this cake stays fantastic for about three to four days. The cake layers are so moist, they hold up extremely well under refrigeration.
How to Store Cake Layers Before Frosting
If you’re making layer cake ideas ahead of time, this is the way to go. Once those chocolate layers are completely cool, wrap each one tightly—I mean *tightly*—in a double layer of plastic wrap. Then, tuck them into a large zip-top freezer bag. They will keep perfectly at room temperature for a day, or you can freeze them for up to three months!
When you take frozen layers out, let them thaw on the counter while still wrapped. This traps any condensation inside the plastic, preventing the cake from getting soggy. It’s a fantastic way a busy baker can prepare for a big celebration!
Reheating Slices for that Fresh-Baked Feel
I know some people think you shouldn’t microwave cake, but honestly, a quick zap brings back that melt-in-your-mouth quality, especially with this moist chocolate dessert.
If you are taking a slice straight from the fridge, place it on a microwave-safe plate. Heat it on medium-low power for just 10 to 15 seconds. The goal is gently warming the chocolate cake part slightly so the frosting gets a little softer, mimicking that fresh-out-of-the-oven experience. Don’t overdo it, or the frosting will melt right off! A quick zap is all you need for the ultimate pick-me-up.
Frequently Asked Questions About Making a Chocolate Peanut Butter Cake
It’s funny how baking brings up the same questions over and over, right? We all want that perfect result when we invest time in making a big, beautiful chocolate peanut butter cake. So, let’s tackle the common snags and quick fixes that pop up when you’re planning your next layer cake ideas project!
I always suggest reviewing the notes section, but sometimes you just need a direct answer! If you’re looking for quick meal wins after you’ve baked this massive dessert, don’t miss my list of easy weeknight dinners so you don’t have to stress about lunch the next day!
Can I make this chocolate peanut butter cake using a cake mix for an easy peanut butter cake?
I know, I know! That scratch recipe can look a little long, and sometimes you just need that easy peanut butter cake shortcut. While you absolutely *can* substitute a boxed mix (often by adding an extra egg or a bit of extra oil as the box suggests), I really, really encourage you to try this scratch version first! Boxed mixes just can’t achieve the same level of deep, rich flavor or that truly spectacular structure that keeps the layers soft. If you want a genuine moist chocolate dessert experience, stick with the flour, cocoa, and buttermilk—it’s worth the extra five minutes of mixing, I pinky-promise!
How far in advance can I bake the layers for this layer cake?
This is one of my secrets to successful layer cake ideas! You absolutely do not need to bake these the same day you frost them. In fact, I think they taste better the next day! Once the layers are completely cooled—I mean stone cold—wrap each one tightly in plastic wrap, making sure there are no dry spots exposed. Then, place them into a large zip-top bag or a freezer container.
You can keep them wrapped like this on the counter for a full 24 hours before frosting. If you need to keep them longer, they freeze beautifully for up to two months! When you pull them out, just let them thaw on the counter *while they are still wrapped*. The wrapping traps the condensation, and your layer is ready to go when it’s room temperature!
What is the best way to get a smooth chocolate ganache topping?
The best way to guarantee a silky smooth chocolate ganache topping is respecting the heat and trusting the process! Remember when we poured the hot cream over the chopped chocolate? The key right after that is *patience*. Do not touch that bowl for a full five minutes.
Your second control point is whisking: start stirring very slowly right in the very center of the bowl. Just move the center chocolate in a small circle until it loosens up. Once you have a thick, dark paste, *then* you can start making bigger, wider circles until the whole thing looks like shiny, liquid velvet. If you try to whisk too fast right away, you can incorporate too much air, which can make the ganache look dull or grainy when it sets up.
Sharing Your Ultimate Comfort Baking Creation
Phew! You did it! You navigated the rich layers, conquered the creamy frosting, and poured that gorgeous, glossy ganache. Give yourself a massive pat on the back. Making a chocolate peanut butter cake like this is a genuine accomplishment, and now you have a truly incredible, decadent dessert ready to impress everyone you know.
But my work isn’t done until I hear from you! Baking truly comes alive when we share the results and talk about what worked best in our own kitchens. Sharing that skill and joy is exactly why I built Food Dexterity—to connect with real bakers like you who love turning simple ingredients into something extraordinary.
If you’ve tried this recipe, I would absolutely love to hear every detail! Did you add Reese’s cups? Did you use coffee or hot water? Let’s create a community cookbook right here in the comments!
- Rate It! If you loved this recipe and it earned a spot on your ‘must-make’ list, please hit those stars and leave a rating so other busy bakers know this is the real deal for ultimate comfort baking.
- Tell Me Your Story: Drop a comment below! I read every single one, and I love knowing what occasion you baked this cake for. Was it a big birthday? Or maybe just a “because-I-deserve-it” Tuesday?
- Show Me Your Drips: If you took a picture of your beautiful ganache drips or your towering layers, please tag me on social media! I live for seeing your finished chocolate peanut butter cake creations. You can find more about my journey and mission over on my About Page, and I hope you’ll share your success there too!
Happy baking, my friends. Enjoy every single, wonderful bite!
PrintExtra Moist Chocolate Peanut Butter Layer Cake

Make this rich, decadent chocolate peanut butter layer cake featuring moist chocolate layers, creamy peanut butter frosting, and a glossy chocolate ganache topping. This is the ultimate comfort baking dessert for any celebration.
- Prep Time: 25 min
- Cook Time: 35 min
- Total Time: 60 min
- Yield: 12 servings 1x
- Category: Dessert
- Method: Baking
- Cuisine: American
- Diet: Vegetarian
Ingredients
- 1 3/4 cups all-purpose flour
- 3/4 cup unsweetened cocoa powder
- 1 3/4 cups granulated sugar
- 1 1/2 teaspoons baking soda
- 3/4 teaspoon baking powder
- 3/4 teaspoon salt
- 2 large eggs
- 1 cup buttermilk
- 1/2 cup vegetable oil
- 2 teaspoons vanilla extract
- 1 cup hot water or hot coffee
- 1 cup creamy peanut butter (for frosting)
- 1/2 cup unsalted butter, softened (for frosting)
- 3 cups powdered sugar (for frosting)
- 1/4 cup milk or heavy cream (for frosting)
- 4 ounces semi-sweet chocolate (for ganache)
- 1/2 cup heavy cream (for ganache)
Instructions
- Preheat your oven to 350 degrees F (175 degrees C). Grease and flour two 9-inch round cake pans.
- In a large bowl, whisk together the flour, cocoa powder, sugar, baking soda, baking powder, and salt.
- Add the eggs, buttermilk, oil, and vanilla extract to the dry ingredients. Beat with an electric mixer on medium speed for two minutes.
- Carefully stir in the hot water or coffee until the batter is smooth. The batter will be thin.
- Divide the batter evenly between the prepared cake pans.
- Bake for 30 to 35 minutes, or until a wooden pick inserted into the center comes out clean.
- Let the cakes cool in the pans for 10 minutes before inverting them onto a wire rack to cool completely.
- Prepare the peanut butter frosting: Beat the peanut butter and softened butter together until smooth. Gradually add the powdered sugar, alternating with the milk or cream, until the frosting is light and creamy.
- Prepare the chocolate ganache: Place the chopped chocolate in a heatproof bowl. Heat the heavy cream until it just simmers, then pour it over the chocolate. Let it sit for 5 minutes, then whisk until smooth. Let the ganache cool slightly until it reaches a pourable consistency.
- Assemble the cake: Place one cooled cake layer on a serving plate. Spread about one-third of the peanut butter frosting evenly over the top. Place the second cake layer on top.
- Frost the top and sides of the cake with the remaining peanut butter frosting.
- Pour the slightly cooled chocolate ganache over the top center of the cake, allowing it to drip down the sides naturally.
- Chill the cake briefly before slicing and serving.
Notes
- For an extra rich flavor, use strong brewed hot coffee instead of hot water in the cake batter.
- You can substitute Reese’s peanut butter cups, chopped, for decoration on top of the ganache.
- If the ganache sets too quickly, warm it gently for a few seconds to restore the pourable texture.
Nutrition
- Serving Size: 1 slice
- Calories: 480
- Sugar: 55g
- Sodium: 350mg
- Fat: 28g
- Saturated Fat: 10g
- Unsaturated Fat: 18g
- Trans Fat: 0g
- Carbohydrates: 58g
- Fiber: 3g
- Protein: 7g
- Cholesterol: 55mg