

Oh, listen up, because I have found the candy cousin to the perfect chocolate chip cookie: the absolute easiest, most nostalgic **cream cheese mints** you can whip up with practically nothing in your pantry. We’re talking about classic cream cheese mints. These aren’t those hard, chalky mints you feel guilty eating; these are the true, old-fashioned kind that dissolve the second they hit your tongue. I love these so much because, honestly, they rely on such basic ingredients, but the texture—that pure, cloud-like, melt-in-your-mouth quality—is simply unmatched. Forget complicated baking; this is purely about mixing, shaping, and letting them sit. If you grew up loving simple, homemade candy, you absolutely need these in your life right now—and if you like this kind of quick treat, you should check out my recipe for easy 3-ingredient chocolate fudge while you’re here!
- Why These Are the Best Cream Cheese Mints Recipe You Need
- Gathering Ingredients for Your Cream Cheese Mints
- Step-by-Step Guide to Perfect Melt-In-Your-Mouth Cream Cheese Mints
- Expert Tips for Perfect Cream Cheese Mints Every Time
- Customizing Your Cream Cheese Mints for Any Event
- Storage and Make Ahead Mints Recipe Instructions
- Frequently Asked Questions About Cream Cheese Mints
- Estimating Nutrition for Your Homemade Cream Cheese Mints
- Share Your Favorite Cream Cheese Mints Creations
Why These Are the Best Cream Cheese Mints Recipe You Need
Seriously, when I tell you that these **cream cheese mints** are the ultimate dessert table addition, I mean it. There’s practically no effort involved, which is why I always have them ready for last-minute company or when I’m trying to recover from making a huge dinner (like after wrestling with my blue cheese dip for appetizers!).
Here’s why you are going to fall in love with this recipe:
- Pure Magic Texture: They are the definition of a melt in your mouth mints recipe. That texture—soft, slightly creamy, and cool—is everything.
- No Oven Required: Yep, this is pure easy no bake candy magic. You mix it, roll it, and let time do the work. No sweat!
- Event Ready: Whether it’s a massive holiday spread, a wedding buffet, or a tiny baby shower, these little bites blend in perfectly and look fancy.
- Super Simple Ingredients: You probably have everything sitting in your fridge right now. That’s my kind of baking!
Gathering Ingredients for Your Cream Cheese Mints
This is where you measure twice and mix once! Because this recipe is so simple, the quality of your ingredients really shines through. Don’t try substituting things here unless you absolutely have to, because these four core components create that phenomenal texture we’re aiming for. If the cream cheese and butter aren’t properly softened, your dough base will never get smoothly incorporated before the sugar goes in—it’s a recipe hazard!
For the best homemade cream cheese mints, you’ll need:
- 8 ounces cream cheese, softened completely
- 1/2 cup (that’s one whole stick, folks!) unsalted butter, also softened
- 1 teaspoon peppermint extract (use a good quality one, please!)
- 4 cups powdered sugar, plus extra for dusting those fingers later
- Food coloring (this is optional, but where the fun starts for holidays or showers!)
My biggest hint right here? Make sure even the butter and cream cheese are looking soft and giving way easily before you even touch the electric mixer. If you’re prepping for a big batch for a party or a homemade chicken nuggets-level event, make sure you grab those sticks of butter out of the fridge about an hour before you start mixing.
Step-by-Step Guide to Perfect Melt-In-Your-Mouth Cream Cheese Mints
Okay, time to get mixing! Don’t be nervous about the sugar—it looks like a mountain, but trust me, it all comes together beautifully. We are aiming for that super light confection, and the first step is all about texture. If you need a great reference for presentation, check out what other folks are doing over at this site. It really helps!
Mixing the Creamy Base
First things first: grab that softened cream cheese and butter. Put them in your biggest mixing bowl, and I mean beat them. Use your electric mixer and run it until it looks like a single, luxurious, pale fluff pillow. This is my own little secret for fighting lumps—if your base isn’t smooth BEFORE the powdered sugar even shows up, you’re going to have little pockets of hard butter or cream cheese hiding in your sweet mints. It takes a good solid minute or so, but be patient here!
Incorporating Sugar and Achieving the Right Dough Consistency
Once that base is silky, pour in the peppermint extract. Then, slowly, almost sadly, start adding your powdered sugar, one cup at a time. Don’t rush this part! If you dump it all in at once, you’re going to have a sugar explosion, and your mixer bowl will look like a snow globe nightmare. Stop when the dough is stiff. And I mean stiff—it should be hard to stir by hand and maybe even start pulling away from the sides of the bowl. That stiffness is what lets you shape them later.
Shaping and Texturing Your Homemade Cream Cheese Mints
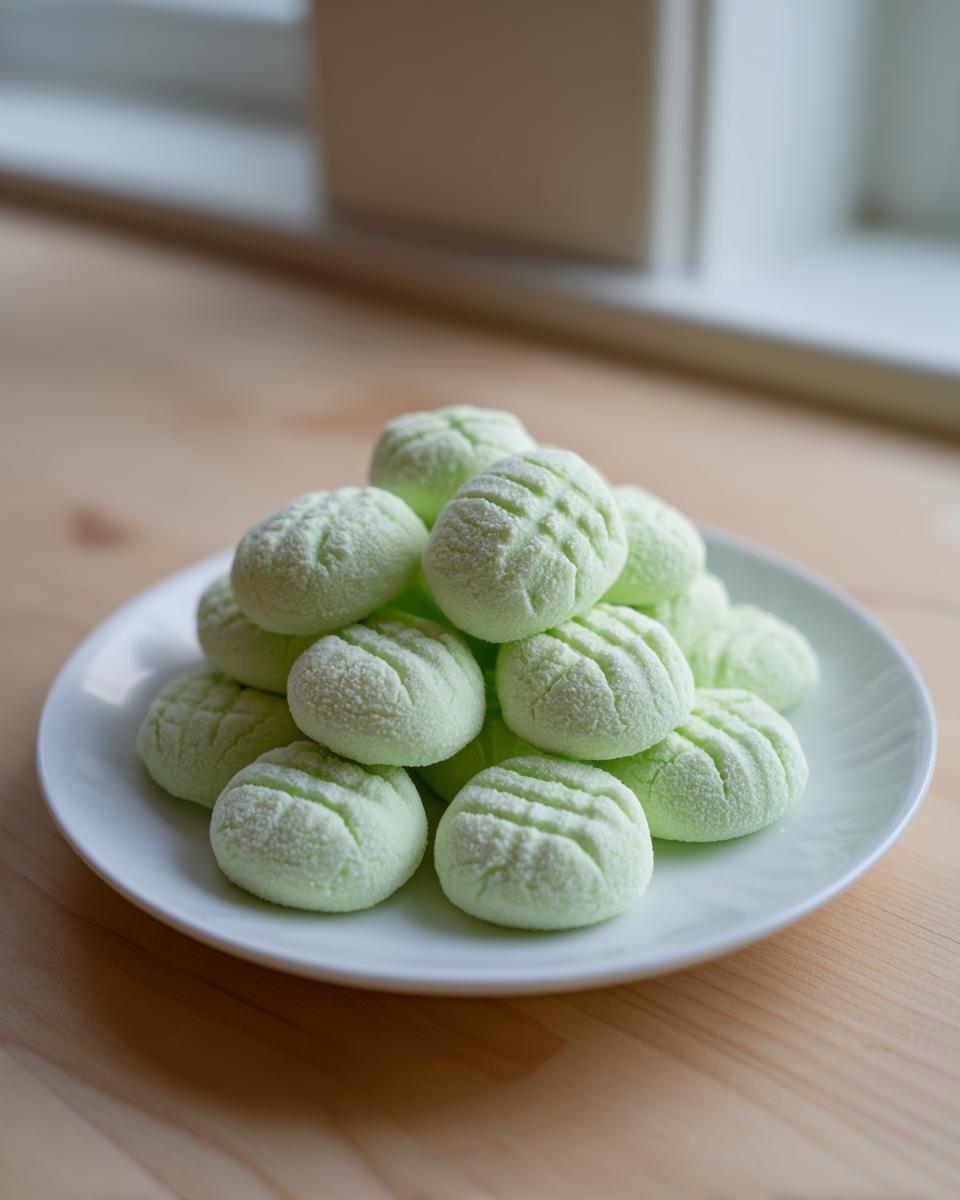
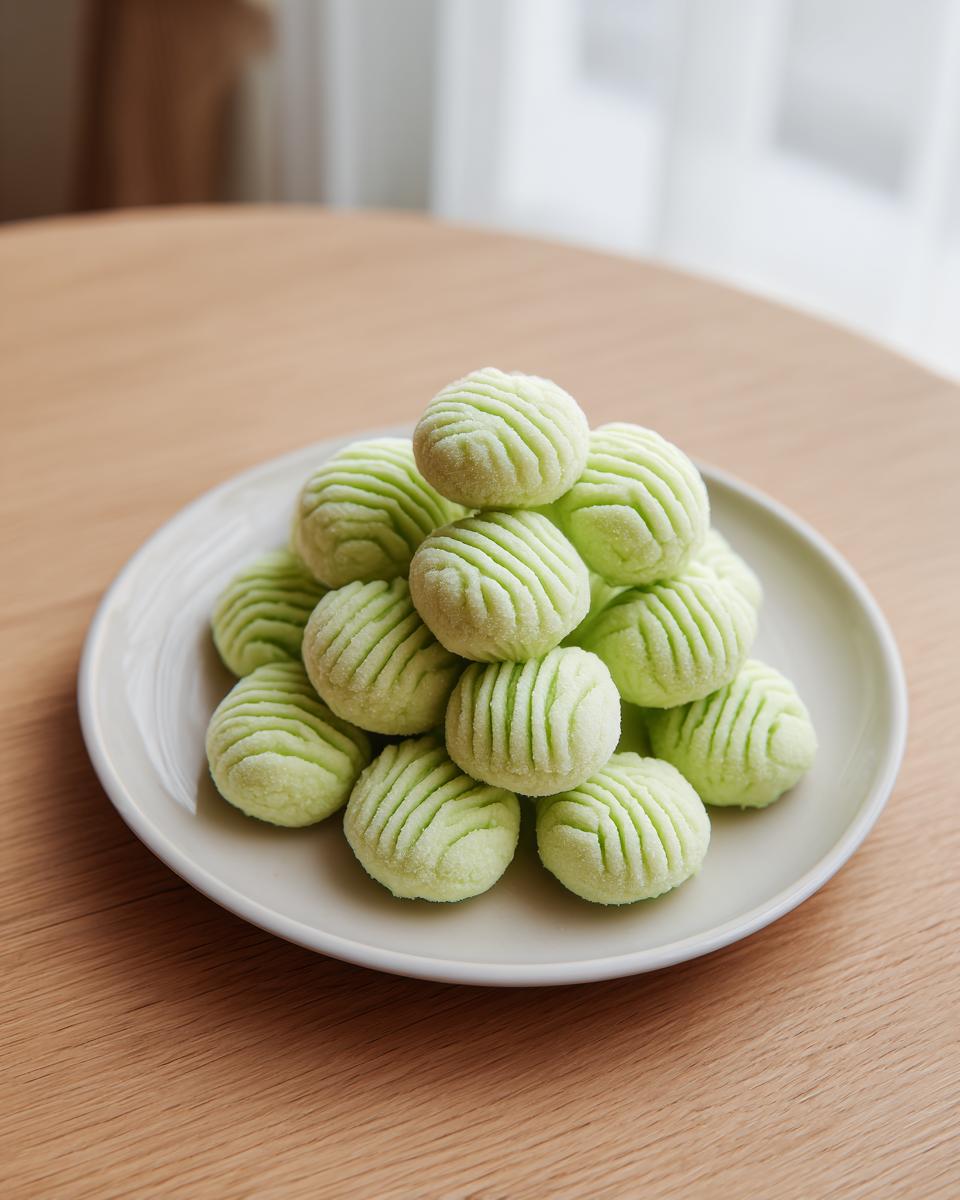
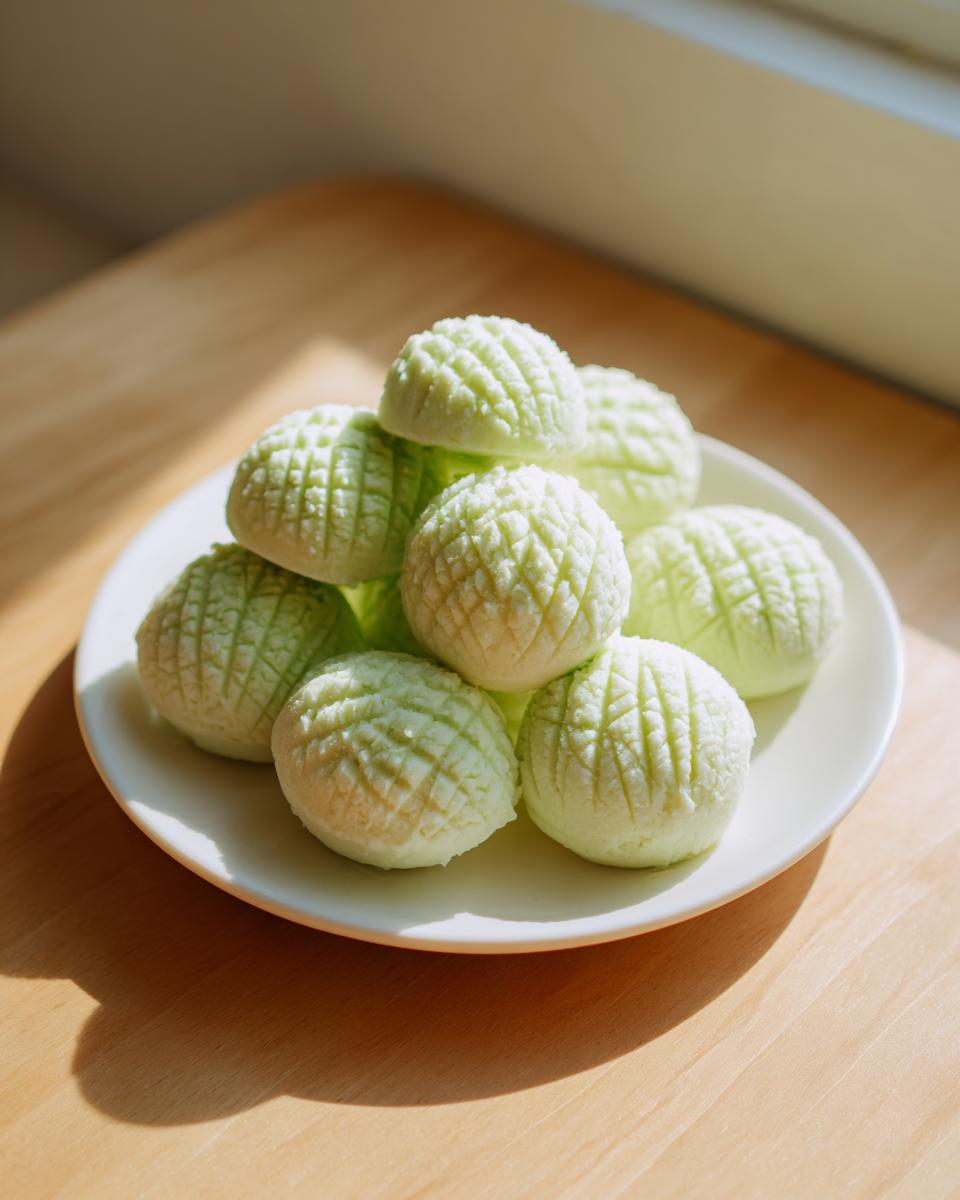
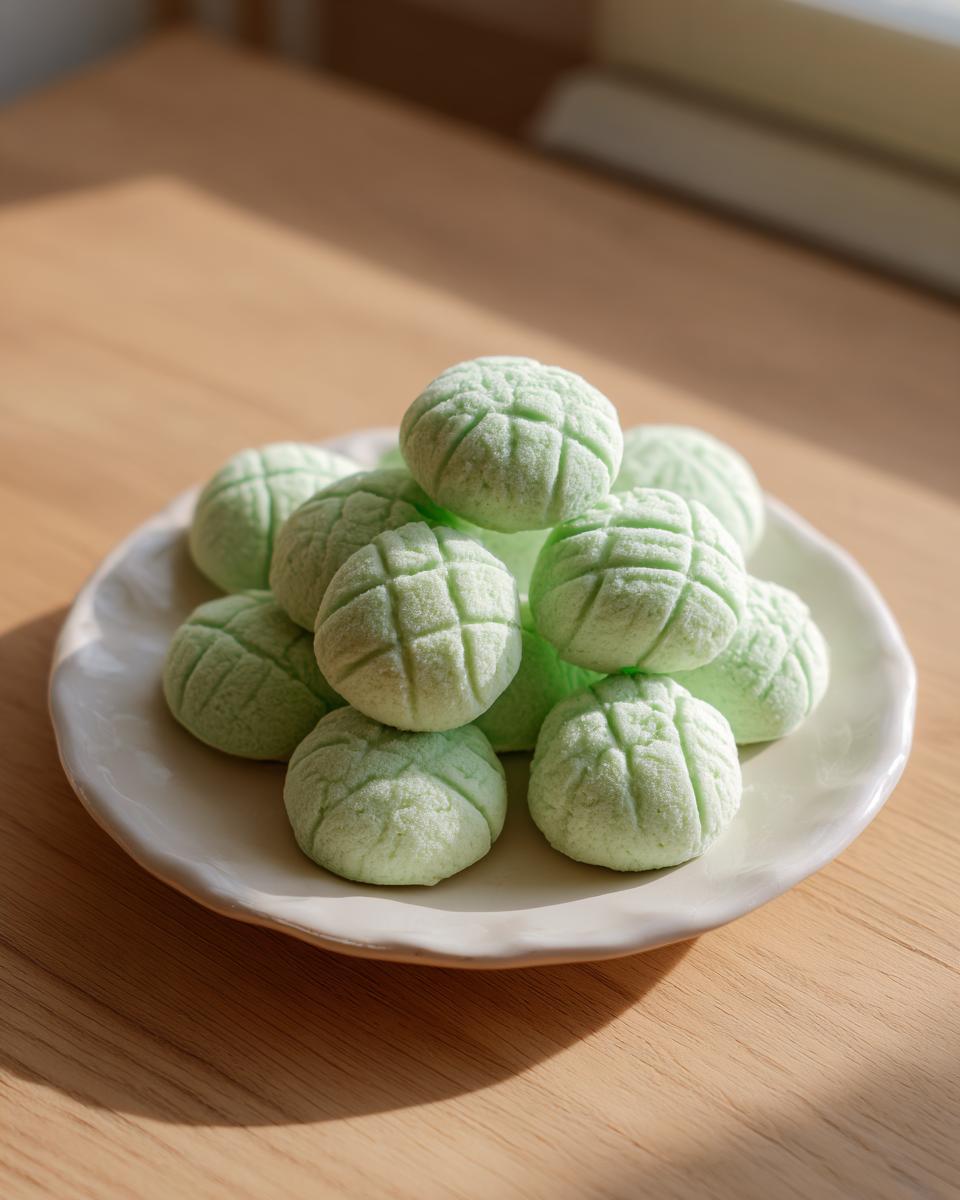
Now for the fun part where these become beautiful, homemade cream cheese mints! Dust your surface lightly with a little powdered sugar so they don’t stick. You can roll them into little balls—about half an inch is perfect—or press them right into cute little candy molds. If you want that classic, old-fashioned look, just use a fork and gently press ‘X’ right onto the top of each ball before setting them aside.
Here’s the real deal: they are NOT ready to eat yet! You absolutely must let these dry uncovered at room temperature for at least four hours, but honestly, overnight is better. That drying time cures them into that signature melt-in-your-mouth texture. Don’t forget to check out how I make my creamy deviled eggs while you wait—another great party staple!
Expert Tips for Perfect Cream Cheese Mints Every Time
I know things don’t always go perfectly when you’re mixing up candy, right? That’s okay! My job here is to help you nail this, whether you’re aiming for classic peppermint or trying out a flavor twist. If your dough ends up too sticky—and sometimes it totally does, especially if your butter was a little too warm—don’t panic! Just pop the whole bowl into the fridge for about 15 or 20 minutes. That chill time firms everything up just enough so you can handle it without making a huge mess. You want to maintain that beautiful, light texture of your simple powdered sugar mints, remember?
Another thing I love doing is experimenting with the extract. If you want refreshing mint desserts that aren’t strictly peppermint, you can lean into citrus flavors. Try swapping the peppermint out for just half a teaspoon of orange extract or even key lime extract. The cream cheese handles those bright flavors wonderfully. These little variations mean you can always have a fresh batch of cream cheese mints ready, even if you’re making them for a party that isn’t Christmas themed. Speaking of fun flavors, if you’re feeling bold after this, you have to try my peppermint espresso martini recipe!
Customizing Your Cream Cheese Mints for Any Event
The beauty of these little candies is how easily they transform for any occasion. They are the ultimate blank canvas for your party theme! For something really elegant, like a big wedding spread, forget the fork press and switch to piping the dough. You can use a pastry bag fitted with a star tip, which instantly elevates them into those gorgeous little peaks you see in many a wedding mints recipe. It looks way harder than it actually is, promise!
If you’re making them for baby showers or shower brunches, pastel colors work beautifully. Just separate your dough into bowls—one for pink, one for blue, or soft yellows—and knead in just a drop or two of gel food coloring until it’s uniform. For Christmas, deep reds and greens are classic, but I love adding silver pearl dust to mine for a little sparkle.
Remember, because these are so soft and melt quickly, they look best when you shape them and then let them sit undisturbed for that crucial drying time. If you want to see some amazing shaping ideas that go beyond the basic ball, check out what my friends are doing over at this farmhouse blog—they offer perfect inspiration for those delicate baby shower candy ideas we all dream about! And speaking of holidays, you can see how I use color in my Christmas sugar cookie bars, which is the same concept!
Storage and Make Ahead Mints Recipe Instructions
One of the main reasons I love making huge batches of these **cream cheese mints** is that they are truly the ultimate make-ahead candy! If you are planning a massive holiday spread or prepping for a wedding shower, doing these beforehand saves so much stress on the day-of. You can absolutely store these little beauties at room temperature in a nice tight, air-sealed container. They hold up really well out on the counter for a few days, which is great if you’re using them for a party centerpiece.
Now, if you need them to last longer, or if you’re worried about humidity getting to them, pop them in the freezer! Make sure you don’t just dump them into a big bag, though. That’s how they stick together! I like to lay them out in a single layer on a baking sheet first, let them freeze solid for maybe an hour, and then transfer them into your airtight freezer bag. That way, they don’t clump up. They freeze like a dream for up to three months, so this really is the best make ahead mints recipe out there. When you’re ready to serve, just pull them out about an hour beforehand to let them soften just a touch. If you want to see how I handle storage for thick sauces—which, believe it or not, is sometimes similar—check out my homemade teriyaki sauce recipe!
Frequently Asked Questions About Cream Cheese Mints
I know you might have a few lingering thoughts. When it comes to candies like these **cream cheese mints**, sometimes the old school ways leave us with questions. Don’t sweat it! These are super straightforward, but a little guidance goes a long way toward getting that perfect, soft finish. I’ve gathered the questions I get asked most often about nailing this recipe.
Can I use Neufchâtel or low-fat cream cheese in cream cheese mints?
Oh, honey, that’s a great question about substitutions. You *can* use Neufchâtel (it’s basically 1/3 less fat than full-fat cream cheese), but I highly caution against anything lower fat than that. These candies rely heavily on the fat content from both the cream cheese and the butter to achieve that signature, almost buttery “melt in your mouth” quality. If you use low-fat, the density changes, and you might end up with a dough that never firms up quite right, even after drying. Stick to full-fat for the best result, especially if you want them to look nice for a party!
What happens if I skip the long drying time for these simple powdered sugar mints?
This is the most important step that people try to rush, and trust me, you can’t skip it! If you try to eat these right after you shape them, they will be horribly sticky, soft, and messy—not the lovely simple powdered sugar mints we are aiming for. That long rest time, four hours minimum, lets the moisture evaporate and the sugar structure set. Skipping it means you end up with slightly sweet, colorful cream cheese blobs instead of actual firm mints. You need that drying time to get that beautiful, cool, melt-away sensation!
If you’ve mastered this and are ready for something slightly different, I have a killer recipe for chocolate lava cake that feels just as indulgent, but involves actual baking!
Estimating Nutrition for Your Homemade Cream Cheese Mints
Okay, let’s talk numbers just for a minute. If you’re one of those folks who likes to track things (or maybe you’re just curious how much splurge you’re making!), I’ve pulled together the estimated nutrition facts for these little bites.
Now, I need to be super clear on this, just like when I break down my easy chicken enchilada recipe: these numbers are total estimates. We’re talking about using standard US measurements for butter, cream cheese, and powdered sugar. If you swap in a sugar substitute or use a lower-fat cream cheese (which I don’t usually recommend, remember?), those numbers will shift!
Here is a general snapshot per serving (which, by the way, is just one single mint—they are small, so watch out!):
- Serving Size: 1 Mint (That yields about 7 dozen total!)
- Calories: Around 75
- Total Fat: About 3g
- Saturated Fat: About 2g
- Carbohydrates: 12g
- Sugar: 14g (Yes, powdered sugar is the main component here, folks!)
- Protein: 1g
- Cholesterol: 10mg
See? They look fancy, they taste luxurious, but at the end of the day, they are wonderfully simple candies made from scratch. Enjoying a couple of these after a big meal is what sweet memories are made of!
Share Your Favorite Cream Cheese Mints Creations
I truly hope you love making these **cream cheese mints** as much as I love eating them! They are so perfect dressed up for holidays or sitting pretty on a platter for a shower. If you tried this recipe out, please do me a huge favor and drop a rating below! I’d love to see what colors you picked out, so feel free to tag me in pictures on social media—or just tell me about your experience in the comments. If you’re looking for a great pairing punch for your next party spread, check out my recipe for easy festive strawberry champagne punch! And for more fun ideas, see what others are doing over at SkiptoMyLou!
PrintThe Easiest Melt-In-Your-Mouth Cream Cheese Mints Recipe

Make classic cream cheese mints that melt in your mouth using just a few simple ingredients. This no-bake candy recipe is perfect for holidays, weddings, and parties.
- Prep Time: 15 min
- Cook Time: 0 min
- Total Time: 4 hours 15 min
- Yield: About 7 dozen 1x
- Category: Candy
- Method: No Bake
- Cuisine: American
- Diet: Vegetarian
Ingredients
- 8 ounces cream cheese, softened
- 1/2 cup (1 stick) unsalted butter, softened
- 1 teaspoon peppermint extract
- 4 cups powdered sugar, plus more for dusting
- Food coloring (optional, for festive colors)
Instructions
- Combine the softened cream cheese and butter in a large bowl. Beat them together with an electric mixer until the mixture is smooth and creamy.
- Add the peppermint extract to the cream cheese mixture and mix until combined.
- Gradually add the powdered sugar, one cup at a time, mixing on low speed until fully incorporated after each addition. The dough will become very stiff.
- If you want colored mints, divide the dough into sections. Add a drop or two of food coloring to each section and knead until the color is uniform.
- Dust a clean surface or a baking sheet lightly with powdered sugar. Roll the dough into small balls, about 1/2 inch in diameter, or press the dough into small candy molds.
- If shaping by hand, gently press the top of each ball with a fork to create a crosshatch pattern, similar to old-fashioned cream cheese mints.
- Place the shaped mints on the prepared surface. Allow them to dry uncovered at room temperature for at least 4 hours, or preferably overnight, until they firm up and achieve that signature melt-in-your-mouth texture.
- Store homemade cream cheese mints in an airtight container at room temperature or freeze them for later use.
Notes
- For a different flavor, substitute peppermint extract with 1/2 teaspoon of orange or key lime extract.
- If the dough is too sticky to handle, chill it for 15 to 20 minutes before rolling.
- You can pipe the mixture using a pastry bag fitted with a star tip for an elegant presentation, similar to wedding mints.
- These mints freeze well for up to three months; place them in a single layer on a cookie sheet to freeze, then transfer to a freezer bag.
Nutrition
- Serving Size: 1 mint
- Calories: 75
- Sugar: 14
- Sodium: 15
- Fat: 3
- Saturated Fat: 2
- Unsaturated Fat: 1
- Trans Fat: 0
- Carbohydrates: 12
- Fiber: 0
- Protein: 1
- Cholesterol: 10