
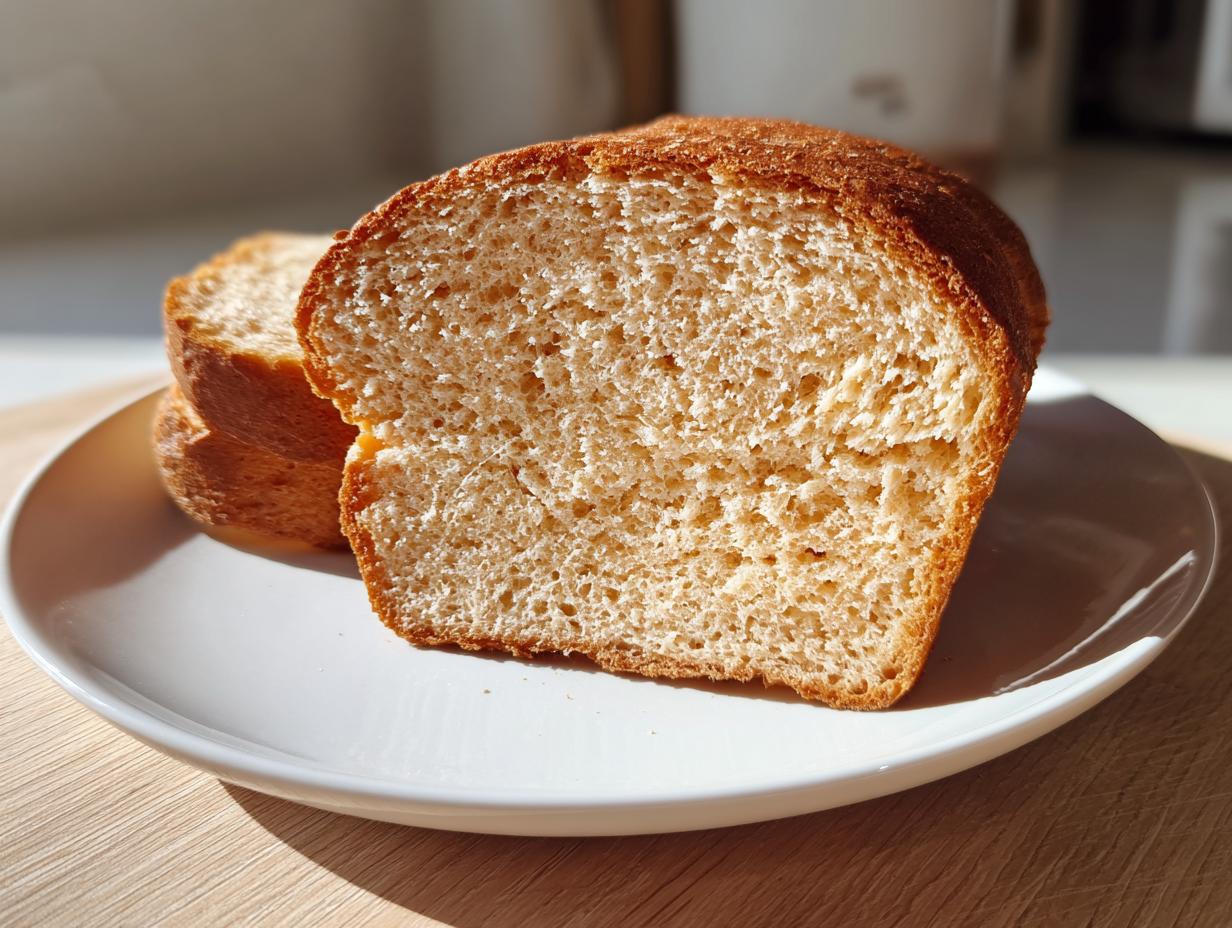
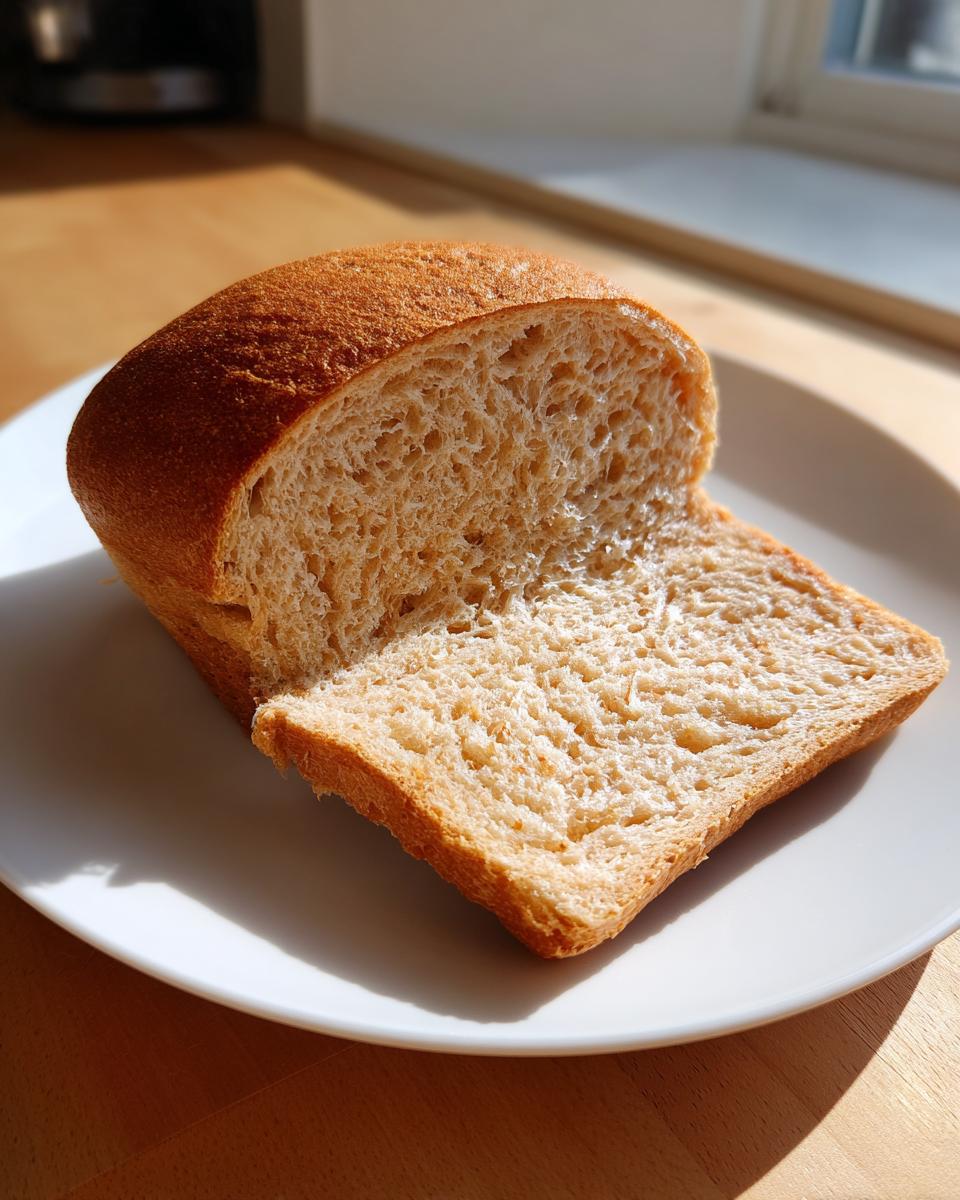
Oh, let’s just get this out of the way first: the myth that homemade whole wheat bread has to be dense, heavy, and taste like a healthy brick? Absolutely false! I wasted so much flour in my early days trying to get that fluffy texture people talk about. Seriously, I almost gave up on baking with whole grains entirely. That rough, crumbly texture is the downfall of so many wonderful loaves, and it kept me chasing that soft, melt-in-your-mouth sandwich bread I missed. Don’t you worry, though! After way too much testing, I finally cracked the code. This foolproof method guarantees a soft, fluffy 100% whole wheat bread every single time. Your sandwiches are about to get very happy. If you’re also trying to perfect a creamy dip, check out my recipe for easy homemade blue cheese dip for another winner!
- Why This Foolproof Soft & Fluffy Whole Wheat Bread Recipe Works
- Ingredients for Your Soft Whole Wheat Bread Recipe
- Step-by-Step Instructions for Easy Whole Wheat Bread
- Tips for Baking the Best Whole Wheat Bread Recipe
- Storage and Making Ahead with Your Whole Wheat Bread
- Variations for Your Homemade Whole Wheat Bread
- Serving Suggestions for This 100 Whole Wheat Bread
- Frequently Asked Questions About Making Whole Wheat Bread
- Nutritional Snapshot of This Healthy Homemade Bread
Why This Foolproof Soft & Fluffy Whole Wheat Bread Recipe Works
I know, I know—you’ve been promised soft whole wheat bread before, and you ended up with something that could patch potholes. The density problem comes down to the bran in the whole wheat flour. It cuts through the gluten strands that are trying to form, right? Well, this recipe fixes that using a few smart tricks that make all the difference when you are making homemade whole wheat bread.
We use melted butter and warm milk instead of just plain water. That extra fat coats the flour particles, keeping things supple and tender right from the start!
And trust me, the kneading time here isn’t just for show; we need muscles in our dough to stand up to all that healthy grain!
The Role of Vital Wheat Gluten in Whole Wheat Bread
So, here is the real game-changer for that fluffy whole wheat loaf: vital wheat gluten. This is basically pure gluten power, and it gives the dough the extra scaffolding it needs. Since the bran tries to sabotage the nice, stretchy gluten network, we give it a boost! Adding just a little bit makes sure our bread rises tall and proud instead of sinking into itself.
Tips for Achieving a Tender Crumb in Your Whole Wheat Bread
You absolutely must get your water temperature right when you wake up the yeast—if it spikes over 115°F, the yeast dies, and your rise fails. Also, when you’re kneading or shaping, try not to add too much extra flour to the counter. Whole wheat dough can feel sticky because it’s thirsty, but adding too much flour late in the game is a fast track to that brick texture we hate.
One more thing: when you brush the top with that egg wash before the final proof, it helps create a lovely, slightly softer crust that seals in all that moisture we worked so hard to trap inside. You can read more about my general philosophy on building confidence in the kitchen here: healthy homemade bread tips.
Ingredients for Your Soft Whole Wheat Bread Recipe
Okay, friend, let’s look at what needs to go into this magic mixture. Remember, clarity is crucial here because baking is chemistry pretending to be intuition. We need precise measurements, especially with yeast, but these items are all super easy to find at any normal grocery store. No specialty trips required for this one!
We are skipping the guesswork and going straight for the good stuff that guarantees that fluffy crumb we are aiming for. Here is exactly what you need for one perfect loaf:
- 1 cup warm water (make sure it’s between 105–115°F—too cold and the yeast sleeps, too hot and it’s toast!)
- 2 1/4 teaspoons active dry yeast (that’s one standard packet, usually!)
- 1/4 cup honey (This is our secret weapon for softness and just a hint of natural sweetness.)
- 1/4 cup unsalted butter, melted (No margarine substitutes here—we need the real flavor and structure butter offers.)
- 1 1/2 teaspoons salt
- 1 cup warm milk
- 4 cups 100% whole wheat flour (Start with 4 cups, but remember doughs vary, so have an extra dusting ready just in case.)
- 1/4 cup vital wheat gluten (Don’t skip this! This is what stops the loaf from becoming a crumbly mess.)
- 1 large egg
Having all this ready to go, measured out before you even touch the yeast, makes the whole process flow so much better. It’s what I talk about—setting yourself up for dexterity in the kitchen! If you need some flavor inspiration for dinner later using this bread, you might want to check out my recipe for easy homemade teriyaki sauce.
Step-by-Step Instructions for Easy Whole Wheat Bread
Now that we have our ingredients ready—and by the way, if you ever need an easy crowd-pleaser for dinner while this is baking, try my easy homemade chicken nuggets—let’s get mixing! Following these steps precisely is what keeps your whole wheat bread hearty but never heavy. We are looking for two nice, long rises here, so don’t rush them! That patient waiting time is what builds the structure for that fluffiness we are obsessing over.
Activating Yeast and Mixing the Whole Wheat Bread Dough
First thing’s first: the yeast party! Get that warm water into your big bowl and sprinkle the yeast right on top. Gently stir *just* enough to get it wet, then walk away for about five minutes. If it gets foamy and bubbly, yay! Your yeast is alive and ready to work its magic. If it just sits there looking sad, your water was probably too hot, and you’ll need to start over with cooler liquid.
Once it’s bubbly, whisk in that honey, melted butter, salt, and warm milk. Don’t worry about getting it perfectly smooth yet. Then, we start adding the dry stuff—the whole wheat flour and that vital wheat gluten we talked about. Stir it until it looks shaggy, and then toss in the egg. Mix until it’s just combined into a rough ball of dough.
Kneading and the First Rise for Perfect Whole Wheat Bread
This is where the structure happens! Dump that shaggy dough onto a *lightly* floured surface. You need to work it for a good solid 8 to 10 minutes. I know, it feels like forever when you’re used to no-knead recipes, but for 100% whole wheat bread, adequate kneading is crucial for whole wheat bread for beginners. You’re looking for it to feel smooth and elastic, not crumbly.
Pop that lovely kneaded dough into a lightly oiled bowl, turn it over once so it’s coated, cover it up, and just let it be for about 1 to 1.5 hours. It needs to double in size. Don’t poke it! Let time do the work.
Shaping, Second Proof, and Baking Your Fluffy Loaf
Once it’s puffy, gently punch that air out—don’t crush it, just deflate it safely. Shape it into your standard loaf shape and tuck it into that greased 9×5 pan. Cover it loosely and let it do its second rise, which is usually 30 to 45 minutes. Check it: it should crest about an inch above the rim of the pan. If it’s pushing way over, it might rise too fast in the oven! While that’s happening, shoot your oven up to 375°F.
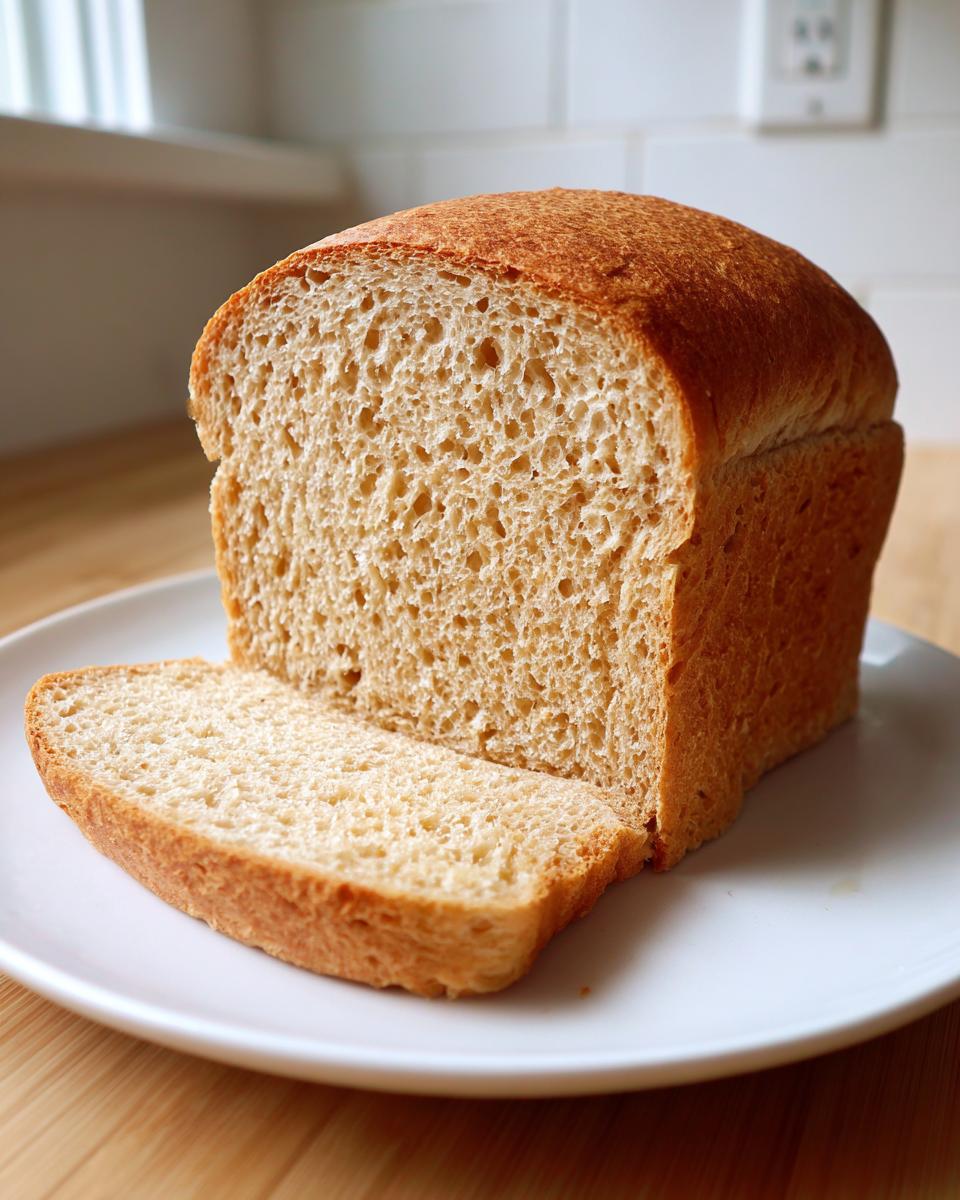
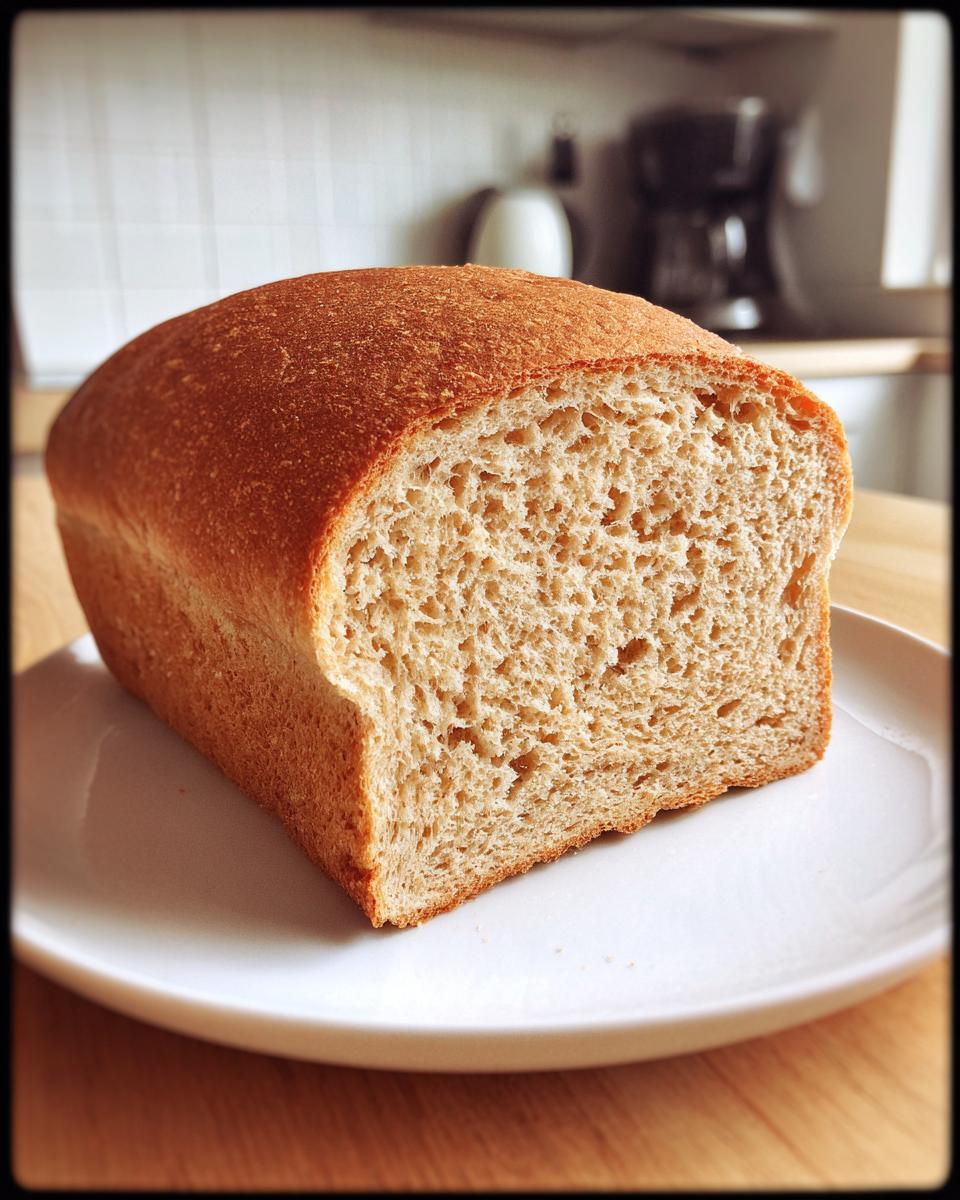
Bake for 30 to 35 minutes. I always check the temperature with my instant-read thermometer because that’s how I know for sure—you want it to hit 200°F inside for a perfect soft whole wheat bread recipe. Pull it out and cool it completely on a wire rack before you dare slice it!
Tips for Baking the Best Whole Wheat Bread Recipe
So, you’ve followed the steps, and you have your first loaf of genuinely soft whole wheat bread! Awesome! But just because you nailed the basic recipe doesn’t mean we can’t tweak it further for perfection, right? I like to treat baking like a journey, not a destination. If you want an even lighter color that looks more like the store-bought stuff but tastes way better, try hunting down white whole wheat flour. It’s milled from a lighter grain, so it gives you that whole grain goodness without the slightly darker hue of traditional red whole wheat.
Also, let’s talk sweetness again. That 1/4 cup of honey is fantastic for moisture and flavor, but if you are making this strictly for savory sandwiches or want to cut back on sugar, I’ve baked this successfully using just two tablespoons of honey. You might also swap the honey out for two tablespoons of molasses—it gives a deeper, almost earthy flavor that really pairs nicely with the nutty wheat. I learned so much more about fermenting grains when I started playing around with my basic sourdough starter guide, and those lessons definitely made their way into this reliable yeast recipe.
Storage and Making Ahead with Your Whole Wheat Bread
The hardest part about baking this amazing bread is waiting for it to cool, but please—I beg you—do not slice into it when it’s piping hot! When you cut bread fresh out of the oven, all that steam escapes, and you’re basically squeezing the air right out of your beautiful, fluffy crumb. Seriously, let it sit on that wire rack for at least two hours. It’s agony, but it keeps the bread soft.
Once it is completely cool (and I mean *completely* cool), the best way to keep this as your new everyday whole wheat bread staple is airtight storage. Wrap it tightly! I usually use plastic wrap first, then pop the whole wrapped loaf into a large zip-top bag. Stored on the counter, it stays beautifully soft for a good three to four days.
If you know you won’t get through the whole loaf that fast—which is rare in my house, honestly—freezing is your move. Slice the loaf *before* you freeze it—this is a survival tip! Then you can just pull out one or two slices whenever you need them. They toast up perfectly from frozen. Thawing sliced bread is way faster than thawing a whole brick, trust me on this one! If you are looking for an easy sauce recipe for dipping leftover crusts, you absolutely have to try my easy homemade teriyaki sauce recipe.
Variations for Your Homemade Whole Wheat Bread
I always encourage people to treat recipes like guidelines, not unbreakable laws. Once you know this healthy homemade bread method works perfectly, you can start experimenting! It’s super easy to load this loaf up with texture if you want something heartier.
Want a serious crunch? Mix in about half a cup of mixed seeds—sunflower and flax seeds are my favorites—right after you add the egg during the final dough mixing stage. They bake right into that tender crumb beautifully. If you want a deep, almost rye-like flavor instead of the honey brightness, swap out the ¼ cup of honey for ¼ cup of dark molasses. It darkens the color a bit, but wow, the flavor!
If you’re looking for something a little sweeter for breakfast toast later on, add a teaspoon of cinnamon and use that extra honey setting we mentioned earlier. It makes splitting a batch much easier if you want to try different things! For more baking ideas that are easy and bright, check out how I make lemon blueberry scones.
Serving Suggestions for This 100 Whole Wheat Bread
Now that you’ve baked the softest, healthiest loaf ever, what are you going to do with it? Honestly, I could eat this entire 100 whole wheat bread loaf standing over the cooling rack with just a smear of good salted butter, but we should probably make some actual meals!
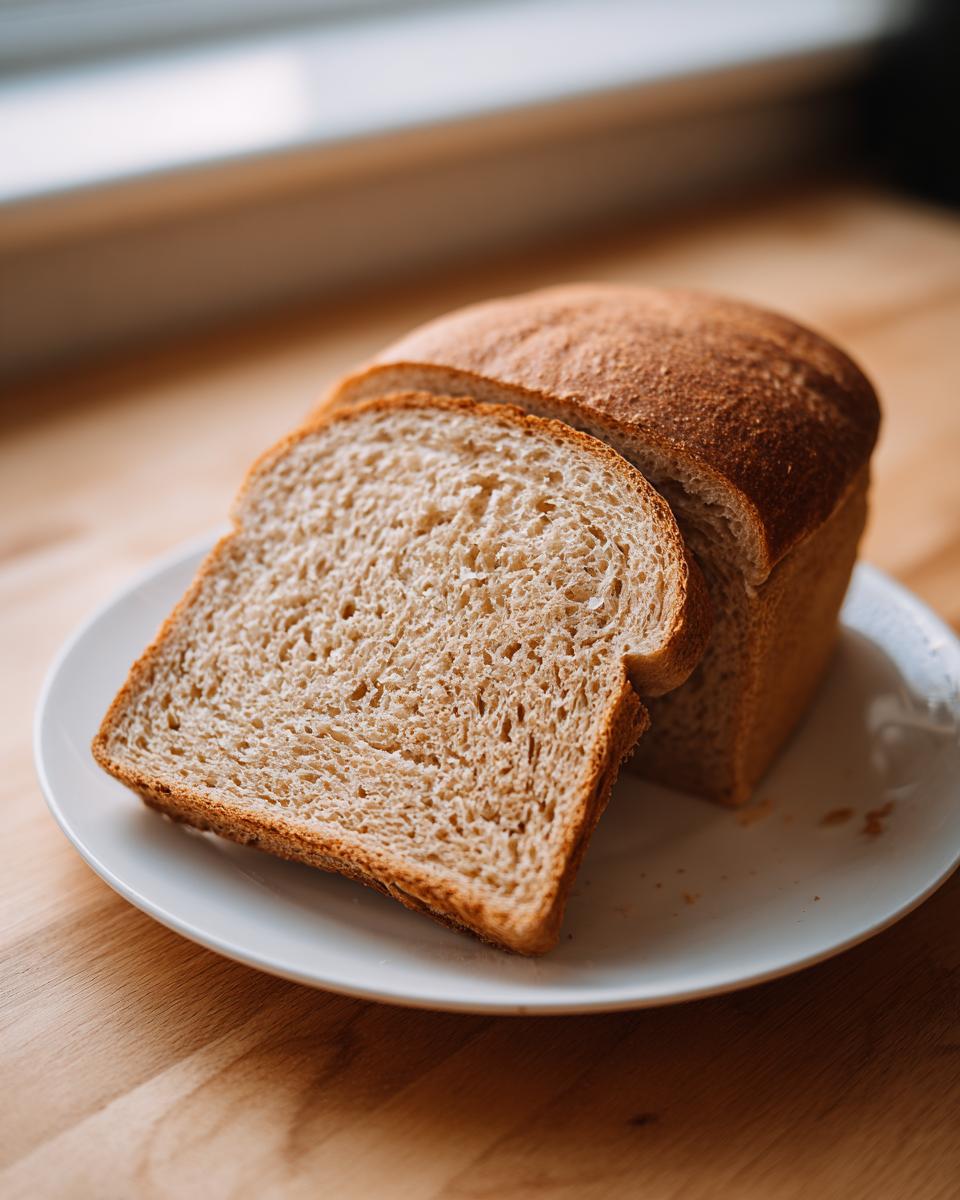
Because this loaf has that fantastic structure—that tender crumb that holds together without crumbling apart—it shines in a few key areas where other whole grain loaves fail.
The Ultimate Sandwich Bread
This is what we made it for, right? This bread is sturdy enough for big lunchtime stacks. Think about good turkey and swiss, or a thick slice of sharp cheddar cheese. The honey sweetness plays so nicely against salty meats and strong cheeses. It doesn’t get soggy immediately, which is a huge win for packing lunches! If you’re trying to get some easy, flavorful chicken done for those sandwiches, you might want to try my crockpot teriyaki chicken recipe as the filling.
Perfectly Toasted
Don’t underestimate a perfect slice of toast. When the inside is this fluffy, toasting it gives you the most satisfying texture contrast—crispy on the outside, still slightly soft in the very middle. Brush it lightly with olive oil and sprinkle with garlic powder for a great side bread, or just go classic with butter and homemade strawberry jam. Mornings just feel cozier when you start with a slice of this!
Dipping Companion
We talked about heartiness, and this loaf absolutely loves soup or stew. Thick slices are perfect for soaking up broth or rich tomato sauces. It stands up better than softer white breads, absorbing the liquid without completely dissolving into mush. It’s also fantastic cut into cubes and toasted for croutons if you happen to have some leftovers—though I doubt you will!
Frequently Asked Questions About Making Whole Wheat Bread
I get so many questions about this recipe because people are understandably cautious after having spent years wrestling with dense loaves. We want that wonderful, wholesome flavor without sacrificing that soft texture! I tried to make this the most reliable whole wheat bread recipe out there for beginners, but I know questions still pop up. Here are the most common things people ask me about achieving that perfect, fluffy slice for their sandwiches and toast.
Can I substitute all-purpose flour for whole wheat flour in this recipe?
Oh, sure you can! If you really need to lighten up the texture, or if you’re just dipping your toes in the whole grain waters, substituting some of the whole wheat flour is fine. Whole wheat flour has that pesky bran that interferes with rising power, remember? If you swap out half the whole wheat flour for all-purpose flour (go for about 2 cups of each), you’ll get an undeniably taller, lighter loaf. It won’t be 100% whole grain anymore, but it will be extremely soft!
Why is my homemade whole wheat bread dense and heavy?
That’s the million-dollar question, isn’t it? Usually, there are three main culprits when you get that ‘brick’ texture in any whole grain sandwich bread. First, you didn’t knead it long enough—we have to develop that structure! Second, your yeast died or you used water that was far too hot, meaning the dough never got the strength it needed in the first rise. Finally, and this happens to everyone: you added too much bench flour while shaping the loaf. Stick to just what you need to keep it from sticking to your hands or the counter.
Can I use instant yeast instead of active dry yeast for this whole wheat bread?
Yes, absolutely! Instant yeast is great because it’s very forgiving. If you use that, you can totally skip Step 1 where we proof the yeast in the warm water. Just whisk the instant yeast right in with the dry ingredients—that’s the whole wheat flour and the vital wheat gluten—and then proceed with adding the wet ingredients. It saves about five minutes and works perfectly well in this recipe!
If you’re looking for another great, easy thing to make for your next gathering, try my recipe for the ultimate creamy deviled egg recipe. It’s always a hit!
Nutritional Snapshot of This Healthy Homemade Bread
I always love seeing the breakdown of what we actually put into our bodies when we bake from scratch. Because we’re using whole wheat flour and honey instead of white flour and processed sugar, this loaf is way more satisfying than anything you’d grab off a grocery shelf. It’s genuinely healthy homemade bread!
Keep in mind that these are just estimates based on splitting the loaf into 16 standard slices, and your measurements might make them vary slightly. But this gives you a fantastic idea of how wholesome this everyday staple really is. If you need a lighter, sweeter breakfast to go along with your first slice, you have to try my easy chia seed pudding recipe!
Here’s the approximate nutritional breakdown per slice:
- Calories: 150
- Fat: 4g
- Saturated Fat: 2g
- Unsaturated Fat: 2g
- Trans Fat: 0g (Hooray for real butter!)
- Cholesterol: 20mg
- Carbohydrates: 26g
- Fiber: 4g (That whole grain goodness!)
- Protein: 6g
- Sugar: 4g (Mostly from that lovely honey!)
See? Nothing scary in there! It’s a great balance, which is why it makes such a wonderful, sturdy sandwich bread that doesn’t weigh you down.
PrintFoolproof Soft & Fluffy 100% Whole Wheat Sandwich Bread
Bake a soft, fluffy loaf of 100% whole wheat bread that avoids the dense, heavy texture common in whole grain baking. This easy recipe is perfect for everyday sandwiches and toast.
- Prep Time: 25 min
- Cook Time: 35 min
- Total Time: 2 hr 40 min
- Yield: 1 loaf 1x
- Category: Baking
- Method: Mixing and Baking
- Cuisine: American
- Diet: Vegetarian
Ingredients
- 1 cup warm water (105-115°F)
- 2 1/4 teaspoons active dry yeast
- 1/4 cup honey
- 1/4 cup unsalted butter, melted
- 1 1/2 teaspoons salt
- 1 cup warm milk
- 4 cups 100% whole wheat flour
- 1/4 cup vital wheat gluten
- 1 large egg
Instructions
- In a large bowl, combine the warm water and yeast. Let it sit for 5 minutes until foamy.
- Add the honey, melted butter, salt, and warm milk to the yeast mixture. Stir to combine.
- In a separate bowl, whisk together the whole wheat flour and vital wheat gluten.
- Gradually add the dry ingredients to the wet ingredients, mixing until a shaggy dough forms.
- Add the egg and mix until incorporated.
- Turn the dough out onto a lightly floured surface. Knead for 8 to 10 minutes until the dough is smooth and elastic. This kneading develops the structure needed for a fluffy crumb.
- Place the dough in a lightly oiled bowl, turning once to coat. Cover the bowl with plastic wrap or a clean towel and let it rise in a warm place for 1 to 1.5 hours, or until doubled in size.
- Gently punch down the risen dough. Shape it into a loaf and place it into a greased 9×5 inch loaf pan.
- Cover the pan loosely and let the dough rise again for 30 to 45 minutes, or until it has nearly doubled and crests about 1 inch over the rim of the pan.
- Preheat your oven to 375°F (190°C) during the last 15 minutes of the second rise.
- Bake for 30 to 35 minutes, or until the top is golden brown and the internal temperature reaches 200°F (93°C).
- Remove the loaf from the pan immediately and let it cool completely on a wire rack before slicing.
Notes
- Using white whole wheat flour can result in a slightly lighter color and softer texture than traditional red whole wheat flour.
- For an extra soft texture, ensure your water temperature is correct for activating the yeast. Water that is too hot will kill the yeast.
- If you prefer a less sweet loaf for sandwiches, reduce the honey to 2 tablespoons.
Nutrition
- Serving Size: 1 slice
- Calories: 150
- Sugar: 4
- Sodium: 250
- Fat: 4
- Saturated Fat: 2
- Unsaturated Fat: 2
- Trans Fat: 0
- Carbohydrates: 26
- Fiber: 4
- Protein: 6
- Cholesterol: 20