
There’s just something about an authentic Italian dessert, isn’t there? That balance of rich coffee, creamy cheese, and a touch of sweetness—it just feels special. But honestly, sometimes the traditional methods look intimidating, especially when raw eggs are involved. Well, let me stop you right there! After testing countless batches, I finally nailed the ultimate tiramisu recipe that skips the raw eggs completely. This no-bake classic is my secret weapon for hosting because it’s incredibly easy, yet it always delivers that beautifully silky, impressive result everyone expects at a dinner party. Trust me, you’re going to love how simple this truly authentic Italian dessert becomes.
- Why This Easy Tiramisu Recipe Works So Well
- Ingredients for Your Classic Tiramisu Recipe
- Step-by-Step Instructions for the Best Tiramisu Recipe
- Tips for Success with Your No Bake Dessert
- Making This Tiramisu Recipe an Impressive Dessert Idea
- Storage and Make Ahead Dessert Instructions for This Tiramisu Recipe
- Variations on the Traditional Tiramisu Recipe
- Frequently Asked Questions About Our No Egg Tiramisu Recipe
- Estimated Nutrition for This Simple Tiramisu
Why This Easy Tiramisu Recipe Works So Well
I developed this specific tiramisu recipe because I needed elegance without the stress. We’re all busy, and sometimes you just want a show-stopping no bake dessert that’s safe and quick to assemble. This method delivers on all fronts, making it perfect for those weeknight cravings or last-minute party invites. It truly takes the guesswork out of making a fantastic homemade Italian treat.
- Truly No-Bake: Zero oven time means less fuss and virtually no cleanup beyond the mixing bowls.
- Built-in Safety: We completely avoid raw eggs, making this a much more worry-free option.
- Incredible Texture: This technique guarantees that light, airy, yet rich mouthfeel every single time.
- Make Ahead Perfection: It tastes even better the next day, cementing its spot as your favorite make ahead dessert.
The Secret to a Silky Cream Dessert Without Raw Eggs
Okay, this is where the magic happens for achieving that silky cream dessert texture people rave about. Instead of relying on egg yolks for richness and structure, we borrow technique from classic pastry arts. I whip cold heavy cream with a touch of powdered sugar until we get stiff peaks—think clouds!
Once that whipped cream is ready, we gently fold it into our sweetened mascarpone base. Folding is key here; we want to keep all those tiny air bubbles intact! That trapped air is what gives you that unbelievably light, stable, and luxurious mascarpone cream recipe without ever needing to worry about tempering eggs. It’s smart, it’s safe, and it keeps things moving quickly so you can get this amazing simple tiramisu chilling faster. For more easy, smart recipes, check out my collection of simple dessert recipes!
Ingredients for Your Classic Tiramisu Recipe
When we make this Classic Tiramisu Recipe, simplicity reigns supreme, but you can’t cheat on the core flavors. Since this is a coffee dessert, using a really strong brew is non-negotiable—freshly pulled espresso is always my first choice! Remember, this list is short, so let those quality ingredients shine. You’ll need the foundational elements for that luxurious layerd coffee dessert experience.
- 1 cup strong brewed espresso, cooled (seriously, make it strong!)
- 1/4 cup coffee liqueur (like Kahlúa or Tia Maria), optional, but I highly recommend it.
- 1 (8 ounce) package ladyfingers (Savoiardi biscuits are the best for structure).
- 16 ounces mascarpone cheese, important: let this soften up on the counter first.
- 1 cup granulated sugar
- 1 teaspoon vanilla extract
- 1 1/2 cups heavy whipping cream, must be very cold from the fridge.
- 1/4 cup powdered sugar (just for whipping the cream).
- Unsweetened cocoa powder, for that beautiful dusting finish.
If you are looking for other effortless recipes that rely on minimal ingredients, you have to check out my easy chia seed pudding recipe!
Step-by-Step Instructions for the Best Tiramisu Recipe
This is where we put it all together, and I promise you, it’s mostly assembly. No fancy techniques required, just a little focus! We want that classic, elegant look for this layered coffee dessert. The instructions are broken down so you can easily manage the cream and the soak without getting overwhelmed. If you’re looking for another easy party appetizer while you wait for this to chill, you should check out my easy cranberry brie bites recipe!
Preparing the Espresso Soak for Tiramisu with Ladyfingers
First thing’s first: your espresso needs to be completely cool, otherwise, you’ll end up with mushy messes instead of perfectly structured tiramisu with ladyfingers. Brew that strong shot—it should almost look like syrup—and stir in your optional coffee liqueur. Now, pour this mixture into a wide, shallow dish. When you dip the ladyfingers, be lightning fast! Hold each one in the liquid for just a second on each side. They should feel dramatically moist but still have a bit of integrity. If you leave them in too long, your final dessert will be watery, and that’s a nightmare!
Creating the Silky Mascarpone Cream Recipe
We are making two separate fluffy components here to guarantee that signature smooth texture. In one bowl, beat your softened mascarpone cheese with the granulated sugar and vanilla until it looks smooth and creamy. Don’t worry about air yet. In a separate, clean, cold bowl, use an electric mixer to whip the heavy cream and powdered sugar until you hit stiff peaks. See those peaks standing up nice and firm? That’s volume! Now, take about a third of that whipped cream and vigorously fold it into the mascarpone mixture. This lightens the base. Then, gently fold in the rest of the whipped cream just until no more white streaks show. That gently folded mixture is your luxurious, stable mascarpone cream recipe.
Assembling and Chilling Your Layered Coffee Dessert
Grab that 8×8 pan! Lay down your quickly dipped ladyfingers. Spread exactly half of your lovely, silky mascarpone cream evenly over the top. Now, repeat the process: another layer of espresso-dipped ladyfingers, followed by the rest of the cream, spread perfectly smooth across the top. This is crucial: Cover the dish tightly with plastic wrap. This amazing make ahead dessert needs time to fully mature its flavors and firm up. You absolutely must refrigerate this for a minimum of 6 hours, but overnight is really when this classic Italian dessert hits its peak performance.
Tips for Success with Your No Bake Dessert
When you’re making this no bake dessert, a few small details can elevate it from good to absolutely unforgettable. First, remember what I said about the espresso: don’t skimp on strength! If your coffee is weak, the whole dessert tastes flat. I learned this the hard way years ago when I tried to rush it using regular drip coffee. The result was just sweet, soft biscuits, not that rich, bold flavor we want!
That leads me to the crucial second point: chill time is your friend. That minimum 6-hour refrigeration isn’t just optional; it’s part of the process. It lets the ladyfingers soften perfectly and helps the structure of that delicate mascarpone cream set up. You need that time for the coffee to really bloom and permeate every layer.
Also, listen up about the dipping—this drove me crazy at first! The first time I tried this tiramisu recipe, I dunked them like cookies in milk, and the whole bottom layer turned into sweet soup. Now, I hold it in for maybe two seconds total. They should look slightly damp, not soaked through. Once you get that quick dip timing down, you’ve got the key to perfect layers. For another recipe that requires a little finesse but tastes incredible, check out my guide for the best classic homemade stuffing recipe!
Making This Tiramisu Recipe an Impressive Dessert Idea
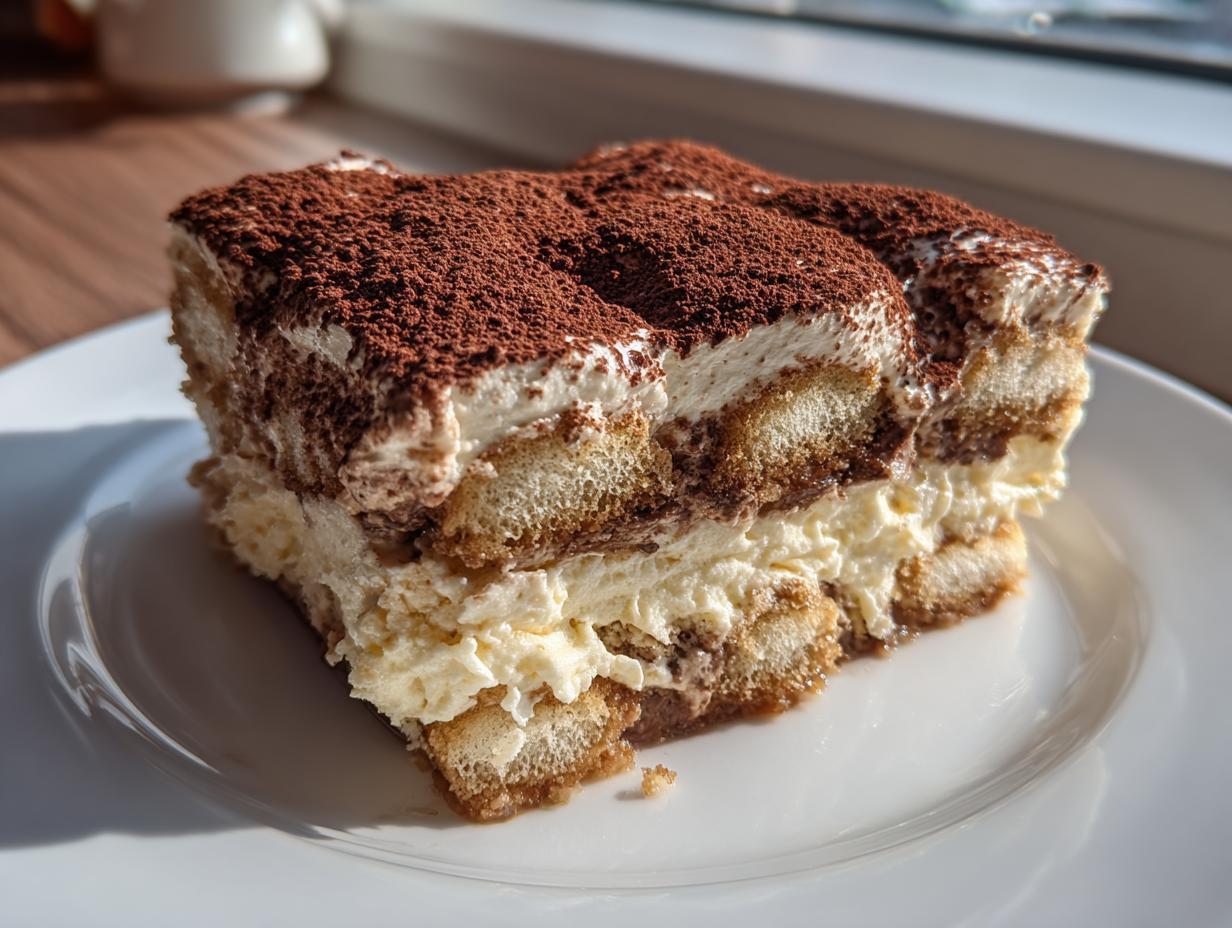
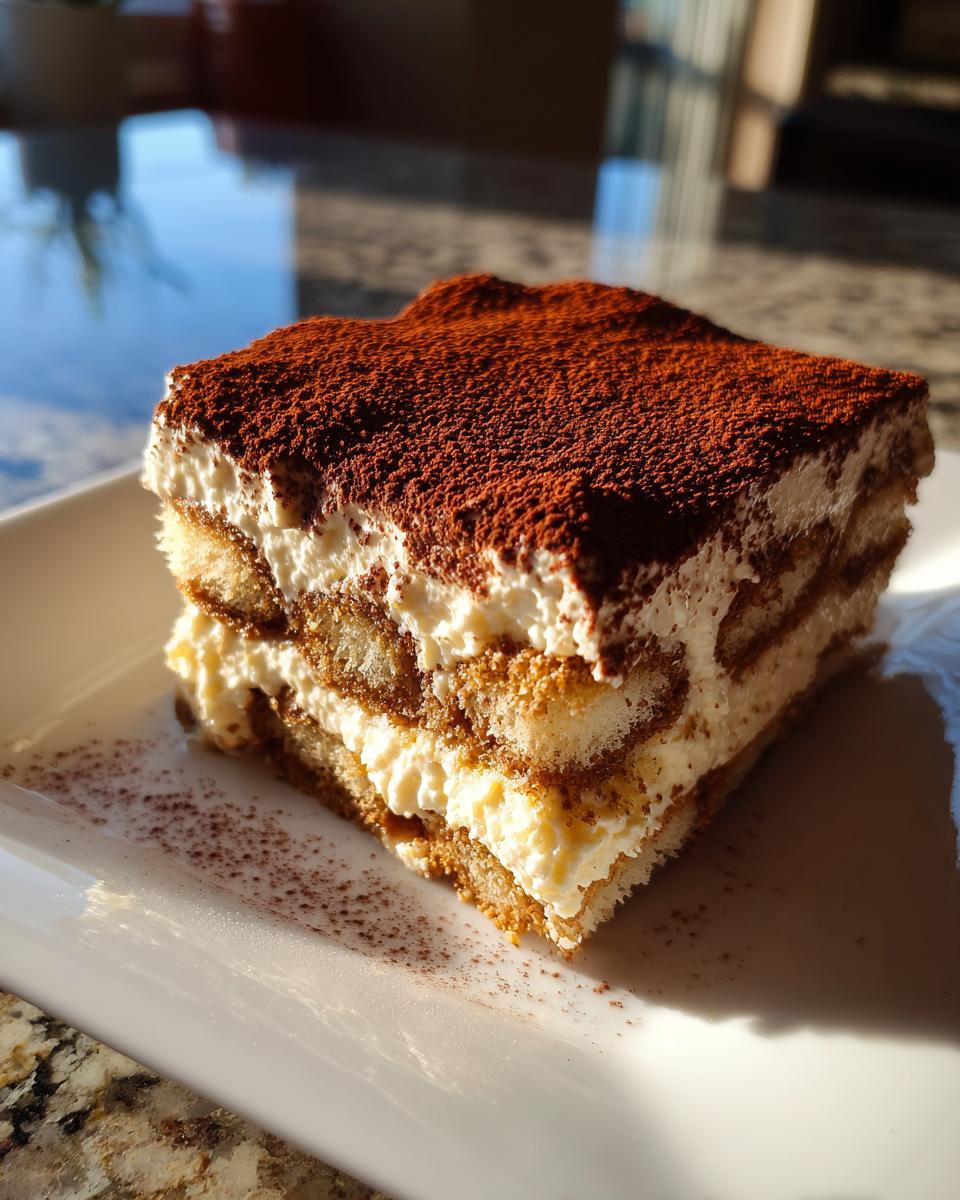
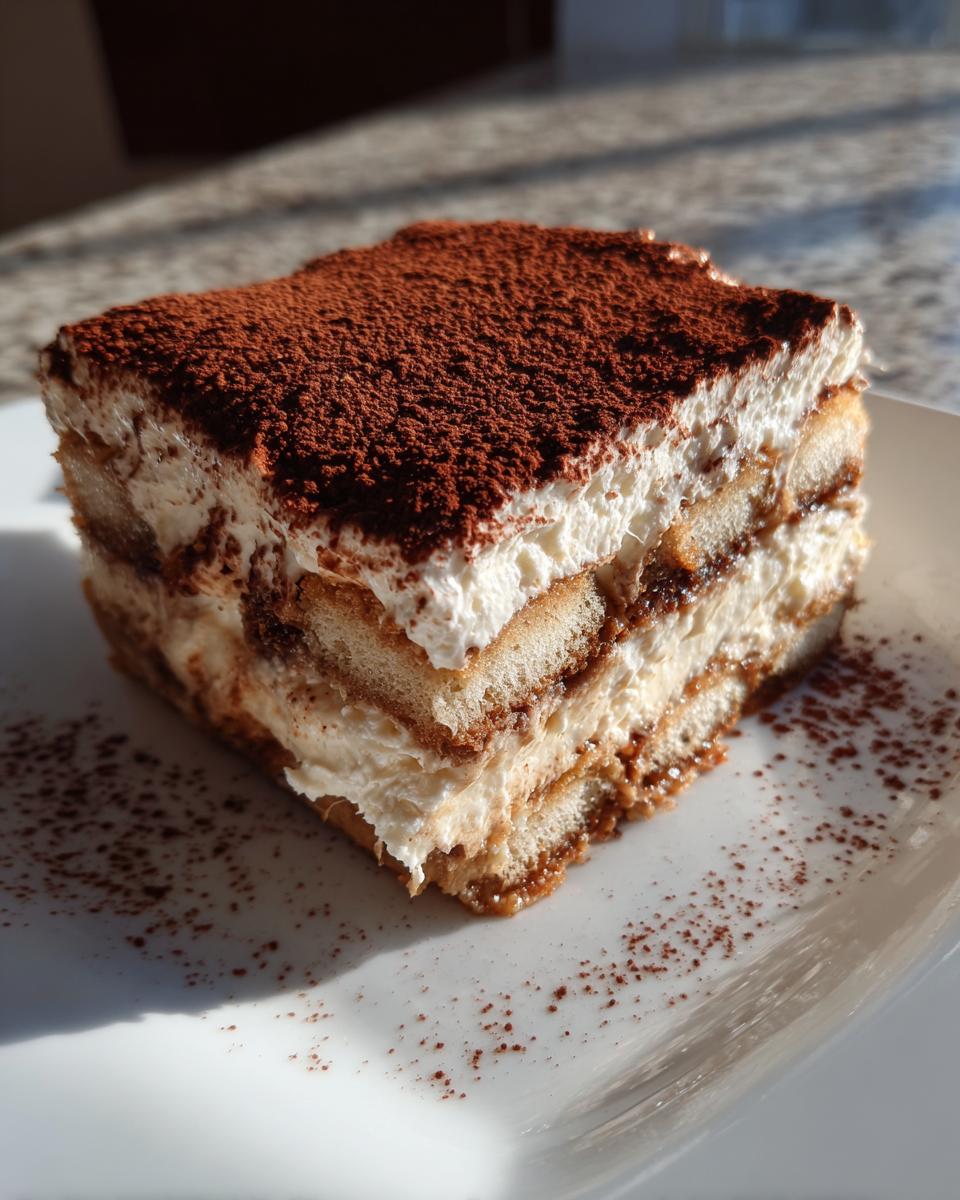
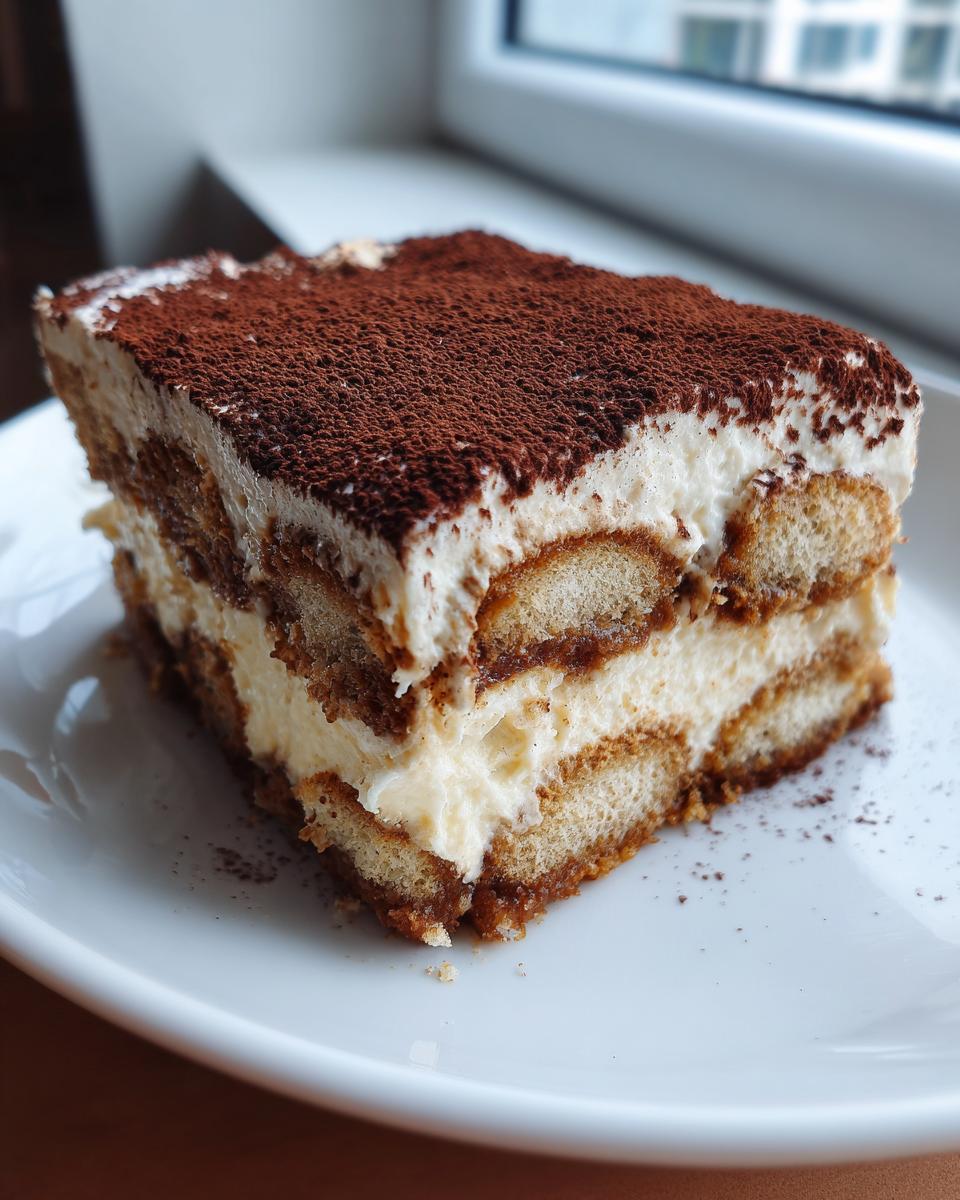
We’ve made the actual tiramisu recipe unbelievably easy, but that doesn’t mean we can’t make it look like it took hours! When you bring this to a dinner party, people expect elegance, and this layered coffee dessert delivers every single time. The final flourish really sets the tone for this incredible dessert for dinner party centerpiece.
The absolute must-do step is the dusting of cocoa. Don’t just sprinkle it on haphazardly! You need a fine-mesh sieve—a sifter, really—to get that super fine, even layer of unsweetened cocoa across the top. It cuts through the richness of the sweet mascarpone beautifully. If you want to be really fancy, try lining a piece of parchment paper with a stencil before dusting, then lift the stencil off. Instant professional look!
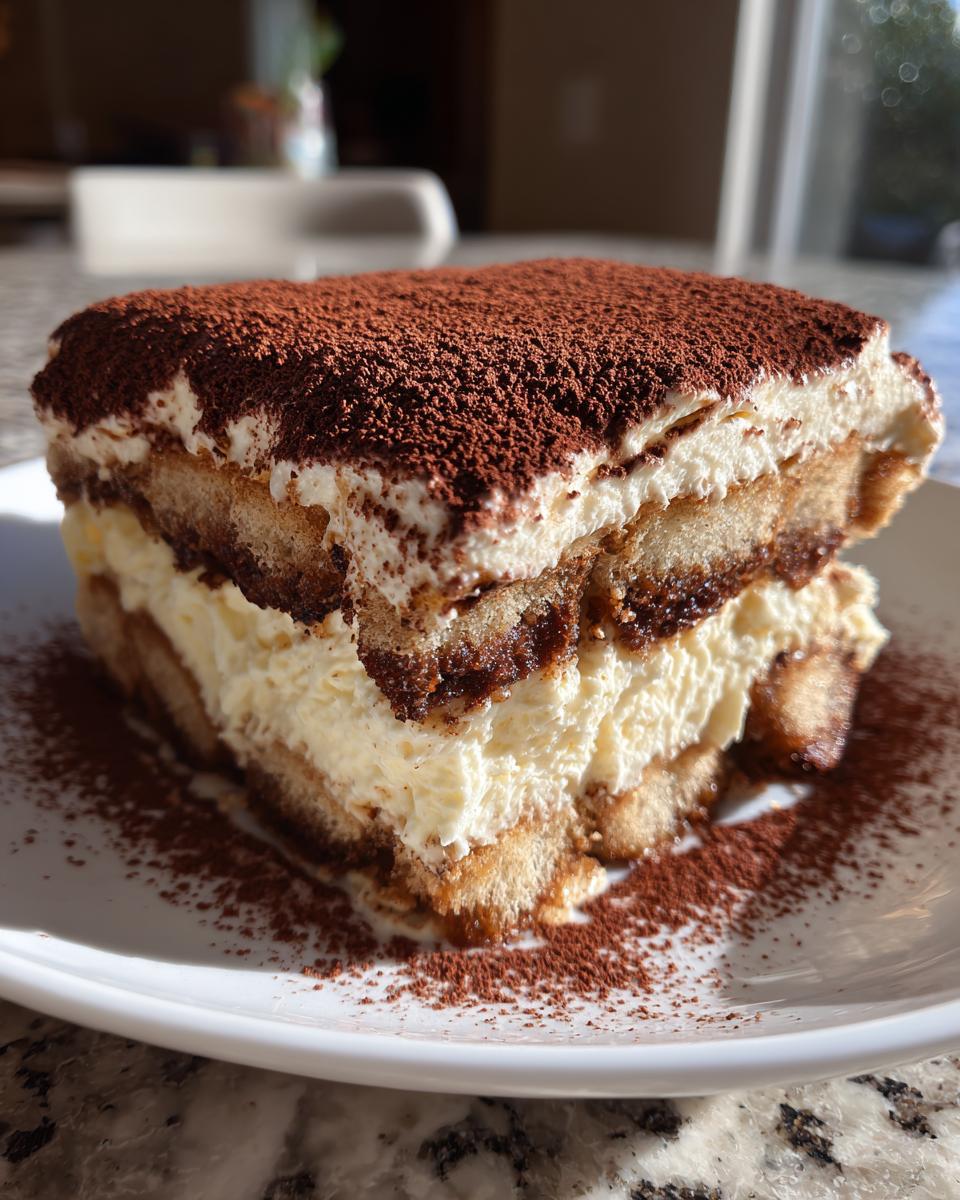
Presentation wise, you have options. Serving it straight from the 8×8 dish is wonderfully rustic and allows everyone to scoop out generous portions of that creamy texture. However, if you want something even more impressive, try assembling this in individual clear glasses or small ramekins. Seeing those neat layers of cream and the coffee-soaked ladyfingers stacked up is breathtaking. It requires a little more effort in the assembly, but the pay-off when you serve them is huge. If you’re looking for other gorgeous, easy Italian components for your spread, you should check out my cannoli cookies recipe!
For recipes that inspire similar levels of awe, I always recommend checking out other fantastic cooks, like the amazing texture work done over at Delish Diarist. Whether you go big or go individual, just make sure you get that cocoa on top just before serving. That’s the moment this whole no bake dessert comes alive!
Storage and Make Ahead Dessert Instructions for This Tiramisu Recipe
This is the part I love most about this incredible no bake dessert: it’s designed to be made in advance! Seriously, plan on making this the day before you need it. Refrigerating your tiramisu recipe overnight isn’t just for chilling; the flavors absolutely meld together, making that coffee soak richer and the silky cream dessert layer set up perfectly. It transforms from good to genuinely spectacular.
You must keep it covered tightly with plastic wrap while it rests in the fridge. This prevents it from absorbing any weird fridge smells and keeps that cocoa powder fresh until serving time. I haven’t done this an awful lot, but you absolutely can freeze it! Wrap the whole dish extra securely in plastic wrap, then aluminum foil. Let it thaw slowly in the fridge overnight, and it comes out almost perfect—just dust with fresh cocoa when you serve it. If you’re looking for other simple make-ahead ideas that take the pressure off, check out my guide for the easy no-bake ice cream cake!
Variations on the Traditional Tiramisu Recipe
While I stand firm that this tiramisu recipe is perfectly balanced as is—that bitter espresso and sweet mascarpone are my favorite combination—sometimes you need to shake things up just a bit! That’s the beauty of developing your own food dexterity; you learn what works and how to twist it for your crew. These little adjustments are still approachable and won’t compromise that beautiful, stable cream layer we worked so hard for.
For instance, if you’re serving this after a heavier meal, perhaps you want to lean into a slightly different flavor profile. I’ve experimented with swapping out the coffee liqueur completely. A splash of Amaretto in the espresso soak brings this lovely almond note that is just divine. Or, if you’re making this for kids who aren’t keen on coffee yet, don’t panic!
You can easily create a fun, lighter version where you swap the cooled espresso for strong, chilled chocolate milk. It turns into this incredible, rich no bake dessert that still has that classic layered look. It’s like a chocolate-covered biscuit dream come true!
Also, don’t stress if you can’t find traditional ladyfingers. While they give the best structure, sometimes you have to work with what the store has. Thick shortbread cookies or even certain crisp vanilla wafers can work in a pinch, but remember the rule: dip them even faster! You’re looking for them to absorb the liquid on the surface, not soak all the way through.
If you want to explore some more unexpected twists on classic desserts, you have to check out my recipe for red velvet cheesecake brownies—it shows you how to blend two classics successfully! And hey, if you ever get curious about how the pros handle this dessert, you can always peek at Gordon Ramsay’s version, though I think our egg-free approach gives him a run for his money in the simplicity department!
Frequently Asked Questions About Our No Egg Tiramisu Recipe
I know you might have a few lingering questions before you dive into making this incredible no egg tiramisu. It’s normal! When you change up a traditional recipe, you wonder if the texture will hold up. But I’ve tested these variables so you don’t have to worry!
Can I use regular milk instead of heavy whipping cream?
Oh, honey, please don’t! The reason we get that perfectly silky cream dessert texture is the fat content in heavy whipping cream. Regular milk or even half-and-half won’t whip up to the stiff, voluminous peaks we need to fold into that mascarpone. If you don’t use heavy cream, you’ll just end up with sweet, runny soup instead of a solid mascarpone cream recipe. Stick to the cold heavy cream for this!
What if I absolutely cannot use coffee or espresso for this layered coffee dessert?
It feels wrong to mess with the classic tiramisu recipe, but I get it—not everyone loves coffee! If you need to skip the caffeine, you can absolutely use strong, cold black tea instead. Black tea, especially Earl Grey, has wonderful tannins that mimic the slight bitterness of coffee. If you want something sweeter, use chocolate milk for a fun twist on this no bake dessert. Just remember to still dip quickly!
What if I can’t find ladyfingers (Savoiardi biscuits)?
This is a common hurdle for finding a quick Italian dessert ingredient! If you can’t source proper ladyfingers, I recommend looking for very plain, crisp vanilla wafers or even thin, dry Italian biscotti (if you soak them for just a half-second longer). The key to this make ahead dessert is starting with something structurally sound that can absorb liquid without disintegrating immediately. If you want more smart swaps for common ingredients, check out my recipe for the easy Big Mac sauce copycat recipe!
How far in advance can I make this dessert for my dinner party?
This is truly the best dessert for a dinner party because it *demands* to be made ahead! I find the flavor profile peaks around the 18-hour mark, but 6 hours is the bare minimum. If I’m hosting a big event, I assemble the entire thing the night before, dust it right before serving, and it’s absolutely perfect!
Estimated Nutrition for This Simple Tiramisu
Now, I won’t pretend this tiramisu recipe is a low-calorie salad—it’s a decadent Italian dessert, after all! But I want you to have the facts so you can serve it confidently. Remember, everything I list here is an absolute estimate based on the ingredients used in my standard batch; what you use definitely changes the final count. If you use a heavy hand with the cocoa dusting or add a lot of liqueur, your numbers will shift!
But for planning purposes, when we break this glorious make ahead dessert down into 8 generous slices, here are the approximate figures you can expect:
- Calories: Around 450 per slice. That’s pretty intense, but totally worth it!
- Total Fat: Roughly 32 grams. Remember, a lot of that is coming from that beautiful, wonderful mascarpone cheese.
- Carbohydrates: About 34 grams. This includes the sugar and the ladyfingers dissolving into that dreamy texture.
- Protein: A modest 8 grams. That dairy base gives us a little boost.
I always tell people, don’t sweat the exact numbers when you’re making something this special. This is the kind of no bake dessert you make to celebrate life or just to treat yourself after a long week. If you’re looking for lighter ideas to balance things out, be sure to check out my healthy snack recipes for ideas you can feel good about all day long!
PrintThe Ultimate Easy, No-Bake Classic Italian Tiramisu Recipe (No Raw Eggs)

Make this classic Italian tiramisu without turning on the oven or using raw eggs. This no-bake dessert features creamy mascarpone and perfectly soaked ladyfingers for an impressive, silky result perfect for any dinner party.
- Prep Time: 25 min
- Cook Time: 0 min
- Total Time: 6 hr 25 min
- Yield: 8 servings 1x
- Category: Dessert
- Method: No-Bake
- Cuisine: Italian
- Diet: Vegetarian
Ingredients
- 1 cup strong brewed espresso, cooled
- 1/4 cup coffee liqueur (optional)
- 1 (8 ounce) package ladyfingers (Savoiardi biscuits)
- 16 ounces mascarpone cheese, softened
- 1 cup granulated sugar
- 1 teaspoon vanilla extract
- 1 1/2 cups heavy whipping cream, cold
- 1/4 cup powdered sugar (for cream)
- Unsweetened cocoa powder, for dusting
Instructions
- Brew 1 cup of strong espresso and let it cool completely. Stir in the coffee liqueur, if using. Pour this mixture into a shallow dish.
- Quickly dip each ladyfinger into the cooled espresso mixture, turning once. Do not over-soak the ladyfingers; they should be moist but not soggy. Arrange a single layer of dipped ladyfingers in the bottom of an 8×8 inch baking dish.
- In a large bowl, beat the softened mascarpone cheese, granulated sugar, and vanilla extract until smooth. Set aside.
- In a separate, clean bowl, whip the cold heavy whipping cream and powdered sugar until stiff peaks form.
- Gently fold the whipped cream into the mascarpone mixture in two additions until just combined, creating a silky cream. Do not overmix.
- Spread half of the mascarpone cream mixture evenly over the layer of soaked ladyfingers.
- Create a second layer by dipping and arranging the remaining ladyfingers over the cream layer.
- Top with the remaining mascarpone cream, spreading it smoothly to cover the top layer completely.
- Cover the dish tightly with plastic wrap. Refrigerate for at least 6 hours, or preferably overnight, to allow the dessert to set and the flavors to meld.
- Before serving, dust the top generously with unsweetened cocoa powder using a fine-mesh sieve. Slice and serve this make-ahead dessert.
Notes
- For a richer coffee flavor, use freshly brewed espresso instead of standard coffee.
- If you skip the coffee liqueur, add 1 teaspoon of dark rum extract to the espresso soak for depth.
- Chill time is crucial; this allows the ladyfingers to soften properly and the cream to firm up, ensuring clean slices.
Nutrition
- Serving Size: 1 slice
- Calories: 450
- Sugar: 35
- Sodium: 90
- Fat: 32
- Saturated Fat: 19
- Unsaturated Fat: 13
- Trans Fat: 1
- Carbohydrates: 34
- Fiber: 1
- Protein: 8
- Cholesterol: 110